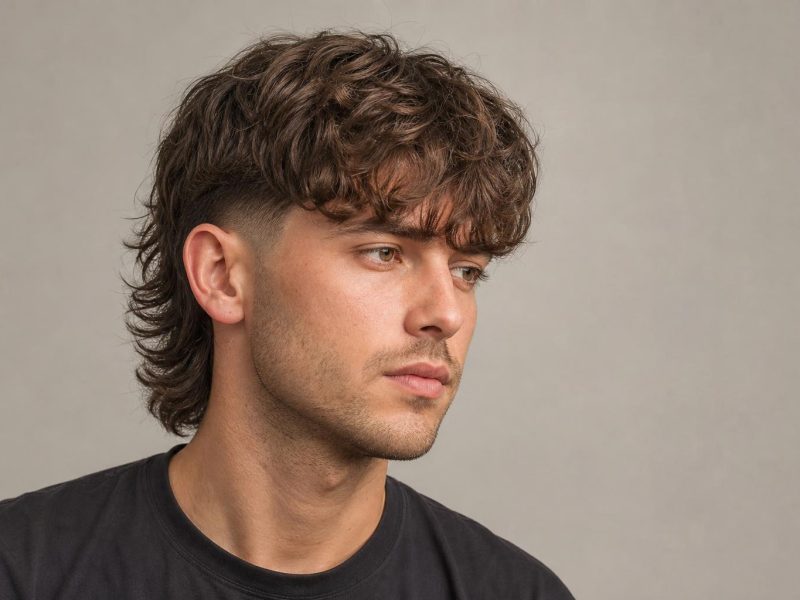
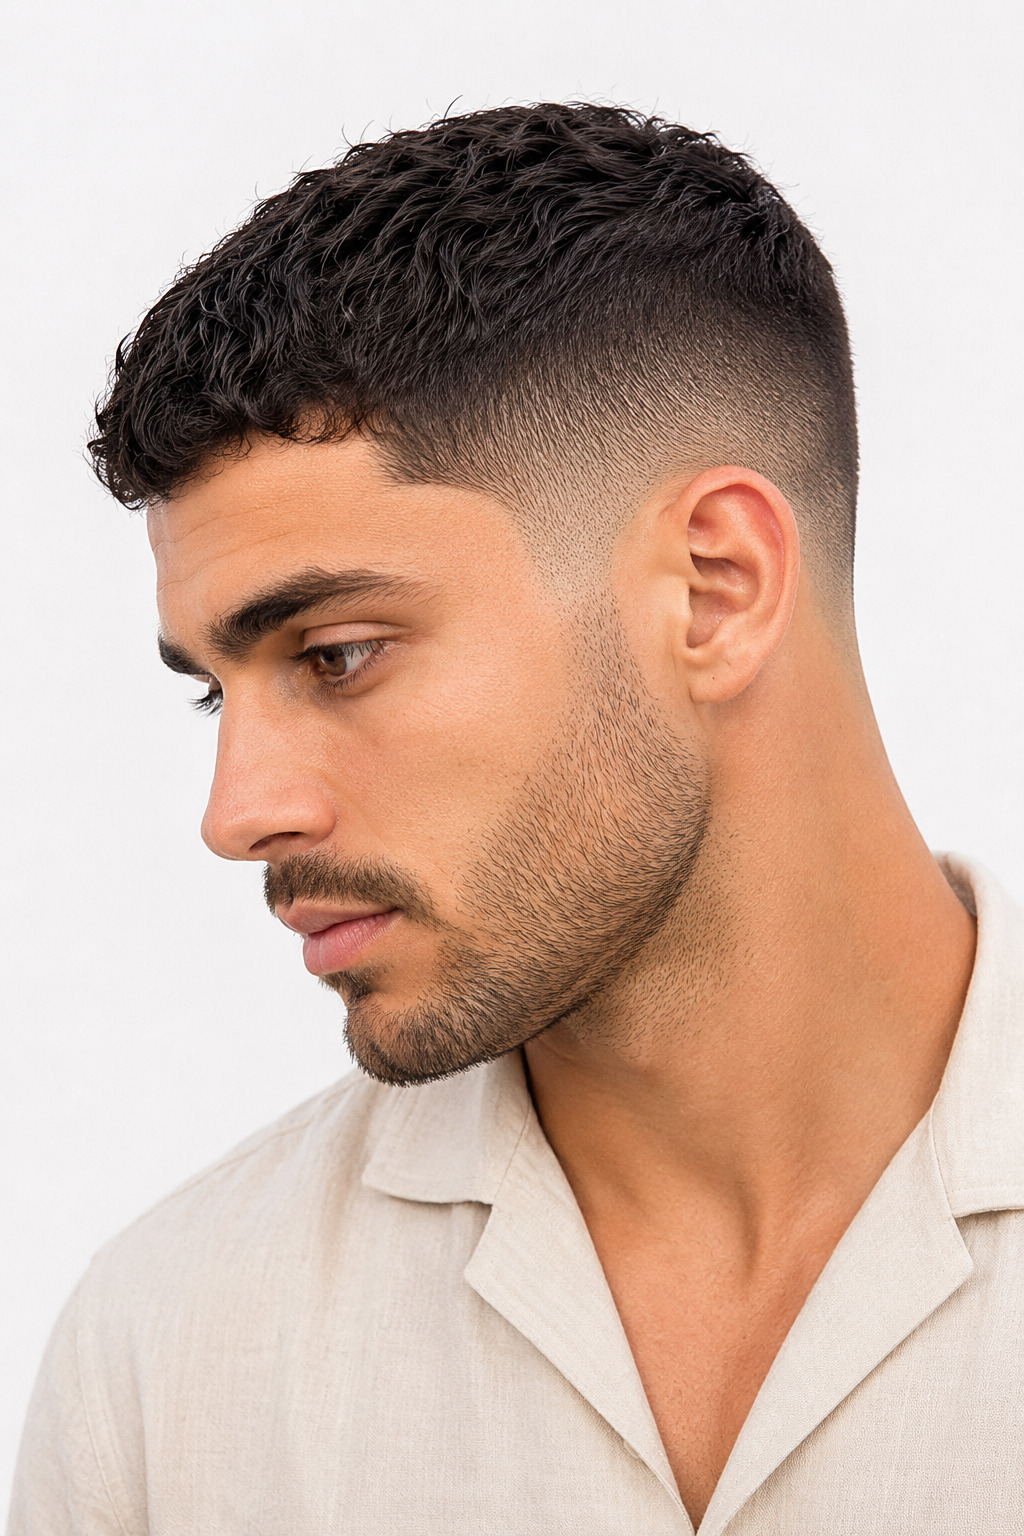
The mid taper fade sits at the exact midpoint of the fade spectrum — not as low-key as a skin-level drop fade, not as sharp and bold as a high skin fade — which is exactly why it’s the most-requested cut at barbershops worldwide.
It starts tapering at mid-ear level (roughly the temple area), blends cleanly through the occipital bone, and leaves enough length on top to style in almost any direction. The result is a cut that works at the office, at the gym, and everywhere between — with one trim appointment doing all that work. If you’ve been stuck choosing between too clean and too casual, 30 mid taper fade hairstyles for men are here to settle the argument.
This gallery is organized by what’s happening on top: short and low-maintenance options, textured and wavy styles, curly and coily variations, longer tops with more styling range, and fade-plus-design combinations. Each entry describes how the cut is structured, who it works for, and what to ask your barber when you walk in with the reference photo.
| Factor | Details |
|---|---|
| Fade start point | Mid-ear / temple height — higher than a low fade, lower than a high fade |
| Best for | Oval, oblong, square, and diamond face shapes; most hair types |
| Maintenance | Barber visit every 2–3 weeks to keep the fade sharp; neckline every 10–14 days |
| Works with | Straight, wavy, curly (2a–4c), and coily textures |
| Avoid if | Very narrow or elongated faces that need more width preserved on the sides |
| Salon time | 30–45 minutes for a cut; 60–90 minutes if color or design work is included |
Short Tops: Clean and Low-Maintenance Mid Taper Fades
Short tops paired with a mid taper fade give you the sharpest contrast and the least daily styling time. The trade-off is that this combination also shows grow-out the fastest — expect to be back in the chair every 2–3 weeks if you want it looking intentional. These work particularly well for straight and slightly wavy hair where the top stays flat naturally without product.
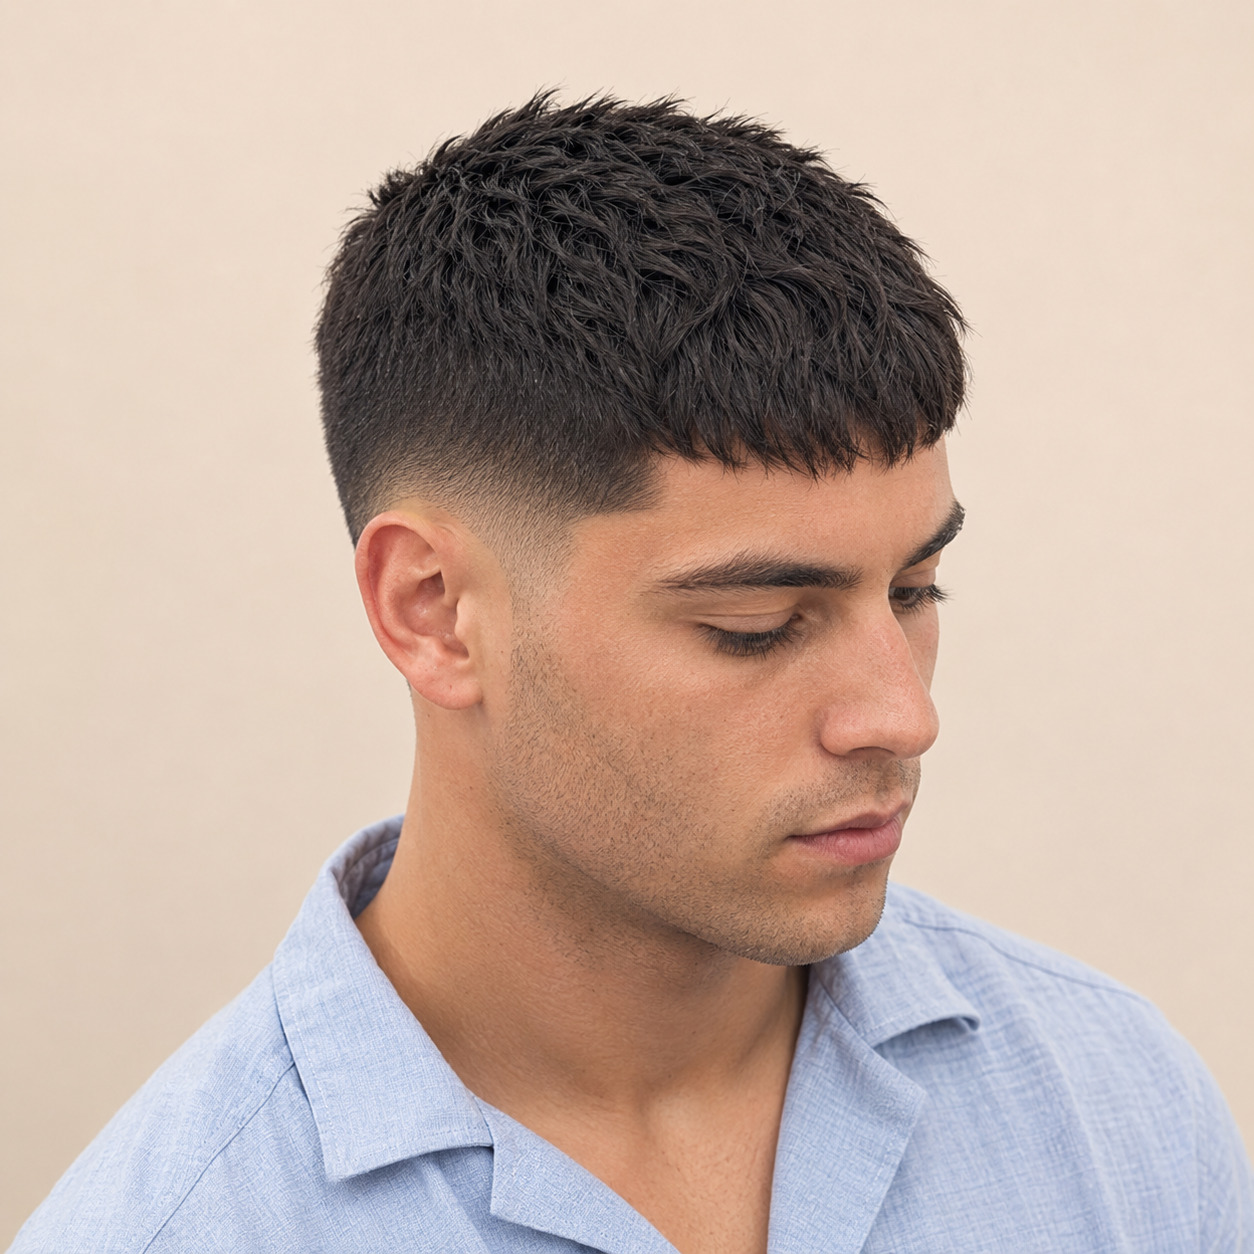
1. Classic Mid Taper Fade with Short Crop
A guard #2 or #3 on top, blended from a skin or #0 at the temple midpoint up through a #1 and #2 as the fade climbs. The simplicity of this combination is that the top requires no styling at all — just run a palm over it in the morning and go. The structured fade does the visual heavy lifting, keeping the look intentional rather than just short. Best suited to oval and oblong face shapes where the clean sides don’t remove width you need.
2. Mid Fade Caesar Cut
The Caesar’s signature horizontal fringe — blunt and cut parallel to the forehead — sits at about 1–1.5 inches on top, while the mid fade keeps the sides tight from the ear up. This fringe shortens the visual length of the face, making it one of the more flattering options for oblong and long face shapes. Ask your barber for the fringe to finish at a hard horizontal line with no tapering into the sides.
3. French Crop with Mid Taper Fade
A French crop takes the Caesar concept and adds texture — the fringe is cut slightly shorter at the corners, which gives it a more modern, less flat finish. The mid fade underneath complements the crop’s clean perimeter line without competing with it. On thick, coarse hair, this combination excels because the short crop controls bulk at the crown while the fade keeps the sides from looking dense.
4. Buzz Cut with Mid Taper Fade
The buzz cut (a uniform guard all over, typically a #3 or #4) gets a significant upgrade from the mid fade at the sides. Instead of looking evenly cropped all around, the fade creates a defined silhouette where the top is clearly separated from the sides. On round or square faces, this adds structure that a plain buzz cut can’t provide. The grow-out is the most forgiving of any cut in this section — the uniformity means there’s no single section that goes “off” first.
5. Hard Part Mid Taper Fade
A clipper line drawn through the natural part creates a crisp contrast between the top and the fade below. The hard part amplifies the side separation without requiring the top to be styled dramatically — even a simple comb-through reads as intentional when the line is there. Ask your barber to cut the part at your natural hairline rather than forcing a geometric line, which tends to look awkward as it grows out.
Textured and Wavy Tops with Mid Taper Fade
Textured tops — whether achieved through point cutting, razor cutting, or the natural movement of wavy hair — are the most versatile group in this gallery. They give the mid taper fade a more relaxed feel without sacrificing the precision of the sides. A small amount of matte clay or texturizing paste is all you need to separate the pieces and define the shape every morning.
6. Textured Fringe with Mid Taper Fade
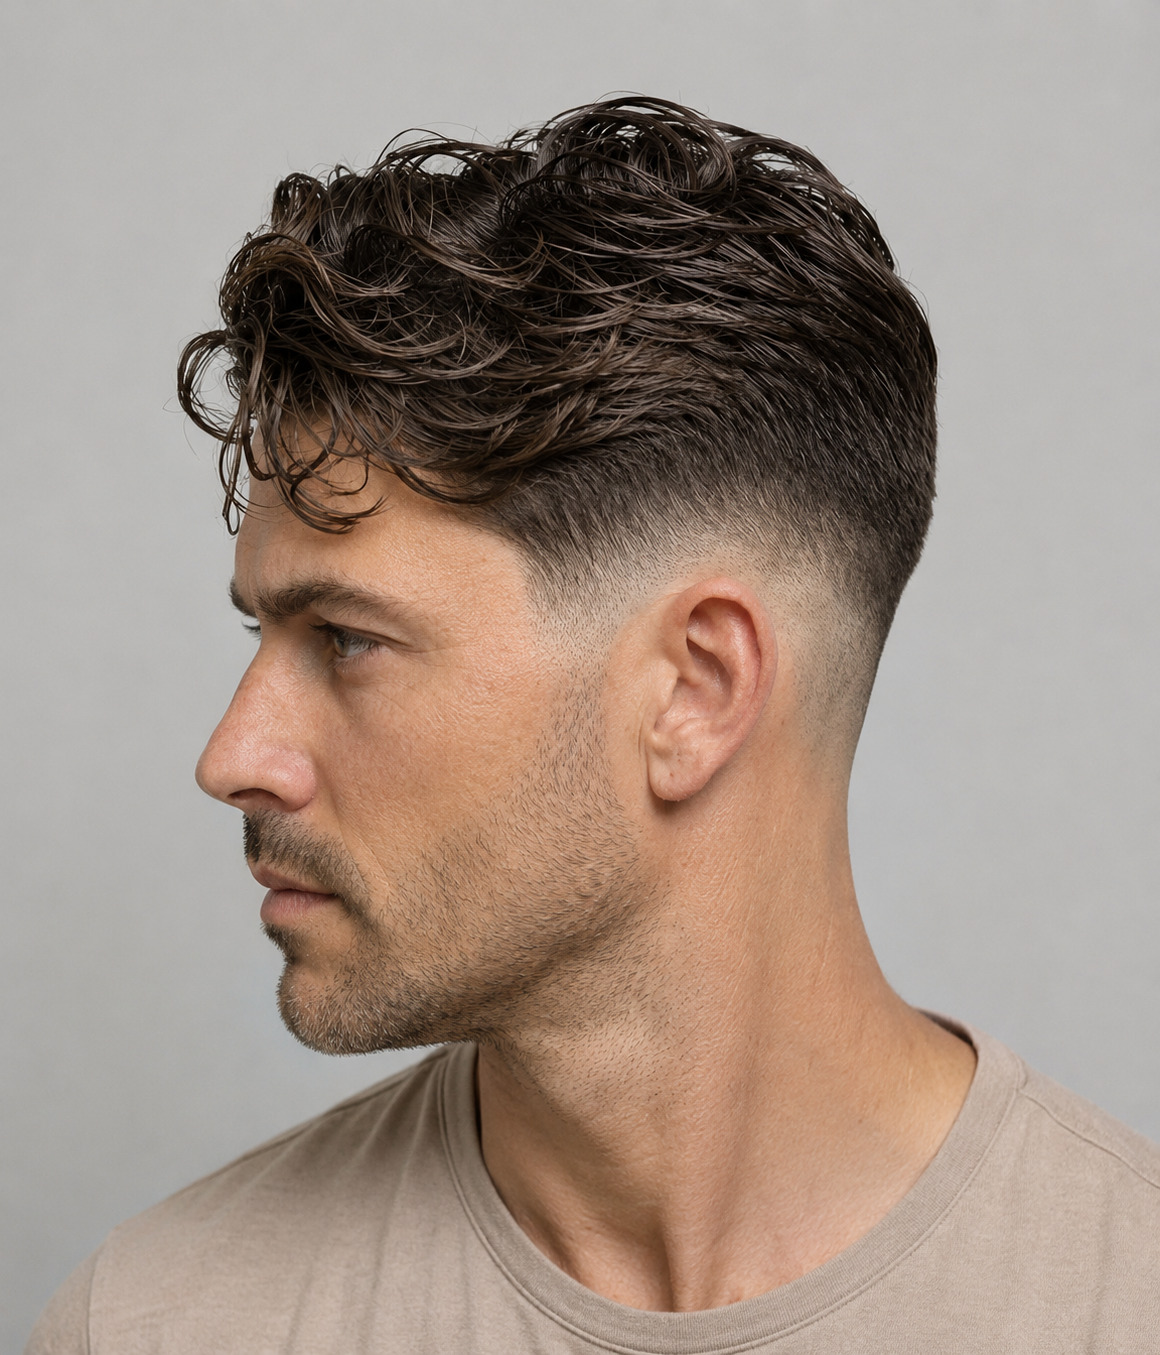
A forward-swept, piece-y fringe with choppy ends is one of the strongest current barbershop trends paired with a mid fade. The disconnection between the texturized top and the clean fade makes the contrast more dramatic than a traditional crop. On square faces, the fringe draws the eye downward and softens angular jaw lines. Use a matte texturizing paste on towel-dried hair, then blow-dry forward for the best result.
7. Slicked-Back Mid Taper Fade
Longer hair on top (2.5–4 inches) brushed cleanly backward gives a polished, businessman silhouette when the sides are faded at mid-ear level. The mid fade is important here rather than a high fade — it preserves enough width at the temples to balance the elongating effect of the combed-back top. Pomade with medium hold and a natural shine works best; heavy gel makes the top look stiff and dated.
8. Wavy Side Part with Mid Taper Fade
Naturally wavy or lightly permed hair that’s left 2–3 inches on top and parted to one side takes on a gentlemen’s barbershop look when contrasted against a mid fade. The wave pattern on top creates depth and dimension that straight-hair styling products have to work harder to replicate. Let it air-dry or diffuse on low heat to preserve the wave, then finish with a light sea-salt spray for hold without stiffness.
9. Faux Hawk with Mid Taper Fade
The faux hawk strips the mohawk’s aggression down to something workable — hair on top is shaped into a central ridge but not shaved down to a stripe on the sides. With a mid fade rather than a skin fade on the flanks, the overall profile reads as edgy but not extreme. Oval face shapes get the best result from this combination; round faces should ask for extra height in the ridge to counteract the roundness. A matte clay gives the ridge its shape without looking greasy.
10. Pompadour with Mid Taper Fade
The modern pompadour — volume at the front gradually decreasing toward the crown — sits differently on a mid fade than on a skin fade. The mid-level taper keeps more material on the sides, which moderates the height contrast and makes the style more suitable for everyday wear. On diamond and oblong face shapes, the pompadour adds needed width at the forehead. Ask for 3–4 inches of length at the front, tapering to 1.5–2 inches at the crown, with a #1 or skin at the temporal fade line.
11. Brushed Forward Crop with Mid Taper Fade
Similar to the French crop but with the top pushed forward and slightly mussed rather than cleanly bladed. The result is intentionally casual — a look that takes 60 seconds to style but appears considered. This combination works particularly well for men with cowlicks near the crown, where a blunt horizontal fringe tends to kick up unpredictably. The forward brushing direction redirects the cowlick into the style rather than fighting against it.
Curly and Coily Mid Taper Fades
A mid taper fade on curly or coily hair requires a different technical approach than on straight or wavy textures. Barbers who specialize in textured hair typically cut curls in their dry, natural state to account for shrinkage — wet cutting on curly hair almost always results in a shorter final length than expected. If your regular barber cuts your hair wet, it’s worth finding someone trained in dry cutting for textured hair.
12. Mid Taper Fade with Curly Top (3a–3b)
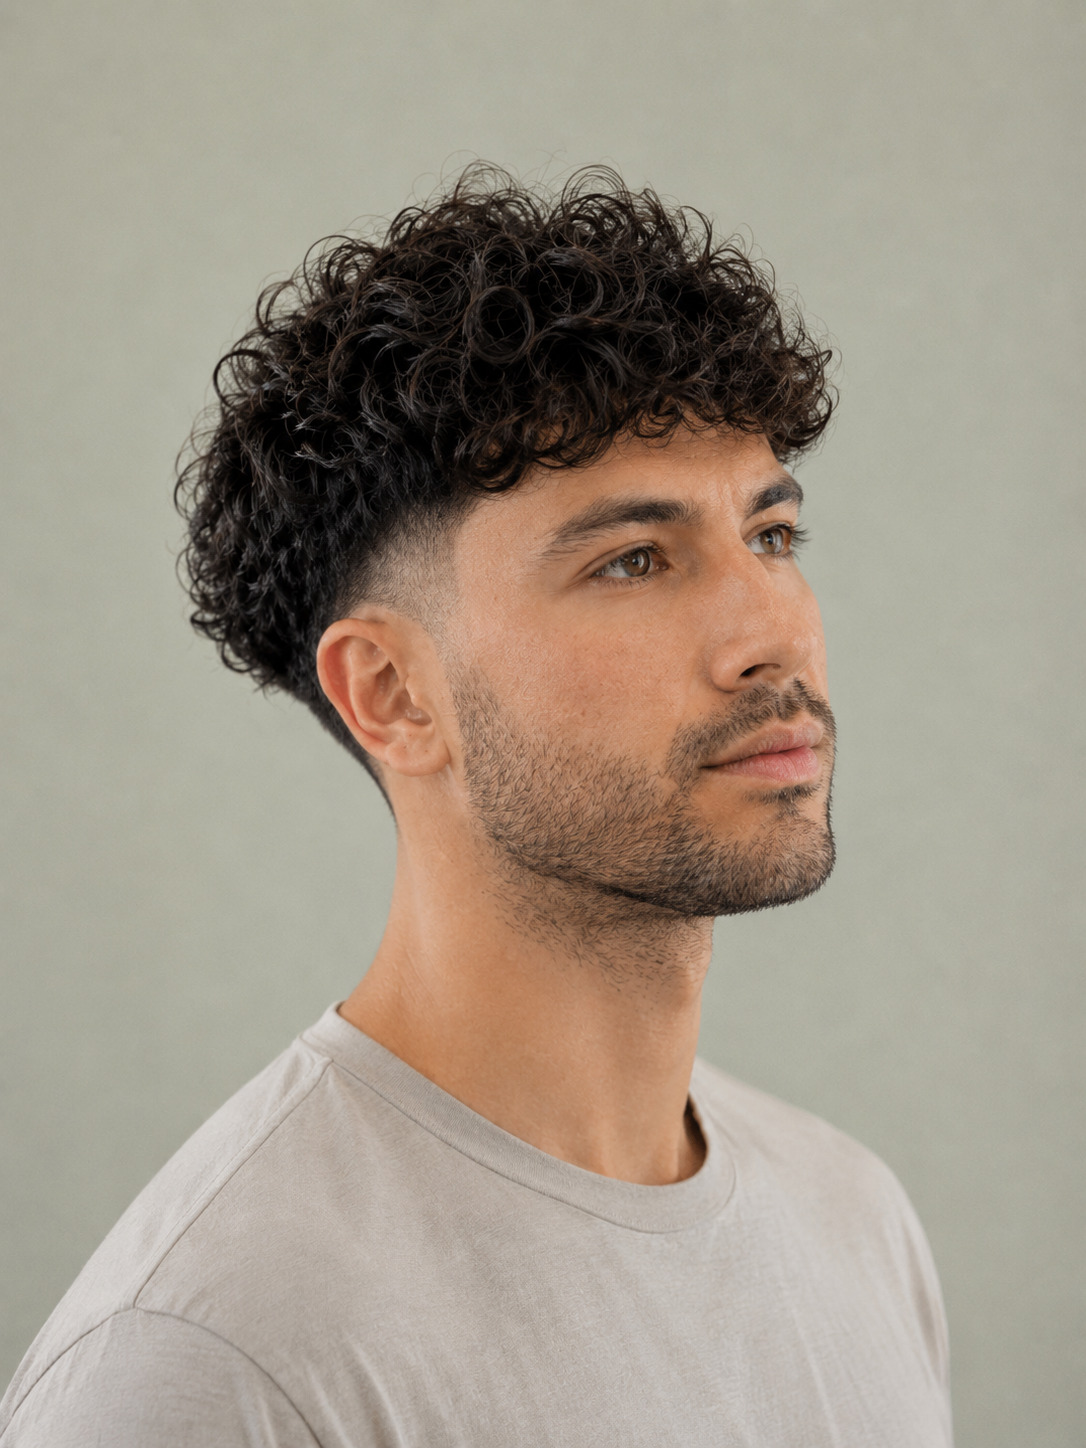
Loose to moderately tight curls (3a–3b) respond well to a mid taper fade because the fade transition happens below the curl pattern’s main visual zone. The curls sit above the temple line, the fade keeps the sides and back tight, and the contrast between the soft curl texture and the crisp fade line is naturally compelling. Use a curl cream or light gel on damp hair, scrunch upward, and let air-dry for defined coils without crunch.
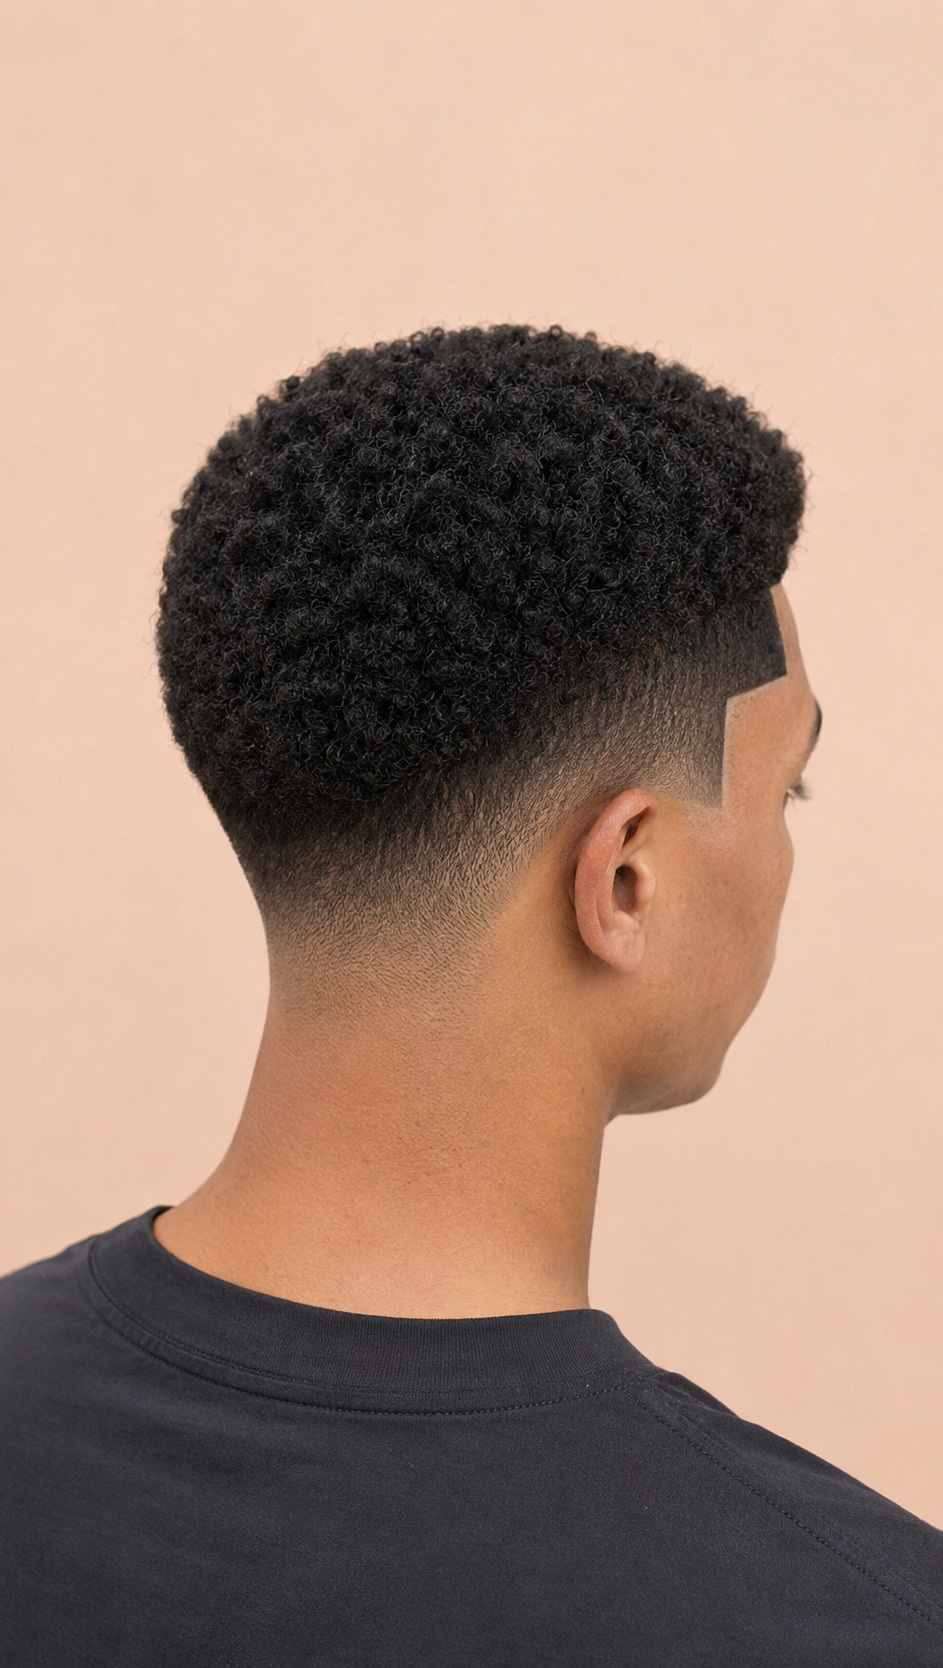
13. Tight Coil Fade (4a–4c)
Tighter curl patterns (4a through 4c) shrink significantly when dry — a barber cutting 4c hair needs to account for up to 75% shrinkage, meaning a 2-inch wet length can become 0.5 inches dry. The mid fade gives tighter coils a clean perimeter without removing the density that makes the top look full. Ask for the fade to end cleanly at the temple and for the top to be shaped, not just trimmed — the coil pattern should look even, not patchy.
14. Mid Taper Fade with Shape-Up
A shape-up (also called an edge-up or line-up) carves geometric precision into the natural hairline at the forehead, temples, and sideburns. On naturally coily or tightly textured hair, the shape-up paired with a mid fade creates a two-stage contrast: the fade blends the sides smoothly, while the shape-up provides a hard defined border at the front. This combination is popular across Black and Latino hair textures because it enhances natural coil density while giving the look a sharp, sculptural finish.
15. Afro Top with Mid Taper Fade
Letting the top grow out into a rounded afro shape while keeping the sides tapered at mid-ear level gives a structured silhouette that reads as intentional and stylish. The mid fade is preferable to a high fade here because it preserves some side volume that prevents the top from looking disproportionately wide. The ratio to aim for: top height roughly 1.5–2 times the width of the fade at the widest point. Pick and shape the afro into a clean dome before leaving the house — a deflated afro looks like grow-out, not a style.
16. Blowout with Mid Taper Fade
A blowout stretches naturally coily hair into a voluminous, rounded shape using a blow-dryer and a pick — the top is lifted and expanded, and the mid taper fade keeps the sides sharp underneath. The mid taper creates a cleaner line between the blowout volume and the tapered sides than a low fade would, making the height contrast more pronounced and the silhouette more deliberate. Heat protectant is non-negotiable here — repeated heat stretching without protection accelerates breakage at the hair shaft.
Longer Tops with Mid Taper Fade
Longer tops (3–5 inches) paired with a mid fade create the most dramatic contrast in this gallery. The gap between the length on top and the skin or #0 at the fade line is significant enough to turn heads, but the mid (rather than high) placement of the fade keeps it from tipping into extreme territory. These styles need the most daily styling time but also offer the most expressive range.
17. Comb-Over Mid Taper Fade
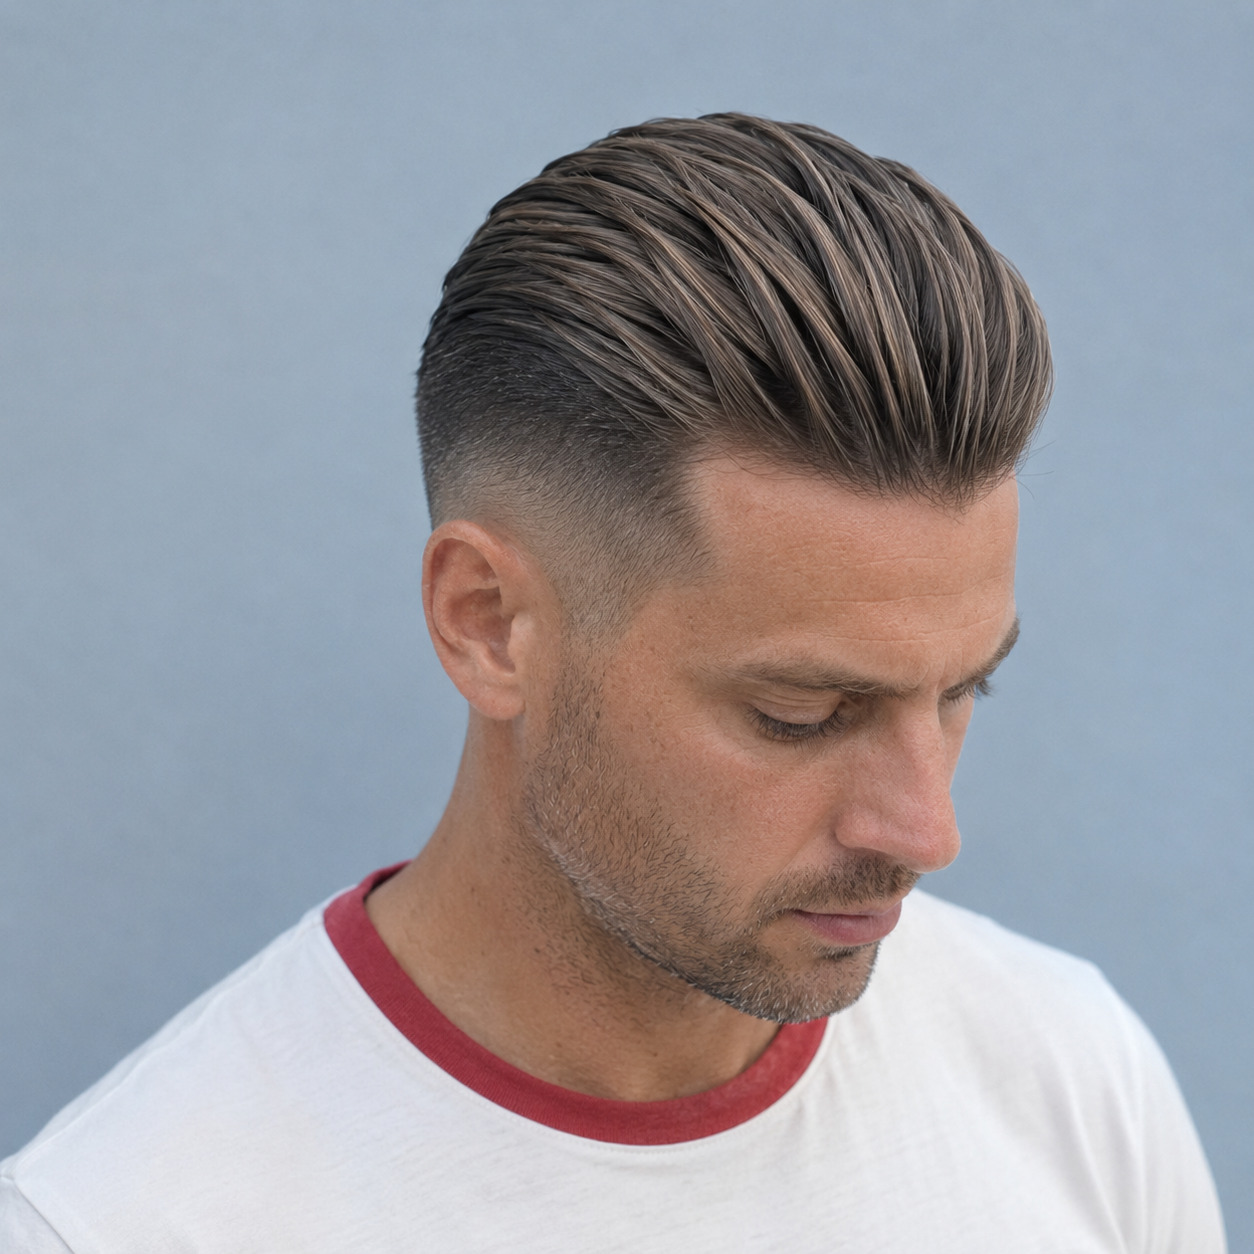
The comb-over is the most common pairing with a mid taper fade — hair on top (3–4 inches) swept to one side and held with a medium-hold pomade, the fade starting at mid-ear and dropping to a skin or #0 at the neckline. The side separation doesn’t require a hard part; a natural side part combed clean reads as sophisticated rather than severe. For round face shapes, opt for a natural side part and no hard line — the gentle curve is more flattering than the geometric clipper line.
18. Undercut with Mid Taper Fade
An undercut disconnects the top from the sides — there’s a clear, visible line between the longer top section and the shorter sides, rather than the blended gradient of a standard fade. When the sides below the disconnect line are also faded (rather than cut to a uniform length), the result is a disconnected undercut fade. On straight, thick hair, this combination is excellent because the top’s weight and density contrast sharply against the faded sides without requiring much product to maintain the shape.
19. Mid Taper Fade with Quiff
A quiff differs from a pompadour in that the styling direction is forward and upward rather than just backward — there’s volume at the front that’s directed toward the face rather than swept away from it. The mid fade underneath keeps the quiff from looking too dramatic by moderating the height contrast. This is one of the more forgiving styles for men with a higher forehead: the forward-directed volume shortens the visual distance between hairline and brow.
20. Man Bun or Top Knot with Mid Taper Fade
Longer hair (5+ inches on top) pulled into a bun or knot at the crown while the mid fade keeps the sides and back tight is one of the sharper contrast looks in men’s styling. The contrast works because the bun or knot creates a defined, contained volume at the top while the fade below is the opposite — gradual, controlled, skin-level at the lowest point. As the bun grows out, the fade starts to look disconnected; plan on barber visits every 2–3 weeks to maintain the side blending even if the top length is unchanged.
21. Mid Taper Fade with Curtain Bangs
Curtain bangs — center-parted fringe that falls to each side of the forehead — have crossed from women’s styling into men’s, particularly on straight and slightly wavy hair. Paired with a mid taper fade, the curtain effect at the front is counterbalanced by the tight sides, keeping the overall look masculine and structured rather than soft. This works best on oval and oblong face shapes where the center part doesn’t add unwanted width across a round or square face.
Mid Taper Fades with Design and Detail Work
Barbers who specialize in design work (also called carving, etching, or razor art) use straight razors and trimmers to cut geometric or freehand patterns into the fade zone. Design work is an additional service — expect to pay $20–$40 more than a standard mid fade — and it needs refreshing every 1–2 weeks as the hair grows in and the lines soften. These combinations are most visible on shorter tops where the design sits in an area of contrast.
22. Mid Taper Fade with Temple Design
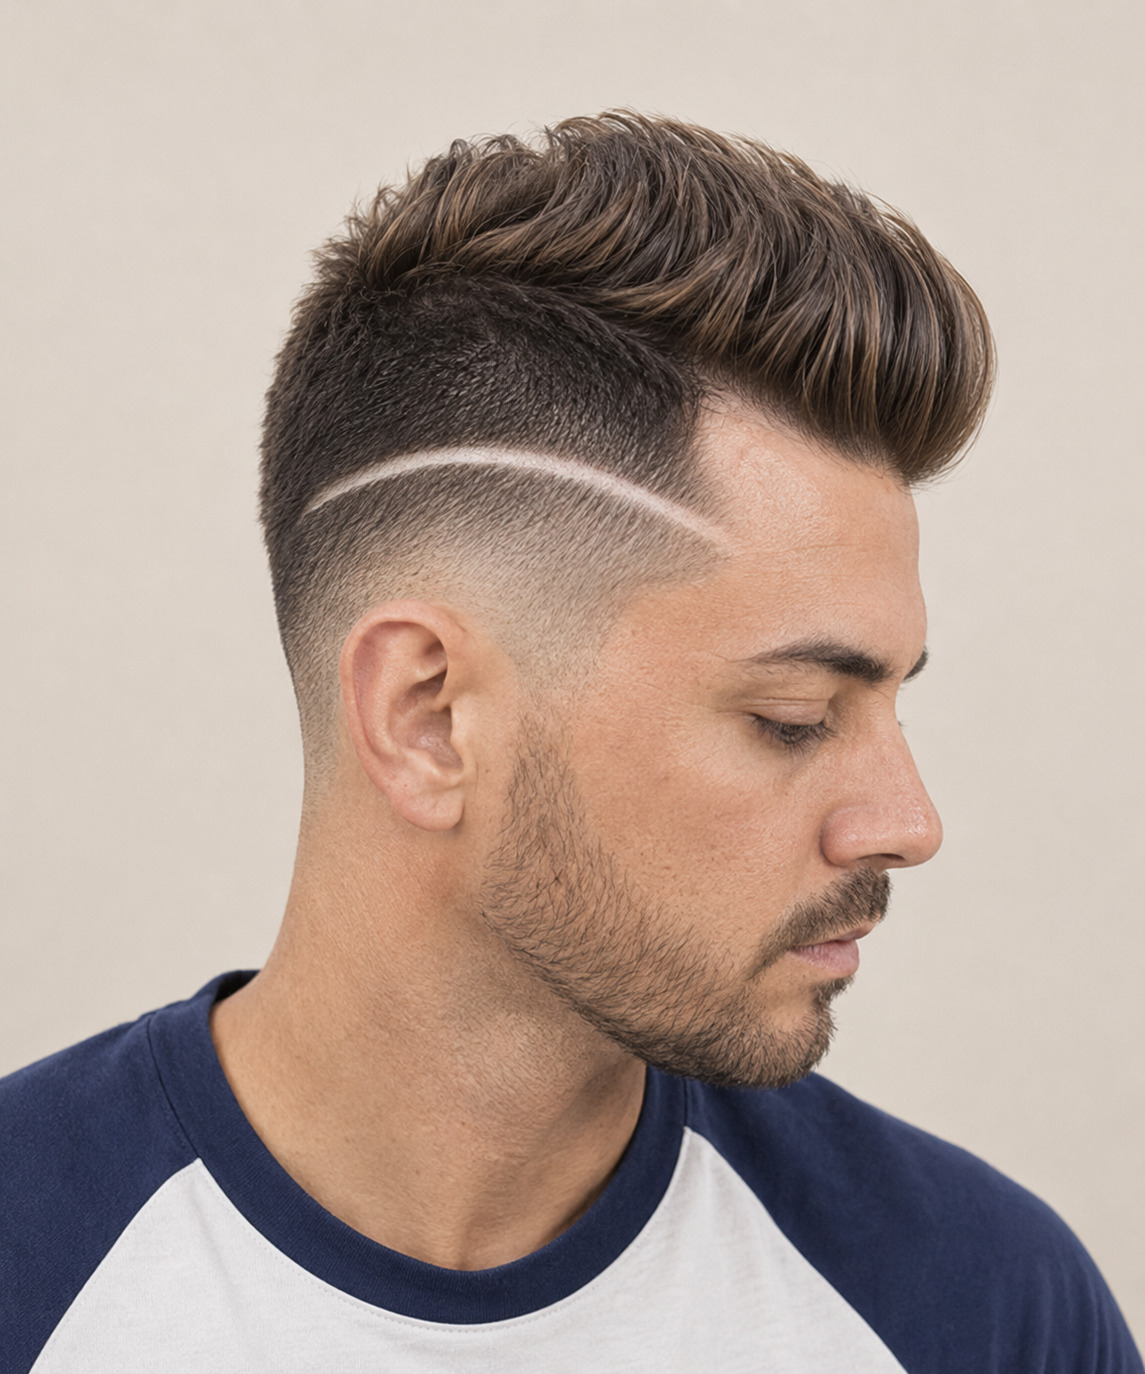
Geometric lines — a thin slash, a series of horizontal stripes, or a chevron — cut into the temple area just above the fade line add visual complexity without affecting the top of the cut. The design sits in the transition zone between the fade and the natural hair, making it the most prominent feature when viewed from the side. This is deliberate self-expression placed where it reads cleanly; it doesn’t distract from the face, it frames the overall silhouette.
23. Mid Taper Fade with Part Design
Rather than a straight hard part, some barbers carve curved, angled, or double-part lines that add architectural interest to an otherwise standard comb-over or slick-back. The design replaces or augments the natural side part, running from the temples into the fade. On dark, coarse hair where the clipper line shows maximum contrast, this is particularly striking — the skin or low-guard line reads sharply against the surrounding hair.
24. Mid Taper Fade with Drop Fade Element
A drop fade curves behind the ear rather than running in a straight horizontal line from temple to nape — it “drops” at the back to follow the ear’s natural contour. Combining a mid taper level at the temples with a drop at the back gives a slightly more casual, rounded silhouette that suits round and square face shapes. The curve behind the ear softens the overall profile compared to a straight-line mid fade, which can look more severe on wider faces.
25. Mid Taper Fade with Full Beard
When a mid taper fade meets a full or medium beard, the fade needs to be blended into the beard line rather than ending abruptly at the sideburn. This technique — sometimes called a beard fade — requires a barber skilled in both the hair fade and facial hair grooming. The result is a seamless transition from scalp hair to beard, with the fade disappearing naturally into the beard growth rather than creating a visible line. On square and diamond face shapes, the full beard adds width at the jaw that complements the width-reduction effect of the mid taper.
26. Mid Taper Fade with Skin Fade Detail
A mid taper that reaches all the way down to skin (also described as a bald fade or zero fade) at the lowest point creates the maximum contrast between the faded zone and the top. The mid start point means the skin exposure begins around ear height — more modest than a high skin fade, which starts at the temple and pushes skin exposure further up. On naturally dark or dense hair, skin fades show the highest contrast and look the most intentional. Maintenance is demanding: the skin line starts showing grow-in within a week.
Mid Taper Fades for Specific Hair Types
Hair type and density affect how a mid taper fade looks and performs more than almost any other factor. A mid fade on fine, straight hair looks completely different from the same fade on thick, coarse hair — the former falls soft and close to the head, the latter stands with more volume and shadow. These four entries address the most common hair-type-specific questions barbers get about this cut.
27. Mid Taper Fade for Thick, Coarse Hair
Thick, coarse hair with a mid fade can develop a “shelf” — a visible ridge where the longer top section meets the shorter sides — if the barber doesn’t blend the transition carefully. Ask specifically for texturizing or point cutting in the top to remove bulk before the fade begins, and request that the blending zone be gradual rather than sharp. A matte clay or fiber product (rather than a pomade) tames coarse strands without weighing them flat or creating greasiness at the crown.
28. Mid Taper Fade for Fine, Straight Hair
Fine hair gets the most from a mid taper fade when the top is left 2–3 inches and styled with a volumizing mousse or light wax — the fade makes the top look proportionally denser by reducing the visible bulk at the sides. Avoid heavy pomades on fine hair; they flatten the strands and accelerate the scalp-showing that fine hair is already prone to. A blowout with a round brush before applying product lifts the roots and extends the style’s lifespan through the day.
29. Mid Taper Fade for Wavy Hair
Wavy hair (2a–2c) paired with a mid taper fade almost styles itself — the natural movement of the wave creates texture and shape without requiring heavy product work. The main risk is the top going wide rather than tall on 2b–2c waves, which can create an unintended roundness at the crown. Ask your barber for internal thinning at the sides of the top section (not the fade zone, but the sides of the top itself) to control width while keeping the wave’s natural movement.
30. Mid Taper Fade with Two-Block Influence
The two-block cut (popularized in Korean and East Asian men’s styling) keeps longer hair on top while cutting the sides and back very short — but without the blended gradient of a traditional fade. A mid taper fade with two-block influence takes this concept and adds blending at the mid-ear transition, softening the disconnect slightly. The result sits between a hard undercut and a traditional fade, giving straight and fine hair types the dramatic top-to-sides contrast of the two-block with a smoother finish at the edges. This is a strong option for men who want a fashion-forward look that doesn’t read as extreme in professional settings.
How the Mid Taper Fade Differs from Similar Cuts
The terms “mid taper,” “mid fade,” and “mid taper fade” are used interchangeably in many barbershops, but they describe slightly different things. Knowing the distinction helps you get what you actually want.
| Feature | Mid Taper | Mid Fade | Mid Taper Fade |
|---|---|---|---|
| Where it starts | Mid-ear / temple | Temple midpoint | Temple midpoint |
| Lowest point | Short but not skin | Often to skin / #0 | Usually to skin or #0.5 |
| Contrast level | Moderate | High | High |
| Grow-out speed | Slower — more forgiving | Faster — skin shows quickly | Fast — skin line shows in 1–2 weeks |
| Best setting | Office, casual, versatile | Style-forward, casual | All settings, most expressive |
In practice, most barbers treat “mid taper fade” as the standard version of the cut — a mid-level start point that fades to skin or near-skin at the bottom. If you want a more natural finish that doesn’t go all the way to skin, ask specifically for a mid taper with no skin exposure, and show your barber where on your head you’d like the fade to stop.
What to Tell Your Barber
Most miscommunication in a barbershop happens because the client uses a general term (“mid fade”) when the barber needs specific instructions about three separate things: where the fade starts, how low it goes, and what guard or technique the top uses. These are the four pieces of information that get you exactly what you want.
Barber tip: Show a reference photo of the specific top style you want — not just a fade photo. Barbers see “mid fade” dozens of times a day and execute it slightly differently each time. A photo of the top (crop, pompadour, textured fringe) narrows the interpretation dramatically and makes the consultation faster and more accurate.
Use this language when you sit down:
- Fade placement: “I want the fade to start at mid-ear / temple level” — physically point to the spot if needed.
- Fade depth: “Take it down to skin at the lowest point” or “I’d like it to stop at a #0.5 — no skin showing.”
- Top length: Give a specific number or show two fingers apart to indicate length. “About 2 inches” is more useful than “short on top.”
- Top technique: “I want it textured” or “I want it blunt” tells the barber whether to point cut or clipper cut the top.
- Neckline: “Squared off” vs “tapered” vs “rounded” — all produce a different look from the back.
If this is your first time getting a mid taper fade with a new barber, add: “Can you check in with me at mid-ear before you go lower?” A 30-second pause to show you the fade height in the mirror prevents a longer discussion about regret.
Maintenance Schedule for the Mid Taper Fade
Fades go stale faster than almost any other men’s haircut because the contrast between the skin or near-skin bottom and the longer top is immediately visible as soon as grow-in begins. Unlike a longer cut where an extra week doesn’t change the silhouette dramatically, a week of fade grow-in blurs the transition and makes the cut look unfinished rather than intentional.
| Task | Frequency | Notes |
|---|---|---|
| Full fade refresh | Every 2–3 weeks | Skin fade needs 2 weeks; blended fade can stretch to 3 |
| Neckline cleanup | Every 10–14 days | Can be self-done with a trimmer or done at the barbershop |
| Razor design refresh | Every 1–2 weeks | Design lines soften faster than the fade itself |
| Daily styling (most tops) | 5–15 minutes | Shorter tops need less; pompadours and quiffs need more |
| Scalp care | 2–3 times per week | Short sides expose the scalp to sun; SPF matters if you’re outdoors frequently |
Mid Taper Fade by Face Shape
The mid taper fade is genuinely versatile across face shapes, but the top style needs to be chosen with the face’s proportions in mind. The fade itself is neutral — the top length and styling direction determine whether the overall look elongates, widens, or balances the face.
| Face Shape | Best Top Pairing | Avoid |
|---|---|---|
| Oval | Any — most tops work; textured fringe, pompadour, comb-over all excellent | Nothing to avoid; the most versatile face shape for this cut |
| Round | High-volume tops (quiff, faux hawk, pompadour) to add length; natural side part | Center part, flat crop — both add width and emphasize roundness |
| Square | Textured or wavy tops to soften angular lines; side part; light beard fade | Very flat, very short tops that expose a strong jawline without softening it |
| Oblong/Long | Caesar crop or French crop (horizontal fringe shortens visual length); low volume on top | High pompadour or quiff — adds length that oblong faces don’t need |
| Diamond | Full beard fade to add jaw width; slicked-back or side-parted top | Extreme volume at the crown — exaggerates the widest point at the cheekbones |
FAQ
What Is the Difference Between a Mid Taper Fade and a Low Taper Fade?
The difference is where the fade begins. A low taper fade starts just above the ear or at the neckline and only removes length in the lowest portion of the sides — the transition is subtle and leaves most of the sides at their natural length. A mid taper fade starts at mid-ear or temple height, creating a more pronounced blending zone that covers a larger portion of the sides and back. The mid fade reads as sharper and more modern; the low fade reads as more conservative and professional.
How Often Do I Need a Barber Visit to Maintain a Mid Taper Fade?
Every 2–3 weeks is the realistic maintenance interval for most mid taper fades. A skin fade at the bottom shows grow-in within 7–10 days; a blended fade that doesn’t go all the way to skin can stretch to 3 weeks before it looks unintentional. The neckline needs cleanup every 10–14 days regardless of whether you’re doing a full fade refresh — this is the most visible grow-in point and the first thing people notice when a cut is past its prime.
Can I Get a Mid Taper Fade with Curly Hair?
Yes — and the results are often striking because the curly top creates a natural texture contrast against the smooth fade transition. The key is finding a barber who cuts curly hair dry, not wet. Wet cutting on curly or coily hair routinely produces a shorter result than intended because shrinkage isn’t visible until the hair dries. Ask specifically: “Do you cut curly hair dry?” before booking. A well-executed mid taper fade on 3a–4c hair is a genuinely excellent look.
Does a Mid Taper Fade Work in a Professional or Corporate Environment?
Generally yes — the mid fade is considered the most office-compatible of all fade types. It’s sharper than no fade at all, but not as dramatic as a high skin fade that can read as aggressive in conservative workplaces. Pairing the mid fade with a comb-over, slicked-back top, or a clean crop keeps the overall look polished. Avoid design work (razor lines, etched patterns) if your workplace has strict grooming standards — the fade itself is typically fine in any professional context.
What Products Work Best for Styling the Top of a Mid Taper Fade?
The product depends on the top style. For short crops and buzz cuts — none needed, or a light wax to define edges. For textured fringe and comb-overs — matte clay or fiber paste applied to towel-dried hair, worked through fingertips, then blow-dried into shape. For pompadours and quiffs — medium-hold pomade (water-based for easy wash-out, oil-based for stronger hold). For curly tops — curl cream or light gel on damp hair, scrunched and air-dried. Avoid heavy gels on any fade top; they sit on the hair surface and create a white cast under certain lighting.
Is a Mid Taper Fade Suitable for Thinning Hair?
It depends on where the thinning is happening. If hair is thinning at the crown, a mid taper fade can actually help — it reduces the visual density at the sides and back, so the crown doesn’t look disproportionately thin by comparison. If thinning is happening at the temples or hairline, a mid fade starting at that point will expose the thin area more prominently. In that case, a lower fade that starts below the temple can keep the hairline less visible while still giving the modern fade silhouette.
What’s the Difference Between a Blowout and a Mid Taper Fade?
A blowout refers to the top styling technique — using a blow-dryer and a pick to stretch naturally coily hair into a voluminous, expanded shape — while a mid taper fade describes the sides and back cutting technique. They’re not competing concepts; a blowout with a mid taper fade is a single combined style where the blown-out top and the tapered sides work together. The mid fade gives the blowout’s volume a clean base to sit on, making the overall silhouette look intentional rather than simply uncut. For more on taper variations in this style family, see our guide to the mid taper and its variations.
The mid taper fade earns its place as the most popular men’s cut category because it genuinely works — not just for one hair type or face shape, but for the full range of textures, densities, and facial proportions that walk through a barbershop door every day. Bring two or three reference photos from this gallery to your appointment: one for the fade level, one for the top style, and one showing the neckline finish. That combination gives your barber everything they need to execute the cut you actually want, not just a version of a mid fade.
Hair results vary based on natural hair type, texture, density, and curl pattern. Always consult with a licensed barber before making significant changes, especially if switching fade levels or adding design work. Photos shown may reflect styled results that require professional tools and products to replicate.