Stylist-approved curly pixie ideas for every curl pattern, from loose waves to tight coils, with dry-cutting advice and product picks.
A pixie cut curly hair combination works when the stylist builds the shape around the curl pattern instead of against it, and these 30 variations prove it across every texture from 2B waves to 4C coils. Each entry covers what makes the cut distinct, which curl types and face shapes get the best result, and what your daily routine looks like once you commit.
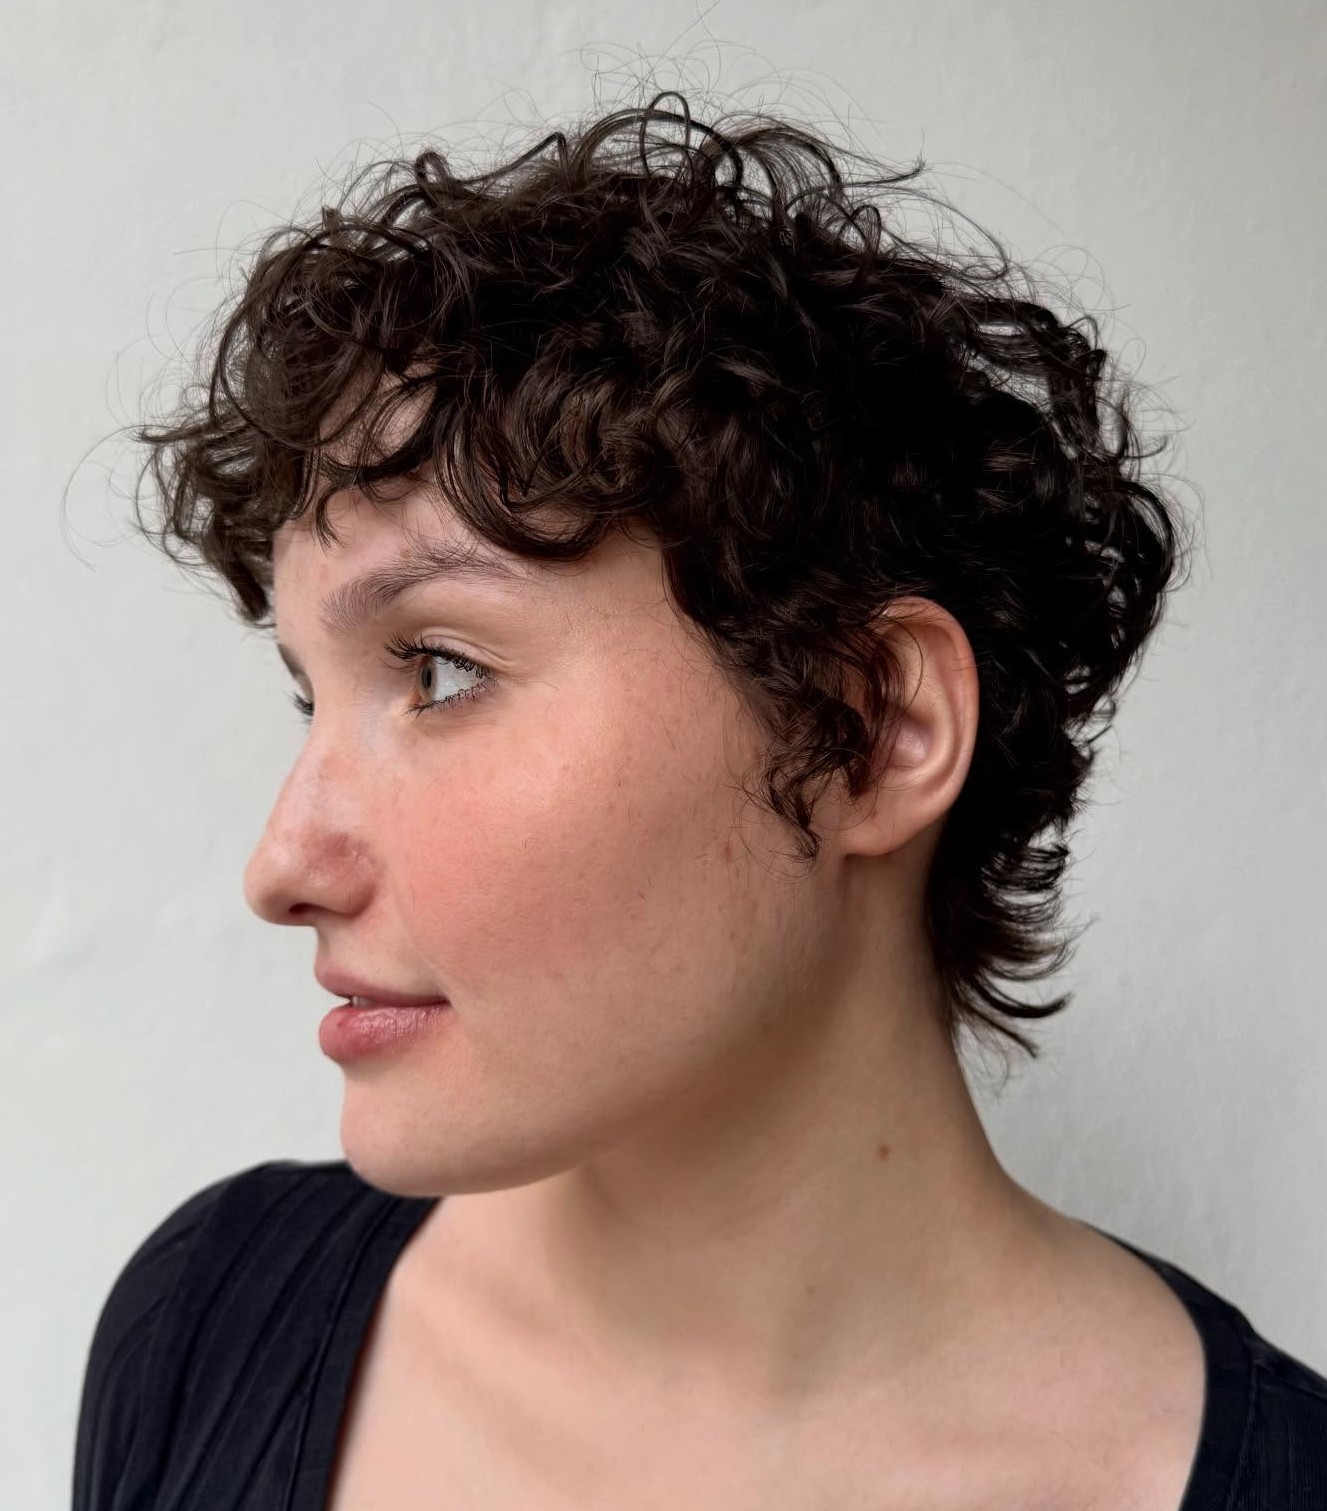
The gallery is organized by curl type so you can skip directly to your texture. After the photos, you will find salon communication tips, a maintenance breakdown by curl pattern, and answers to the most common questions about going short with curly hair. If you are exploring pixie cuts for women more broadly, that guide covers 50 variations across all textures.
Wavy and Loose Curl Pixie Cuts
Wavy hair between 2A and 2C has a natural bend that gives pixie cuts built-in movement without much effort. The cuts in this section lean into that texture rather than smoothing it out, so you can skip the blow-dryer most mornings and still walk out with shape and definition.
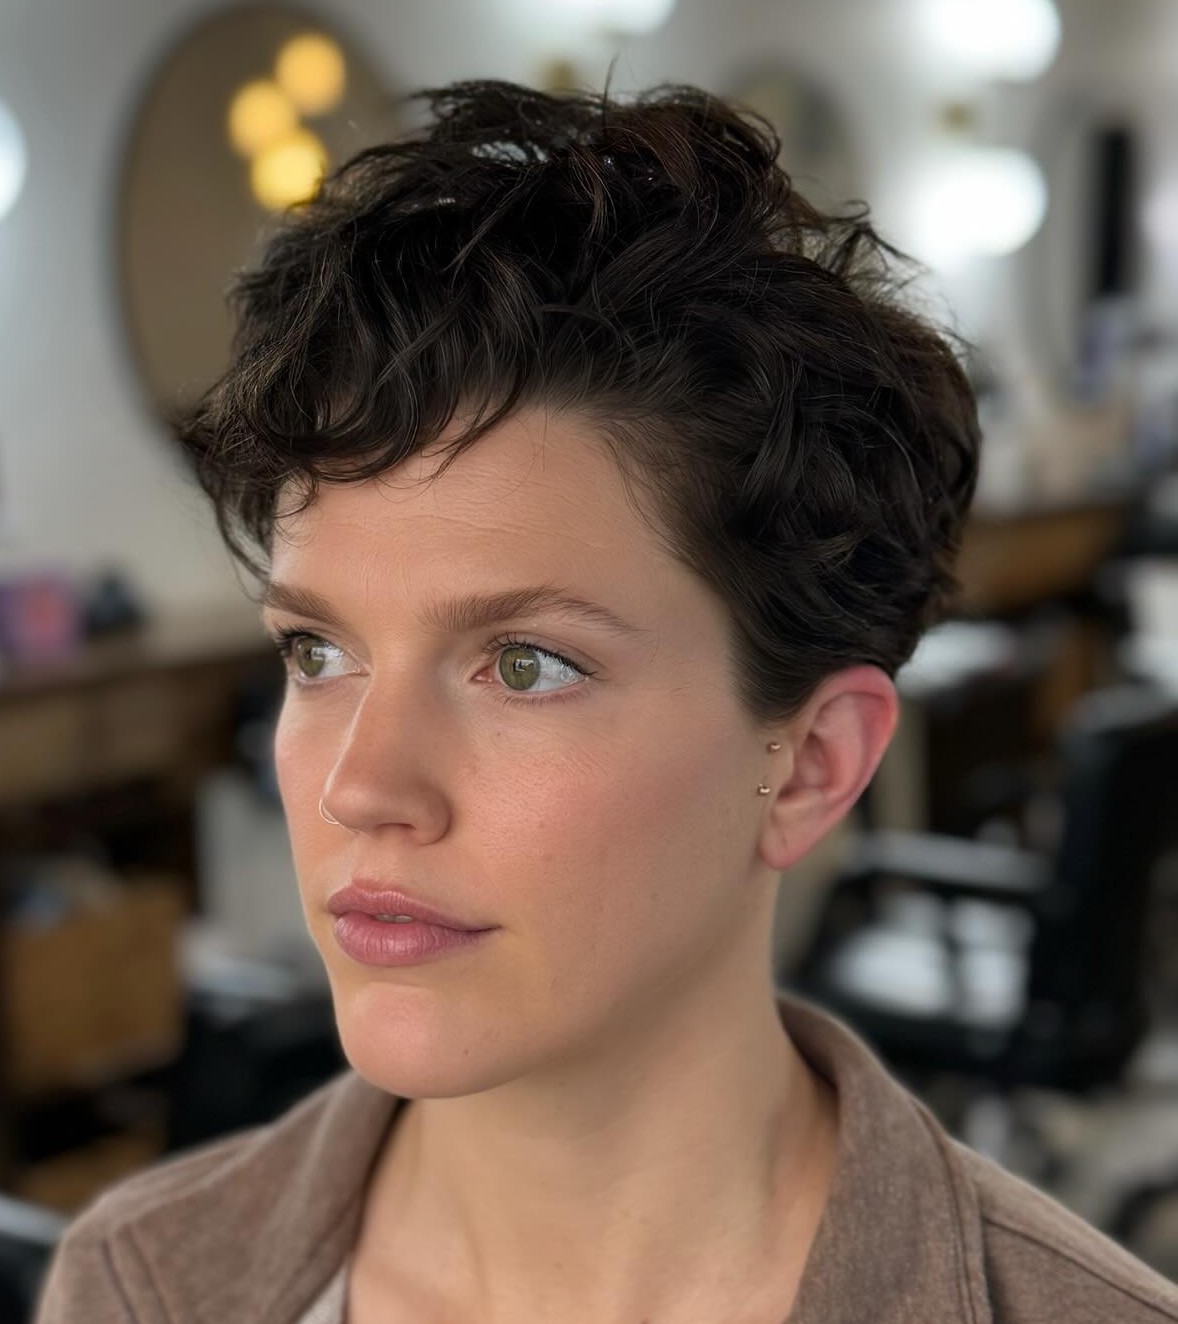
1. Tousled Wavy Pixie
A salt-spray scrunch through towel-dried hair is all this cut asks for. The layers are cut long enough on top, about 3 inches, for the wave to form a visible S-pattern, while the sides taper to about half an inch. Oval and heart-shaped faces wear it well because the texture fills in the crown without adding width at the jaw.
2. Wavy Pixie Bob with Side Part
Sitting between a pixie and a bob, this bixie-length cut gives wavy hair enough room to bend without looking flat. The side part creates a diagonal sweep across the forehead that works especially well on round faces, the asymmetry breaks up width and draws the eye vertically. Ask your stylist for point-cut ends to keep the perimeter soft rather than blunt.
3. Textured French Crop on Wavy Hair
Longer through the fringe with a piecey, undone quality at the top, the French crop reads effortless on 2B-2C waves. Finger-style it with a matte paste and skip the heat tools entirely. The lived-in finish means grow-out stays intentional-looking for 5-6 weeks between trims, making this one of the lowest-commitment curly pixie options.
4. Wavy Undercut Pixie
Buzzed sides and nape with 3-4 inches of wavy length on top create contrast that highlights the texture. Thick wavy hair benefits most here, the undercut removes bulk from the sides while letting the crown keep its natural volume. The shaved section needs a clipper touch-up every 2-3 weeks, but the top can stretch to 5 weeks before it loses shape.
5. Beachy Layered Wavy Pixie
Slide-cut layers throughout the top encourage the wave to separate into individual pieces with visible space between them. A texture spray applied to damp hair and scrunched upward is the full styling routine. If you have fine wavy hair that tends to clump together at short lengths, the slide cutting prevents that by creating varied strand lengths within each section.
6. Shaggy Wavy Pixie with Curtain Bangs
Curtain bangs parted at the center frame each side of the face while the back stays cropped and textured. Stylists typically use a razor for the fringe on wavy hair to keep the ends tapered rather than blunt. The grow-out is forgiving, this shape transitions into a short shag naturally over 8-10 weeks without hitting an awkward stage, which is a real advantage if you prefer fewer salon visits.
Defined Spiral Curl Pixie Cuts
Type 3A through 3C curls create a rounded, voluminous silhouette at pixie length that straight-haired cuts simply cannot replicate. The critical rule here is dry cutting, any stylist who cuts spiral curls wet at this length is guessing where the curls will land once they spring up. Every cut in this section assumes a dry cut on natural curl pattern.
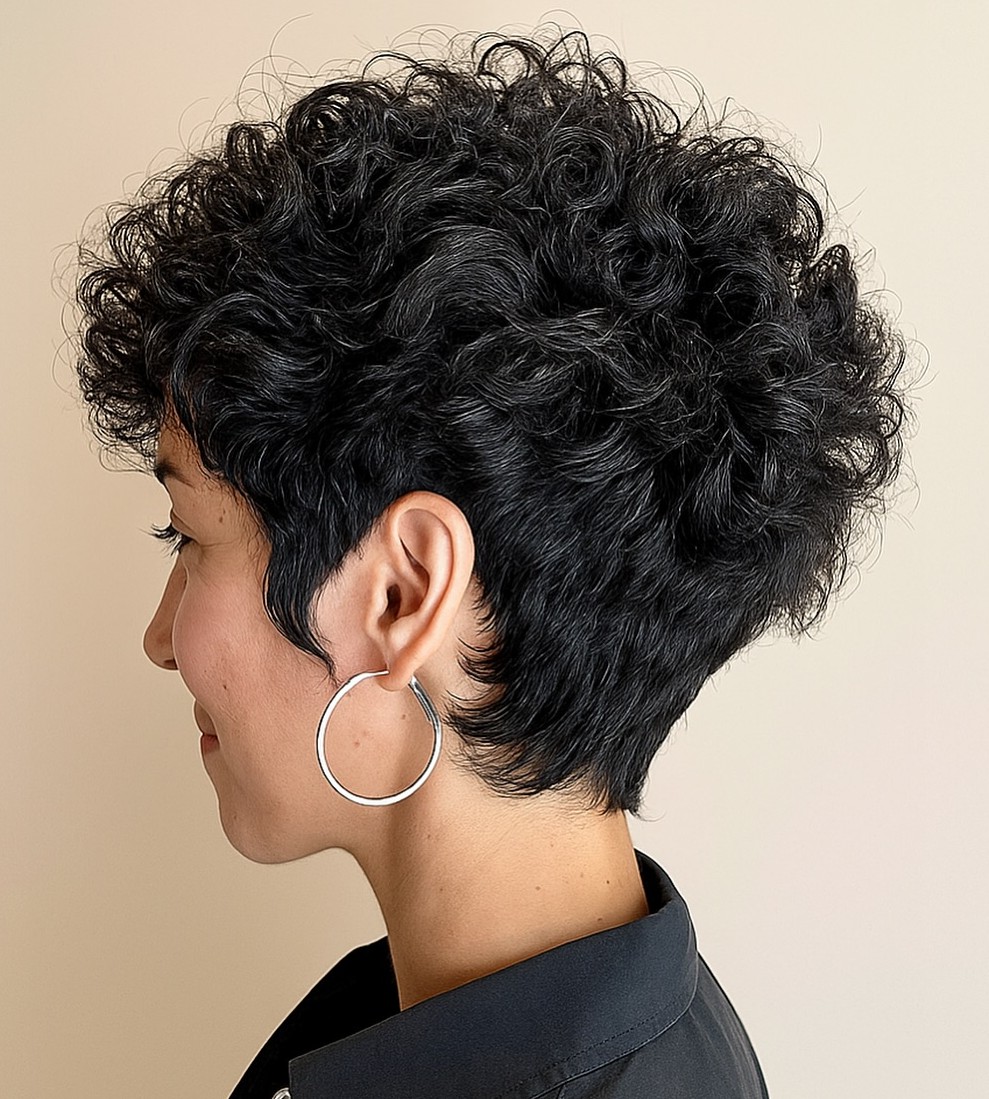
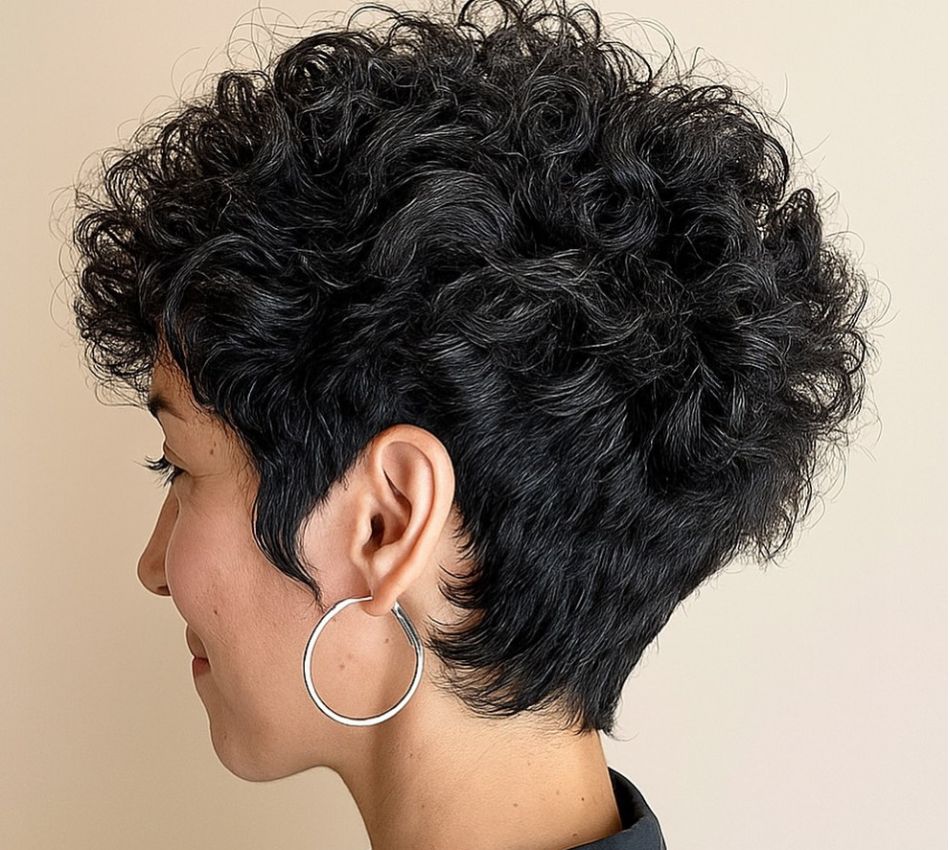
7. Classic Spiral Curl Pixie
Defined ringlets at pixie length produce a halo-like shape that flatters oval and heart-shaped faces particularly well. The stylist shapes the outline by cutting individual curls to create a rounded silhouette, keeping the sides slightly shorter than the crown. A curl-defining cream and a diffuser on low heat are your daily tools, apply the cream to soaking-wet hair, scrunch upward, and diffuse without touching the curls until they set.
8. Curly Pixie with Tapered Nape
A clean taper at the nape gives this cut a polished edge that balances the volume on top. The taper can be done with clippers on 3A curls or carefully scissor-cut on tighter 3B-3C patterns where clipper lines risk looking uneven against the curl texture. Square and round face shapes benefit from the height-to-width ratio this taper creates, more volume up top, clean lines at the bottom.
9. Voluminous Curly Crop
Maximum curl, minimum length. The sides sit close while the crown keeps 3-4 inches of curl, enough for the spirals to form fully without weighing each other down. Coarse 3B-3C hair responds well because the density supports the shape all day without collapsing. Avoid heavy creams here; a lightweight mousse gives hold without flattening the curl.
10. Curly Pixie Bob
For anyone not ready to go full pixie, the curly bixie leaves ringlets at jawline length while keeping the back short. The additional length reduces shrinkage anxiety, you can see the curl pattern clearly without worrying about the cut springing up shorter than expected. Stylists recommend this as a first step if you are transitioning from a longer cut to a short curly style, because it lets you test the length before committing shorter.
11. Asymmetrical Curly Pixie
One side cropped close, the other left with enough length for 2-3 full curls to hang past the ear. The asymmetry creates a bold diagonal that flatters oblong and rectangular faces by adding horizontal visual weight. Keep in mind that the longer side will need more product and attention than the short side, a curl cream on the long section and nothing on the cropped section is the usual approach.
12. Layered Spiral Pixie with Side-Swept Fringe
Internal layers reduce bulk through the crown without disrupting the curl pattern on the surface. The side-swept fringe adds a soft angle across the forehead and can be tucked behind the ear on days when you want a cleaner look. Ask your stylist to use point cutting rather than thinning shears, thinning shears on curly hair create frizzy, uneven ends that fight the spiral pattern.
13. Elongated Curly Pixie
Longer than a classic crop but shorter than a bob, this variation keeps 4-5 inches of curl on top and through the fringe while the nape stays scissor-tapered. The extra length gives 3A curls room to form their full S-shape without shrinkage cutting the visible length in half. Fine curly hair gets the best result here because the longer top allows curls to stack on each other and build natural volume at the crown.
Coily and Natural Texture Pixie Cuts
Type 4A through 4C coily textures create their own distinct silhouette at pixie length, tight coils close to the head produce a sculptural quality that loose curls cannot match. Moisture is the priority at this length. Short coily hair loses hydration faster than longer strands, so a daily leave-in conditioner sealed with a light oil is non-negotiable for keeping the texture defined and healthy.
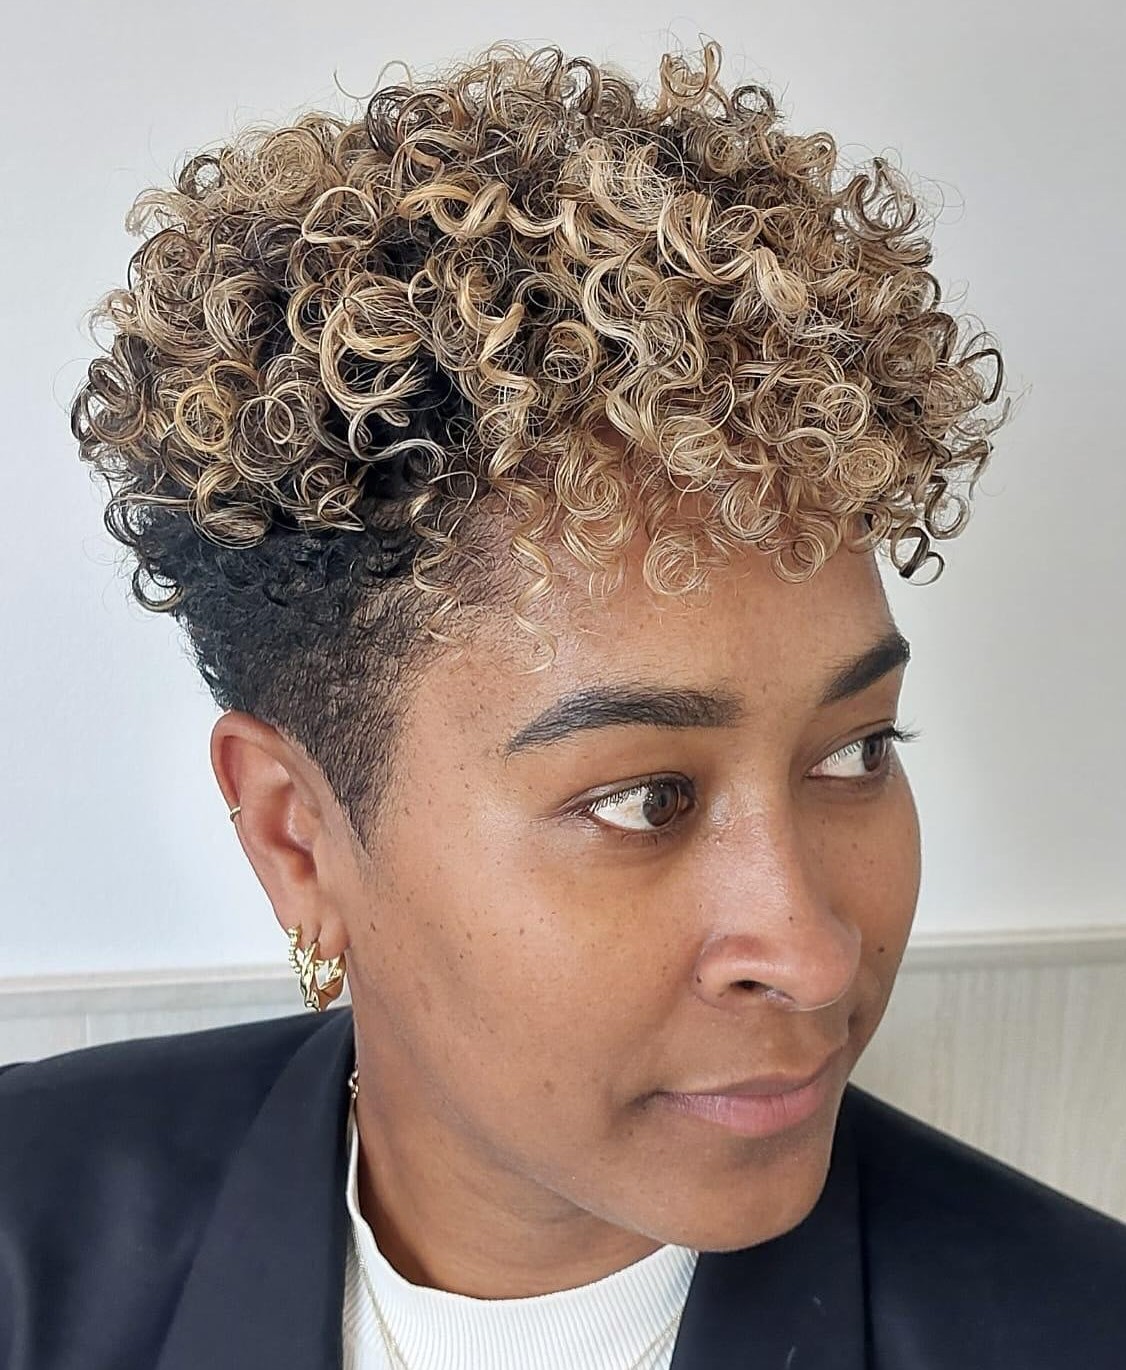
14. Classic TWA (Teeny Weeny Afro)
Close-cropped all over with the natural coil pattern on full display. The TWA is the simplest coily pixie to maintain, a moisturizing leave-in and a light oil in the morning, and a silk or satin pillowcase at night. Oval faces and those with strong cheekbones wear it particularly well because the uniform length puts facial features front and center with no distraction.
15. Tapered Coily Pixie
Shorter at the nape and sides, gradually longer at the crown, the taper adds dimension to 4A-4B coils and creates a shape that reads intentional from every angle. Stylists who specialize in natural hair often use a combination of clipper work at the perimeter and scissor shaping through the top to get the graduation right. Trims every 4-5 weeks keep the taper clean.
16. High-Top Coily Pixie
Faded or closely cropped sides with height and volume concentrated at the crown. The flat-top-meets-pixie shape works best on 4B-4C hair because the tight coil pattern holds vertical height naturally without product. A pick or wide-tooth comb gently lifts the top section, while a strong-hold mousse adds definition without crunch. Square and round faces benefit from the vertical emphasis.
17. Shaped Coily Pixie with Defined Part
A razor-etched part line adds geometric precision to natural coils. The part can be straight, curved, or angled depending on how bold you want the look. Keep in mind the line grows out within 10-14 days, so this requires regular barber visits or learning to maintain the part yourself with a trimmer. The rest of the cut stays simple, even length with slightly more height at the crown.
18. Coily Pixie on Locs
Short locs at pixie length create a textured look that is entirely different from loose-hair pixies, each loc acts as an individual design element. Starting locs at this length requires patience through the early stages, but once established, maintenance is primarily retwisting every 4-6 weeks. The weight of even short locs helps them lay flatter than loose coils, which suits round and oval faces well.
19. Finger Coil Pixie
Individual coils wrapped around the finger and set with a curl-defining gel create a polished, uniform pattern across the entire head. The technique takes 30-45 minutes to set but the result lasts 5-7 days when protected at night with a satin bonnet. 4A-4B textures get the most defined coils from this method. The upfront time investment pays off with almost zero daily styling for the rest of the week.
Color-Enhanced Curly Pixie Cuts
Color on short curly hair plays differently than on straight hair—curls create shadows and depth naturally, so the right color technique amplifies that dimension rather than flattening it. The shorter length also means less cumulative damage from processing, which is a real advantage for curly textures that tend toward dryness.

20. Curly Pixie with Honey Balayage
Hand-painted highlights concentrated at the crown and fringe catch the light where curls naturally lift away from the head. Warm honey tones on a medium-brown base add depth without the harsh contrast of foil highlights. Because balayage grows out without a visible root line, the maintenance schedule stays manageable—a toner refresh every 8-10 weeks is usually enough.
21. Copper Curly Crop
Copper catches light from every angle on curly hair, making each individual curl visible against the next. The shade sits between a true red and a warm blonde, and it flatters warm and neutral skin tones well. Use a sulfate-free shampoo and a color-depositing conditioner in a copper tone to extend vibrancy between salon visits—standard shampoos strip red-family colors quickly.
22. Platinum Coily Pixie
Bleaching coily hair to platinum requires an experienced colorist who understands the damage thresholds of textured hair. Expect 2-3 sessions spaced weeks apart, never a single-appointment job. The payoff is a head-turning contrast—platinum on tight coils creates a visual texture that is hard to replicate on any other hair type. Protein treatments every 2 weeks are essential to maintain strand integrity after lightening.
23. Pastel-Tinted Curly Pixie
Semi-permanent pastels—lavender, rose gold, soft blue—need a pre-lightened base to show up, but the short length limits the damage zone significantly. The tint fades within 6-8 washes, transitioning through softer shades before returning to the blonde base. Re-applying at home with a semi-permanent formula between salon visits keeps the color fresh without additional bleach processing.
24. Curly Pixie with Money Pieces
Two lighter panels at the front—specifically the curls that frame each side of the face—create instant brightness without a full color commitment. On curly hair, money pieces land on the outermost curls at the temples, which means the color is always visible rather than hidden in interior layers. A low-maintenance choice because the face-framing placement grows out naturally without a harsh line.
Face-Flattering Curly Pixie Cuts
Curly hair adds natural volume, which changes the face-shape calculation compared to straight-hair pixies. A curly pixie on a round face needs a different strategy than the same cut on an oval face—the curl volume is already doing work that straight hair cannot, so the cut needs to direct that volume to the right places.
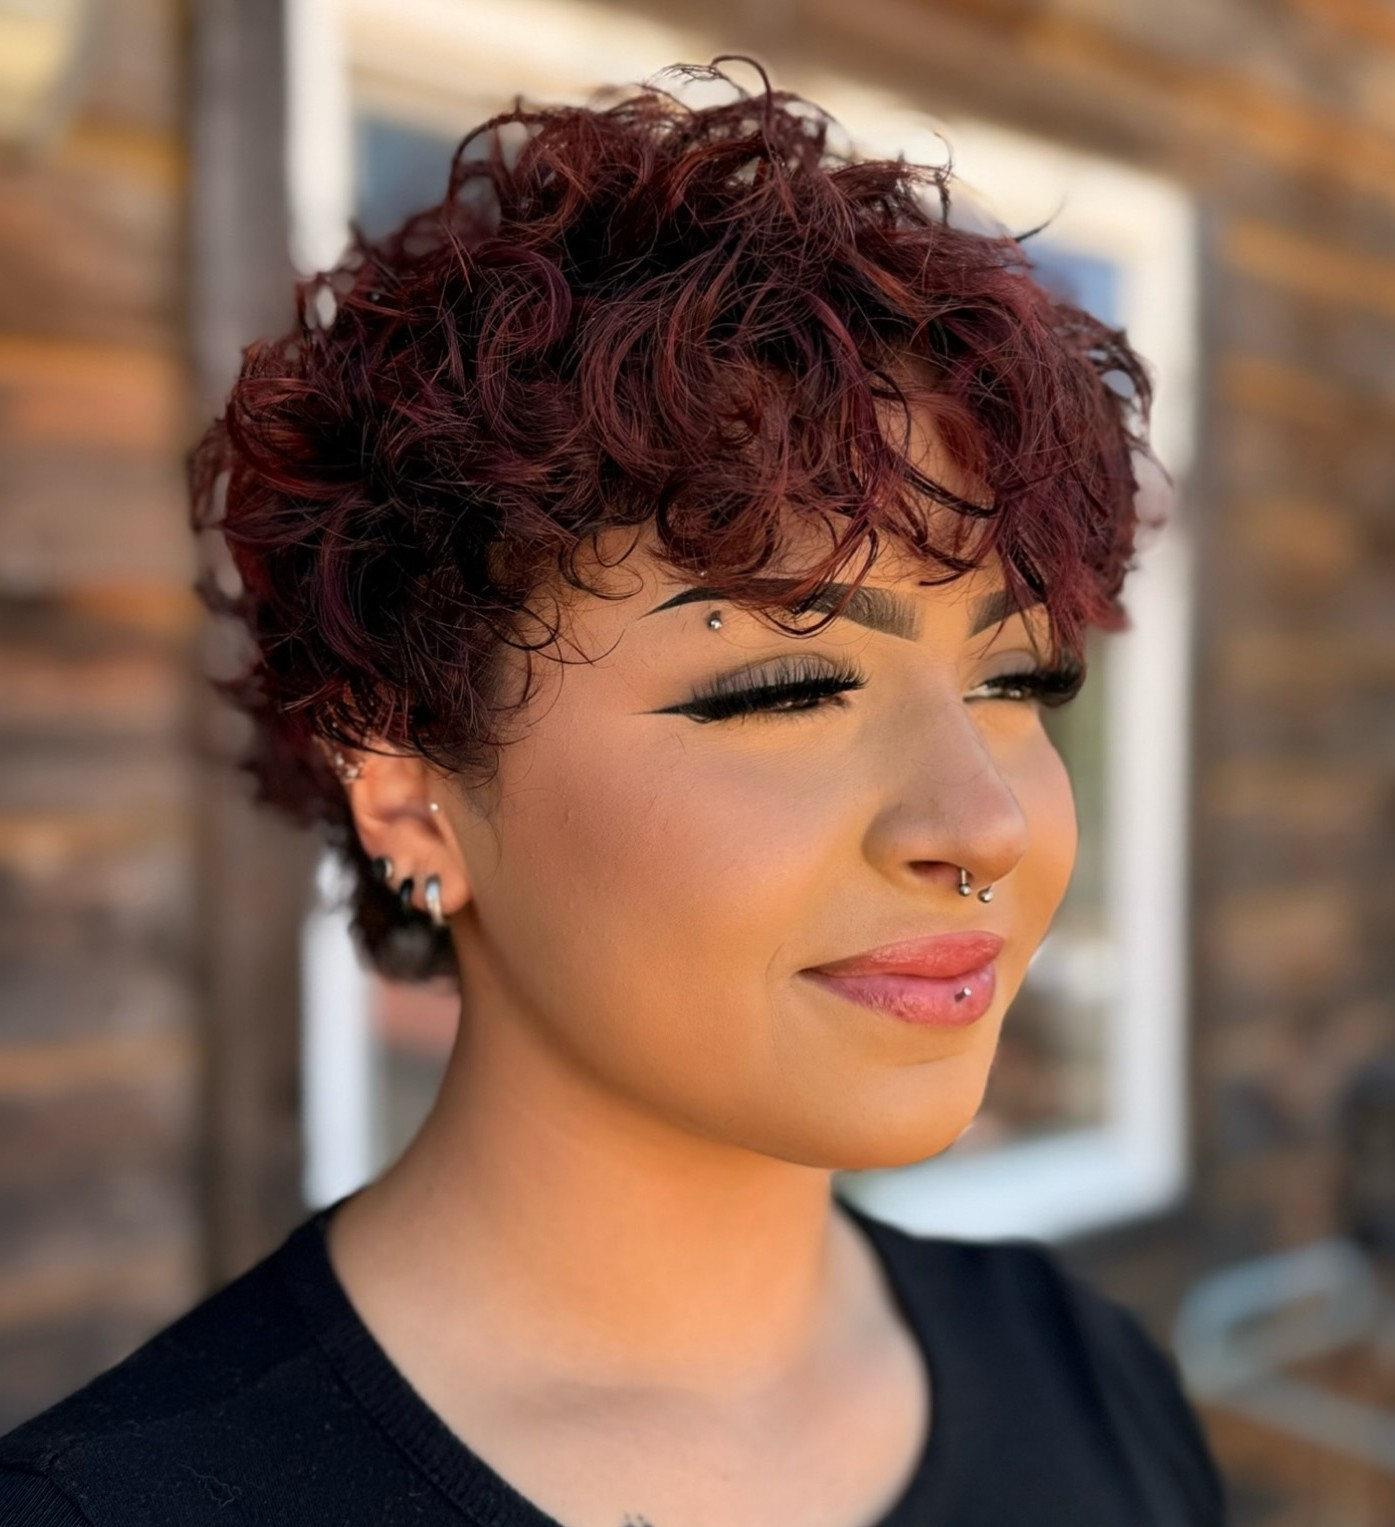
25. Curly Pixie for Round Faces
Height at the crown and closely tapered sides create vertical lines that visually lengthen a round face. With curly hair, the crown volume comes naturally—the stylist’s job is to remove width at the sides and temples while leaving the top to do its thing. A side part adds asymmetry that further breaks up the circular shape. Avoid center parts and same-length-all-over crops, which echo the roundness.
26. Curly Pixie for Oval Faces
Oval faces and curly pixies are a reliable match because balanced proportions mean the natural curl volume enhances rather than distorts the face shape. You have the widest range of options here—go ultra-short, try an asymmetrical cut, add bold color, or keep it classic. The real decision is about curl type and maintenance preference, not face-shape compensation.
27. Curly Pixie for Heart-Shaped Faces
A wider forehead and narrower chin mean you want curl volume distributed at or below the cheekbones, not piled up at the crown. A curly bixie with ringlets framing the jawline adds visual weight where a heart-shaped face needs it most. Side-swept curly bangs draw attention away from forehead width, and a little extra length at the sideburns helps balance the proportions.
28. Curly Pixie for Square Faces
The natural softness of curly texture already offsets strong jawlines—curls introduce curves that blunt cuts on straight hair cannot achieve. A curly pixie with volume at the crown and soft, diffused curls at the temples works well here. Avoid clipping the sides too short, because exposing the full jawline on a square face without any softening at the sides creates a severe look that most clients are not after.
29. Curly Pixie for Women Over 50
Hair texture often changes after 50—strands get finer, drier, and sometimes curlier than they were earlier in life. A well-shaped curly pixie addresses these shifts at once. Keep the layers soft rather than sharp, and avoid super-short crops if thinning has started at the temples. A volumizing mousse at the roots gives lift where aging hair tends to flatten, and a side part is usually more flattering than a center part at this stage.
30. Curly Pixie for Fine Curls
Fine curly hair wants volume but cannot support heavy products. A graduated pixie with layering through the crown allows the curls to stack on each other, building height naturally. Use a lightweight mousse rather than a cream, and scrunch upward while diffusing. Avoid heavy oils—they flatten fine curls within an hour. The payoff of this cut is that it creates the appearance of thicker, denser hair because the graduated layers concentrate the curls where they are most visible.
What to Discuss with Your Stylist Before a Curly Pixie Cut
A curly pixie cut consultation is where the shape is essentially “designed” before any cutting begins, because curl patterns, shrinkage, and density can completely change how a short cut sits on the head. The most important step is assessing your hair in its natural, dry state so the stylist can see how each curl behaves without being stretched or controlled. This helps avoid one of the most common mistakes with curly pixies—cutting too short based on wet length, only for the hair to spring up much higher once dry. Bringing reference photos is useful, but the real value comes from discussing what you want in terms of silhouette, not just a specific look.
| Topic | What to Discuss | Why It Matters |
|---|---|---|
| Curl Pattern & Shrinkage | Show your hair dry and explain how much it shrinks when it dries. | Prevents the cut from ending up shorter than expected and ensures accurate shaping. |
| Face Shape Balance | Discuss where you want volume (top, sides, or fringe). | Helps tailor the pixie to flatter your features and proportions. |
| Maintenance Plan | Ask how often the cut will need reshaping or trimming. | Keeps the pixie looking intentional during grow-out stages. |
| Daily Styling Routine | Explain how much time you spend styling and what tools you use. | Ensures the cut matches your lifestyle and skill level. |
| Cut Structure Preferences | Talk about undercut, taper, layers, or blunt shapes. | Defines the overall silhouette and how the curls will sit. |
During the consultation, a skilled stylist will also translate your curl type into a workable structure—deciding where to build volume, where to remove weight, and how to balance proportions around your face shape. This is also the moment to talk honestly about maintenance, since pixie cuts grow out quickly and need regular shaping to stay intentional. Your daily routine matters here too: whether you diffuse, air-dry, use strong definition products, or prefer a low-maintenance approach will influence layering, length, and perimeter design. A good consultation aligns expectations so the cut works with your curls from day one through every stage of grow-out.
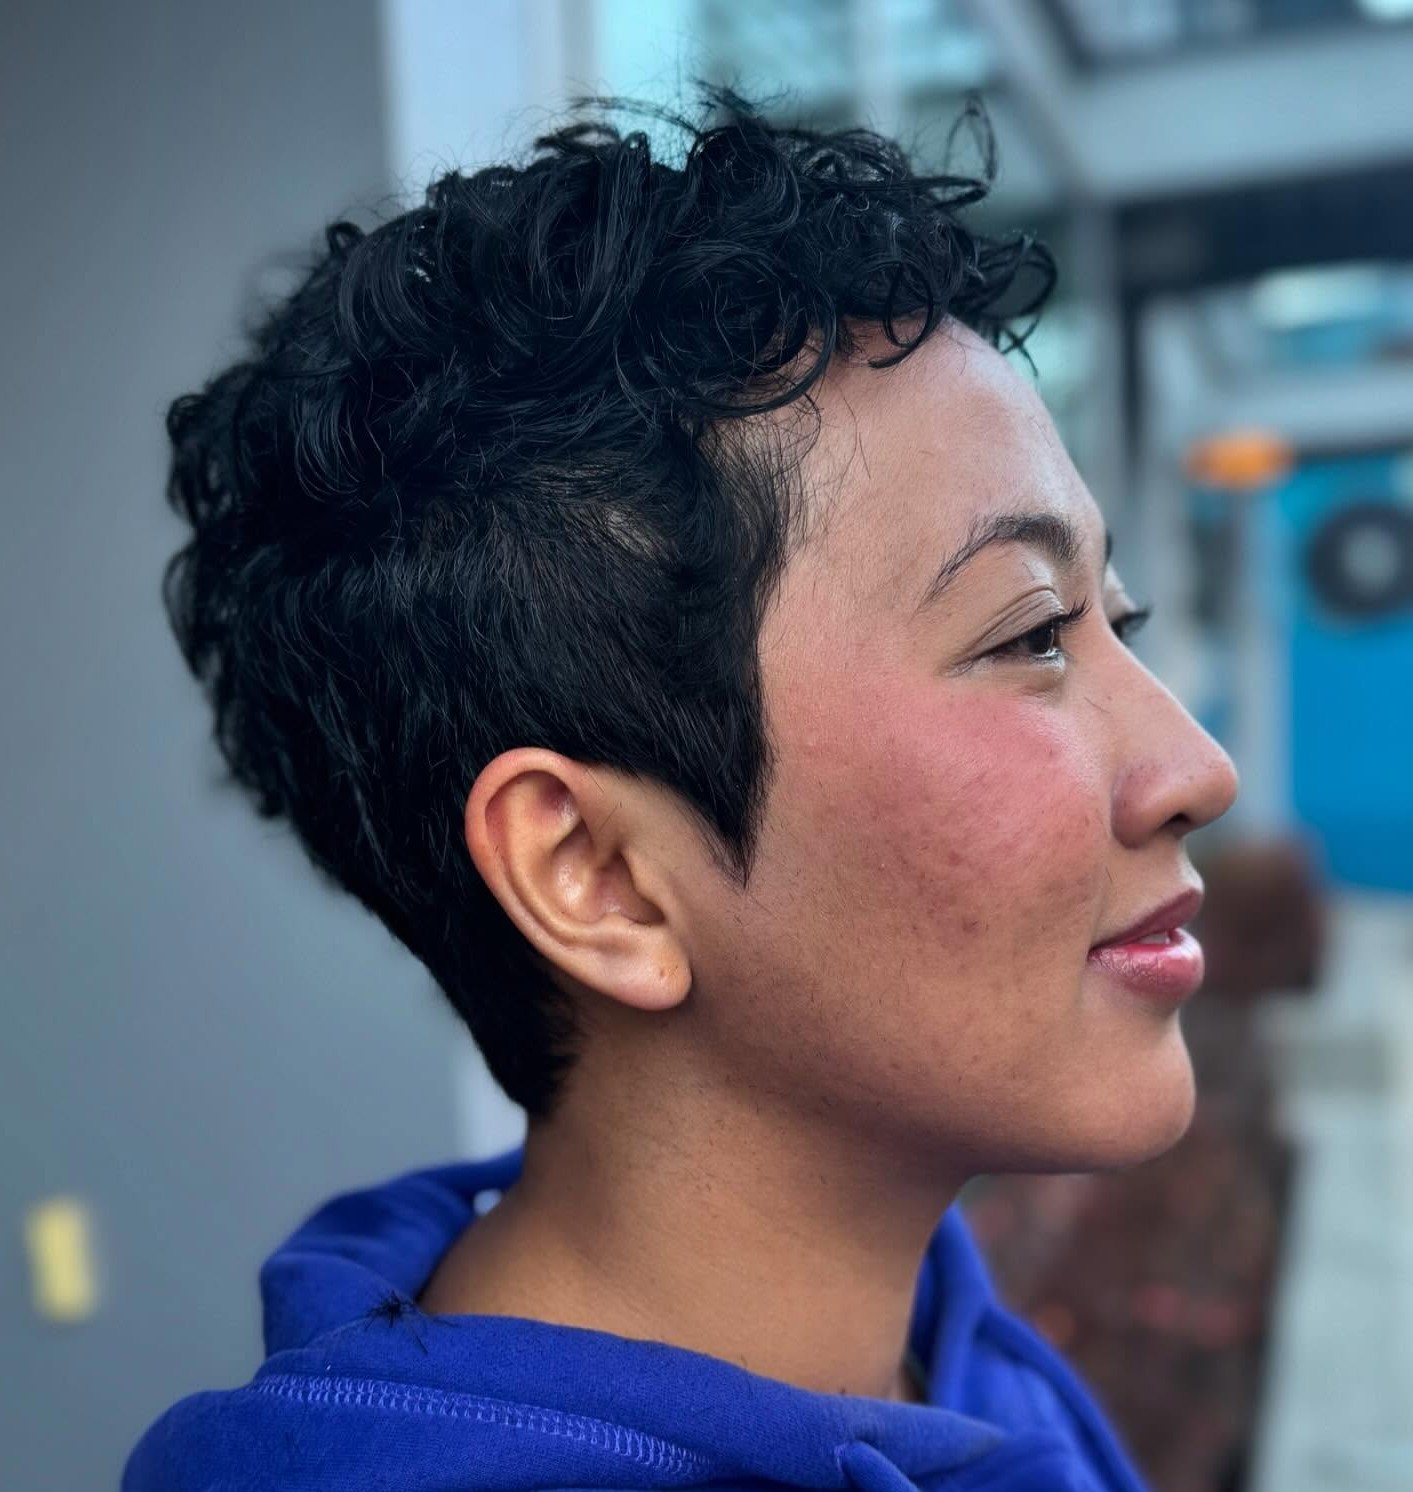
Curly Pixie Styling Essentials
Styling a curly pixie cut relies on a small but intentional set of essentials, because short curls need definition and control without being weighed down. The foundation usually starts in the shower with a lightweight, hydrating cleanser and conditioner that won’t leave buildup at the roots. Once out of the shower, most curl types benefit from a leave-in conditioner to lock in moisture, followed by a curl cream or mousse depending on whether the goal is softness or stronger definition. Since pixie lengths dry quickly, product distribution matters more than quantity—too much can easily overwhelm the shape and reduce volume at the crown.
| Essential | Purpose | Best For |
|---|---|---|
| Leave-in Conditioner | Adds hydration and helps reduce frizz after washing | All curl types, especially dry or high-porosity hair |
| Curl Cream | Defines curl pattern and softens texture | 3A–4A curls needing shape and moisture |
| Mousse | Adds lightweight hold and volume without heaviness | Fine curls and wavy hair (2B–3B) |
| Diffuser | Speeds up drying while enhancing curl shape and volume | 3B+ curls and coily textures needing definition |
| Microfiber Towel / T-Shirt | Reduces frizz and prevents curl disruption during drying | All curl types |
| Lightweight Oil | Seals moisture and adds shine without heavy buildup | Coily and dry curl textures (3C–4C) |
Tools also play a key role in maintaining a well-shaped curly pixie. A diffuser attachment helps set curl definition while preserving volume, especially for 3A to 3C textures, while air-drying works well for looser waves if you prefer a more relaxed finish. A microfiber towel or cotton T-shirt is essential for reducing frizz during drying, and a wide-tooth comb or fingers should replace traditional brushes to avoid disrupting the curl pattern. Finishing products like lightweight oils or curl-refresh sprays can be used sparingly on non-wash days to revive shape without adding heaviness, keeping the pixie looking fresh between washes and trims.
FAQ
Should I Cut My Curly Hair Wet or Dry for a Pixie?
Dry cutting is the standard recommendation for curly pixies. When curly hair is cut wet, it stretches to a longer length, and once it dries and springs back, the result is often shorter than expected. Dry cutting lets your stylist see the actual curl pattern, where each curl falls, and how much shrinkage to account for. If your stylist insists on cutting wet, ask them to leave at least an extra inch of length as a shrinkage buffer.
How Often Do I Need to Trim a Curly Pixie?
Most curly pixies need shaping every 4-6 weeks, depending on the variation. Undercuts and fades on curly hair need attention every 2-3 weeks at the sides. The good news: curly texture disguises grow-out better than straight hair because the curls add natural shape and movement even as the length increases. You can often stretch an extra week or two before the cut looks unintentional.
Will My Curls Look Different at Pixie Length?
Yes. Shorter length means less weight pulling the curl down, so most curly textures appear curlier and tighter at pixie length than at longer lengths. A 3A curl pattern might look more like 3B once the weight is removed. Factor this into your length expectations—if your curls are 3 inches long when stretched, they may appear to be only 2 inches once they spring back. Your stylist should account for this during the cut.
Can I Get a Pixie Cut with Very Fine Curly Hair?
Fine curly hair works well at pixie length when the cut uses graduated layering to build volume at the crown. The curls stack on each other, creating the appearance of thicker hair. Avoid heavy products—a lightweight mousse or volumizing spray is enough. Thinning shears should be off the table entirely, as they remove density that fine curly hair cannot afford to lose.
What Is the Hardest Part of Growing Out a Curly Pixie?
The awkward stage between a pixie and a bob typically hits around months 3-5, when the sides and nape grow out faster than the top and the shape loses definition. Regular trims during this period are essential—your stylist can clean up the outline while preserving the length you are growing. Curly hair has an advantage here: the natural texture helps the in-between stages look more intentional than they would on straight hair.
Do I Need a Diffuser for a Curly Pixie?
A diffuser is not mandatory, but it speeds up drying time and helps set the curl pattern in place. Without a diffuser, air-drying works fine for 2A-3A textures—just apply your styling product, scrunch, and leave it alone. Tighter curl patterns (3B and above) benefit more from diffusing because the concentrated airflow helps coils set in their natural shape without disrupting the clumping pattern.
Finding the right pixie cut curly hair match comes down to three things: your curl type, your face shape, and how much time you actually want to spend on styling. Bring reference photos that show hair like yours, insist on a dry cut, and start with a slightly longer variation if you are going short for the first time. Save this guide, take it to your next appointment, and give your curls the short shape they have been waiting for.
Hair results vary based on your natural hair type, texture, density, and condition. Always consult with a licensed hairstylist before making significant changes, especially with chemical treatments or dramatic length changes. Photos may show styled results that require professional tools and products to replicate.