
Ditch the flat strands: these 30 high-volume pixie secrets will double your hair density overnight.
Pixie cuts are one of the smartest moves for fine hair: shorter lengths remove weight that drags thin strands flat, and the right layering technique creates the illusion of density your hair doesn’t naturally have. Below are 30 stylist-approved variations organized by the specific volume trick each one uses, from stacked backs and textured crowns to strategic highlighting and point-cut fringe.
| Style | Best For | Maintenance | Works With | Skip If |
|---|---|---|---|---|
| Textured pixie | Oval, heart faces | Trim every 4–5 weeks | Straight to wavy fine hair | Very round face, coarse texture |
| Stacked pixie | Oblong, diamond faces | Trim every 4–6 weeks | Straight fine hair | Strong cowlick at nape |
| Layered pixie bob | Round, square faces | Trim every 5–6 weeks | Any fine hair texture | Want very low maintenance |
| Shaggy pixie | Oval, heart, oblong faces | Trim every 6–8 weeks | Wavy or curly fine hair | Prefer polished looks |
Textured Pixies That Build Volume at the Crown
Heavy, uniform layers flatten fine hair because they remove density from already-sparse ends. The pixies in this section rely on point cutting, texturizing, and choppy internal layers to create lift where fine hair needs it most, at the crown and temples. Most work best on straight to slightly wavy textures.
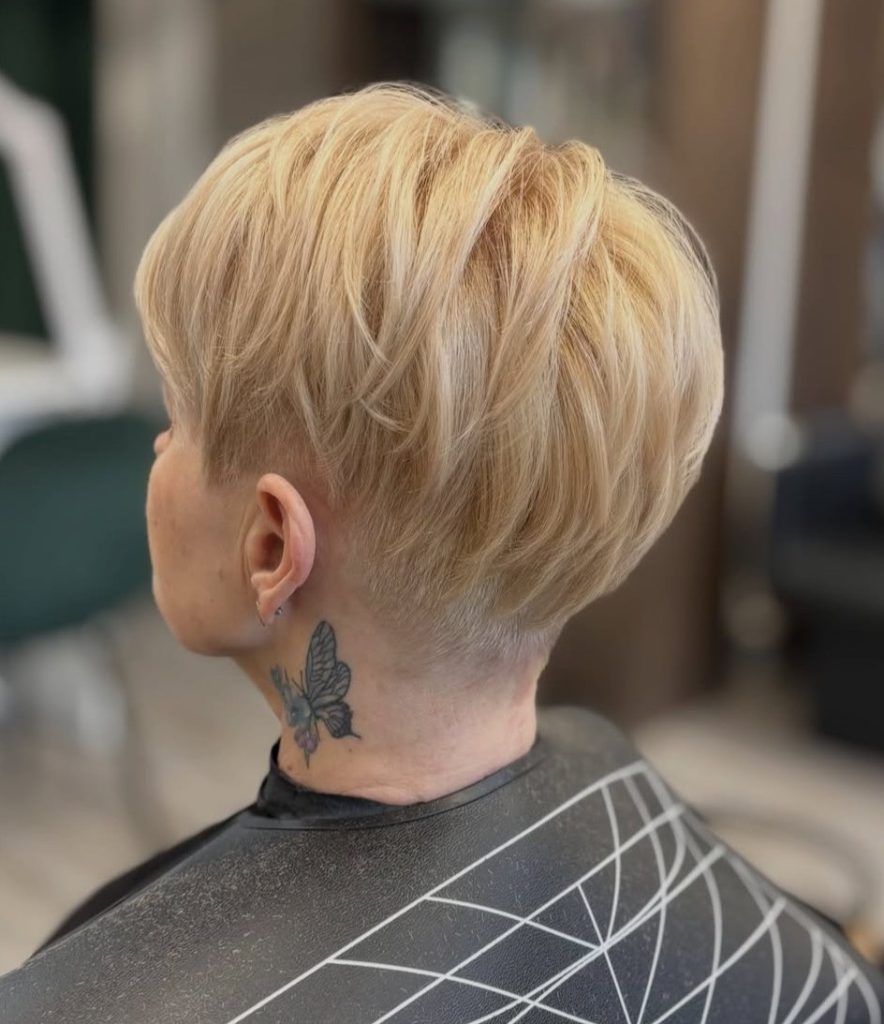
1. Choppy Crown Pixie With Micro Layers
Micro layers stacked through the crown area lift the roots without thinning the perimeter, giving fine blonde hair the appearance of twice its natural density. The sides stay close to the head, keeping all the visual weight up top where it counts. Ask your stylist for point-cut layering above the occipital bone, that’s where fine hair tends to collapse first.
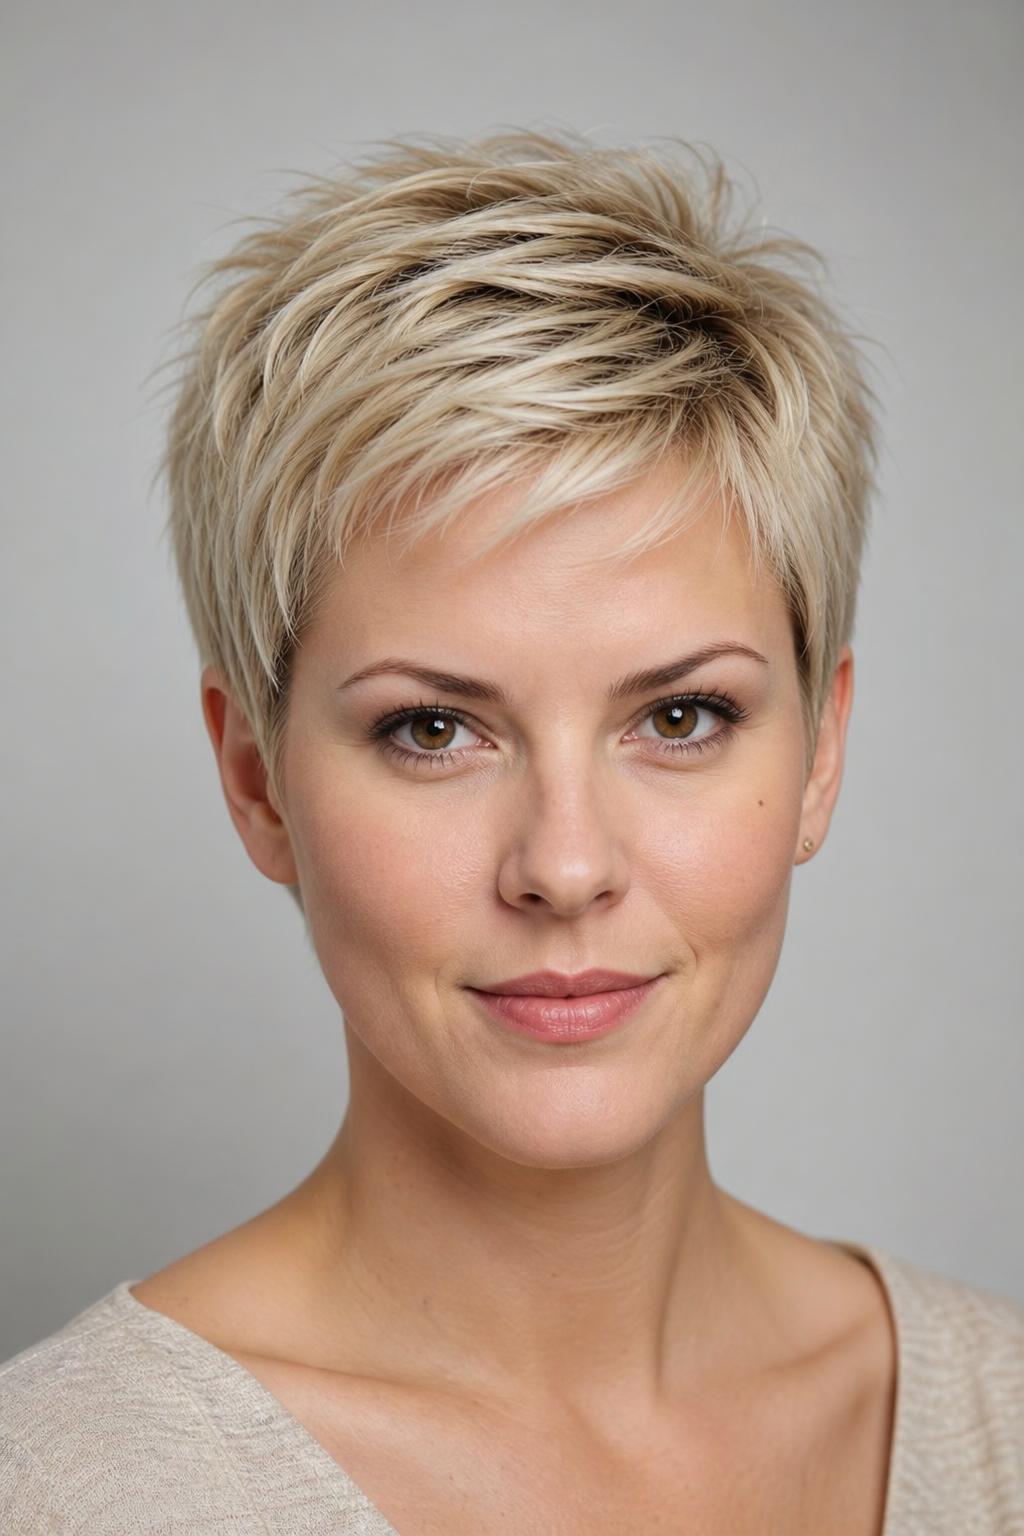
2. Piecey Textured Pixie With Deep Side Part
A deep side part pushes about 70% of the hair to one side, and on fine strands that displacement alone creates noticeable body. The piecey texture here comes from razor-finished tips that separate into individual wisps rather than clumping together. This cut works particularly well on heart-shaped faces, the side-heavy fringe balances a narrower chin.
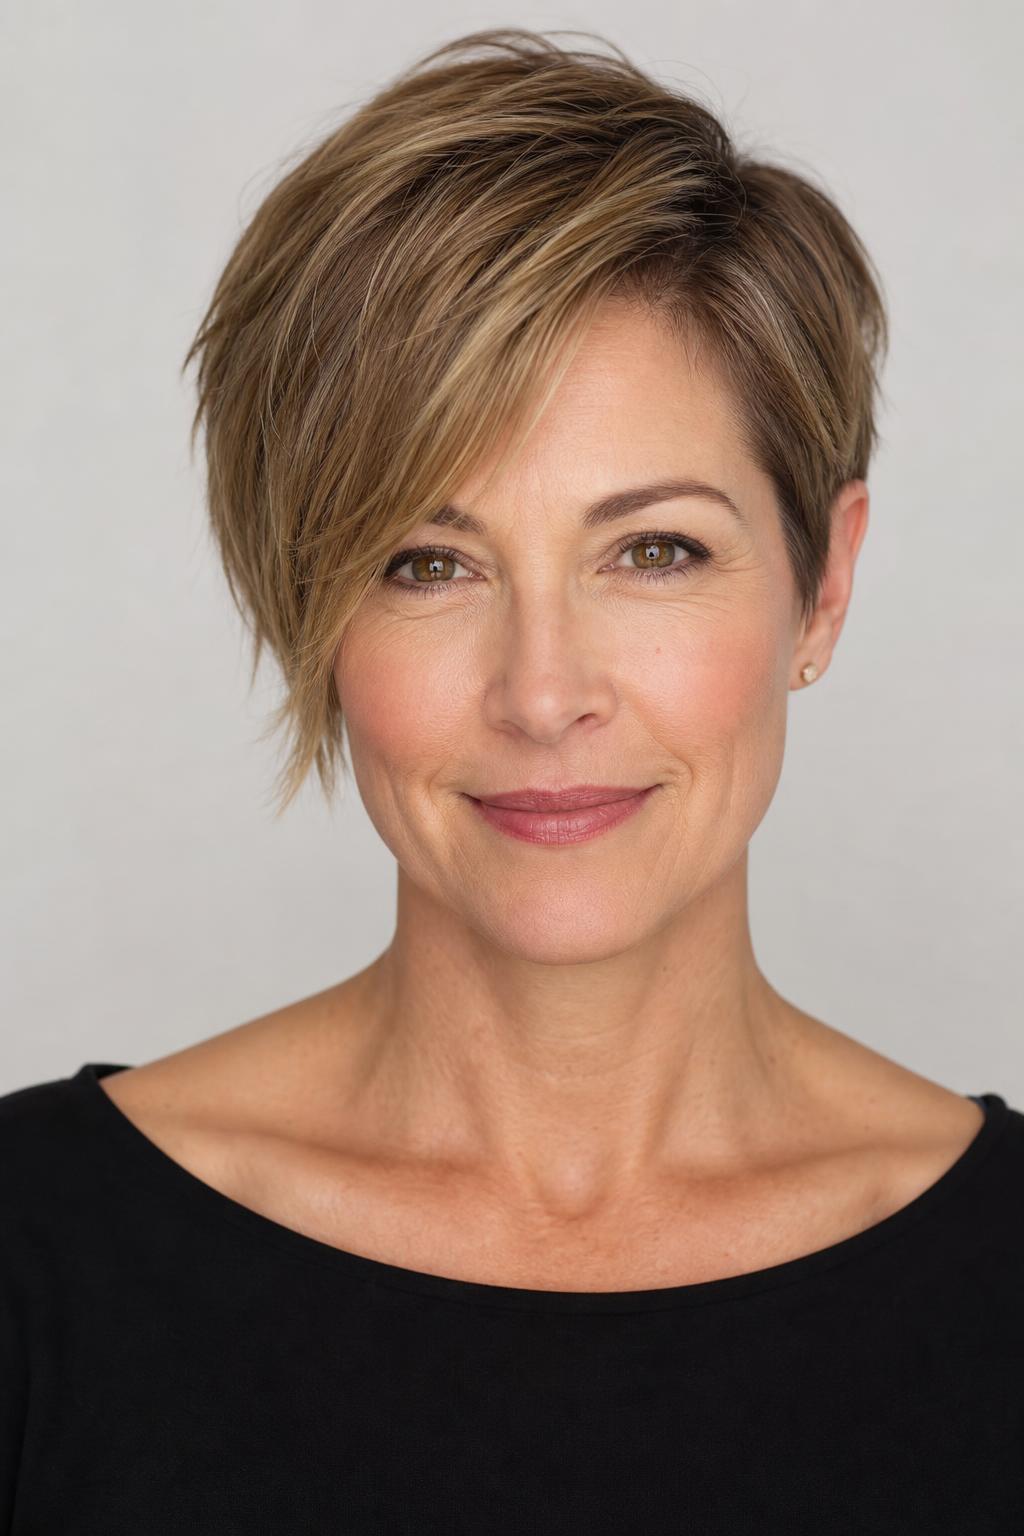
3. Feathered Pixie With Soft Fringe
Feathered layers blend so gradually that the transitions between lengths are almost invisible, that softness is what keeps fine hair from looking choppy or see-through at the ends. The fringe here sits just above the eyebrows, light enough to move with air but full enough to mask a thinner hairline. Plan on about 5 minutes of styling: a walnut-size amount of volumizing mousse, a round brush at the roots, and a quick blast from a blow-dryer.
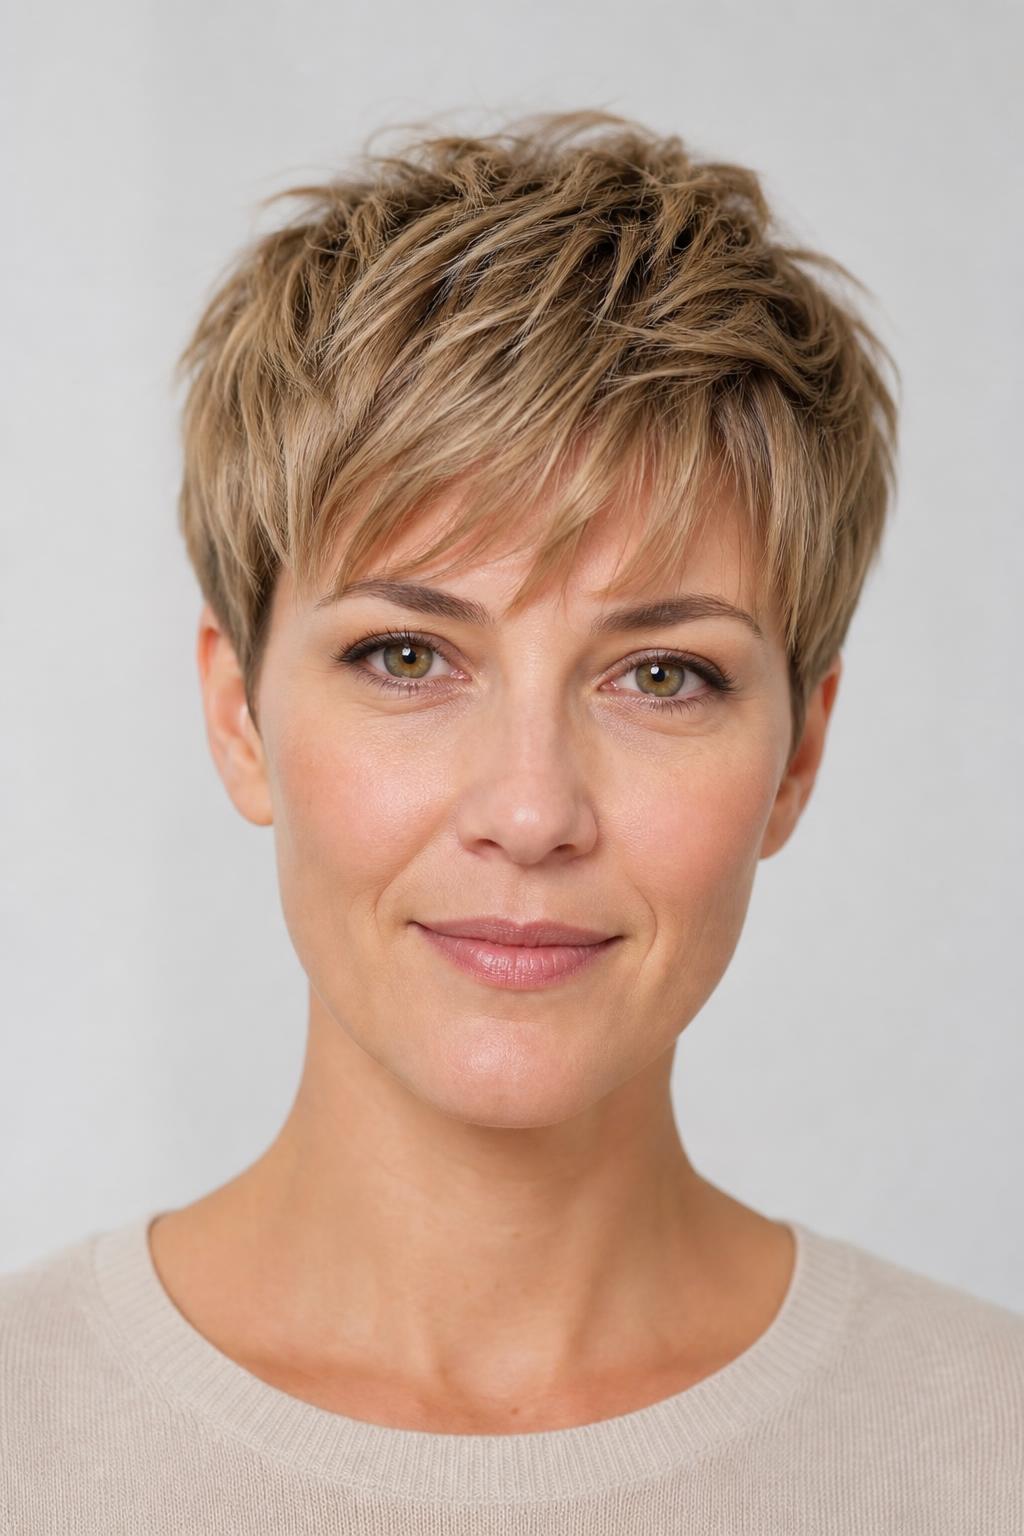
4. Disconnected Top With Tapered Sides
The contrast between longer, textured hair on top and closely cropped sides creates an optical trick, all the volume reads as concentrated and intentional. For fine-haired women who want an edgier silhouette, this disconnect approach means you can have density where it’s visible without fighting your hair’s natural thinness around the ears. Trims every 4 weeks keep the sides from growing into the top.
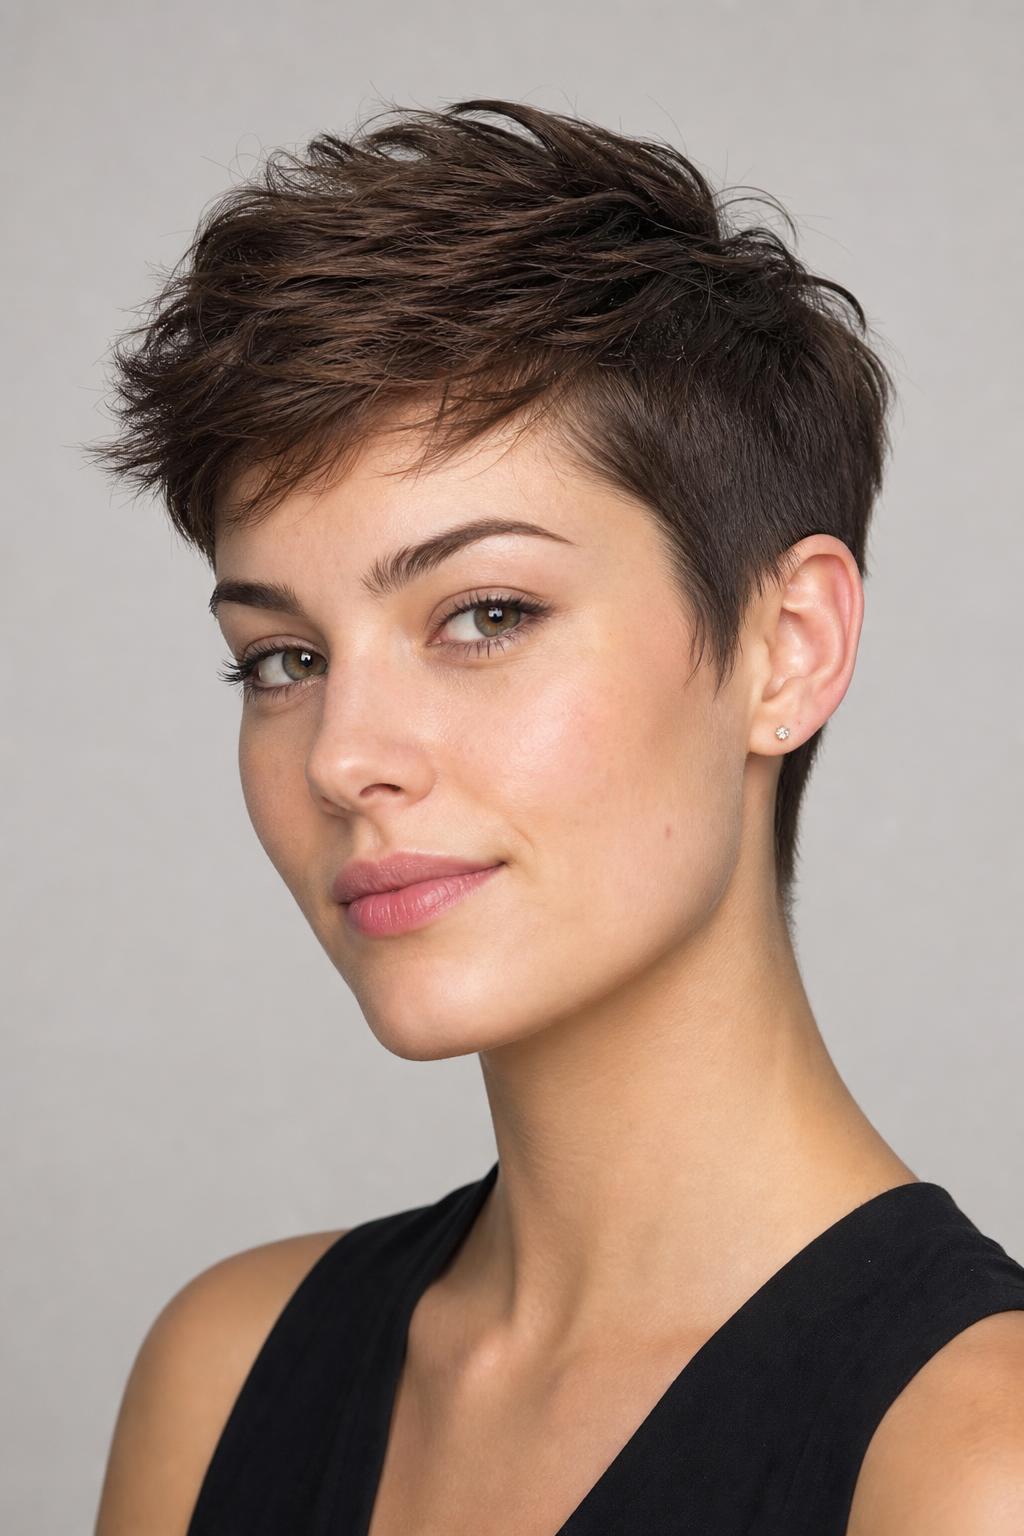
5. Tousled Crop With Texturizing Spray Finish
Sometimes the styling technique matters as much as the cut itself. This crop has medium-length layers throughout, nothing dramatic, but a texturizing spray worked through with fingers creates grip between strands that mimics the way thicker hair naturally holds shape. Women with oval or oblong faces get the most from this style because the tousled width at the temples shortens a longer face visually. Skip the sea salt spray, though; it dries fine hair out and makes it brittle within a few weeks of regular use.

Stacked and Graduated Pixies for Back-of-Head Fullness
Fine hair’s biggest problem area is often the back of the head, the occipital bone creates a flat zone that longer hair just hangs from. Stacking and graduation build shape into that zone by cutting progressively shorter layers from the nape upward, creating a rounded silhouette that reads as fuller from every angle.
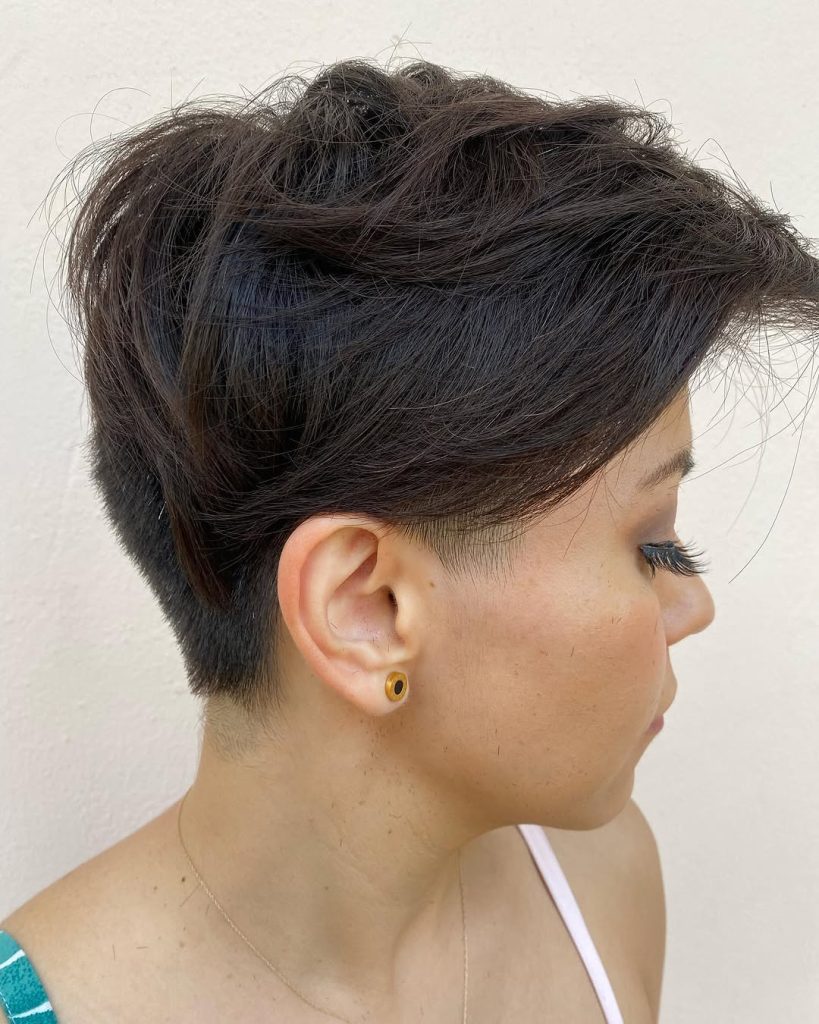
6. Graduated Nape Pixie
The graduation through the nape, each layer about a quarter-inch shorter than the one above it, pushes the hair forward and up rather than letting it hang flat against the neck. From behind, this reads as a full, rounded shape even on the thinnest hair. The front stays long enough to tuck behind the ear or sweep to the side.
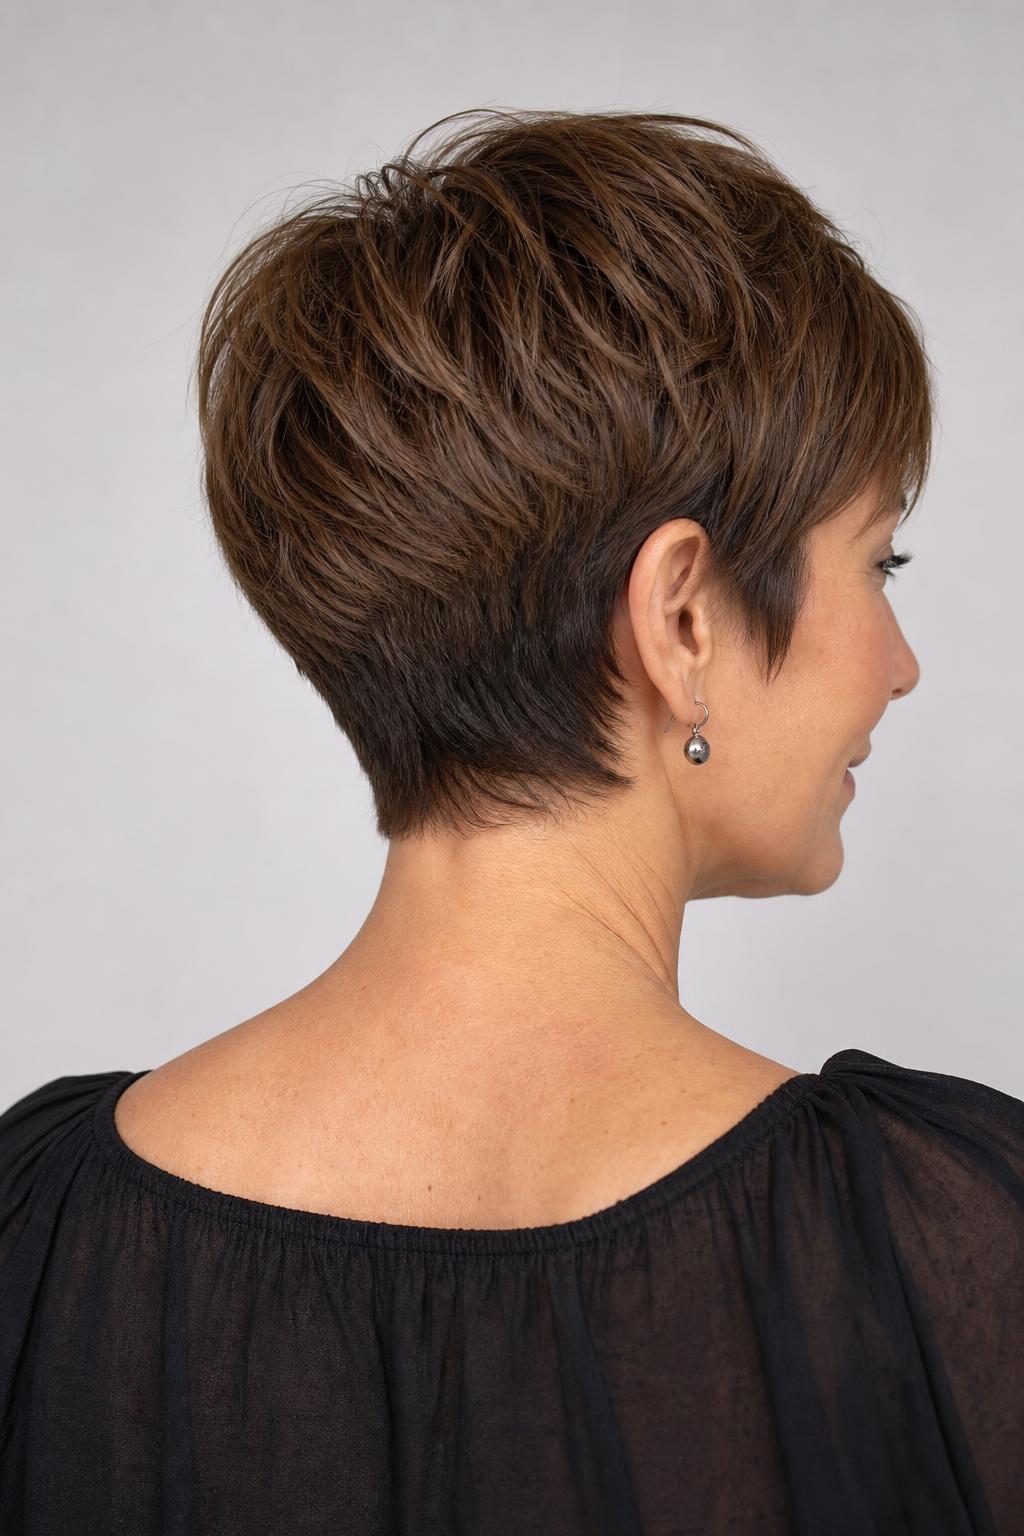
7. Stacked Pixie With Undercut Detail
An undercut at the very bottom of the nape removes the finest, wispiest hair that would otherwise drag the shape down. The remaining layers stack over it, landing on a clean base that gives them nowhere to go but outward. Result: the back looks thick and sculpted instead of thin and clingy. If you’ve been disappointed by pixies that went flat at the back within hours, ask your stylist about this combination.
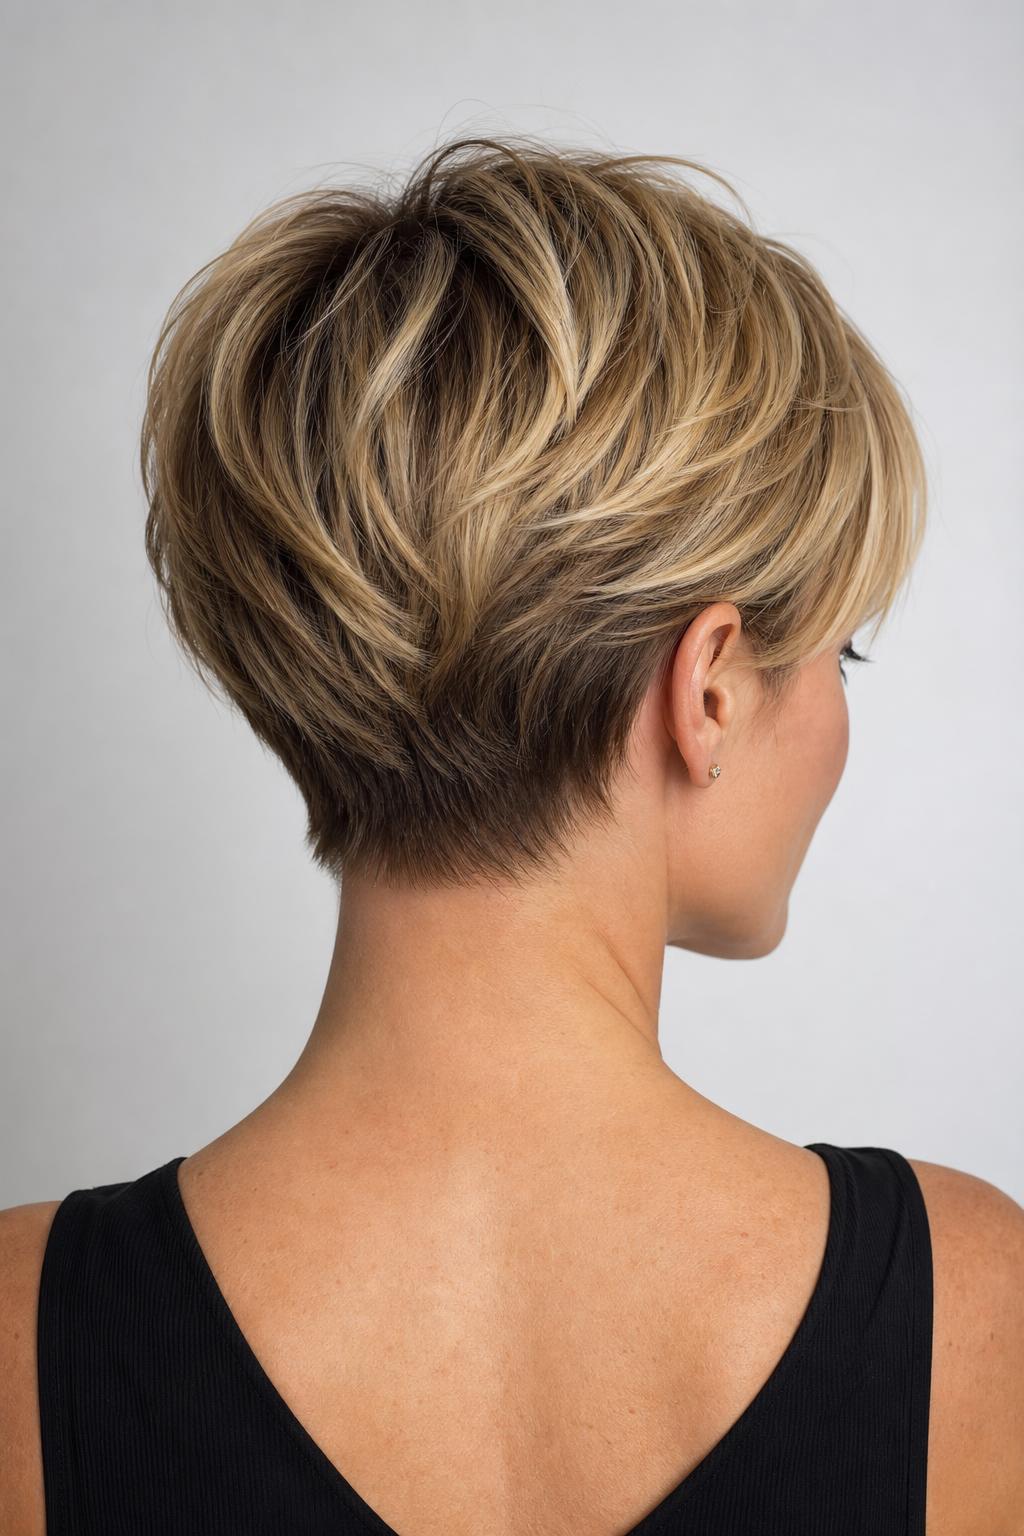
8. Short Stacked Pixie With Blunt Perimeter
A blunt perimeter line might sound counterintuitive for fine hair, but it actually concentrates weight at the ends instead of feathering it away. Paired with stacked internal layers, this creates a dense, structured shape that holds its form between salon visits. Square and diamond face shapes wear this one well because the rounded back softens angular features. Trim schedule: every 4–5 weeks to keep that perimeter crisp.
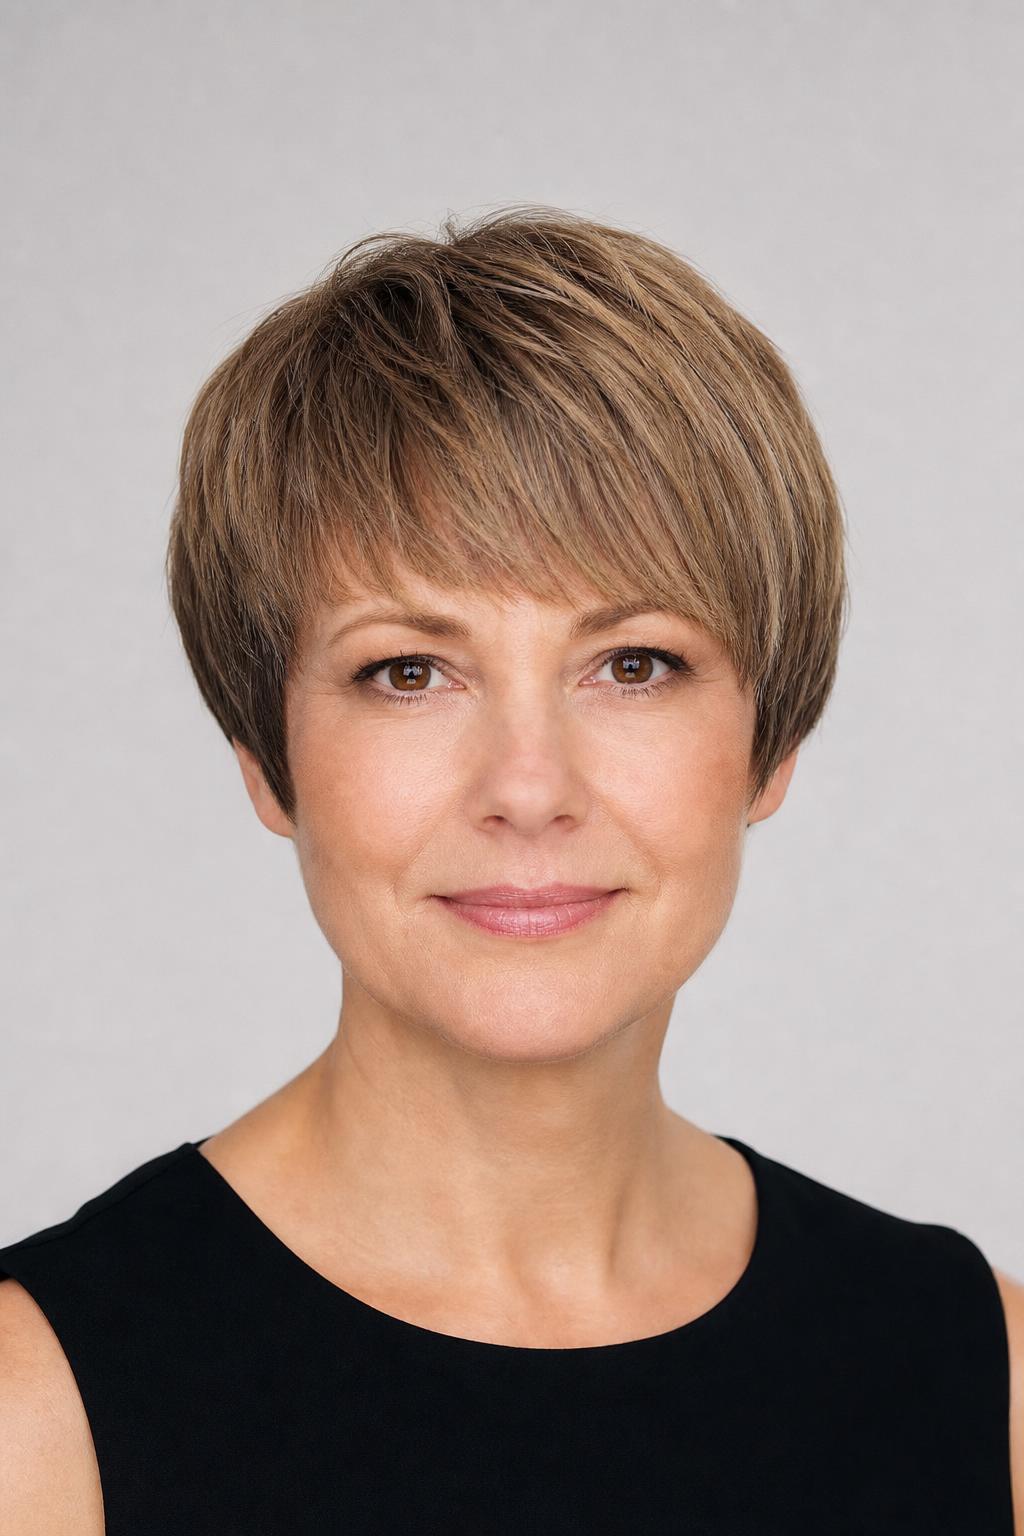
9. Graduated Pixie Bob (Bixie) for Fine Hair
Sitting right between a pixie and a bob, this graduated bixie keeps enough length at the front to feel less drastic while the back does the real volume work. The graduation through the crown is subtle, maybe three-quarters of an inch of difference between the shortest and longest layers, but on fine hair that’s enough to create visible lift. A solid option if you’re transitioning from a bob and want to test shorter territory without going all-in.
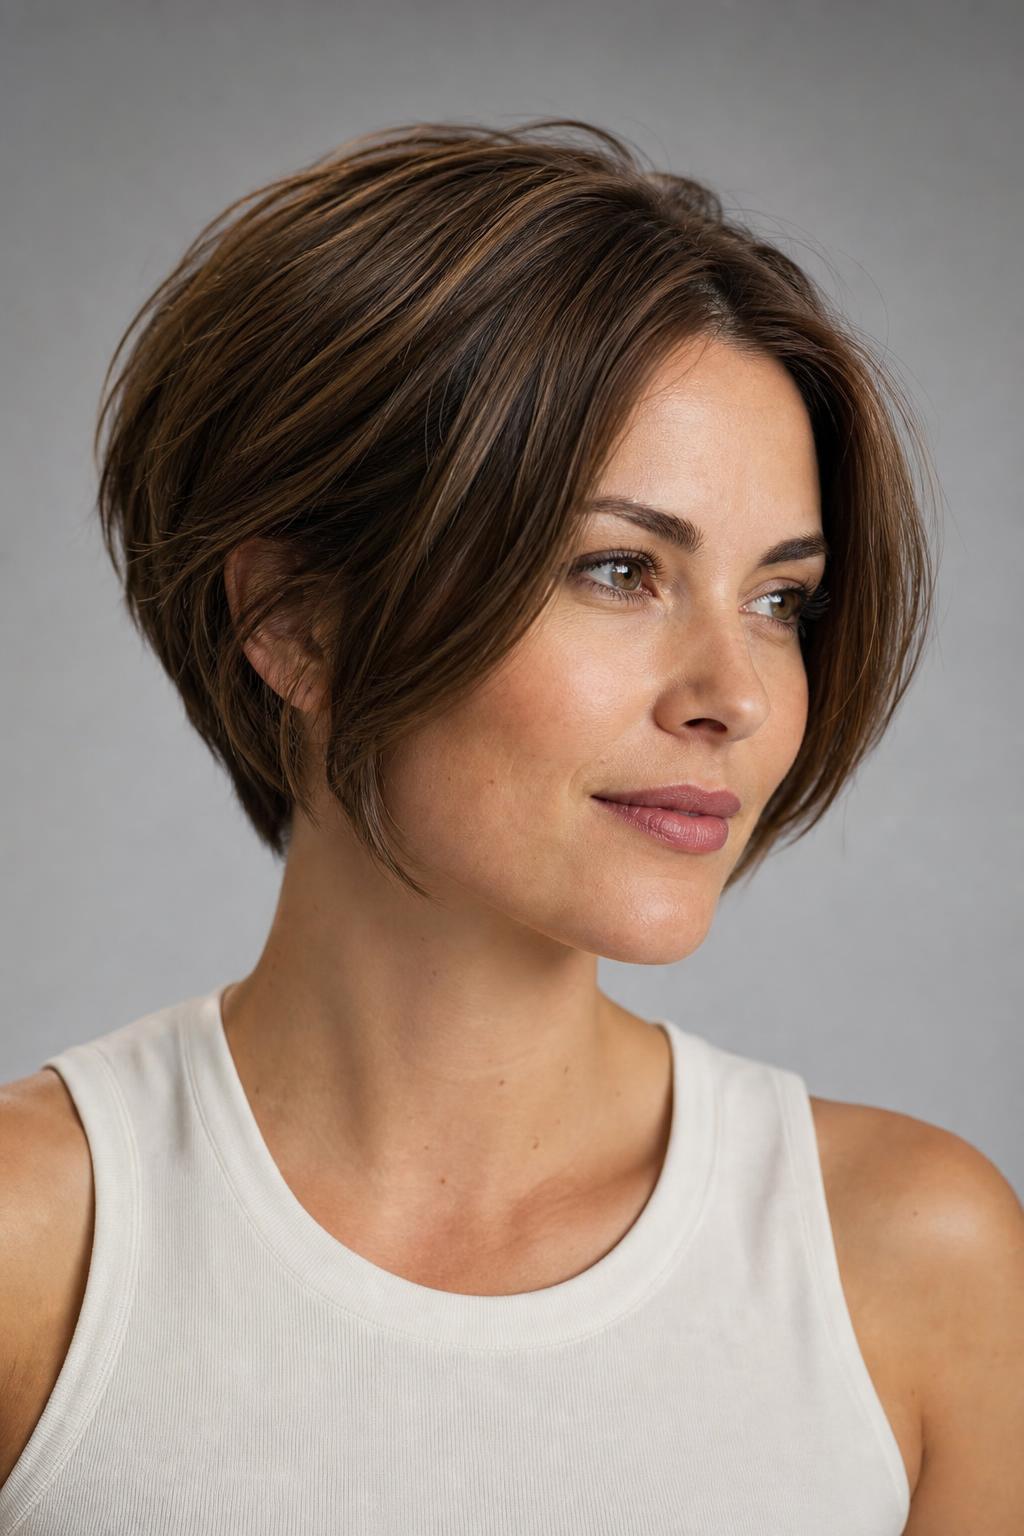
10. Wedge-Shaped Pixie With Volume at the Occipital
The wedge silhouette concentrates all the bulk right at the occipital bone, the flattest part of the head on most people. For fine hair, this is strategic placement. The cut is tight at the nape and ears, then builds outward through the mid-back before tapering into a slightly longer crown. It doesn’t need much styling: blow-dry the back section while angling the round brush upward and it holds its shape for most of the day.
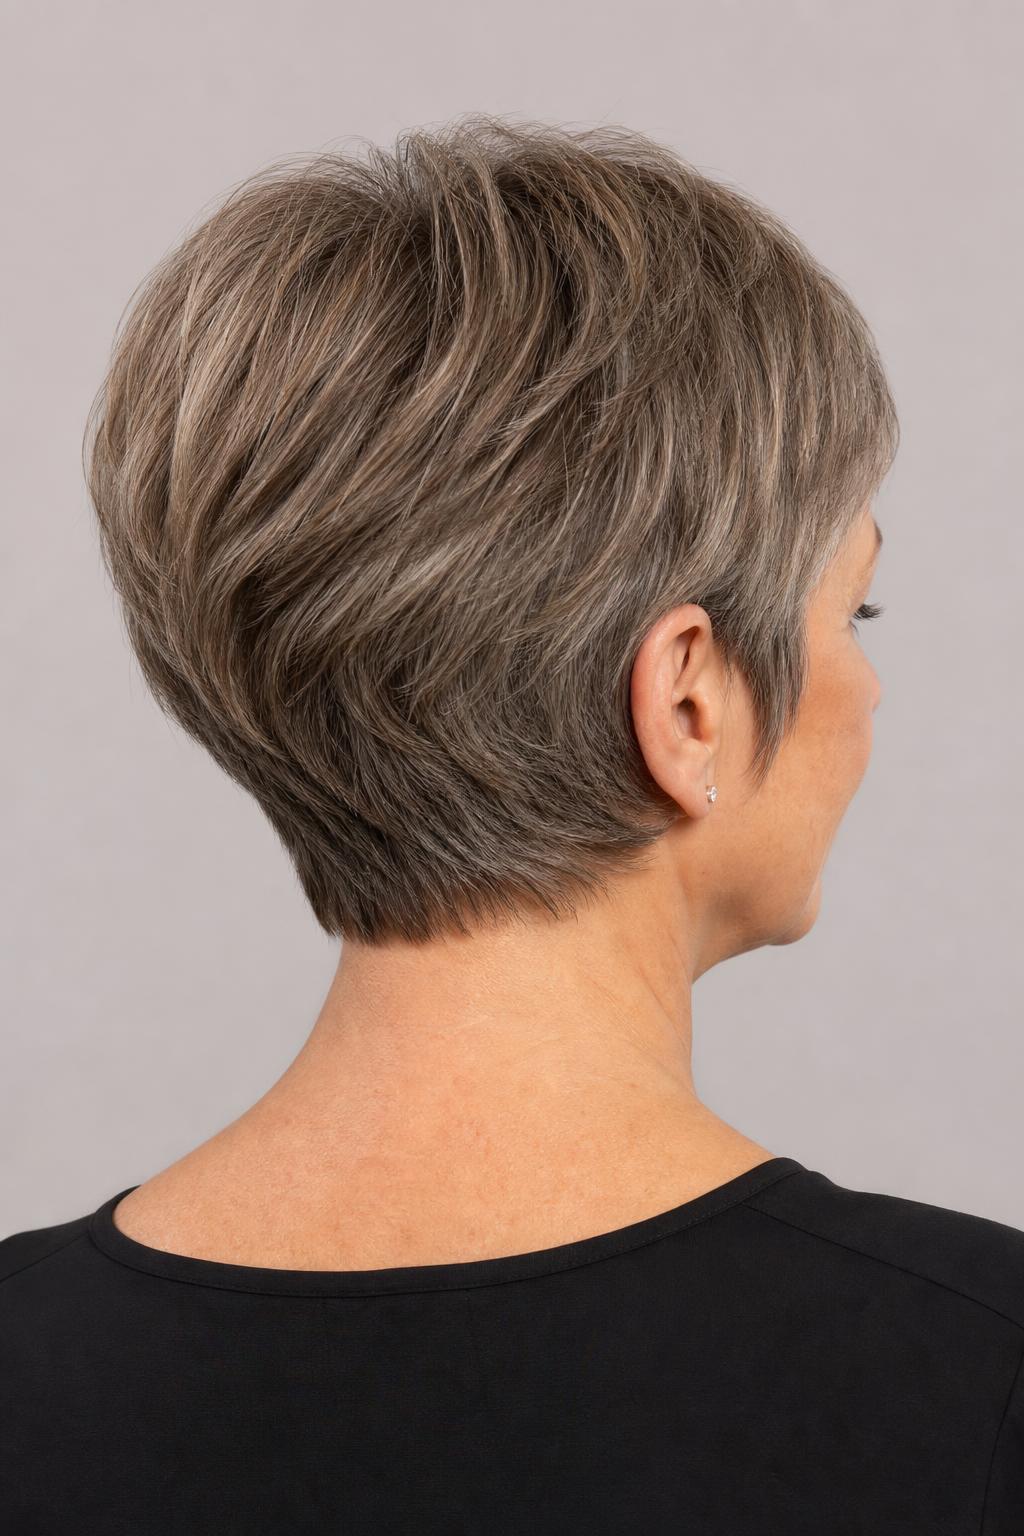
Pixies With Fringe That Makes Fine Hair Look Denser
Bangs on fine hair are a calculated move. The wrong fringe, too thick, too blunt, steals density from the top and sides. The right fringe borrows just enough hair from the crown to create the impression of fullness across the forehead without exposing thinness anywhere else. Each variation below uses a different fringe weight and angle for this balancing act.
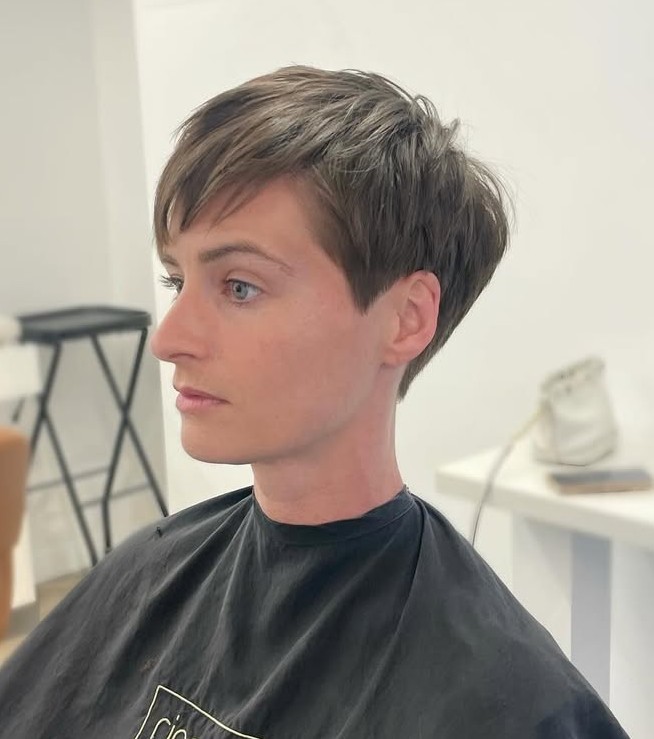
11. Wispy Curtain Fringe Pixie
Curtain fringe split just off-center works on fine hair because it doesn’t demand a thick section from the crown to look full. The wispy tips sit at cheekbone level and frame the face without weighing down the top. If you have an oval or heart-shaped face, this framing effect draws attention to the cheekbones, and away from a potentially thin hairline.
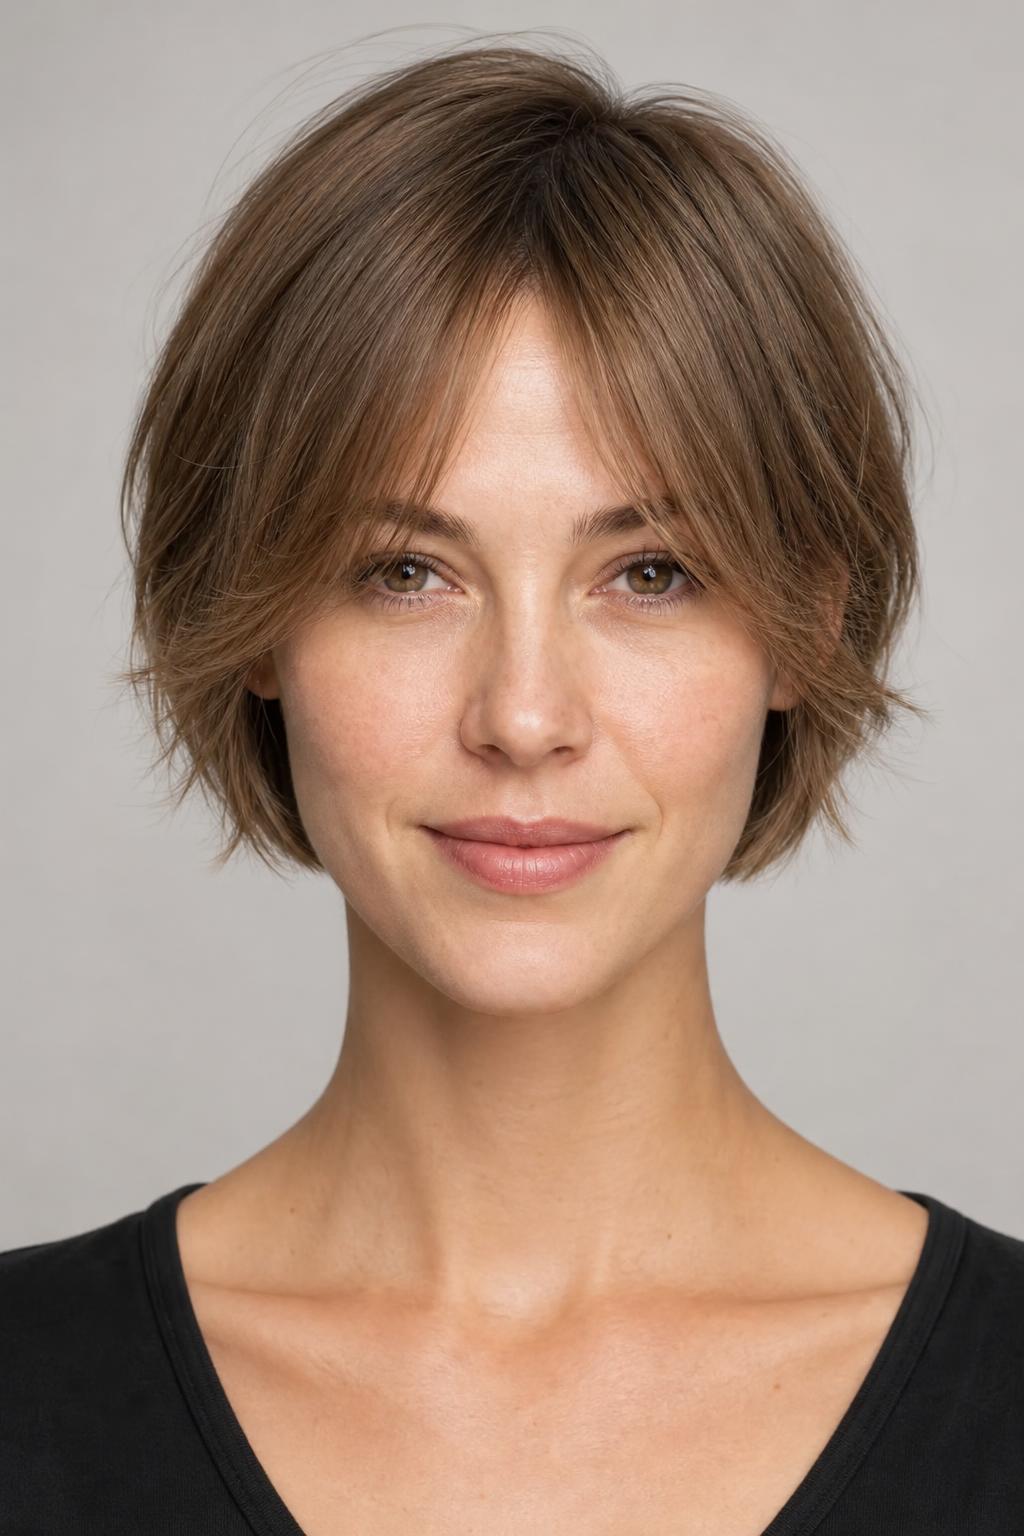
12. Side-Swept Bangs With Textured Crop
When the fringe sweeps to one side, it creates a diagonal line across the forehead that adds visual movement. On fine hair, this sweep also piles more strands on one side, tricking the eye into reading greater density. The crop behind the bangs is kept short and textured, the contrast between the longer fringe and the close-cut back adds dimension that flat, all-one-length cuts can’t match. A medium-hold hairspray keeps the sweep in place without stiffness.
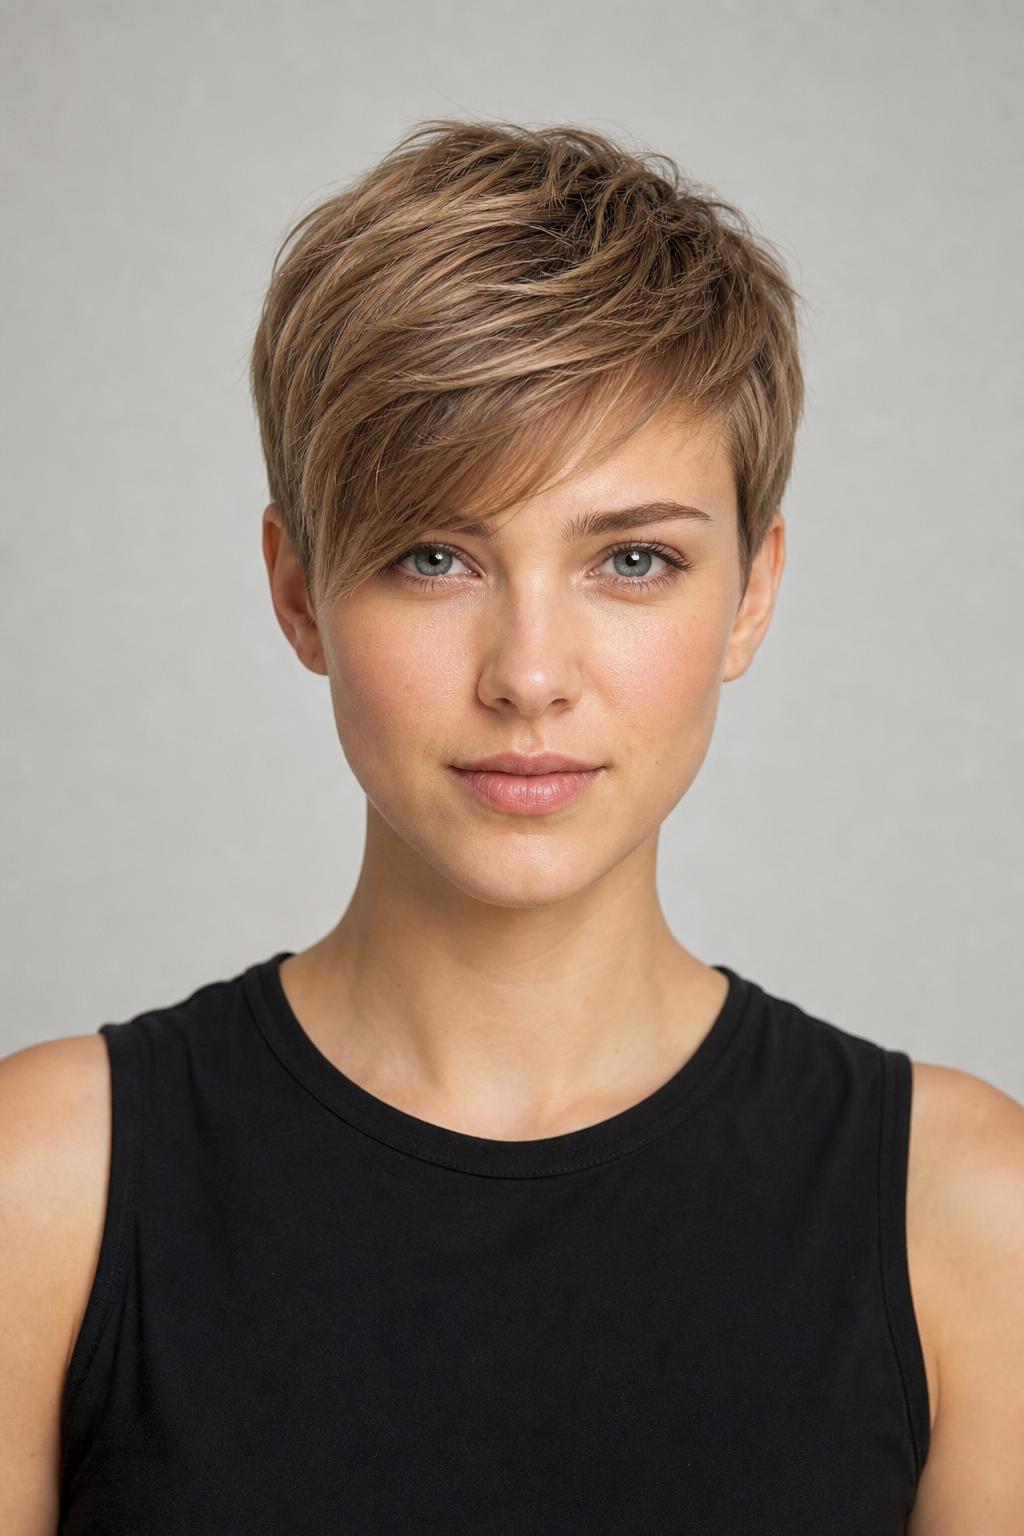
13. Baby Bangs Pixie for Maximum Forehead Coverage
Baby bangs, cut about an inch above the eyebrows, require very little hair from the crown, making them one of the safest fringe choices for fine textures. They expose more forehead, which actually makes the face look longer (helpful for round or square shapes), while the short length means they don’t go limp or separate the way longer bangs on fine hair tend to. Style them with a flat iron and a dime-sized amount of light pomade to keep them smooth.
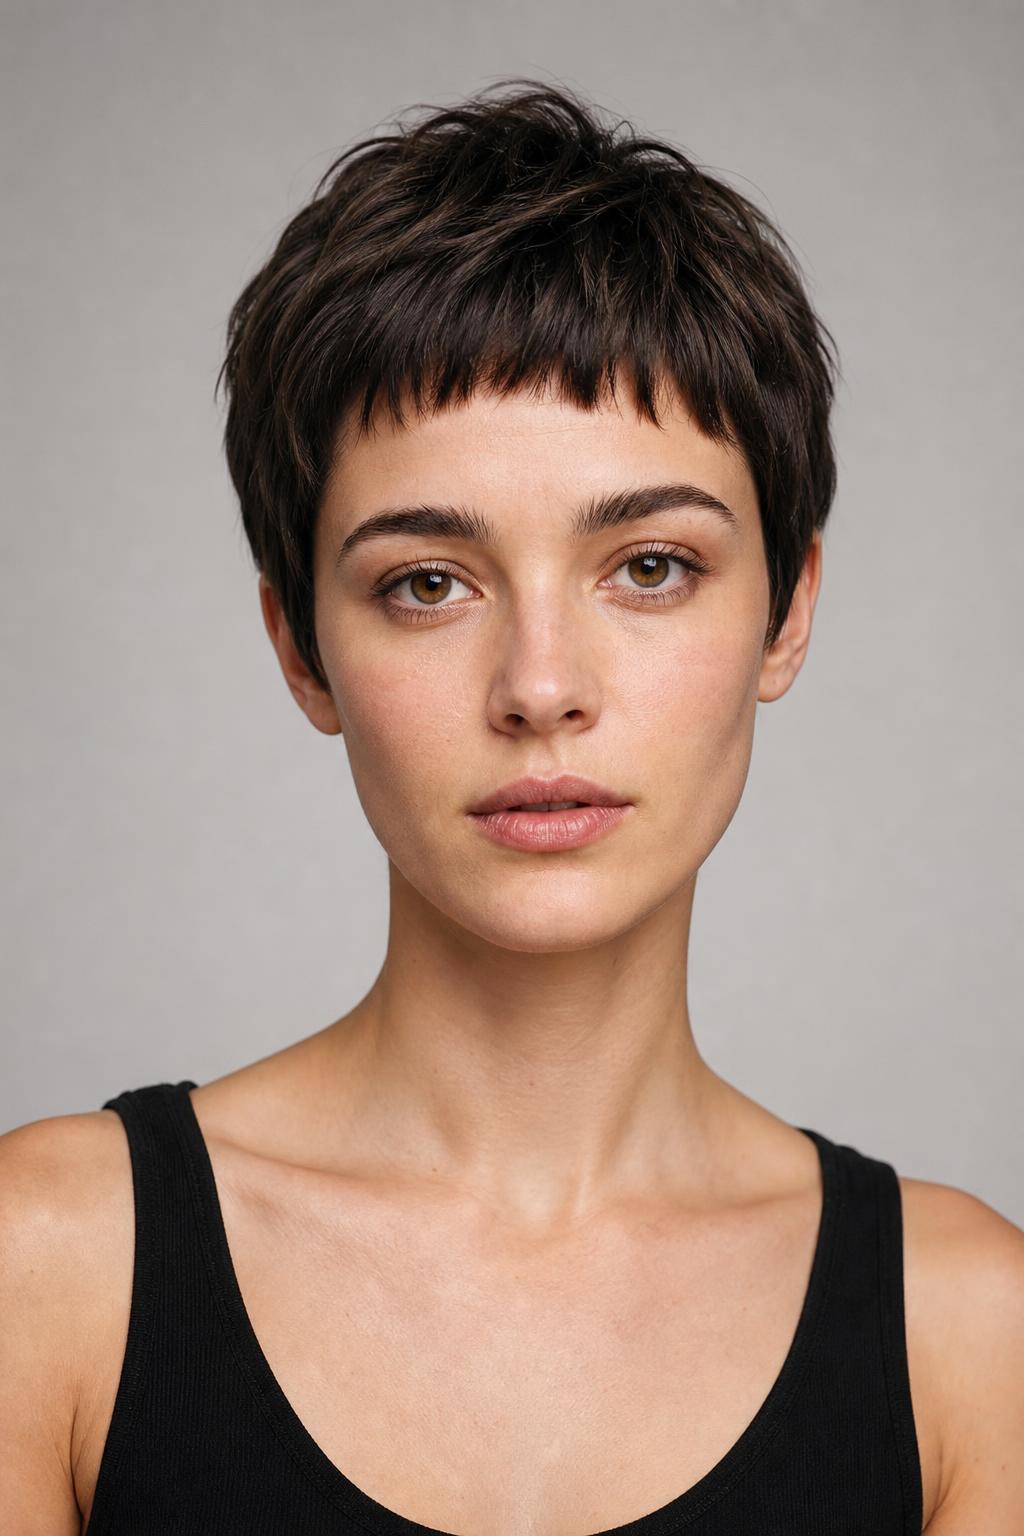
14. Long Swooping Fringe With Close-Cut Sides
This is the most dramatic fringe option in the gallery, one long, curved section that falls from the crown across the forehead and past the cheekbone. On fine hair, it works because the rest of the cut is cropped tight, so all available density funnels into that one statement section. The fringe looks thick because it is thick relative to the surrounding hair. Just know it needs daily blow-dry direction; without it, fine hair won’t hold the curve.
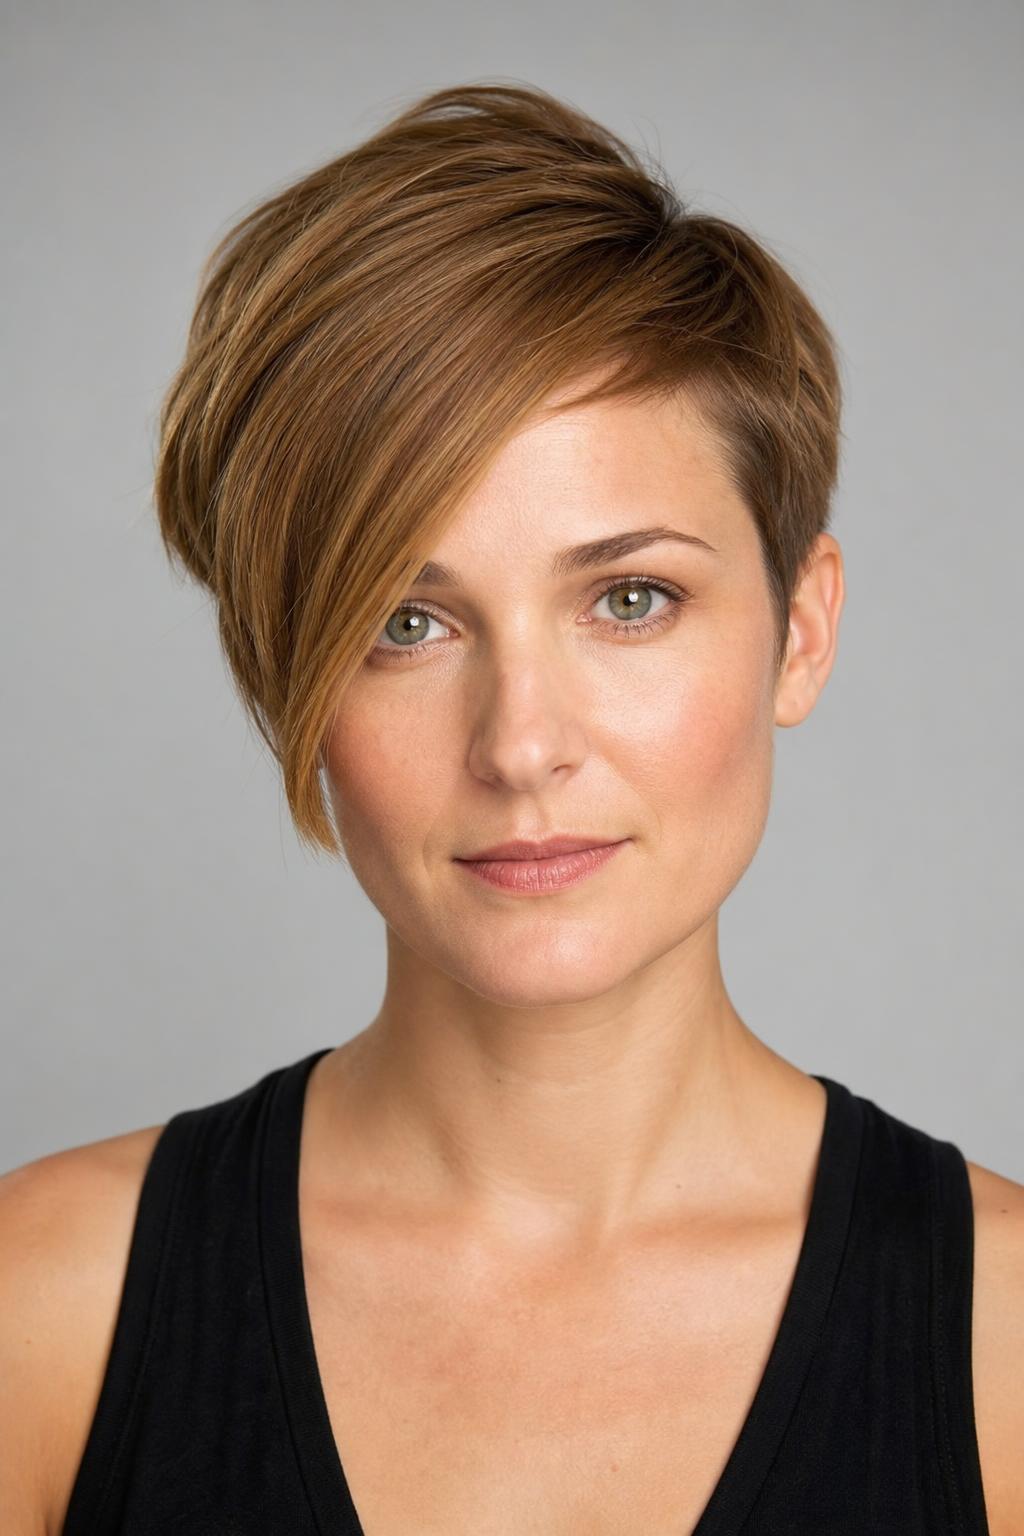
15. Textured Micro Fringe With Razored Tips
Razoring the very tips of a micro fringe creates a softened edge that blends into the skin rather than ending in a hard line. Fine-haired women often avoid bangs because they separate and show forehead between strands, the razored tips prevent this by producing enough irregular texture that the eye reads it as one continuous piece. Keep it dry-cut; wet-cutting fine fringe leads to shrinkage surprises once it dries.
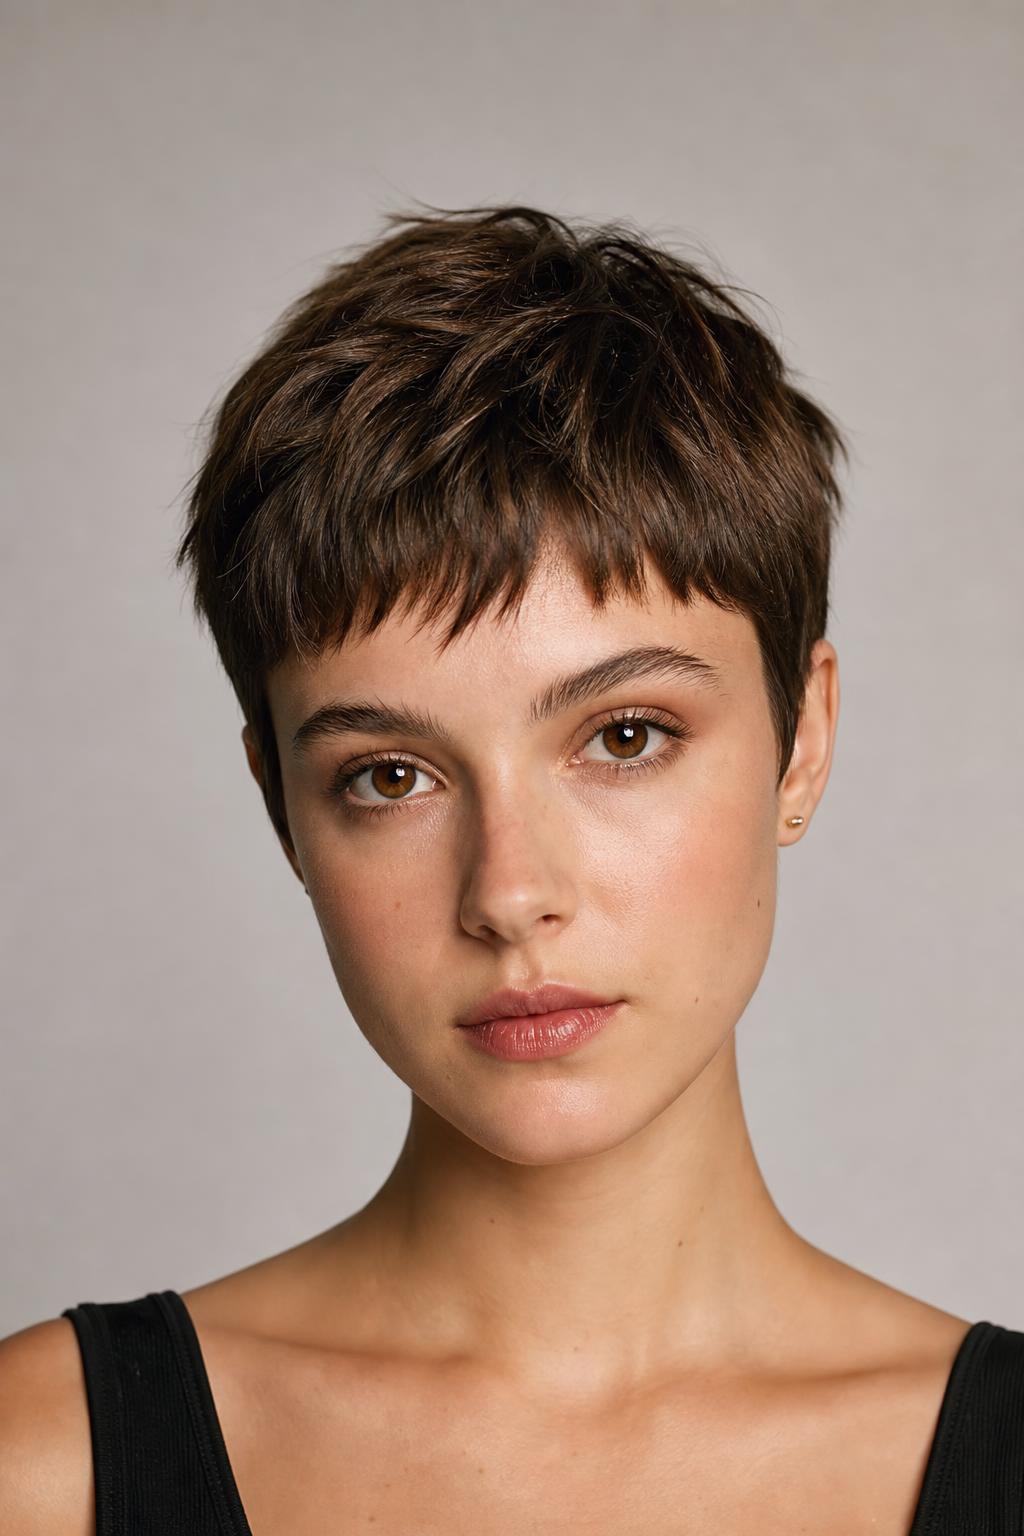
Pixies Where Color Creates the Illusion of Thickness
Color is one of the most underused tools for making fine hair look thicker. Highlights, lowlights, and dimensional single-process shades create the impression of depth because light reflects off multiple tones at different angles. A single flat color on fine hair, by contrast, lets light pass through and exposes how thin the strands actually are. The five cuts below pair their structure with intentional color placement.
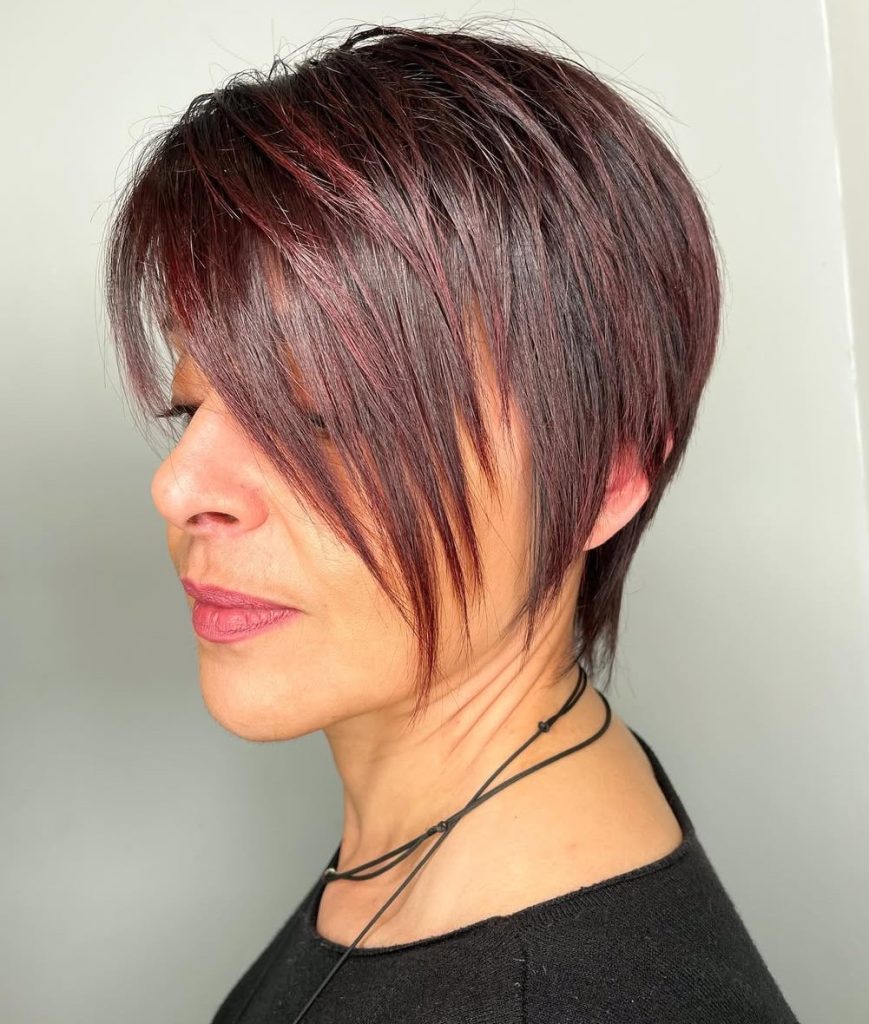
16. Babylight Pixie With Dimensional Blonde
Babylights, ultra-fine highlights placed close to the root, are the thickening trick colorists recommend most for fine pixies. Because the highlighted sections are so narrow, they blend into the base color and create a three-dimensional effect without obvious striping. On a short cut, that dimension reads as density. Maintenance note: babylights grow out gracefully, so you can stretch appointments to every 8–10 weeks before they look obvious.
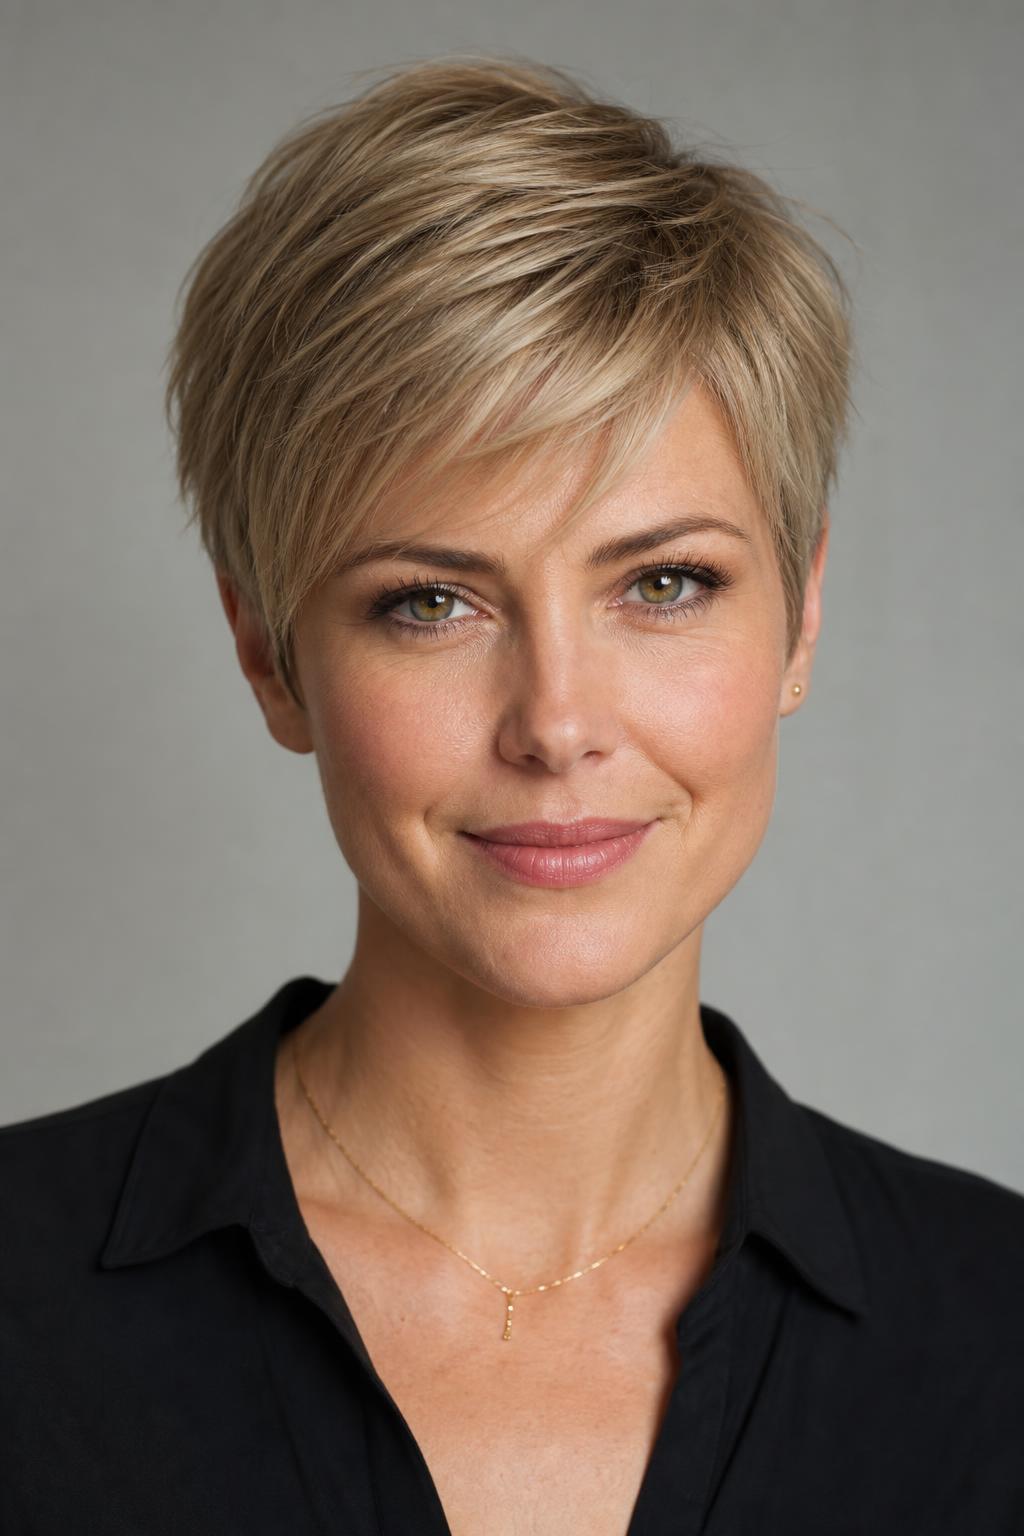
17. Shadow Root Pixie for Depth at the Crown
A shadow root, darker color at the scalp that gradually lightens through the mid-lengths, makes the root area look denser because the dark tone absorbs light instead of reflecting it. On a pixie, where the root area is basically the whole style, this effect is even stronger. It’s also strategic for fine hair that shows scalp: the darker root camouflages any visible skin between strands. Ask for a 1.5-inch shadow root that melts into your lighter shade.
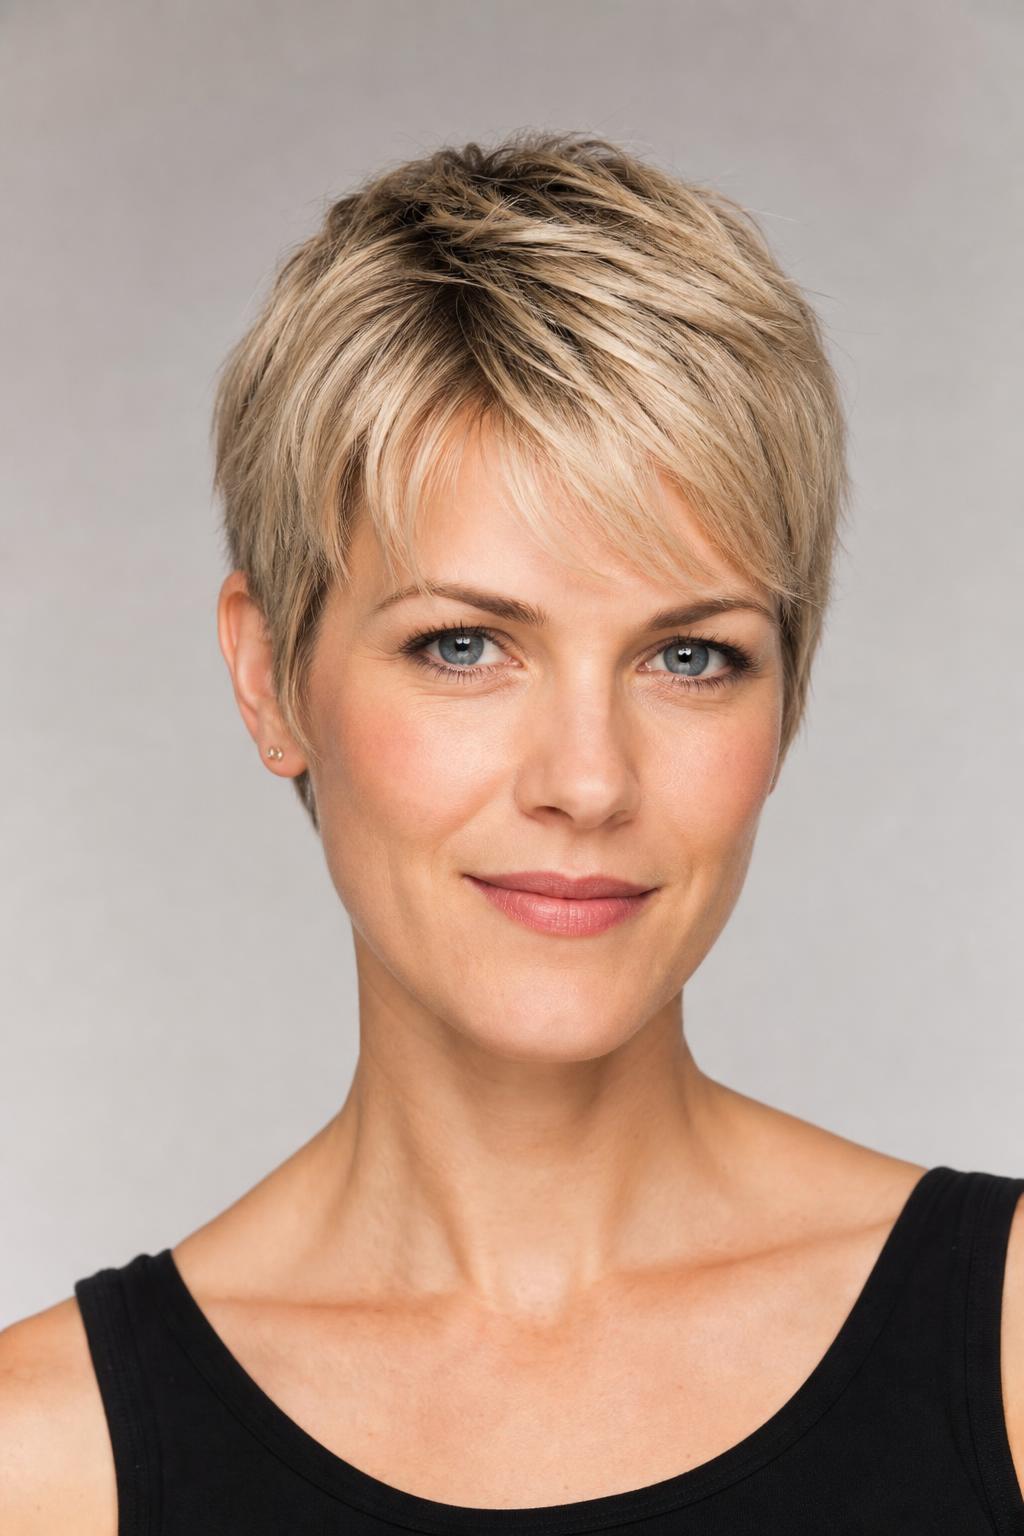
18. Copper-Toned Pixie With Warm Highlights
Warm tones, copper, amber, golden bronze, catch light more aggressively than cool shades, which is why they add a perception of thickness on fine hair. The warm highlights here are concentrated around the crown and face-framing sections, pulling attention to the areas where density matters visually. Copper fades faster than most colors, so expect a semi-permanent gloss refresh every 4–6 weeks if you want to keep the vibrancy.
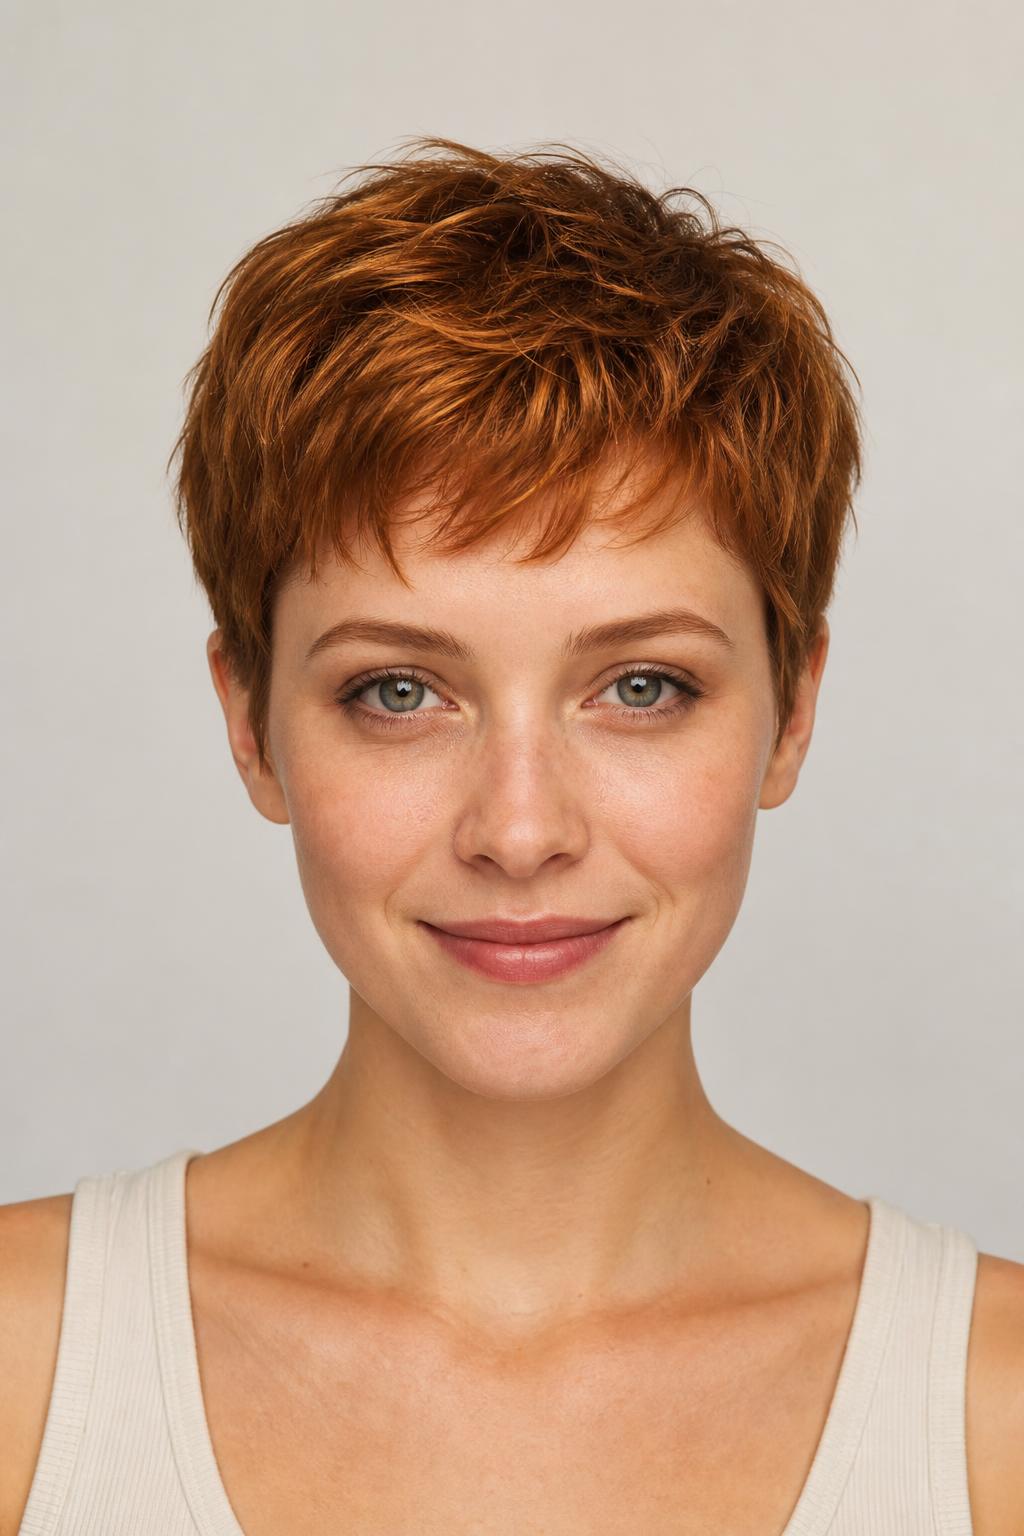
19. Ash-Blonde Pixie With Lowlights for Contrast
While highlights add brightness, lowlights add shadow, and on fine hair, shadow at the root creates the same density illusion as a shadow root without committing to a single darker shade. This ash-blonde pixie threads thin lowlights in a cool brown through the under-layers and nape, so when the hair moves, flashes of darker color peek through and suggest more hair than is actually there. Works well for oval and heart faces where you want structure without weight.
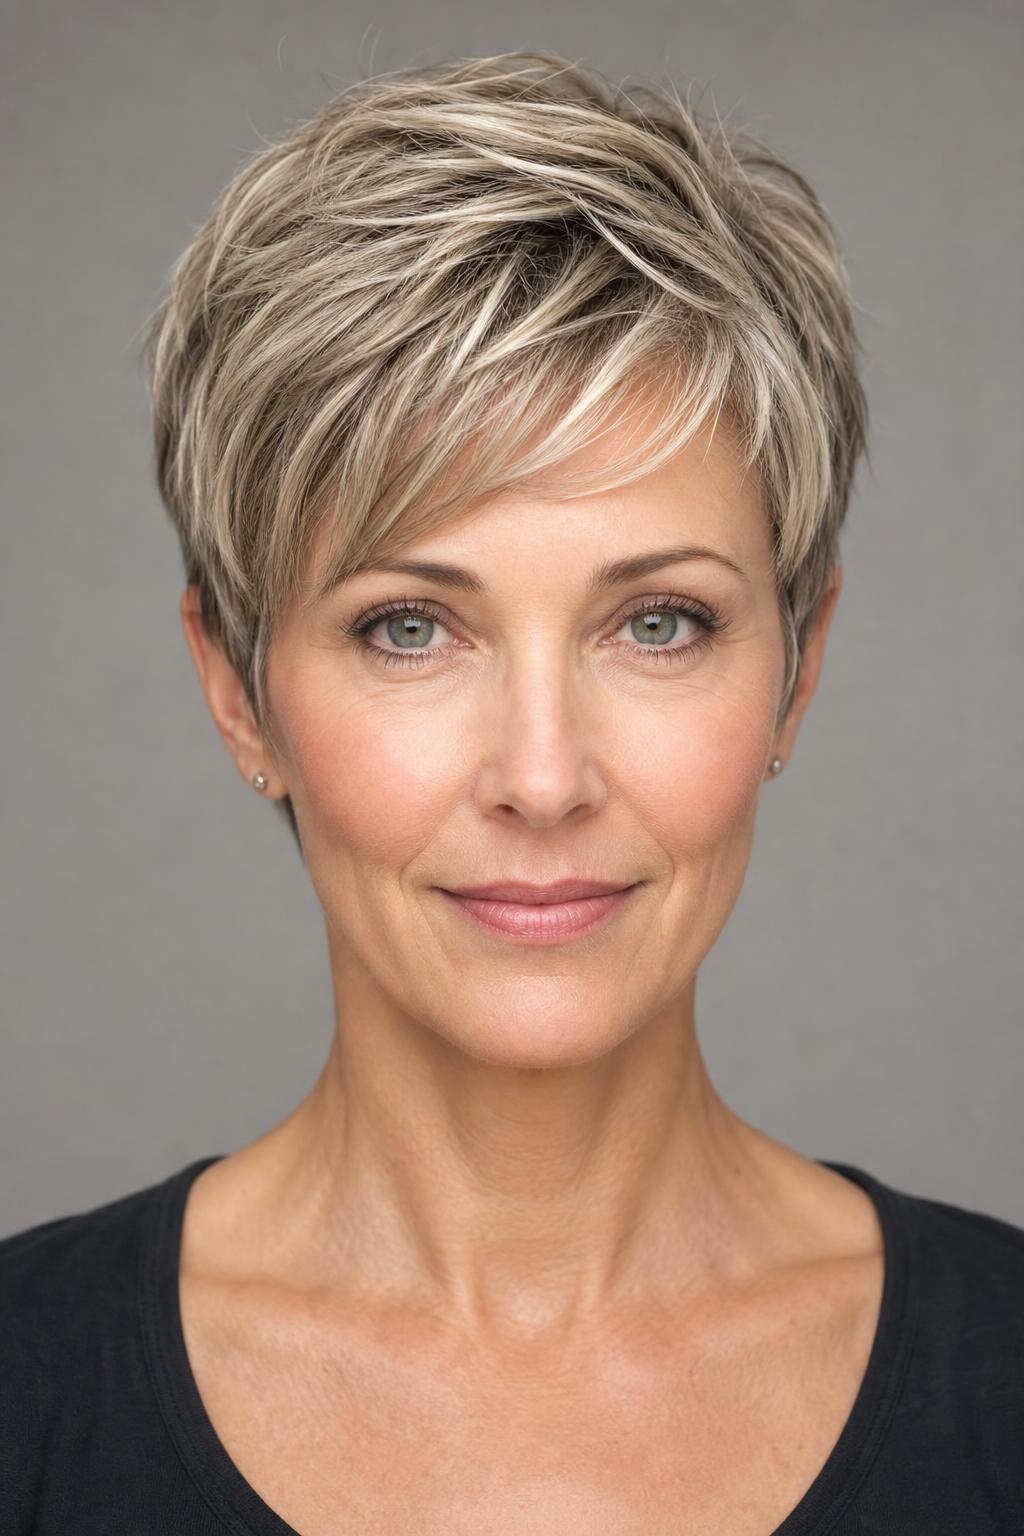
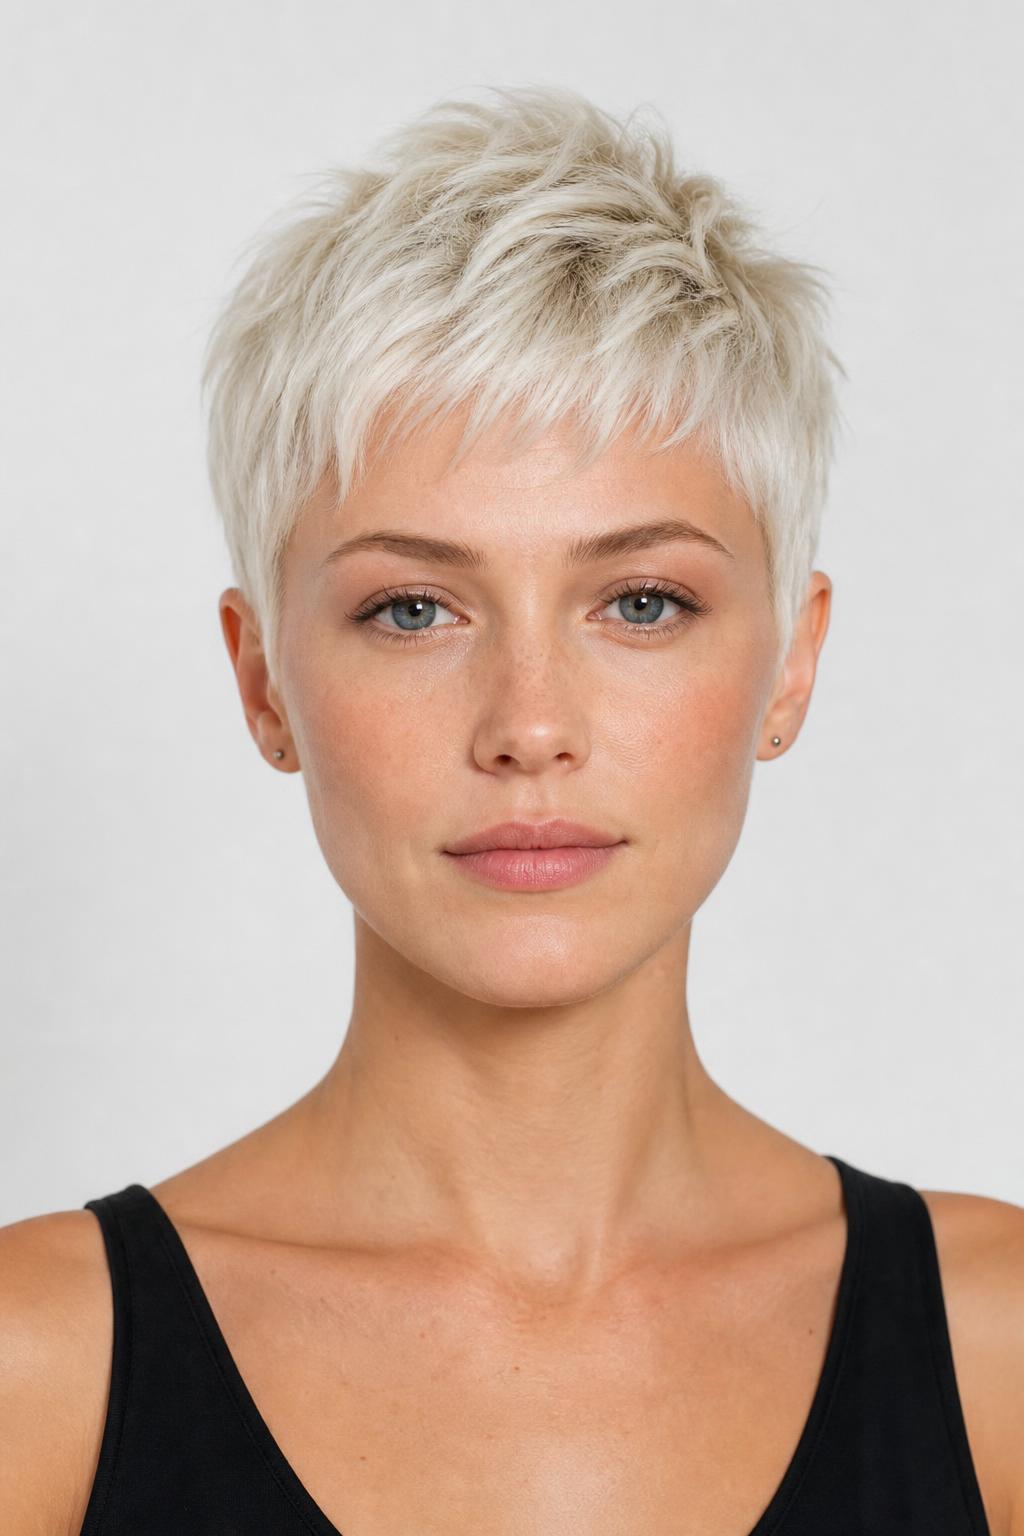
20. Platinum Pixie With Textured Finish
Going platinum is a bigger commitment on fine hair, the bleaching process can compromise strand integrity if not done carefully. But when it works, the reflective quality of platinum blonde makes every single strand visible to the eye, and on a textured pixie, that visibility reads as fullness. Talk to your colorist about bond-rebuilding treatments during the lightening process (something like a protein-bond additive mixed into the bleach). Budget for 3–4 hours in the chair initially, plus toning touch-ups every 4–6 weeks. Stylist tip: Request a strand test before going platinum on fine hair. Fine strands process faster than thick ones, and what takes thick hair 40 minutes might take yours 15. Over-processing turns fine hair gummy, and at that point no toner will save it.
Pixies for Wavy and Curly Fine Hair
Fine hair with natural wave or curl has a built-in volume advantage, the bends in the strand take up more space than straight strands of the same diameter. The challenge is controlling that volume so it reads as intentional thickness rather than frizz or puffiness. Every cut below is designed to work with the curl pattern instead of fighting it.
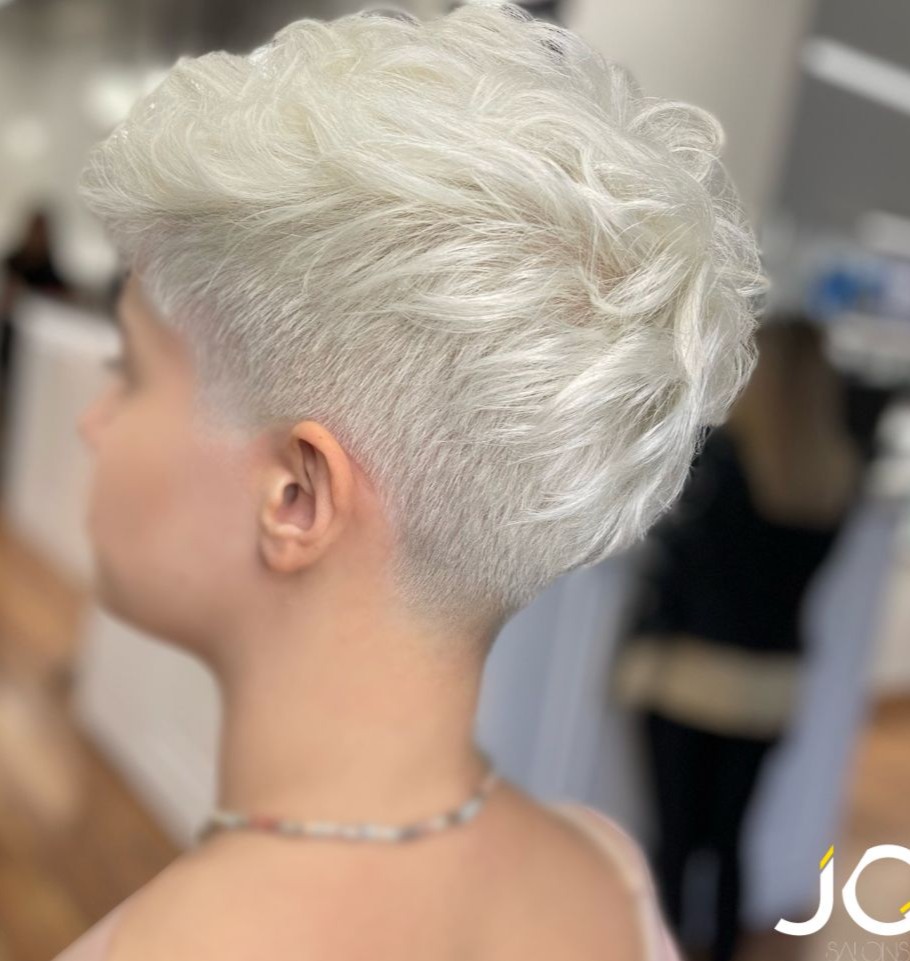
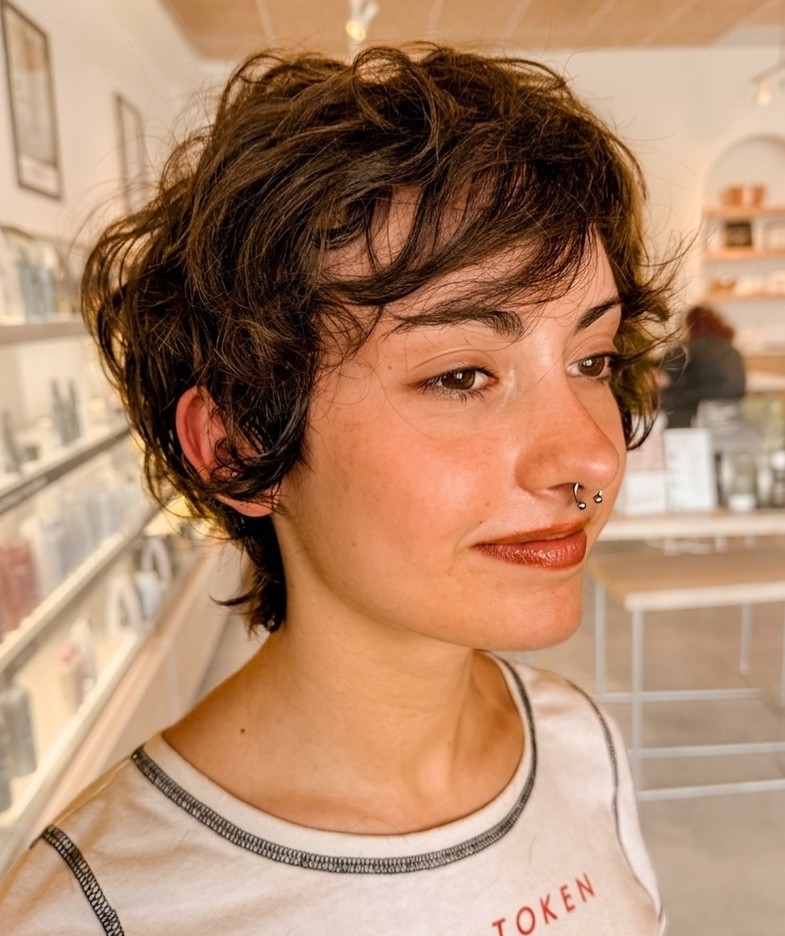
21. Wavy Pixie With Soft, Piece-y Layers
Soft layers through the crown and temples let each wave separate individually, which makes the hair look like it has more strands than it does. The key is resisting the urge to over-layer, fine wavy hair only needs 2–3 layer lengths to create movement. More than that, and the wave pattern breaks apart into strings. Air-dry with a curl cream for the least effort; diffuse on low heat if you want more definition.
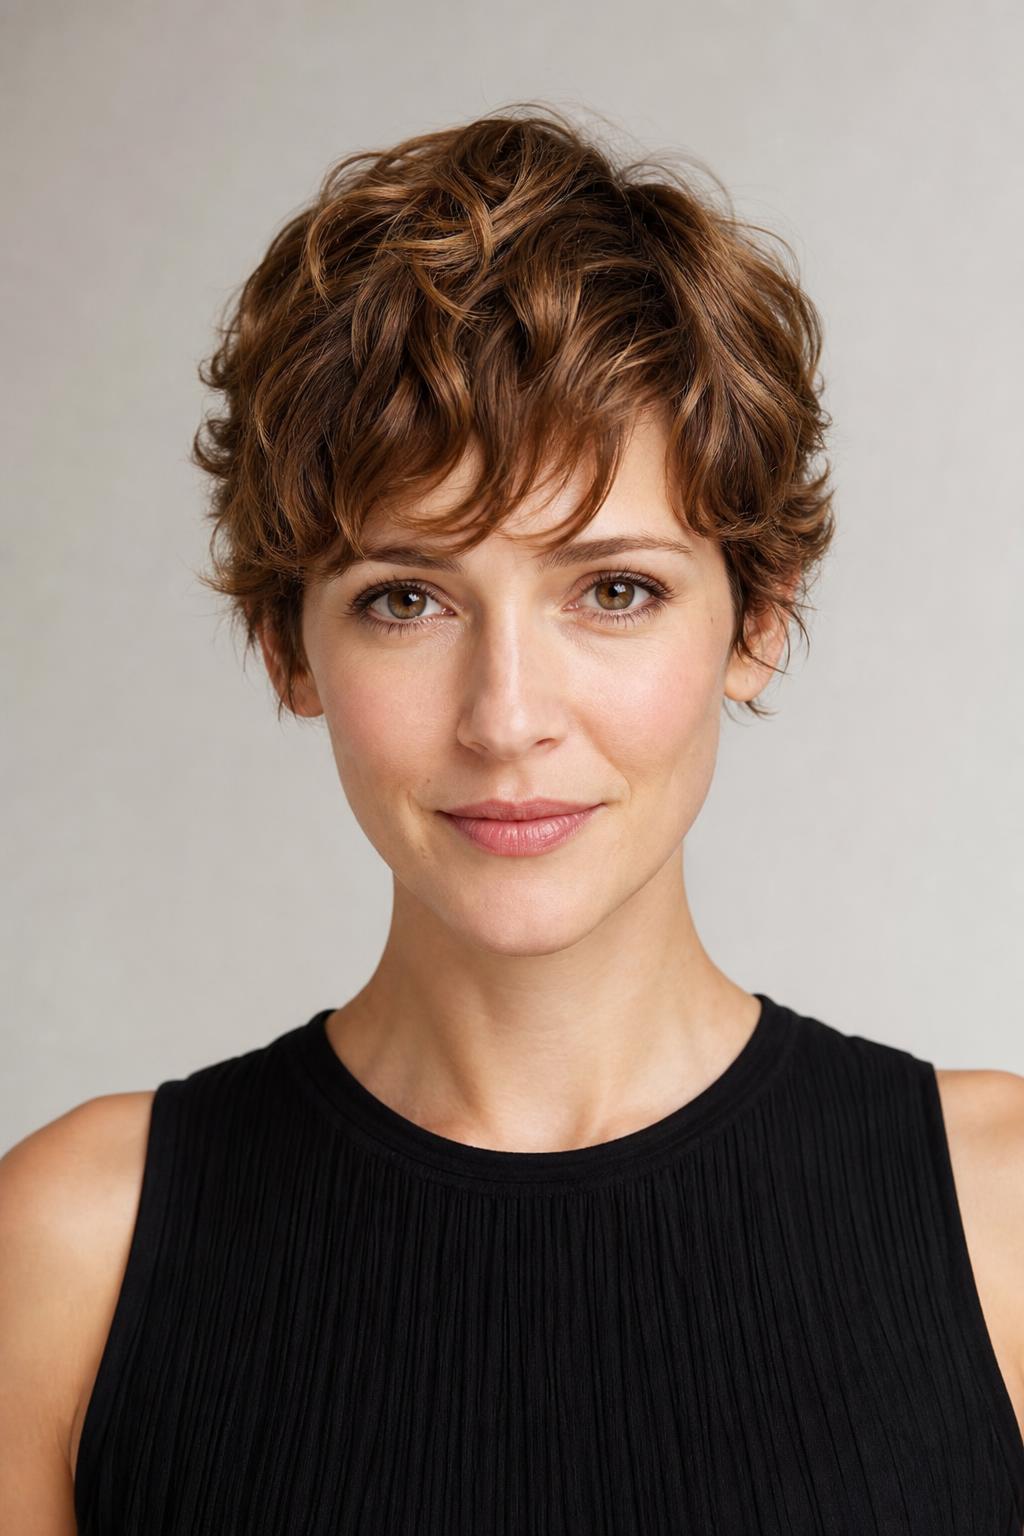
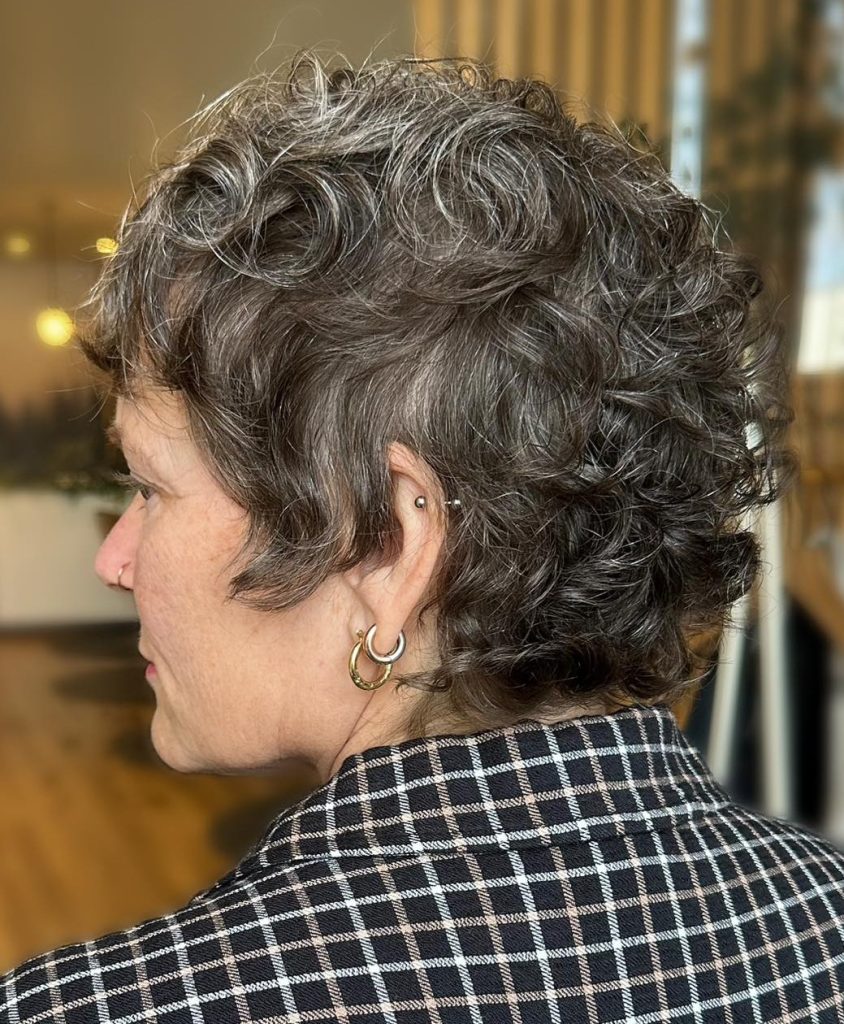
22. Curly Pixie With Tapered Nape
Curly fine hair often looks thickest on top and thinnest at the nape, so tapering the back short and letting the curls do their thing up top plays to the hair’s natural strengths. This cut should be done on dry hair, curly hair shrinks 25–40% from wet to dry, and cutting it wet means you’ll end up shorter than planned. Scrunch a lightweight gel through damp curls, then hands-off until fully dry.
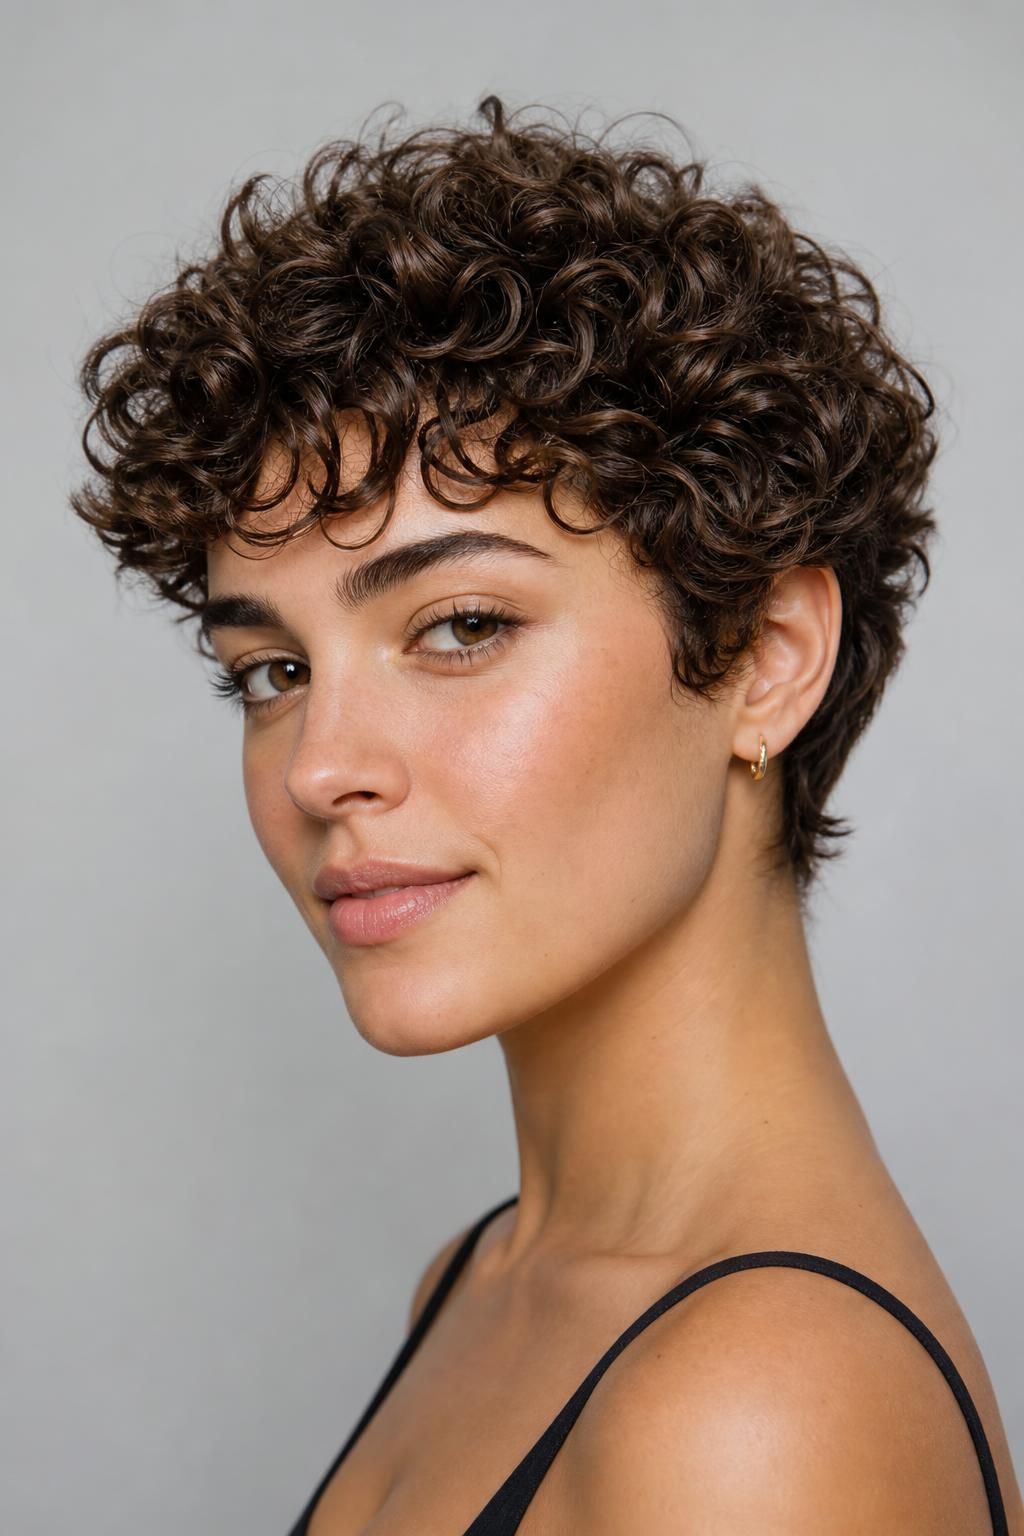
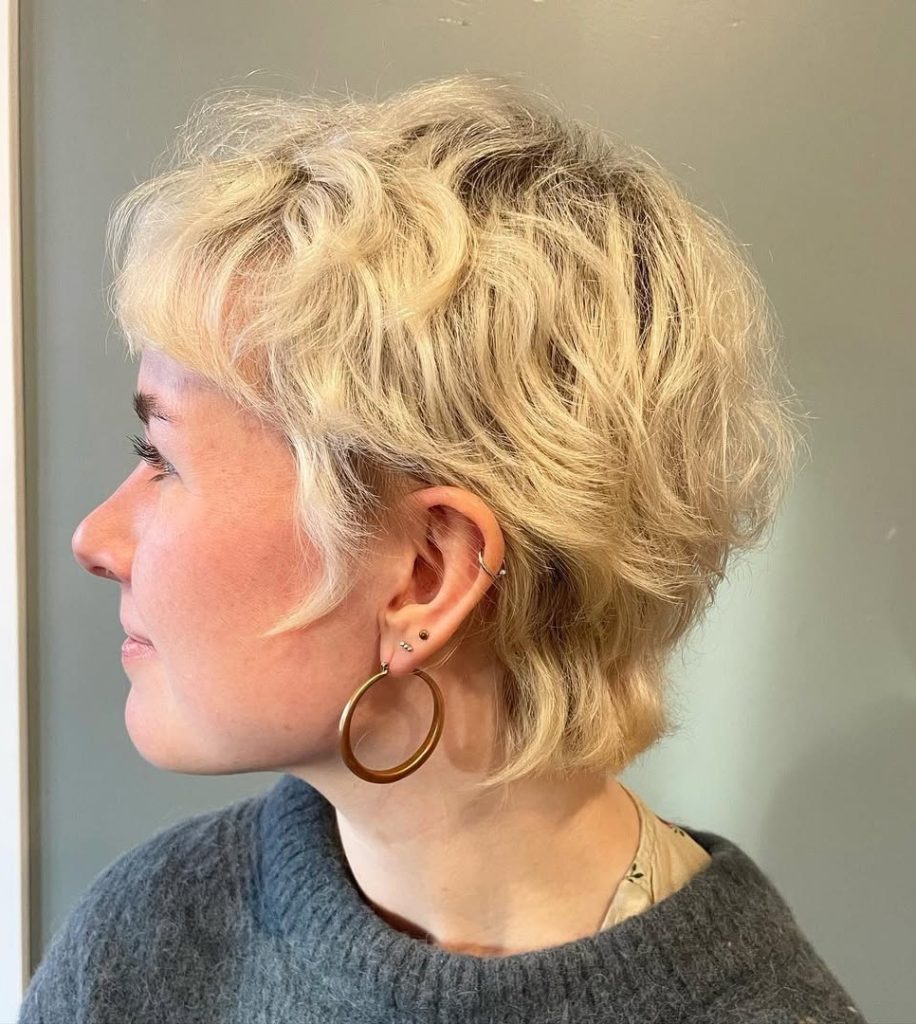
23. Shaggy Pixie for Fine Wavy Hair
A shag silhouette on a pixie means longer face-framing pieces and shorter interior layers, the exact opposite of a uniform crop. Fine wavy hair benefits because the longer exterior pieces show off the wave (proving your hair has body), while the shorter interior lifts the crown without adding bulk to the sides. This grows out more gracefully than most pixies, lasting 6–8 weeks between trims before it starts to lose its shape.
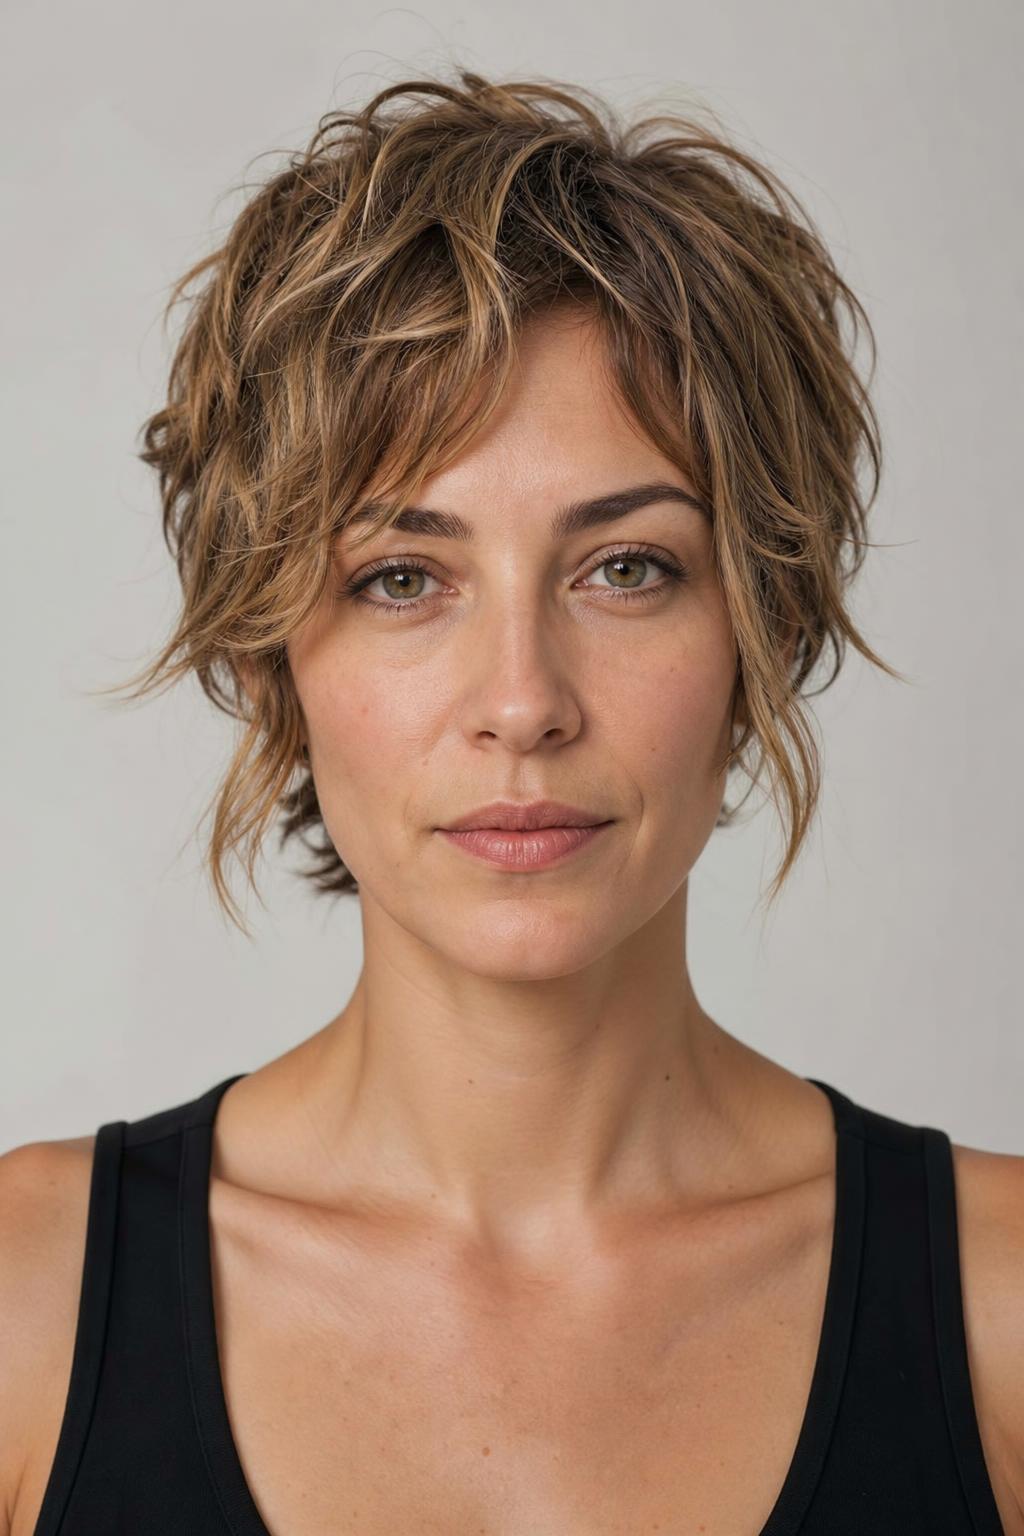
24. Loose-Curl Pixie With Side-Swept Length
If your fine curls fall in a loose pattern, think waves that occasionally twist into full curls, a side-swept length through the top lets you show off that texture at its best. The sides are cut short enough to stay controlled, while the top is left about 3–4 inches long so the curls have room to form. On round faces, sweeping that length to one side creates the asymmetry needed to visually elongate.
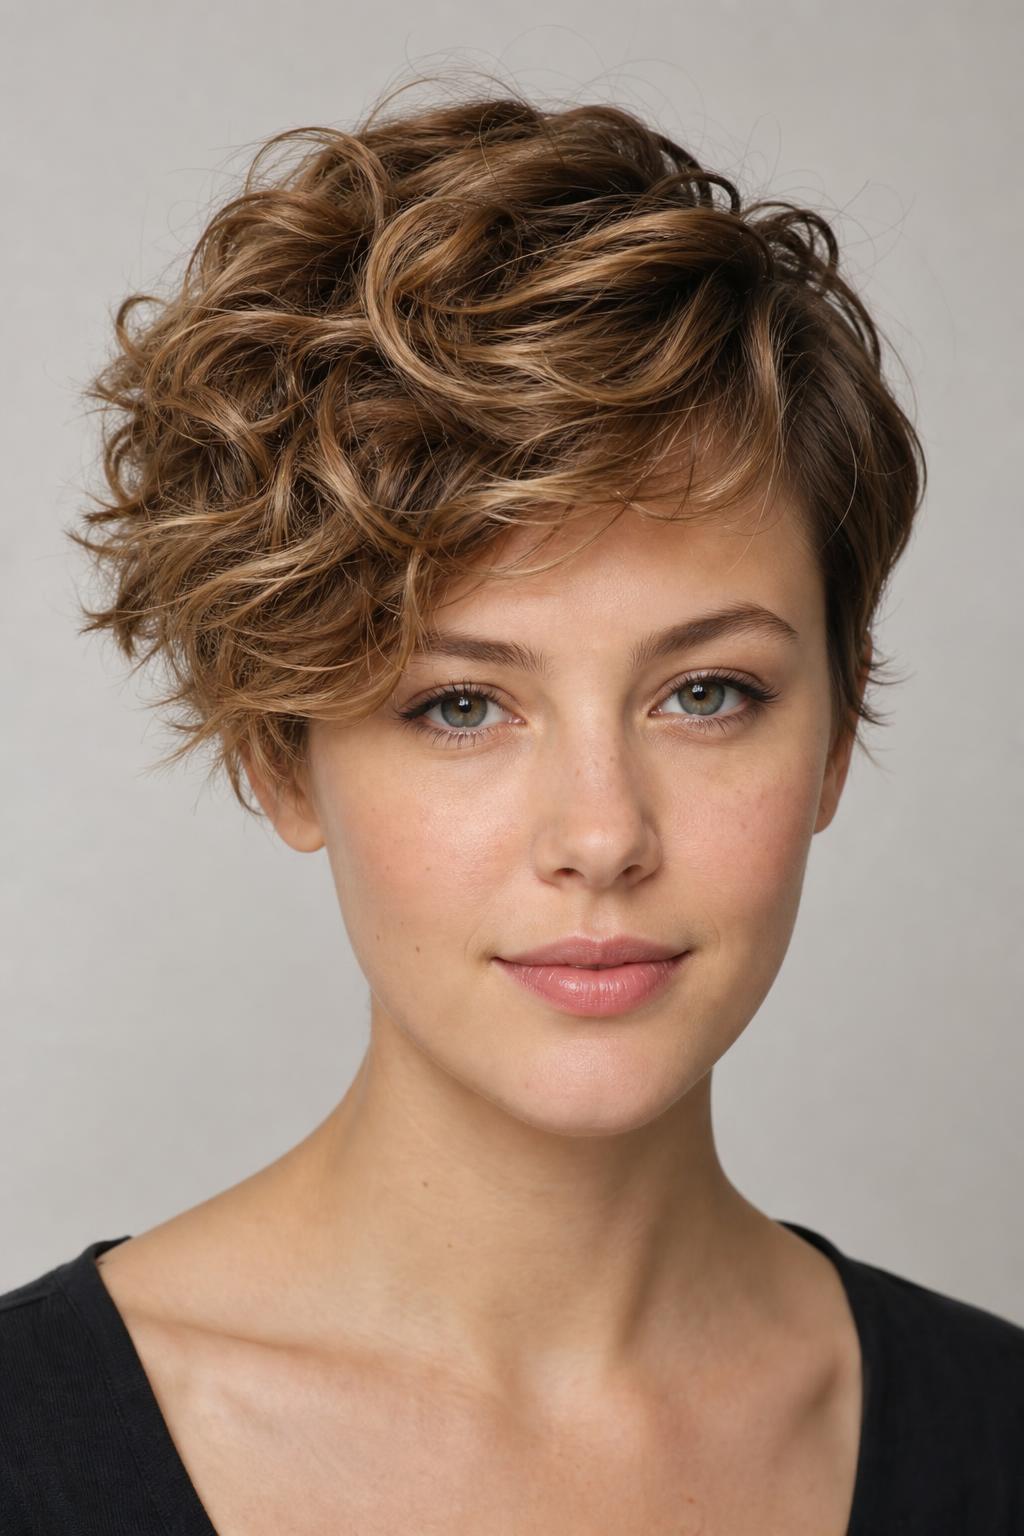
25. Defined Ringlet Pixie With Volume at the Crown
When fine hair holds a tight ringlet pattern, cutting it into a pixie concentrates those ringlets into a smaller area where they stack on top of each other and create substantial visual density. The crown can look two to three times thicker than the hair actually is. Avoid thinning shears entirely on this texture, they create frizzy, undefined ends that undercut the whole purpose of showing off the curl pattern. A protein-based leave-in conditioner helps the ringlets hold their shape without weighing them flat.
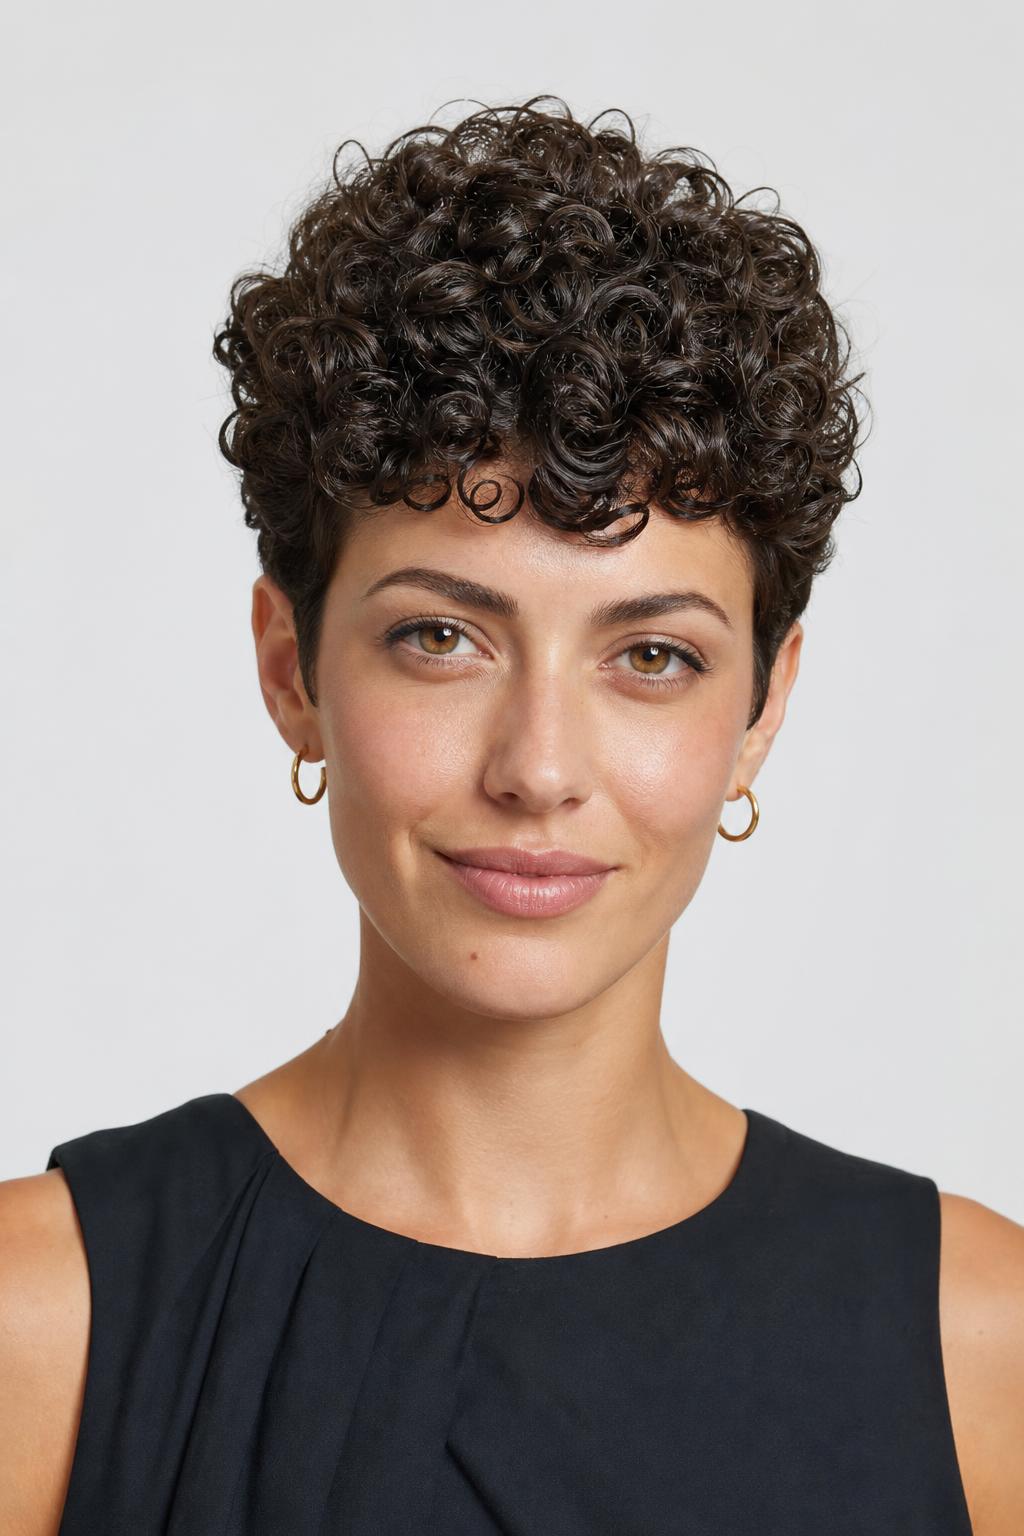
Age-Confident Pixies for Fine Hair Over 50
Hair density naturally decreases with age, and fine hair that was once manageable at longer lengths may start showing visible scalp or looking flat. Pixie cuts solve this practically less length means less weight pulling the hair down, but the right variation also addresses common concerns like softening around the face and working with gray or silver tones rather than against them.
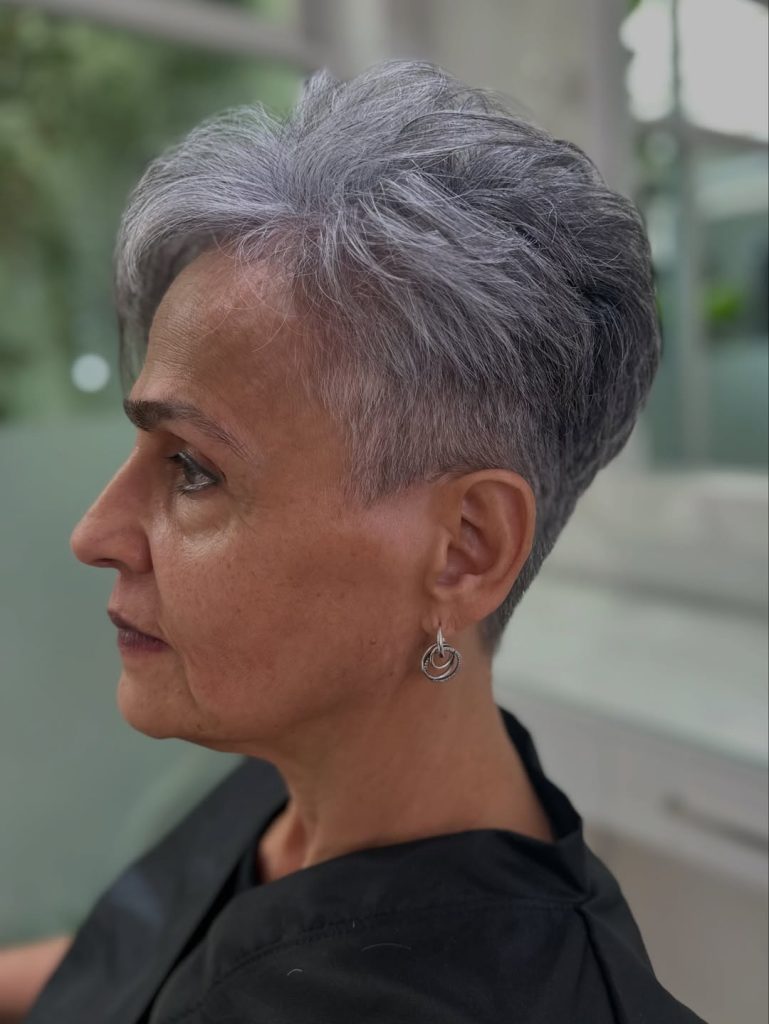
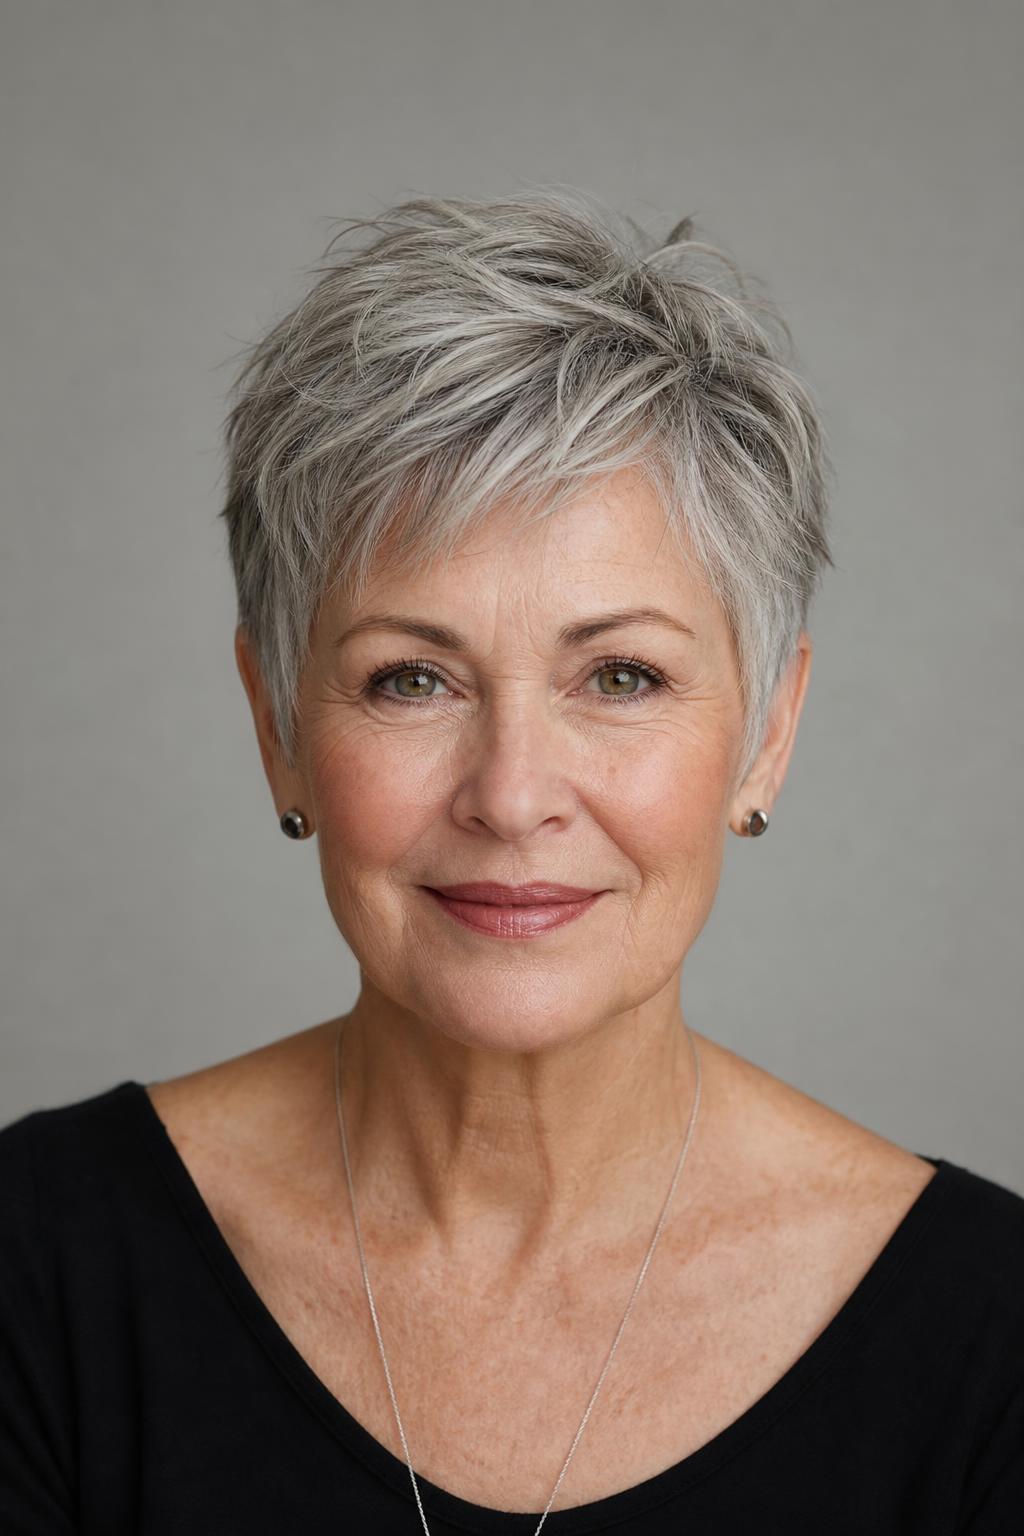
26. Silver Pixie With Soft Face-Framing Layers
Natural silver hair has a coarser texture than its pigmented version, which actually works in fine hair’s favorthe coarser gray strands prop up the finer ones and create more overall body. Soft face-framing layers here keep the look from going severe. If your gray is patchy rather than fully silver, a demi-permanent gloss in a steel or platinum tone evens it out without the commitment of permanent color.
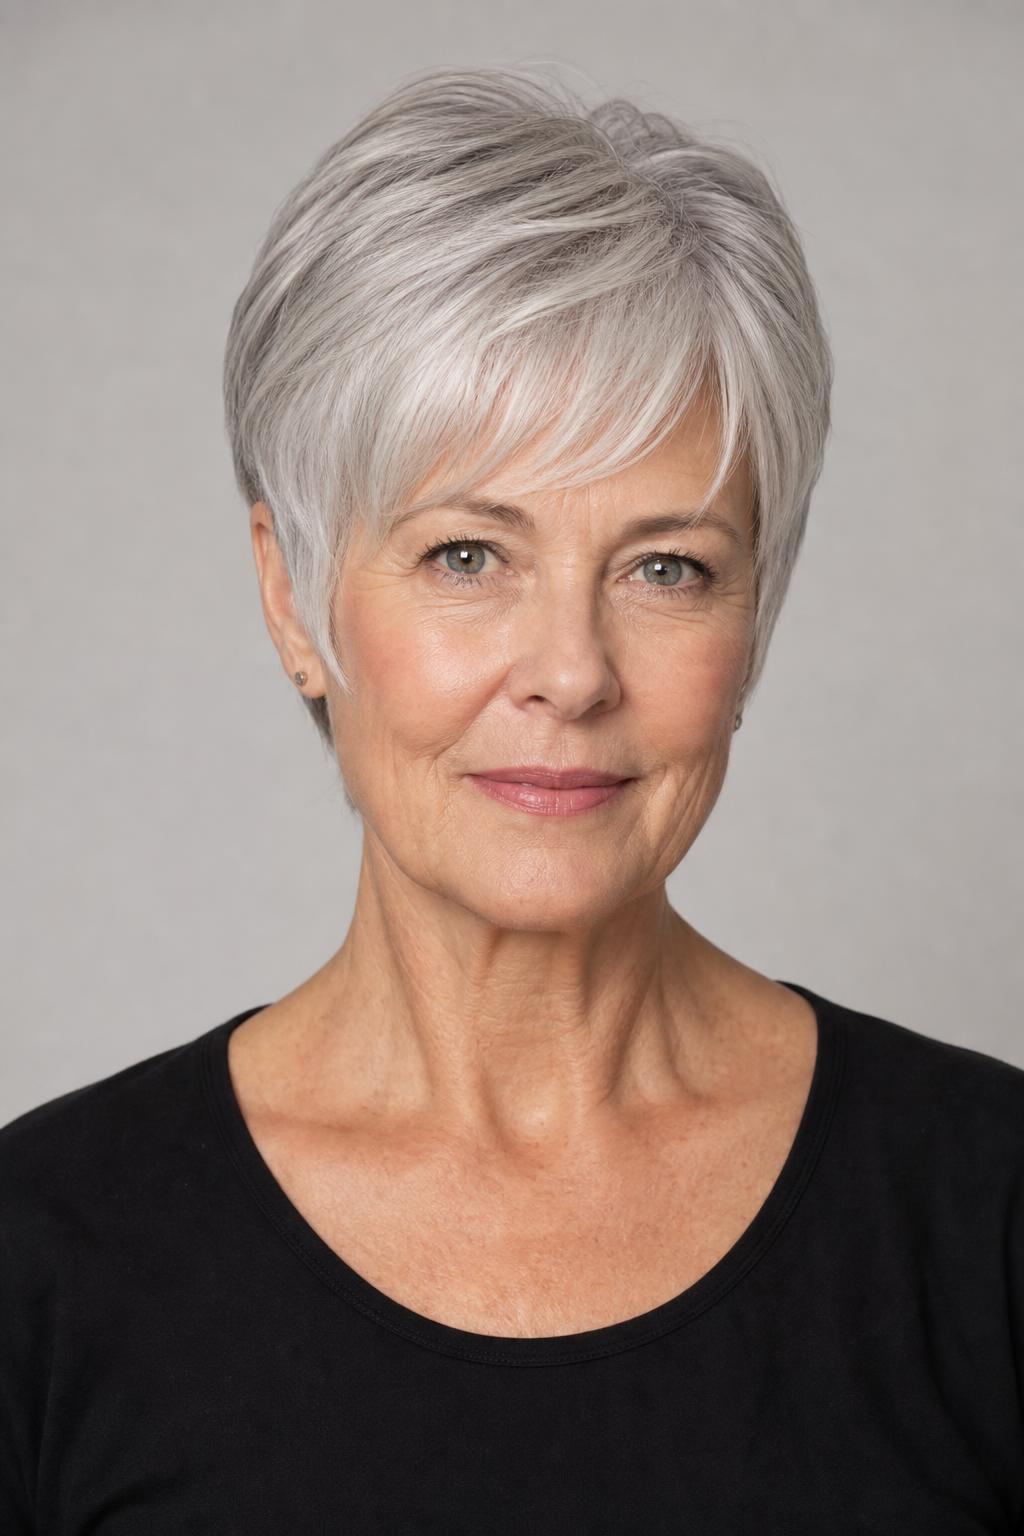
27. Classic Short Pixie With Lifted Crown
This is the lowest-maintenance option in the gallery: a short, classic pixie where all the styling effort goes into lifting the crown with a round brush during blow-drying. Fine hair over 50 responds well to root-lifting mousse, apply it to towel-dried roots, flip your head forward, and dry from the nape upward. The whole process takes 3–4 minutes and holds shape for most of the day. Keep the length above the tops of the ears so the style stays crisp between trims.
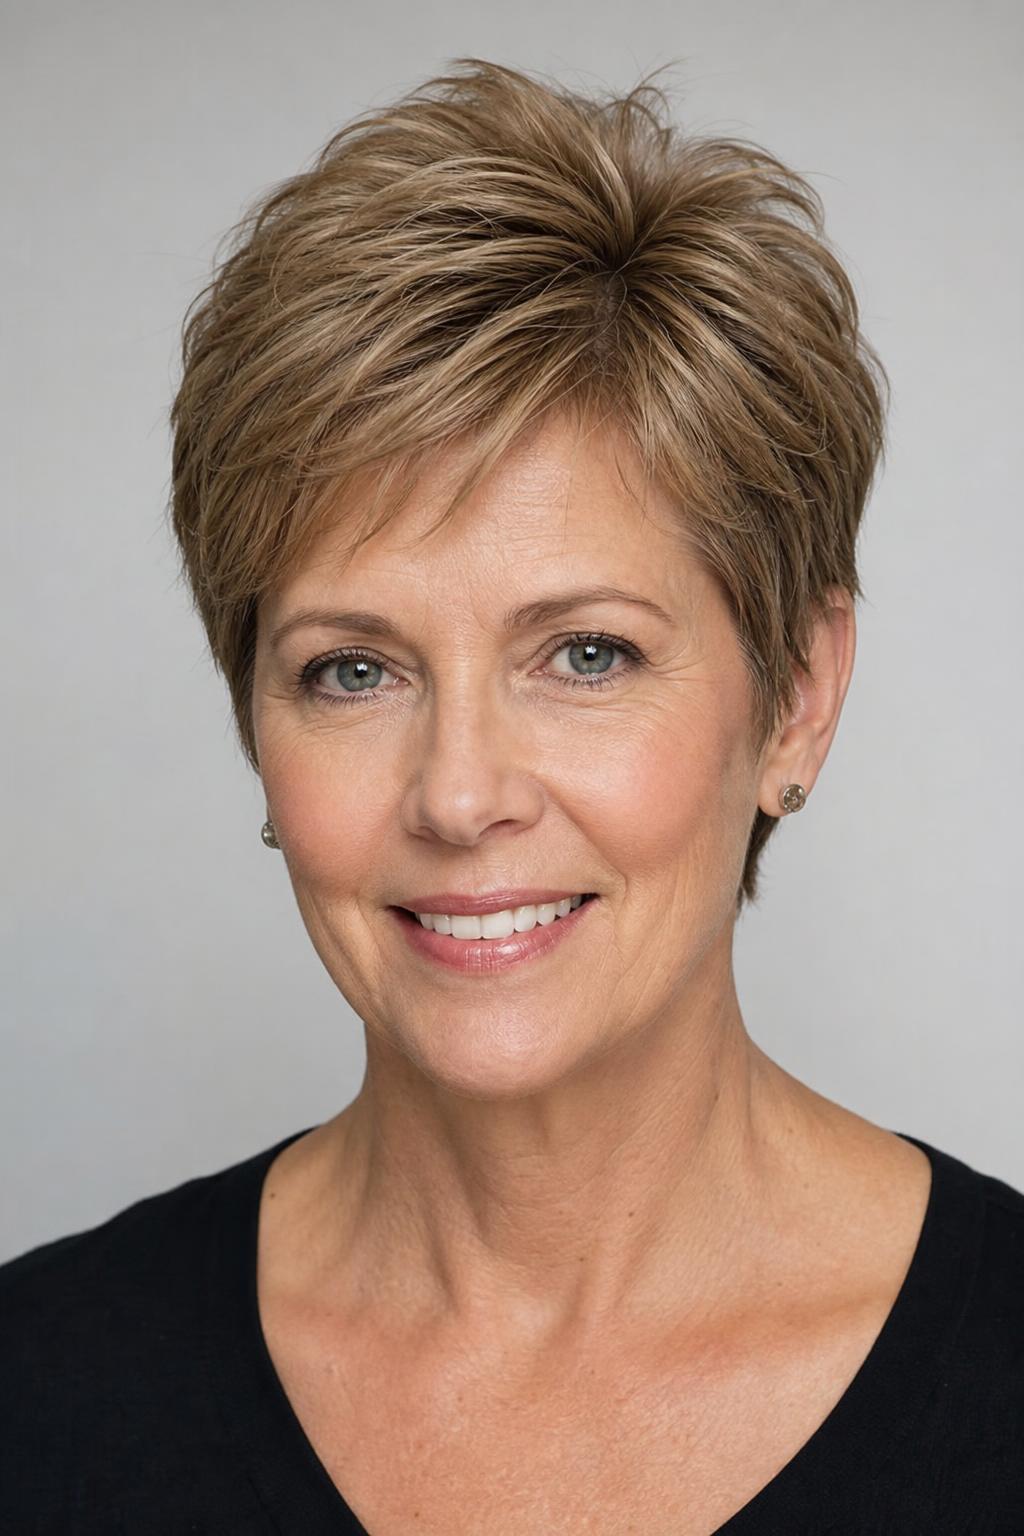
28. Feathered Pixie With Side Part for Thinning Hair
Thinning along the part line is common after 50, and a deep side part shifts hair away from the thin zone while feathered layers camouflage any scalp visibility along the parting. The feathered tips also catch light in a way that makes each strand more visible. If you’re dealing with hormonal thinning, mention it to your stylist during the consultation, they may recommend a shorter crown length to reduce the pull on weakened follicles.

29. Layered Pixie With Soft Bangs for Fine Gray Hair
Bangs on gray fine hair need to be lighter than you think, a heavy fringe section will expose thinness at the crown. Soft bangs here use maybe 15–20% of the front section, point-cut so they blend into the temple hair rather than sitting as a separate piece. The layered crown adds enough shape that the style holds without product on wash days, though a dime of lightweight cream smoothed through the ends keeps flyaways tidy.
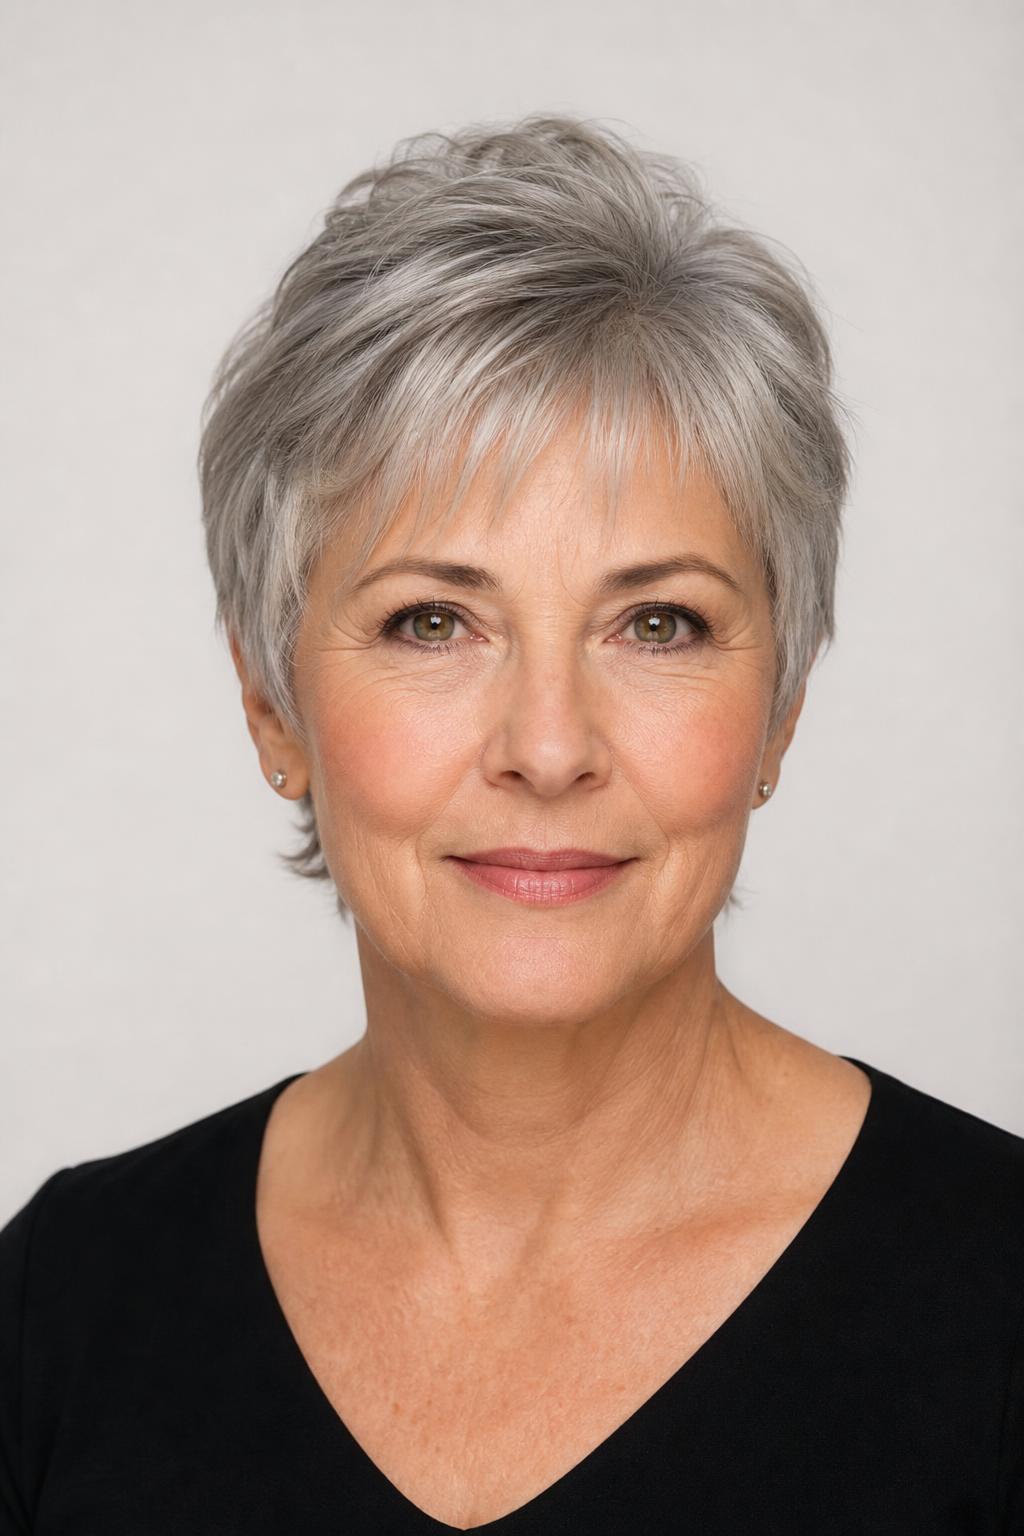
30. Pixie With Volume-Boosting Highlights on Mature Hair
Strategic highlights on gray or silver hair serve a dual purpose: they add dimensional depth (which reads as thickness), and they blend the line between gray and pigmented sections for women in the transition stage. Champagne and warm-white tones work better than stark platinum on mature skin, they add warmth without the yellow cast that pure white can pick up. Budget for a toner refresh every 6–8 weeks; the highlights themselves can go 10–12 weeks between sessions.
How to Choose the Right Pixie Cut for Your Face Shape
The goal of matching a pixie to your face shape is visual balance, adding width where the face is narrow, adding length where it’s round, or softening angles where they’re sharp. Fine hair adds a layer of complexity because you have less material to work with, so the specific pixie variation matters more than it would on thick hair.
| Face Shape | Goal | Best Pixie Variation | Avoid |
|---|---|---|---|
| Oval | Maintain balance | Textured crop, classic short pixie, feathered pixie | Very tight buzz cuts |
| Round | Add vertical length | Side-swept pixie, asymmetrical fringe, volume at crown | Chin-length sides, center parts |
| Square | Soften angular jaw | Soft-layered pixie, wispy fringe, stacked back | Blunt, boxy cuts; heavy bangs |
| Heart | Balance wider forehead | Curtain fringe pixie, piecey texture, side-swept bangs | Extreme crown volume with no fringe |
| Oblong | Add width | Textured pixie with side volume, full bangs, shaggy layers | Very short sides with no fringe |
| Diamond | Soften cheekbones | Stacked pixie, soft face-framing layers, graduated back | Ultra-tight sides |
Stylist tip: Bring at least two reference photos to your appointment, one showing the front view and one showing the back. Most consultation miscommunications happen because the client and stylist are picturing different angles of the same cut. For fine hair specifically, show a photo of someone whose hair texture looks similar to yours, not just the shape you want.
What to Tell Your Stylist
Walking into a salon and saying “I want a pixie” leaves too much room for interpretation, especially when fine hair is involved. The difference between a pixie that adds volume and one that exposes thinness comes down to specific cutting decisions. Here’s how to communicate the details that matter.
For volume at the crown: “I want internal layering concentrated above the occipital bone, point-cut not razor-cut. I need the crown to lift, not lie flat.”
For a stacked back: “Please graduate the nape so the back is rounded, not flat. I want the weight to push outward, not hang.”
For bangs that don’t thin the top: “Keep the fringe section light, no more than about a half-inch depth from the front hairline. I don’t want to borrow too much hair from the crown.”
For color-based volume: “Can we add babylights through the crown and temples? I want dimensional color that makes the hair look denser, not flat highlights.”
General fine-hair note: “My hair is fine, please use point cutting on the ends rather than razor cutting. Razor cutting removes too much weight from fine strands and makes the ends see-through.”
Maintenance and Styling Expectations
Pixie cuts on fine hair are low-maintenance in daily styling time but high-maintenance in salon visits. The shorter the cut, the faster it loses its shape, expect to trim every 4–6 weeks for most styles. Here’s what to plan for:
Trim frequency: Every 4–5 weeks for textured and stacked pixies. Every 5–6 weeks for longer pixie bobs and shaggy styles. Curly pixies can push 6–8 weeks because curl pattern disguises the grow-out.
Daily styling time: 3–7 minutes for most cuts. Classic and short pixies need a round brush and blow-dryer. Textured styles can get away with finger-styling and a texturizing product. Curly pixies often style themselves, just apply product and go.
Products by category: Volumizing mousse (walnut-sized amount at the roots), texturizing spray (light mist for grip and separation), lightweight pomade or cream (pea-sized for smoothing and defining). Skip heavy waxes, thick creams, and silicone-based serums, they weigh fine hair flat within an hour.
Tools: Small round brush (1–to 1.25-inch barrel) for root lifting, blow-dryer with a concentrator nozzle, mini flat iron for smoothing fringe. A diffuser attachment for curly or wavy versions.
Grow-out behavior: Most pixies go through an awkward phase around weeks 6–8 where the shape softens and the nape gets shaggy. Stacked and graduated cuts handle grow-out better than uniform-length crops. If you’re growing a pixie out entirely, plan for “clean-up” trims that reshape without removing length, your stylist can trim the nape and ears while letting the top keep growing.
FAQ
Will a pixie cut make fine hair look thinner?
Not if it’s cut correctly. The right pixie actually makes fine hair look thicker because short lengths remove the weight that pulls thin strands flat and concentrate density into a smaller area. The cuts that work best use point cutting (not razor cutting), internal layering at the crown, and graduation at the back. Where fine hair runs into trouble is with heavy thinning shears or extreme razor work, both remove too much material and leave the ends transparent.
How often do I need to trim a pixie on fine hair?
Most pixie cuts need trimming every 4–6 weeks. Fine hair shows grow-out faster than thick hair because there’s less bulk to disguise where the shape has shifted. Textured and stacked pixies need the most frequent upkeep (every 4–5 weeks), while shaggy pixies and bixies can stretch to 6–8 weeks because their deliberately undone shape masks the grow-out.
What products should I use on a fine-hair pixie?
Stick with lightweight, volume-building formulas: a volumizing mousse at the roots, a texturizing spray for separation and grip, and a lightweight pomade or cream for finishing. Avoid anything labeled “smoothing,” “anti-frizz,” or “heavy hold”, these products contain silicones or waxes that flatten fine hair within the hour. A dry shampoo at the roots extends volume into day two.
Can I get a pixie if I have a round face and fine hair?
Yes, but the specific shape matters. A pixie with a deep side part and asymmetrical length across the top creates diagonal lines that visually lengthen a round face. Volume should sit at the crown (not the sides), and a side-swept fringe works better than straight-across bangs, which can emphasize width. Avoid pixies that are the same length all around with a center part, that symmetry tends to reinforce roundness.
Does coloring fine hair before a pixie cut cause damage?
Color can actually help fine pixie cuts by adding texture and dimension to the strands. Semi-permanent and demi-permanent formulas deposit color without lifting the cuticle, so damage is minimal. Permanent color and bleach carry more risk on fine hair, but a skilled colorist will use bond-protecting additives during processing to minimize breakage. The trade-off is usually worth it: dimensional color is one of the strongest visual tricks for making fine hair appear thicker.
How do I grow out a pixie cut on fine hair without an awkward stage?
The awkward stage is mostly unavoidable, but you can minimize it with strategic clean-up trims every 5–6 weeks during the grow-out. Tell your stylist you’re growing it out, they’ll trim the nape and around the ears to keep the shape controlled while letting the top and crown gain length. A texturizing spray and headbands or clips help manage the in-between phase. Expect about 6–12 months to transition from a pixie to a short bob, depending on your growth rate.
Is a pixie cut suitable for fine curly hair?
Fine curly hair is actually a strong candidate for a pixie because the curl pattern creates inherent volume that straight fine hair doesn’t have. The curl concentration on a short cut makes the hair look denser. Two non-negotiables: have it cut dry (wet cutting leads to unexpected shrinkage on curly hair), and avoid thinning shears, which create frizzy undefined ends on curls. A diffuser and a lightweight gel are the only styling tools you’ll need.
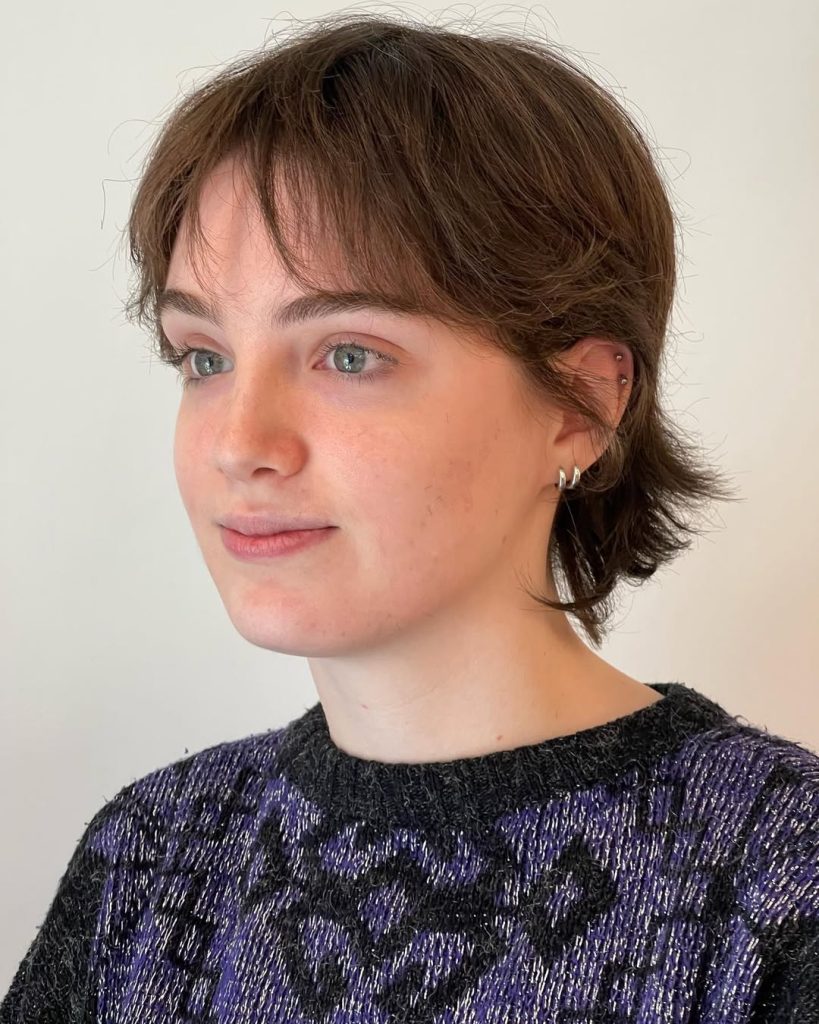
Pixie cuts for fine hair are a great way to create natural volume and a more defined shape without relying on heavy styling. Consider your face shape and consult your stylist before the chop for a perfect match. And, of course, bring some inspiration to make your next transformation truly unique!
Hair results vary based on your natural hair type, texture, density, and condition. Always consult with a licensed hairstylist before making significant changes, especially with chemical treatments or dramatic length changes. Photos may show styled results that require professional tools and products to replicate.