


Bring two or three reference photos, say exactly what you like about each one, and tell your stylist your real hair type up front, and your inspo photos start working for you instead of against you.
The fastest way to get a haircut you actually wanted is to bring two or three reference photos, point to the one specific feature you like in each, and describe your natural hair type, density, and length in the same breath. One photo alone is risky because it forces your stylist to guess which part you care about, and it is almost always shot on hair that behaves differently from yours. Several photos that share a common thread, paired with a few honest words about your own hair, remove that guesswork.
This guide covers how many photos to bring and why a single image backfires, what separates a useful reference from a misleading one, the photo types that quietly confuse stylists, why bringing a picture of what you want to avoid helps as much as the ones you like, how to talk through each photo feature by feature, which angles matter, and how to close the gap between a filtered image and a realistic result.
| Factor | Details |
|---|---|
| How many photos | Two to three that share the feature you want. One is too little context, more than four gets confusing. |
| Best photo match | At least one photo on hair with a similar type, density, and length to yours. |
| Angles to include | Front, side, and back where you can find them, especially for layered or graduated cuts. |
| Add one “avoid” photo | A look you do not want, so the stylist knows where the boundaries are. |
| Biggest risk | Filtered, professionally lit, or heavily styled photos that promise a result real hair cannot copy. |
| How to talk | Name the one feature you like in each photo, not “the whole look.” |

Two or Three Photos Beat a Single Reference Every Time
Two to three reference photos give your stylist enough information to find the pattern in what you like, while a single image leaves too much open to interpretation. When you show only one photo, your stylist has to guess whether you are drawn to the length, the layers, the color, or the way it was styled that morning. If that photo happens to be shot on hair with a different texture or density than yours, the guess starts from a false premise, and the result drifts from what you pictured.
Bringing more than four photos creates the opposite problem. A stack of ten images pulls in conflicting details, and your stylist ends up trying to average them rather than build one coherent cut. The sweet spot is two or three photos that share a common thread. If all three show a soft, jaw-length shape with movement through the ends, that repetition tells your stylist exactly which quality matters to you.
You can also split photos by purpose. One image can carry the cut, another the color, and a third the styling or the fringe. Even if the color photo has black hair and you want to stay blonde, a good stylist can separate the idea of the shape from the idea of the shade. The point of multiple photos is not to find one perfect match, but to let the shared details speak louder than any single image could.
Stylist tip: Put your thumb over the model’s face in a celebrity photo before you save it. A captivating face makes it hard to tell whether you love the hair or the person, and cropping to the hair alone helps you describe the actual cut you want.
What Makes a Reference Photo Actually Useful
A useful reference photo shows hair with a texture, density, and length in the same neighborhood as yours, shot in ordinary light with minimal editing. The closer the model’s hair is to your own, the more honestly the photo predicts how the cut will fall on you. A sleek, chin-length blunt line on fine straight hair will behave nothing like it does on thick, waist-length curls, and no amount of cutting skill closes that gap in a single appointment.
This is where knowing your own hair matters as much as the photo. If you can tell your stylist that your hair is fine but there is a lot of it, or that it is coarse and dries with a wave, they can translate the photo onto your real texture. Understanding your density in particular shapes almost every decision about layers and weight, which is why it helps to choose a haircut based on your hair density before you even open your camera roll.
Ordinary lighting is the other quiet requirement. A photo taken by a window in daylight tells the truth about color and shape far better than one lit by a ring light or shot under warm salon bulbs. If your best reference happens to be a glossy editorial image, keep it, but pair it with a plainer photo so your stylist has a realistic baseline to work from.

The Photos That Quietly Mislead Your Stylist
Most disappointing haircuts trace back to a photo that promised something the image itself could not deliver honestly. Filters shift color, professional styling hides the real cut, and a model with the wrong hair type sends the whole plan off course. Knowing which photos mislead helps you screen your references before you ever sit in the chair.
The table below pairs the most common photo mistakes with why each one throws off the result and how to fix it before your appointment.
| Photo Mistake | Why It Misleads | The Fix |
|---|---|---|
| One photo only | Your stylist cannot tell which feature you actually want. | Bring two or three that share the same key detail. |
| Very different hair type | The cut behaves differently on your density and texture. | Include at least one photo close to your real hair. |
| Filtered or edited color | The tone on screen has no real pigment behind it. | Ask what shade is realistic on your natural base. |
| Styled blowout for a cut request | You see the styling, not the cut underneath it. | Say plainly which part is the cut and which is styling. |
| Front-facing photo only | The back and sides are where cuts most often go wrong. | Add a side and back reference for layered shapes. |
| Celebrity glamour shot | The face distracts from the actual hairstyle. | Crop to the hair or cover the face with your thumb. |
The styled-blowout trap catches people most often. A bouncy, glassy finish in a photo comes from a round brush, heat, and product, not from the cut itself. If you bring that image expecting the same look air-dried at home, the cut can be perfect and you will still feel let down. This is the same disconnect behind a lot of haircut regret and what to do about it, and naming the styling out loud is how you avoid it.
Bring a Photo of the Look You Want to Avoid
A photo of a haircut you do not want can steer your stylist as clearly as the ones you love. Stylists often say that seeing what to avoid removes a whole category of risk, because it marks the boundary you do not want crossed. If you are terrified of ending up with a mullet shape, a stacked back, or a heavy fringe, one “please not this” image says it faster and more precisely than a paragraph of nervous explanation.
This works especially well for length and volume anxieties. Someone growing out a short cut can show a photo of the awkward mid-length shape they are trying to skip past. Someone with a lot of natural volume can point to a pyramid-shaped result and say the layers need to prevent exactly that. The avoid photo does not have to be dramatic to be useful, it just has to mark the edge of your comfort zone.
Stylist tip: Pair every avoid photo with one sentence about why. Saying “not this much length off the front, it swings into my eyes” tells your stylist the practical reason, so they can honor the intent even if your exact hair calls for a slightly different solution.
Talk Through Each Photo Feature by Feature
The single most useful thing you can say about a reference photo is which one feature you like, rather than “I want this whole look.” A photo carries a dozen decisions at once, including length, layers, color, part, fringe, and styling, and your stylist has no way to know which of those pulled you in. When you point and say “the fringe here” or “the way the ends flick out,” you hand over the exact instruction instead of a vague mood.
Break each photo into its parts as you show it. On one image you might love the fringe, on another the collarbone length, and on a third the soft internal layers. Naming them one at a time lets your stylist assemble a cut from real components rather than reverse-engineering a single picture. If you are asking for a specific shape like a collarbone bob, describing the length in your own words alongside the photo doubles the clarity.
Words and pictures together beat either one alone. A photo removes the ambiguity that plain description leaves behind, and your words tell the stylist which slice of that photo matters. This is also the moment to talk about upkeep, because a look you can maintain in five minutes is very different from one that needs twenty. It helps to tell your stylist your maintenance level in the same conversation, so the cut fits your mornings and not just the photo.
Front, Side, and Back Angles All Matter
A cut lives in three dimensions, so front-only photos hide the parts most likely to surprise you. The back and the sides are where graduation, stacking, and layering actually happen, and a straight-on selfie says nothing about them. For any shape with movement or a defined silhouette, a side and back reference tells your stylist how the weight should fall where you cannot easily see it yourself.
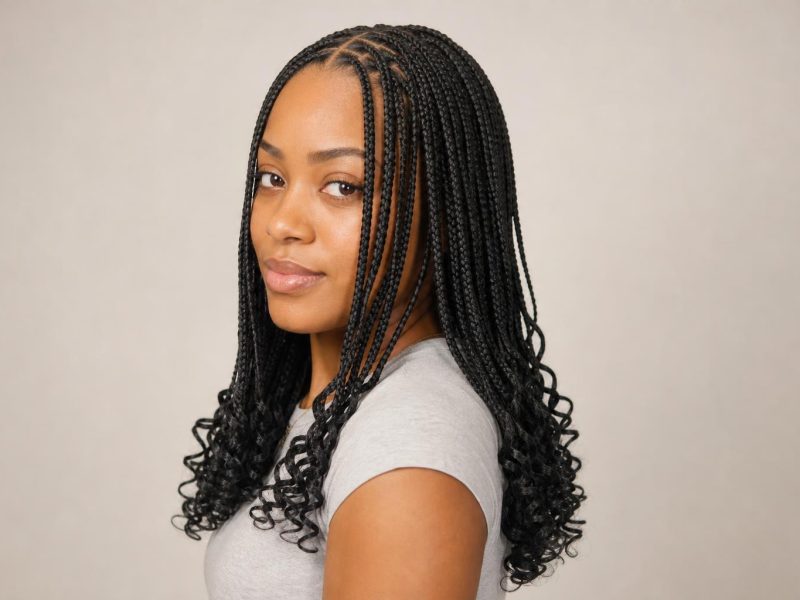
Different styles need different angles. A blunt one-length bob reads clearly from the front, but a layered or graduated cut needs a back view to show how short the interior goes. Braids, updos, and textured cuts like the kitty cut come across best from a side or 45-degree angle, where the layering and shape are visible rather than flattened. Close-up shots capture fine detail, so if you care about face-framing pieces or a specific fringe, get in tight on that area.

If you can only find a front view of a cut you love, ask your stylist to describe what the back will look like before they start. A quick verbal preview closes the gap, and it gives you the chance to adjust while it is still just a conversation. The same goes for a soft, face-framing style like a butterfly haircut, where the layering around the crown does most of the work you cannot see straight on.
Set Realistic Expectations Against the Photo
A reference photo is a direction, not a guarantee, and treating it as a forecast is where most disappointment begins. The same haircut looks different on every head because bone structure, face shape, density, curl pattern, and growth direction all change how it falls. A shape that looks airy on thick waves can turn flat and stringy on fine straight hair, and that is a hair-type reality, not a failure of the cut.
There is also a maintenance gap hiding in most inspiration photos. The people in them often have professional help, meaning fresh touch-ups, a stylist blow-dry, and product you may not own. A cut that shines under those conditions can behave very differently when you air-dry it in a rush before work. Ask your stylist directly how much daily effort a look really takes, and whether it holds up between salon visits on your texture.
The honest move is to ask “what will this look like on my hair?” and listen to the answer. A good stylist will tell you when a photo is reachable in one session and when it is a two-appointment or grow-out project, especially with color. Reference images communicate length, layers, and shape well, but they cannot promise you will resemble the person in the picture, and knowing that in advance is what keeps you happy with the result.
Inspo Photo Myths That Lead to Salon Regret
A few stubborn beliefs about reference photos cause more bad haircuts than any single mistake. Clearing them up before your appointment protects you from the letdown of expecting one thing and leaving with another.
Myth: A Photo Guarantees You Will Look Like the Model
Reality: A photo predicts shape and length, not the final look on your head. Your face shape, hair density, and growth pattern reshape any cut, so the same style reads differently from person to person. Use the photo to communicate the structure you want, then trust your stylist to adapt it to what your hair will actually do.
Myth: More Photos Always Mean a Clearer Result
Reality: Past three or four images, extra photos usually add confusion, not clarity. A large stack pulls in conflicting details and forces your stylist to average them. Two or three references that share a common feature communicate far more precisely than ten that pull in different directions.
Myth: The Color in the Photo Is What You Will Get
Reality: Screen color rarely matches real pigment because filters, lighting, and editing all shift the tone. A shade that glows in an app may not exist on real hair, and your natural base changes where any color can realistically land. Ask your colorist what is achievable on your starting point rather than assuming the photo is the target.
Your Quick Salon Photo Checklist
Before your appointment, run through a short list so your photos do the talking for you. The goal is a small, focused set of images plus the few words that tell your stylist what each one is for.
| Bring This | Why It Helps |
|---|---|
| Two or three photos of the look you want | A shared feature across them tells your stylist what matters most. |
| One photo of a look to avoid | Marks the boundary you do not want crossed. |
| At least one photo near your hair type | Predicts how the cut will fall on your density and texture. |
| Front, side, and back angles | Shows the parts of the cut you cannot see straight on. |
| One feature you like per photo | Turns a vague mood into a specific instruction. |
| Your hair in its natural state | Lets your stylist read your real texture and growth. |
One more habit rounds this out. Arrive with your hair worn the way it usually falls, not scraped into a tight ponytail or freshly straightened. Your stylist needs to see how it behaves on its own before they cut, because that natural state is what they are actually working with. If you also want a clean way to ask for a specific cut in words, a short script like the one in our guide on how to ask for a bob pairs neatly with your photos.
FAQ
How Many Reference Photos Should I Bring to the Salon?
Bring two or three photos that share the feature you want most. One image leaves your stylist guessing which detail matters, and more than four starts pulling the plan in conflicting directions. If all your photos show the same length or the same layered movement, that repetition is the clearest instruction you can give.
Should I Bring a Photo of a Haircut I Do Not Want?
Yes, an “avoid” photo is one of the most useful things you can show. It marks the boundary your stylist should not cross, which removes a whole category of risk. Pair it with one sentence about why you dislike it, so your stylist understands the intent behind the boundary.
Why Does My Haircut Never Look Like the Photo?
The model in the photo has different bone structure, density, and growth patterns than you, so the same cut falls differently. Many reference images also rely on professional styling, product, and lighting that you will not recreate at home. Ask your stylist how a look will behave on your specific hair before they start, and treat the photo as a direction rather than a promise.
Can I Bring a Photo with a Different Hair Color Than the Cut I Want?
Yes, you can separate the cut and the color into different photos. A stylist can take the fringe from a dark-haired photo and the length from another and still keep you blonde. Just tell them clearly which photo is for the shape and which is for the shade so nothing gets merged by accident.
Does the Photo Need to Be Someone with My Hair Type?
At least one of your photos should be close to your real texture and density, though not every image has to match. A cut on hair very different from yours behaves differently once it is on your head, so a similar-hair reference keeps expectations honest. You can still use an aspirational photo for the shape, as long as your stylist knows your true starting point.
Do Filters and Salon Lighting Really Change How a Photo Looks?
Filters, editing, and professional lighting all shift color and shine in ways real hair cannot copy. A tone that glows on your screen may have no real pigment behind it, and glossy studio light exaggerates smoothness and depth. Bring at least one plainly lit, unedited photo so your stylist has a realistic baseline.
Is It Better to Bring Photos or Just Describe What I Want?
Photos and words together work far better than either one alone. A picture removes the ambiguity that description leaves behind, while your words tell the stylist which part of the picture you actually care about. Show the photo, point to the one feature you like, and add a note about how much daily styling you are willing to do.
Getting the cut you pictured comes down to preparation, not luck. When you bring a small set of honest inspo photos, name the one feature you like in each, include the angles that matter, and speak plainly about your real hair type and how much upkeep you want, your stylist has everything needed to build a cut that suits you. Reference photos are at their best when they open a conversation rather than close it, so treat them as the starting point for a shared plan with the professional in the chair.
Hair results vary based on your natural hair type, texture, density, and condition. Always consult with a licensed hairstylist before making significant changes, especially with chemical treatments or dramatic length changes. Photos may show styled results that require professional tools and products to replicate.

2 responses