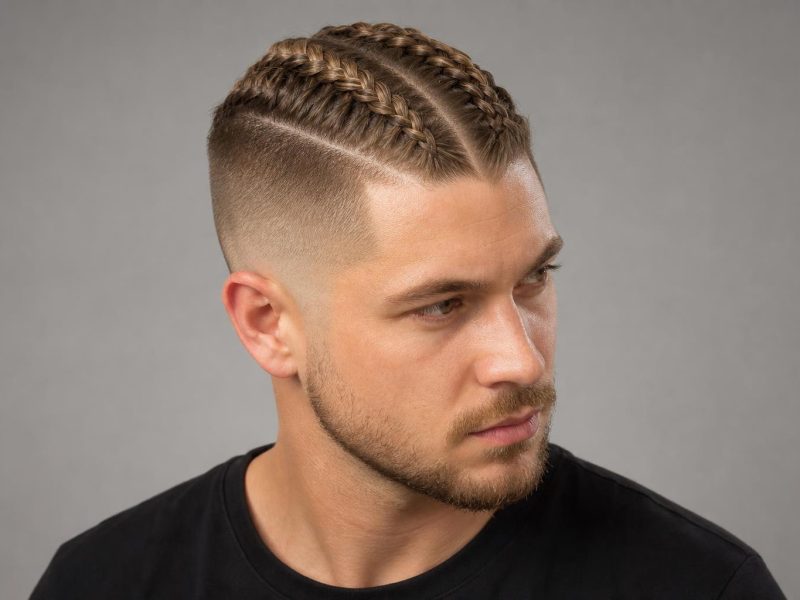

Two-strand twists are one of the most versatile protective styles in natural hair — they work on 3b through 4c curl patterns, install in a single session at home, and give you a completely different look when you take them down.
The technique is straightforward: divide a section of hair into two equal strands and wrap them around each other from root to tip. What changes everything is how you section, what products you use, and which variation you choose — mini twists close to the scalp look nothing like chunky jumbo twists, and a classic full set reads completely differently from flat twists that frame the face. This gallery covers 30 distinct looks across lengths, sizes, and styling directions, followed by a complete step-by-step guide so you can install your own.
You’ll find styles organized by size, length, and purpose — short tapered looks for men, loc-starter sets, twist-out prep, and updo-ready lengths for women — plus a face shape guide, product breakdown, and honest notes on how long each variation actually lasts.
| Factor | Details |
|---|---|
| Best for | Type 3b through 4c natural hair; works on all lengths from 2 inches and up |
| Wear time | Mini twists: 2–3 weeks; medium: 3–4 weeks; jumbo: 1–2 weeks |
| Install time | 1–3 hours depending on section size and hair density |
| Tools needed | Rat-tail comb, clips, spray bottle, twisting cream or butter, lightweight gel (optional) |
| Avoid if | Hair is severely damaged at ends (fraying increases unraveling); fine 2c–3a hair without strong curl memory |
Mini Two-Strand Twists
Mini twists use sections roughly pencil-width or smaller — anywhere from 1/4 inch to 1/2 inch parts. The smaller the section, the more defined each individual twist, the fuller the overall set, and the longer the style tends to hold before frizz sets in. They take longer to install than medium or jumbo twists (expect 2.5–3 hours for a full head of dense 4c hair), but the payoff is a polished, detailed look that photographs well and withstands activity better than larger twists. Mini sets are also the best foundation for a defined twist-out — small twists unravel into tight, bouncy coils rather than the loose waves that jumbo twists produce.
1. Precision-Parted Mini Twists on 4c Hair
Clean square parts in a grid pattern give each mini twist a defined base and a neat, intentional appearance even from above. On 4c hair, the tight coil pattern means the twists self-seal at the root with minimal product — a light twisting butter is enough at the roots, with slightly more applied toward the drier ends. This look lasts 2–3 weeks when refreshed nightly with a satin bonnet; after week 2 the roots begin to frizz but the twists themselves stay structured.
2. Mini Twists with Natural Shrinkage
Installed on damp (not wet) hair and left to air dry without stretching, these twists shrink back to their natural curl length — typically half to two-thirds of stretched length on 4c hair. The result is a compact, voluminous look where the twists coil in on themselves and the overall silhouette is rounded rather than hanging. If you want length, stretch after installation using the two-strand tension method or a twist-and-curl rod at the ends.
3. Mini Twists with Curled Ends
Wrapping the last inch of each mini twist around a small flexi-rod before drying adds a tight coil at the tip that prevents unraveling and gives the ends a finished, deliberate look. The curl at the tip also helps seal the moisture in during wear — a practical detail that makes this the preferred approach for 4a–4b hair, where the curl pattern isn’t quite tight enough to fuse the ends on its own. Remove rods once hair is fully dry (about 4 hours air-dried, 45 minutes under a hooded dryer).
4. Tapered Mini Twists on Natural Short Hair
On hair between 2 and 4 inches, mini twists sit close to the head and the tapered length means each twist terminates in a neat point rather than hanging loose. Ask your stylist for slightly smaller sections toward the temples and nape, where finer density can make larger twists look sparse. This is one of the most low-manipulation styles available for TWA (teeny-weeny afro) length — zero tension on the scalp and edges when installed correctly.
5. Half-Up Mini Twist Bun
Gathering the top third of a full mini twist set into a pineapple bun at the crown while letting the rest hang loose is the simplest styling upgrade for week two, when fresh-install neatness has softened into a more relaxed texture. The contrast between the gathered crown and the free-hanging twists below reads as intentional rather than undone. Use a scrunchie or a silk hair tie — never a rubber band on individual twists.
Medium Two-Strand Twists
Medium twists use sections roughly 1/2 to 3/4 inch wide — the standard size most people picture when they imagine two-strand twists. They install faster than minis (1.5–2 hours for most), hold for 3–4 weeks on 3c–4c hair, and offer more styling flexibility because the individual twists are substantial enough to manipulate into updos, high puffs, and braid-outs without collapsing. This is the most versatile size and the best starting point if you’re doing two-strand twists for the first time.
6. Classic Medium Twists on Natural 4a Hair
The foundational version — square-parted sections, equal strand tension from root to tip, ends sealed with a small amount of twisting butter. On 4a hair the natural curl pattern provides enough grip that the twists stay put without heavy product; a lightweight hold cream rather than a thick butter is ideal here to avoid buildup. This is the style that produces the most uniform, photogenic result for a first-time installation.
7. Medium Twists on 3c Curl Pattern
The looser curl pattern of 3c hair means twists are slightly less self-adhesive than on tighter coils — a medium-hold gel at the roots keeps them from loosening at the base within the first week. Install on hair that’s about 80% dry (damp enough for product absorption, dry enough that shrinkage doesn’t distort the twist shape as it dries). Expect 2–3 weeks of wear on 3c hair before the style starts to look frizzy; minis last longer on this pattern.
8. Medium Twists on Locs Starter Set
Two-strand twists are one of the most common starting methods for locs — the twist structure speeds up the matting process compared to coils or interlocking, and each twist becomes the framework of a future loc. For a loc starter set, parts are more intentional (often diamond or triangular rather than square) and the twists are installed tighter at the root. Work with a loctitian for the initial installation if possible; the parting pattern you establish in the first set determines the loc layout permanently.
9. Chunky Flat Twists Cornrow Style
Flat twists look like cornrows but use two strands wrapped around each other rather than three strands braided together — the result is a flatter, smoother finish that’s quicker to install. They lie flush against the scalp, making them an excellent option for anyone who wants a low-profile protective style or a base for wigs and weaves. Flat twists are also significantly easier to learn solo at home than cornrows, which require practice to maintain even tension while adding hair.
10. Crown Flat Twist with Free-Hanging Medium Twists
Flat-twisting the top section of hair into a crown pattern while leaving the rest as free-hanging medium twists creates a style that reads as elegant for events while remaining protective day-to-day. The flat-twist crown stays neat for 5–7 days before it needs to be redone; the hanging twists below can stay in for weeks. This is the most practical upgrade for medium twists when you have somewhere specific to be.
11. Medium Twists in a High Puff
Gathering medium twists into a high puff at the crown — the larger section size makes them easier to gather and tuck than minis — works best on week 2 or 3, when the style has settled and the twists have a softer, more pliable texture. The puff holds better than loose natural hair because the twist structure keeps the gathered section compact. A wide satin-lined hair tie prevents edge damage and maintains the puff’s shape throughout the day.
12. Two-Strand Twists with Natural Hair Accessories
Loc cuffs, gold rings, and small hair pins slot easily over individual medium twists without damage, turning a functional protective style into a layered statement. Distribute accessories sparingly — two or three pieces placed asymmetrically at the crown or framing the face reads as intentional; accessories on every twist reads as busy. Cuffs with smooth interior edges (not sharp ridges) are safest; rough metal can snag the hair shaft and cause micro-breakage over weeks of wear.
Jumbo Two-Strand Twists
Jumbo twists use sections 1 inch or wider — they install in under an hour for most head sizes and produce bold, graphic coils that are visible from a distance. The trade-off is a shorter wear time: jumbo twists on natural hair without extensions typically last 1–2 weeks before the loose curl pattern at the root causes slippage, and the larger section means more hair per twist is exposed to friction and dryness. For events and shorter-term wear, jumbo twists are the easiest and fastest option. For multi-week protective styling, medium or mini sizes hold significantly longer.
13. Jumbo Twists on Long Natural Hair
On hair past shoulder length, jumbo twists form long, thick ropes that have real visual weight — each twist can be as thick as a finger and hangs with a distinct spring when the hair’s natural texture provides enough curl memory to hold the structure. Side part plus jumbo twists at this length creates the closest thing to a statement piece that protective styles offer. A twisting butter with strong slip (rather than a gel) works best at this length to keep the strands moving smoothly through the full length of the twist.
14. Jumbo Twists with Extensions
Adding Marley hair or Havana twist hair to natural hair at the roots extends length and increases the weight, which helps longer jumbo twists stay in place rather than slipping loose at the ends. The extension hair wraps around the natural strands as you twist, and the combined texture fuses well on 4c hair without needing gel. For a natural finish, choose extension hair that matches your natural texture as closely as possible — the visual seam where extension meets natural hair is most obvious at the midpoint of the twist.
15. Havana Twists
Havana twists are a specific type of jumbo two-strand twist installed with Havana hair (a thick, matte, spongy pre-twisted extension fiber). The bulk of the hair creates especially large, rope-like twists that hold their structure without product and last 4–6 weeks — significantly longer than natural-hair jumbo twists. The matte texture reads as more natural than shiny extension fibers, and the weight of the hair means the style is not ideal for fine or low-density natural hair; the added weight can stress the roots.
16. Rope Twists (Single Twists)
Rope twists differ from traditional two-strand twists: instead of two separate strands wrapping around each other, a single section of hair is twisted in one direction, then doubled back on itself in the opposite direction — the tension between the two opposing forces creates a tight, dense coil that looks like rope. On 4b–4c hair, rope twists can be done with natural hair alone; on looser patterns, extensions or a strong holding gel are necessary to prevent the style from unwinding. Rope twists are firmer and denser than standard two-strand twists and hold their shape longer.
Men’s Two-Strand Twists
Two-strand twists on men work on any natural hair length above 2 inches and on all curl types from 3c to 4c. The style is most commonly worn with short to medium length on top and a fade or taper on the sides — the contrast between the tapered sides and the textured twists on top is one of the most modern natural hair looks for men in 2026. Below are styles organized from shortest and most low-profile to longer and more statement-driven.
17. Short Two-Strand Twists with High Fade
Tight mini twists on 2–3 inches of hair combined with a high skin fade is the men’s version of the textured crop — a clean, barbershop-ready look that works for professional and casual settings. The fade maintains a sharp perimeter line that keeps the overall silhouette looking intentional rather than simply growing out. Ask your barber to fade up to where your natural curl begins and leave the top length untouched for the twists; the line between fade and natural texture is the focal point of the style. The Edgar cut is another men’s natural style that pairs well with twists on top for a sharper, more graphic silhouette.
18. Two-Strand Twists with Mid Taper
A mid taper that fades to skin at ear level is more conservative than a high fade and suits thicker, coarser hair that would look heavy without some perimeter reduction. Medium twists on top with a mid taper is one of the most versatile men’s natural styles — workplace-appropriate with the neatness of the taper, distinctly textured with the twists on top. If you have a broader forehead, keep the taper lower and the twists fuller at the crown for proportional balance.
19. Loc Twist Starter Set on Short Hair (Men)
Men starting locs frequently use two-strand twists on short natural hair — 2–4 inches is the practical minimum for twists that will mature into individual locs rather than unraveling. Sections are intentionally small (pencil-width) and parts are precise. The visual difference between a fresh loc starter set and a polished mini twist set is the tightness at the root: loc twists are twisted all the way to the scalp, while styling twists have some length of natural hair at the base before the twist begins.
20. Two-Strand Twists with Bleached Tips (Men)
Bleaching only the bottom inch of each twist adds color contrast and a distinct visual break without committing to a full bleach job. On 4c hair, the tips are already the most fragile section — bleaching them increases porosity, which means the bleached ends absorb product faster and need additional moisture sealing with a light oil after every refresh. Choose a 20-volume developer rather than 30+ to limit damage at the ends.
21. Twisted Mohawk (Men)
Flat-twisting the sides of the head while leaving medium or jumbo free twists at the center creates a mohawk silhouette that’s fully protective and dramatically more interesting than a standard high-top fade. The flat twist panels lie smooth against the skull and connect cleanly to the standing center section. On natural hair without a hard shave on the sides, the transition between flat twists and free twists is most seamless when the parting is precise — use a rat-tail comb and take your time with the edge of the center section.
22. High Top Two-Strand Twists (Men)
Longer twists on top — 4–6 inches — gathered upward by their own volume and the natural spring of 4c curl create an organic high-top silhouette without any product stiffening. The key is even section sizes across the entire top section so no one area is heavier than another, which would cause the style to lean. A clean lineup at the forehead and temples and a low taper on the back of the neck frame the high-top shape without over-formalizing it. A mid taper fade on the sides keeps the sides clean without going all the way to skin.
23. Two-Strand Twist Bun (Men)
Gathering medium or jumbo twists into a bun at the crown is the most practical styling option for men with 5+ inches of natural hair. The bun keeps the style out of the way for active situations while maintaining the protective benefits of the twists underneath. If your twists don’t have enough length to reach the bun point easily, install with a slight forward lean during the twisting so the gathered section falls where you want it rather than fighting the natural growth direction.
Twist-Out and Post-Twist Styles
The two-strand twist is the single most common method for creating a twist-out — a style where the twists are left in for several hours or overnight, then carefully unraveled to release defined, separated coils. The size of the twist determines the curl size of the twist-out: mini twists produce tight, small coils; medium twists produce bouncy, medium spirals; jumbo twists produce loose, S-shaped waves. What many people don’t realize is that the condition of your ends at unravel time matters as much as the installation itself — dry, rough ends frizz immediately on contact with fingers.
24. Classic Medium Twist-Out on 4b Hair
Unraveling medium twists after they’ve dried fully — 8 hours air-dried or 4 hours under a hooded dryer — reveals defined coils with some separation that read as natural curls rather than the tightly structured twist shape. The unravel technique matters: separate each twist by pulling the two strands apart at the base and working downward, rather than at the ends and working upward (which causes frizz). A small amount of curl-defining cream on your fingertips before unraveling each twist helps the coils release cleanly.
25. Braid-and-Twist-Out Hybrid
Installing a mix of two-strand twists and three-strand braids in the same set before unraveling creates a curl pattern that varies across the head — the braids release into a different texture than the twists, and the combined result looks less uniform and more like natural curl variation. Section work can be alternated (every other section a braid, every other a twist) or zoned (braids at the crown, twists at the sides). This technique is especially useful for 3c–4a hair that produces very uniform twist-outs that can look artificial.
26. Mini Twist-Out on Natural Short Hair
On 2–3 inches of natural hair, unraveling mini twists produces tight, defined coils that add visible volume without length — the hair appears to double in fullness when the twist structure releases. Apply a very light curl refresher spray before unraveling to reduce friction and help the coils separate cleanly. This is one of the fastest ways to get a defined, product-free-looking coil style on short natural hair without using a diffuser or a specific curl-setting product during wash day.
27. Jumbo Twist-Out with Stretched Length
Unraveling jumbo twists on medium-length natural hair produces loose, flowing S-shaped waves rather than tight coils — the larger section size means the curl has more room to spread when the twist releases. The key to preventing a frizzy jumbo twist-out is separating the twists at the base with a single finger pull, never separating at the ends and working upward. For maximum stretch, install the jumbo twists while hair is slightly damp, then sit under a hooded dryer or use the African threading method on the set before taking it down.
28. Two-Tone Twist-Out with Color
Installing medium twists on hair that has a natural or color-treated two-tone effect — darker roots and lighter mid-lengths, for example — produces a twist-out where the color variation is amplified by the separation of the coils. The contrast between sections becomes visible in a way it isn’t when the hair is in its natural loose state. If your natural hair has any balayage, ombre, or highlighted sections, a medium-size two-strand twist-out is one of the most effective ways to show off the color dimension at home without any additional styling tools.
29. Retwist Refresh at Week Three
Re-twisting only the sections that have frizzy or loosened roots — rather than taking down the entire set — extends medium or mini twist wear time by an additional week without starting from scratch. Lightly mist each re-twist section, apply a small amount of fresh twisting cream to the root area, and re-twist just the top 1–2 inches before sealing with a satin bonnet overnight. This targeted approach is significantly less time-consuming than a full reinstall and produces a noticeably refreshed appearance by morning.
30. Two-Strand Twists into Bantu Knots
On the last day or two of a medium twist set, coiling each twist into a flat Bantu knot pinned against the scalp transforms the style completely and adds a day of wear without reinstalling. The Bantu knots can be worn as-is for an evening look, or unraveled the next morning for a voluminous, defined curl that blends the twist texture with the coil from the knot. This transition from a protective style into a distinct wear style is what makes the two-strand twist such a practical and long-lasting choice over a full protective install like braids or locs.
How to Do Two-Strand Twists: Step-by-Step
You need clean, moisturized hair, two products (a leave-in conditioner and a twisting cream or butter), a rat-tail comb, and sectioning clips. The entire process takes 1–3 hours depending on your hair’s density and the size of the twists you want.

Step 1: Start with Clean, Damp Hair
What you need: Freshly washed hair, a spray bottle of water.
How: Wash and condition, then allow hair to air dry until it’s roughly 80% dry — damp but not dripping. If your hair is fully dry, mist it evenly with a spray bottle until pliable.
Why: Damp hair provides the grip the twist needs to hold its shape as it dries. Fully wet hair causes shrinkage distortion as it dries, which can loosen the twist structure at the base. Fully dry hair has less elasticity and is more prone to breakage during manipulation.
Common mistake: Installing on soaking wet hair. The twist looks tight during installation but loosens significantly as the water evaporates, leaving gaps at the root within 24 hours.
Step 2: Section and Clip Your Hair
What you need: Rat-tail comb, sectioning clips.
How: Divide the entire head into four quadrants — two in the front and two in the back. Clip all but the section you’re working on out of the way. Within the working quadrant, part out individual sections using the rat-tail comb: square parts for a traditional look, triangular parts for more visual interest, or diamond parts if you’re starting locs.
Why: Working section-by-section prevents the product from drying out before you reach it and keeps your parting pattern consistent across the head.
Common mistake: Inconsistent section sizes. Larger sections near the crown and smaller sections near the hairline create an uneven finish where some twists hang heavy and others look sparse.
Step 3: Apply Leave-In and Twisting Cream
What you need: A lightweight leave-in conditioner, a twisting cream or twisting butter.
How: Smooth a small amount of leave-in through each section from root to tip, followed by a pea-to-dime-sized amount of twisting cream. The leave-in softens and detangles; the cream provides the slip and hold the twist needs. Work the cream through until every strand feels coated but not weighed down.
Why: The twisting cream is the structural element of the style. Too little and the twist unravels; too much and the hair looks greasy and takes longer to dry, increasing the risk of mildew odor during extended wear.
Common mistake: Using heavy butters or thick styling gels on fine-density hair. A lightweight cream works for all curl types; a thick butter is only necessary for very coarse, low-porosity 4c hair that repels lighter products.
Step 4: Divide and Twist from Root to Tip
What you need: Two fingers, consistent tension.
How: Split the section cleanly into two equal strands. Hold strand A in one hand and strand B in the other. Wrap strand A over strand B, then B over A, continuing with firm and consistent tension all the way to the tip. Keep both strands taut — a loose, floppy twist won’t hold.
Why: Equal strand sizes are what give the twist its uniform spiral appearance. If one strand is significantly thicker than the other, the twist will have an asymmetric, lumpy texture rather than a clean coil.
Common mistake: Letting tension loosen toward the ends. The bottom third of each twist is where unraveling starts — maintain the same twisting pressure from root all the way to the tip.
Step 5: Seal the Ends
What you need: Twisting cream or butter, optional flexi-rods or perm rods for curl ends.
How: Apply a small extra amount of twisting cream to the last inch of the twist and coil it tightly around your fingertip in a circular motion, letting the natural curl pattern grip and seal the end. For extra security — especially on looser patterns or damaged ends — wrap the last inch around a small rod before drying.
Why: Unsealed ends are the most common reason twists unravel within the first few days. The tip of the twist has no neighboring hair to grip; it requires either the natural curl pattern to fuse the strands together or a small amount of product to hold them in contact.
Stylist tip: If your ends keep slipping loose even with product, a tiny amount of flaxseed gel — about the size of a grain of rice — applied to the very tip and twirled around a finger before the product dries creates a natural cast that holds both strands together without stiffness or flaking.
Step 6: Dry Fully Before Styling
What you need: Time (8–12 hours air dry) or a hooded dryer (45–60 minutes on low–medium heat).
How: Leave the twists undisturbed until completely dry. Touching, stretching, or sleeping on damp twists is the primary cause of frizz and distorted twist shapes. If air-drying overnight, wrap with a satin bonnet or tie a satin scarf to keep the twists from rubbing against a cotton pillowcase.
Why: Twists hold their shape by drying into the coil structure established during installation. Disturbing them while they’re still damp interrupts this process and causes the outer strands to frizz permanently — that frizz doesn’t smooth back out once the hair is dry.
Face Shape and Twist Style Guidance

Two-strand twists themselves are a neutral protective style — the face shape guidance here is about section size, part direction, and how you wear the twists (up, down, or pulled to the side) rather than whether you can get twists in the first place.
| Face Shape | Best Twist Sizing | Styling Direction | Avoid |
|---|---|---|---|
| Oval | Any size | Wear down or in any updo — most proportions work naturally | Nothing specific; most sizes and styles flatter |
| Round | Mini or medium; avoid very large/heavy jumbo | High puff or pineapple bun adds vertical height; side part rather than center part | Full, wide low puffs that add horizontal volume; center parts without length to elongate |
| Square | Medium twists with soft, uneven parts | Face-framing twists at the temples; asymmetric updos soften a strong jaw | Very blunt, geometric square parts that echo angular jawline features |
| Heart | Medium to jumbo at chin-level length | Twists worn at chin length or longer add width at the jaw to balance a wider forehead | Very high updos that expose the forehead and emphasize the wider upper face |
| Oblong | Medium or jumbo to add horizontal volume | Side or middle parts with volume at the sides; flat twists at the crown reduce height | Very high top buns or pineapple puffs that further lengthen a naturally long face |
What to Tell Your Stylist
If you’re getting two-strand twists installed at a salon or by a natural hair specialist, use this language to make sure you leave with exactly the size and style you want.
For mini twists: “I’d like mini two-strand twists with 1/4-inch square parts, installed on my natural hair with no extensions. I want the ends sealed with a curl at the tip, not straight ends. I’m aiming to wear them for 2–3 weeks.”
For a loc starter set: “I want to start locs using two-strand twists. I’d like you to part in a diamond pattern and keep the sections about pencil-width. I want them twisted tight to the root, not with loose hair at the base.”
For a twist-out prep set: “I want medium two-strand twists on my natural hair — about 1/2-inch sections — that I can unravel tomorrow morning for a twist-out. Please use a product with a medium hold, nothing too stiff. I want the curl to stay soft when I take them down.”
Stylist tip from Danielle Okafor, licensed cosmetologist and THP contributor: Always bring a reference photo that shows the section size specifically, not just the overall look. A photo of loose twists hanging down tells your stylist nothing about the size of the parts underneath. Find a photo taken from above that shows the parting pattern — that’s the clearest communication tool you have.
Maintenance: How to Make Your Twists Last
| Twist Size | Expected Wear Time | Daily Routine | Key Risk |
|---|---|---|---|
| Mini (under 1/2 inch sections) | 2–3 weeks | Satin bonnet nightly; light moisturizing spray every 2–3 days | Dryness at mid-shaft; lint accumulation |
| Medium (1/2 to 3/4 inch) | 3–4 weeks | Satin bonnet or scarf; moisture mist every 2 days; scalp oil weekly | Root frizz after week 2; over-manipulation |
| Jumbo (1 inch+, natural hair) | 1–2 weeks | Handle gently; avoid heavy styling; keep ends sealed | Slippage at the base; ends unraveling |
| Havana/extension twists | 4–6 weeks | Satin bonnet; scalp oil every 5–7 days; no heavy product on extensions | Root tension buildup over 6+ weeks; scalp dryness |
The single most important maintenance habit is wearing a satin bonnet or sleeping on a satin pillowcase every night without exception. Cotton pillowcases absorb the moisture from the twists, dry out the hair, and create friction that frizzes the outer layer of each twist — this damage is cumulative and irreversible. A $10 satin bonnet extends the life of a two-strand twist set by at least a week.
For scalp moisture, apply a lightweight scalp oil (jojoba or sweet almond are ideal — not a heavy grease, which clogs follicles) to the parts every 5–7 days and massage gently without disturbing the twists. Avoid moisturizing sprays with heavy humectants like glycerin in humid climates — glycerin draws moisture from the air into the hair, which causes frizz and puffing of the twist structure rather than keeping it smooth.
Common Mistakes That Cause Twists to Unravel
Twisting on Wet Rather Than Damp Hair
Fully saturated hair swells during the twisting process and then contracts significantly as it dries, loosening the twist structure from the root. The visual result is a base that looks baggy and undefined after the first day. Install on hair that’s about 80% dry — if you press a twist between your fingers and feel moisture but don’t see it, that’s the right point.
Unequal Strand Tension from Root to Tip
The twist structure relies on continuous, consistent wrapping tension. Most people inadvertently loosen their grip in the bottom third of the twist because their arms are tired and they’re rushing to finish. The bottom third is exactly where unraveling starts — make a deliberate effort to keep the same grip pressure from the first wrap to the last.
Not Sealing the Ends
Unsealed tips are the fastest path to a set that looks ragged within three days. The tip of a two-strand twist has no structure to hold the two strands together except whatever product you applied during installation. On 4c hair, the tight curl pattern often fuses the ends naturally; on 3c–4b hair, you need a coiled-finger seal or a small rod. Don’t skip this step.
Using Glycerin-Heavy Products in Humid Weather
Glycerin is an excellent humectant in low-humidity conditions but actively works against defined twist styles when relative humidity rises above about 60%. The glycerin pulls moisture from the air directly into the hair shaft, causing the twist to expand and puff rather than drying into a tight coil. In summer months or humid climates, switch to a glycerin-free twisting cream or butter.
FAQ
How Long Do Two-Strand Twists Last on Natural Hair?
Mini twists on 4c hair last 2–3 weeks with proper nighttime care (satin bonnet, no cotton friction). Medium twists last 3–4 weeks on most 3c–4c patterns. Jumbo twists on natural hair typically last only 1–2 weeks before the root area loosens. Extension twists (Havana, Marley hair) last 4–6 weeks regardless of the underlying hair type because the extension fiber provides structure that natural hair doesn’t.
Can I Do Two-Strand Twists on 3c Hair?
Yes — but 3c hair requires a medium-hold gel at the roots to keep the base from loosening, since the curl pattern is less self-adhesive than tighter coils. Install on hair that’s just slightly damp and use a gel rather than a thick butter at the root. Expect 2–3 weeks maximum wear before frizz sets in on 3c; mini twists hold longer than medium or jumbo on this pattern.
What Is the Difference Between Two-Strand Twists and Flat Twists?
Standard two-strand twists hang free from the scalp as the hair exits its part. Flat twists follow the scalp like cornrows — the two strands are twisted while lying flat against the head and feeding in additional hair as you progress, similar to how a flat braid is done. Flat twists produce a smoother, more sculptural result close to the scalp; free-hanging two-strand twists produce the hanging coil rope look. Many styles combine both in the same installation.
Do Two-Strand Twists Help Hair Grow?
Two-strand twists don’t directly stimulate hair growth — that’s determined by scalp health and genetics. What they do is reduce breakage, which is the primary reason natural hair appears not to grow. By keeping the ends tucked away from daily friction, manipulation, and environmental dryness, protective styles like two-strand twists allow hair to retain length that would otherwise be lost to breakage. Length retention, not accelerated growth, is the real benefit.
How Do I Keep My Two-Strand Twists from Frizzing?
The main frizz triggers are cotton pillowcases (always use satin), glycerin-based products in humid weather (switch to glycerin-free in summer), and touching or manipulating the twists while they’re still damp after installation. Once frizz appears on the outer layer of a twist, it cannot be reversed — running fingers over the twist or applying product to it only makes the frizz worse. The strategy is prevention, not correction.
Can I Wash My Hair While Wearing Two-Strand Twists?
Yes — co-washing (conditioner-only washing) while twists are in place is the standard maintenance approach for keeping the scalp clean during extended wear. Focus the product on the scalp, rinse gently, and squeeze water out of the length rather than rubbing. Re-twist any sections that loosen during washing before the hair dries. Avoid fully saturating the entire set more than once every 7–10 days, as repeated wet-dry cycles loosen the twist structure at the root over time.
Are Two-Strand Twists Suitable for Men with Short Hair?
Two-strand twists work on men’s natural hair from about 2 inches in length — enough hair to grab, divide, and twist from root to tip. Below 2 inches the sections are too short for the twist to hold without immediately unraveling. Mini twists with a high or mid fade are the most practical men’s natural style at shorter lengths; at 4–6 inches medium or jumbo twists give more shape options including high-top and bun styles.
What Products Are Best for Two-Strand Twists?
A two-product system works for most hair types: a lightweight leave-in conditioner as a base layer, followed by a twisting cream or twisting butter for hold and slip. On fine or 3c hair, substitute a medium-hold styling gel for the twisting butter to prevent the style from weighing down and slipping. Heavy oils like castor oil are best applied to the scalp during maintenance rather than in the twist product stack — they create too much weight and make sections difficult to separate cleanly.
Two-strand twist hairstyles remain one of the most adaptable protective styles in natural hair because the core technique scales across every curl type, length, and context — from a 2-inch starter loc set to a shoulder-length gallery of jumbo twists with extensions. Getting the installation right comes down to three non-negotiables: damp (not wet) hair, consistent tension from root to tip, and sealed ends. Everything else — size, part pattern, styling choices, accessorizing — is personal preference. Bring a reference photo that shows the parting pattern from above, use the salon language in this guide, and your stylist will know exactly what you want.
Hair results vary based on your natural hair type, texture, density, and condition. Always consult with a licensed hairstylist before making significant changes, especially with chemical treatments or dramatic length changes. Photos may show styled results that require professional tools and products to replicate.