One has a clamp and one does not, and that single detail decides curl shape, styling time, and how often you burn your fingers.
A curling iron holds the ends of your hair in a spring-loaded clamp and winds the section up the barrel, which produces even, matched curls with a defined starting point. A wand is a bare rod you wrap hair around by hand, so there is no clamp mark, the curl is looser at the root, and the whole thing looks more like hair that dried that way. Neither is better across the board; they suit different results, different lengths, and different levels of confidence with a hot tool.
This guide compares them on curl shape, barrel size, hair length, learning curve, and safety, then gives a clear recommendation for the common scenarios and one for anyone buying a single tool to cover everything.
The Clamp Is the Real Difference
On an iron, the clamp grips the last inch or two of the section, and you rotate the barrel so the hair winds around it from the ends toward the scalp. That grip is what makes an iron easy: your free hand does nothing except guide, and the tool holds the tension for you. It also means every curl starts at the same point on the strand, which is why iron curls look matched.
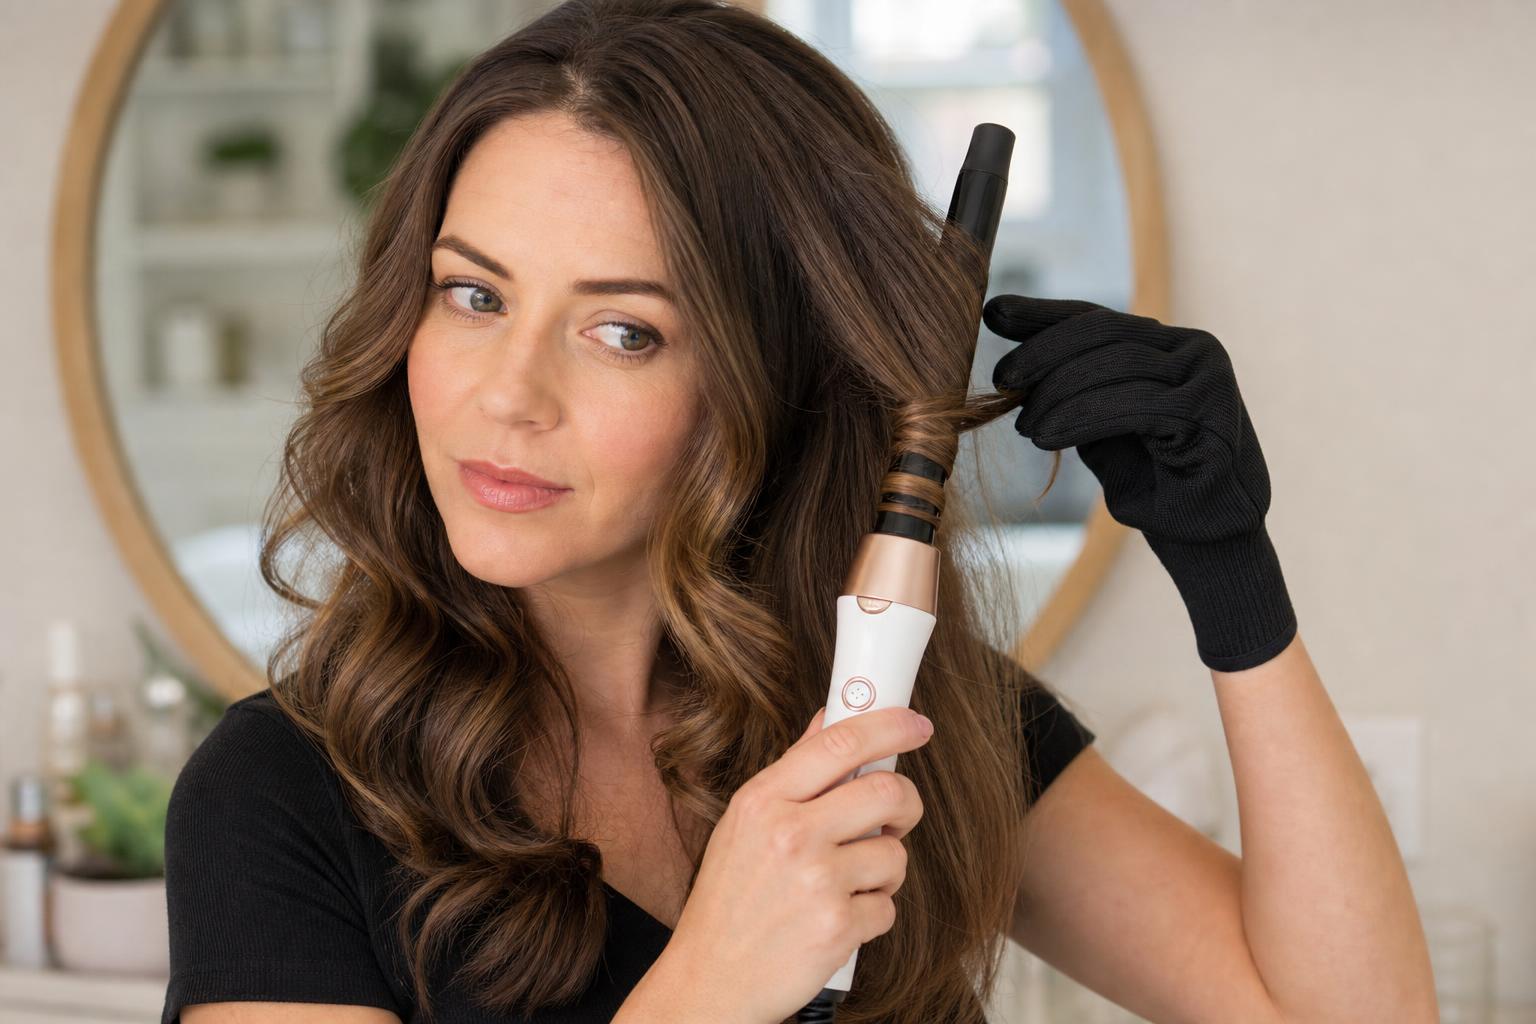
A wand has no grip, so you hold the end of the section between your fingers and wrap it around the barrel yourself, usually with a heat-resistant glove on. Because you control where the wrap starts and how tightly it spirals, wand curls vary slightly from one to the next, which is exactly why they read as more relaxed. The trade is that your hand is close to a hot metal rod for eight to ten seconds per section.
The clamp also leaves a mark. On fine or freshly straightened hair a clamp can press a faint crease where it gripped, most visible when the curl is brushed out. Modern irons with rounded, spring-tension clamps have reduced this considerably, and moving the clamp slightly during the wind removes it entirely, but the risk exists on an iron and does not on a wand.
Wand and Iron Compared
The table below is the practical summary. Read the last two rows first if you are choosing between them for the first time, because learning curve and burn risk are what most people actually end up caring about after a month of ownership.
| Feature | Curling Iron (Clamped) | Curling Wand (Clampless) |
|---|---|---|
| Curl shape | Uniform, defined, ringlet-like with a clear end curl | Loose, slightly irregular, looser at the root and tighter at the ends |
| Barrel shape | Straight, one diameter along its length | Straight or tapered, so curl size varies down the section |
| Curl direction | Set by the clamp position, easy to keep consistent | Fully up to you, easy to alternate for a lived-in finish |
| Speed | Slower per section, faster to learn | Faster per section once practiced, slow at first |
| Crease risk | Possible where the clamp grips, mostly on fine hair | None |
| Learning curve | Gentle, usable on the first try | Steeper, expect three or four sessions to get even |
| Burn risk | Low, the clamp keeps fingers away from the barrel | Higher, a heat-resistant glove is genuinely necessary |
Barrel Size Decides Curl Size More Than the Tool Does
People argue about wands versus irons and then buy the wrong diameter, which matters far more. A smaller barrel wraps hair more times per section and produces a tighter spiral; a larger one produces a bend that behaves like a wave. Length changes the maths too, since long hair wrapped on a narrow barrel makes a corkscrew, while short hair on a wide barrel barely holds a shape at all.
| Barrel Diameter | Curl It Produces | Suits This Length | Watch Out For |
|---|---|---|---|
| 0.75 inch | Tight ringlets and spirals | Pixie to chin length | Looks dated on long hair unless brushed out hard |
| 1 inch | Classic defined curls that soften as they drop | Chin to collarbone | The most versatile size, and the safest single purchase |
| 1.25 inch | Loose curls with visible movement | Collarbone to mid-back | Drops fast on fine hair without hold product |
| 1.5 inch | Blowout-style waves rather than curls | Shoulder length and longer | Barely registers on hair above the chin |
| Tapered wand, 1.25 to 0.75 | Wide bend at the top narrowing to a tighter end | Collarbone and longer | Hardest to keep even, and the most natural-looking result |
Section thickness works alongside the barrel. A 1-inch section on a 1-inch barrel gives the cleanest curl, and doubling the section thickness roughly halves how well the curl holds, because the strands on the outside of the wrap never reach a setting temperature.
Which One Suits Your Hair and Your Patience
The right answer depends on three things: what you want the finished hair to look like, how much practice you are willing to put in, and how long your hair is. Work through the scenarios below and one will usually match closely.
Beginners Get Usable Results Faster From a Clamped Iron
If you have never curled your own hair, buy the iron. The clamp handles tension so your only job is rotating the tool, and a passable curl happens on the first attempt rather than the fourth. Learning on a wand means several sessions of uneven curls and at least one burn, which is a poor introduction to a habit you are trying to build.
Long or Thick Hair Curls Faster on a Wand
Past mid-back length, an iron becomes slow, because winding a long section up a clamped barrel takes time and the ends often slip free. Wrapping by hand on a wand is quicker and gives you room to take larger sections. Anyone with dense hair below the shoulder blades usually finds the wand cuts their styling time by a third once the technique clicks.
Fine Hair Holds an Iron Curl Longer
Fine strands drop a curl quickly, and the tighter, fully wound spiral an iron produces gives you more curl to lose before the shape disappears. Set each curl by pinning it to the head with a clip while it cools, then release once every section is done. Curls set cool rather than hot, which is the same reason a cool shot matters when you do a round brush blowout at home.
Formal Styles Need Matched Curls, So Reach for the Iron
Anything that gets pinned up, braided into, or photographed close-up benefits from curls that are the same size and start at the same point. A wand’s slight irregularity is a feature on a Tuesday and a problem in an updo, where mismatched spirals show as lumps rather than movement.
What the Marketing Gets Wrong
Myth: A Wand Is Less Damaging Than an Iron
Reality: The heat source is identical, and damage tracks temperature and contact time, not whether a clamp is present. The one genuine difference is that a clamp holds hair against the barrel under pressure, which conducts heat slightly more efficiently. Set either tool to the same temperature and hold for the same duration and the outcome for your hair is broadly the same.
Myth: Higher Heat Makes Curls Last Longer
Reality: Hold time and cooling do far more for longevity than temperature. Most hair sets fine between 300 and 375 degrees Fahrenheit, and fine or colored hair should stay at the lower end. The same temperature logic that applies to a flat iron setting applies here, and the highest setting on the dial is rarely the right one.
Myth: You Need a Ceramic, Tourmaline, Titanium, and Ionic Barrel
Reality: Ceramic barrels heat evenly and that genuinely matters. Beyond that, the stacked coating claims on the box outrun the evidence. A well-made ceramic tool with an accurate, adjustable temperature dial outperforms a cheap one with four buzzwords printed on the handle.
Myth: Curling Damp Hair Speeds Things Up
Reality: Water inside the shaft turns to steam against a 350-degree barrel, and that is how you get the audible sizzle and hollow, brittle mid-lengths. Hair must be completely dry before either tool touches it. If you are pressed for time, an overnight heatless curl set gives you a wave without the wait or the heat.
Heat, Product, and Making Curls Last
Whichever tool you choose, a heat protectant is not optional at these temperatures, and it needs to go on before the hair is dry rather than sprayed onto a finished style. Applying it properly is the difference between protection and a light mist that mostly lands on your bathroom mirror, and the right application sequence is worth getting right once.
Hold each section for eight to ten seconds, not twenty. Longer contact does not produce a stronger curl past the point where the hair reaches temperature; it just removes moisture. Release the curl into your palm rather than letting it drop, hold it coiled for a few seconds while it cools, and only then let it fall.
Stylist tip: Alternate the direction of every second curl, winding one section away from your face and the next toward it. Curls all wound the same way stack into a single wave and look set; alternating them keeps the shape looking like it happened on its own, and it is the fastest upgrade available to anyone whose curls come out looking too neat.
If You Are Only Buying One
Buy a 1-inch clamped iron with an adjustable temperature dial and a ceramic barrel. It covers the widest range of lengths, it is the easier tool to learn, and a clamped iron can be used as a wand by simply not engaging the clamp, whereas a wand can never be used as an iron. That asymmetry settles the question for most people.
Go to a wand instead only if your hair is past mid-back, you specifically want relaxed beachy waves rather than defined curls, and you are comfortable working with a heat-resistant glove. Choose a tapered barrel in that case, since it is the shape that produces the least uniform and most natural-looking result.
If you already own an iron and want more variety, an interchangeable-barrel set costs less than a second full tool and gives you three or four diameters. Check that the base has a proper temperature dial rather than preset heat levels, because presets are usually calibrated for thick, healthy hair and run hotter than fine or colored hair should ever see.
FAQ
Can I Use a Curling Iron Without the Clamp?
Yes, and it is a good way to try wand technique before buying one. Hold the clamp open with your thumb or leave it closed against the barrel and wrap hair around the outside as you would on a wand. The only limitation is that the clamp adds bulk to the barrel profile, so the curl is slightly less clean than a true wand gives.
Why Do My Curls Fall Out Within an Hour?
The most common reason is releasing the curl before it cools, since hair holds whatever shape it is in as it drops to room temperature. Pin each curl to your head with a clip and let the whole head cool for ten minutes before releasing. Second most common is sections that are too thick for the barrel, which leaves the outer strands underheated.
What Temperature Should I Use?
Roughly 300 to 325 degrees Fahrenheit for fine or color-treated hair, 325 to 350 for medium, and up to 375 for coarse or resistant hair. Start lower than you think and go up only if the curl will not hold after a proper cool-down. Frequent styling at 400 degrees and above is where visible damage accumulates.
Is a Tapered Wand Harder to Use?
Somewhat, because the diameter changes as you wrap, so where you place the section on the barrel changes the curl you get. That variability is the point, since it produces curls that do not match. Start every wrap at the same place on the barrel until you can control it, then vary deliberately.
Do I Need a Heat-Resistant Glove?
For a wand, yes, and skipping it is how people give up on wands. For a clamped iron it is optional, though useful when you get near the roots. The cheap fabric ones that come bundled with tools work perfectly well and cost nothing to replace.
Can I Curl Hair That Is Already Curly?
You can, and it is a common way to smooth out an uneven natural pattern for a polished look. Straighten lightly first or the tool will fight the existing curl and produce two competing shapes. Keep the temperature moderate, since applying high heat to curls repeatedly can loosen the natural pattern permanently.
The curling wand vs curling iron question comes down to what you want the result to look like and how much practice you are prepared to invest, and for most people the clamped iron in a 1-inch barrel is the more useful first purchase. Buy the diameter that matches your length rather than the one that matches the photo you liked, keep the temperature lower than the dial allows, and let every curl cool before you release it. The rest of your styling tool kit matters far less than those three habits.
Hair results vary based on your natural hair type, texture, density, and condition. Always consult with a licensed hairstylist before making significant changes, especially with chemical treatments or dramatic length changes. Photos may show styled results that require professional tools and products to replicate.