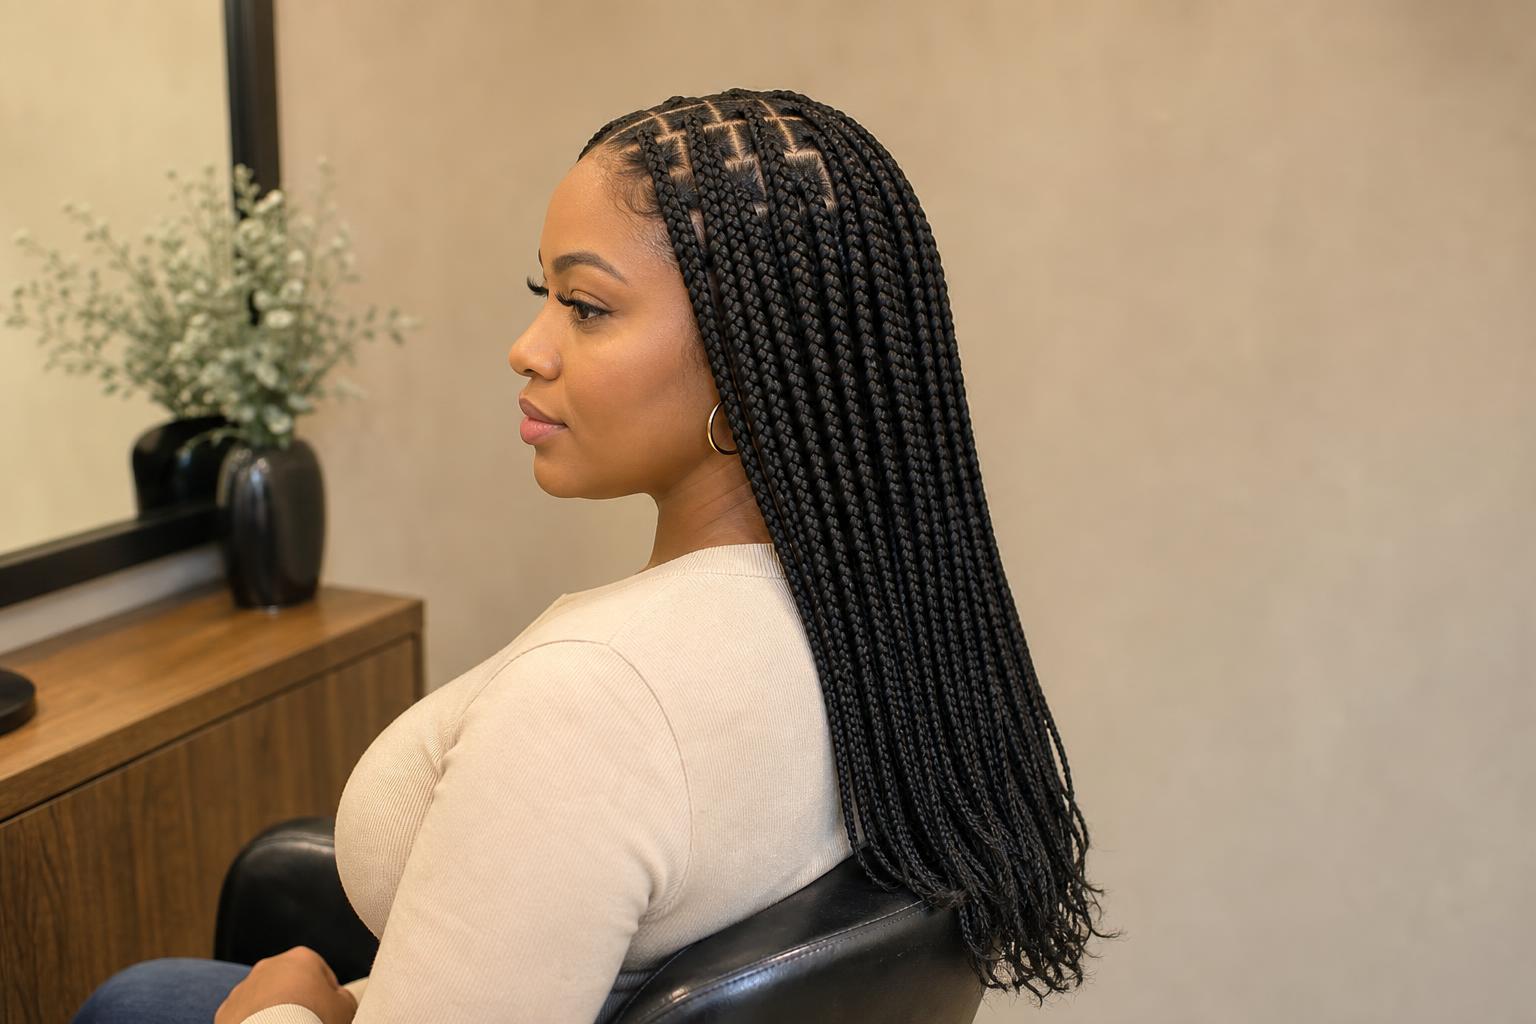
Knotless braids take away the knot at the root, but they do not take away the weight hanging from it.
The feed-in start is a genuine improvement: your braider begins with your own hair and adds extension in small increments, so nothing clamps onto the root the way a traditional box braid knot does. What it does not change is how much hair ends up hanging from each section by the time the braid reaches your waist. Comfort at hour one and safety at week six are two different measurements, and the second one is the one almost nobody talks about.
These 26 styles are sorted by exactly that: how much load each one places on your scalp, running from the lightest shoulder-length sets through to the waist and hip lengths that carry the most. Pack counts, install hours, safe wear windows and the tension checks to run before you leave the chair all follow the gallery.
| Factor | Details |
|---|---|
| What defines it | A feed-in start in square parts, with no knot at the base |
| Chair time | 4 to 9 hours depending on part size and length |
| Wear time | 4 to 6 weeks for light sets, 4 weeks maximum for heavy ones |
| Best for | Anyone wanting a protective style with less root tension |
| Avoid if | Your edges are already thin or you have active scalp irritation |
| Hair needed | 4 to 10 packs of braiding hair, depending on part size and length |
Knotless Removes the Knot, Not the Load
In a traditional box braid, the extension is looped around your natural hair in a knot and the full weight of that extension lands on the root from the first second. In a knotless braid, your braider starts with your own hair and feeds extension in gradually over the first inch or so, which spreads the same weight down the length instead of concentrating it at one point. That difference is real and it is why knotless feels dramatically more comfortable on day one.
The gap in the standard advice is what happens afterward. Dermatologists have documented traction alopecia caused by the weight of hair alone, with no tight styling and no tension at install involved at all, in a case where the pattern followed the parts down the middle of the scalp rather than the hairline, as described in a case report on non-marginal traction alopecia from excessively long hair. Weight alone is enough. A knotless set that is long, small-parted and worn for eight weeks can carry more total load than a shorter traditional set worn for four.
There is a second, quieter problem. Because knotless braids genuinely feel better, people leave them in longer, and the clinical picture of traction alopecia is that it is reversible early and scarring once the pulling has gone on long enough, as summarized in the StatPearls overview of traction alopecia. Comfort is not the same signal as safety, which is the single most useful thing to know before booking a long set.
| Feature | Knotless Box Braids | Traditional Box Braids |
|---|---|---|
| Start of the braid | Your own hair, extension fed in gradually | A knot of extension looped at the root |
| Root tension | Spread down the first inch | Concentrated at one point |
| Total weight carried | The same for the same length and part size | The same for the same length and part size |
| Install time | 4 to 9 hours | 3 to 6 hours |
| How it lies | Flat at the scalp, easy to style in any direction | Raised at the base, limited movement at the root |
| Slipping at the root | More likely, since nothing anchors the extension | Rare; the knot holds |
The Lightest Knotless Box Braids
Everything in this first group stops at the collarbone or above and uses medium to jumbo parts, which keeps the number of braids low and the total hanging weight modest. These are the sets to choose if your edges have thinned before, if this is your first protective style, or if you want something you can genuinely wear for six weeks without worrying. They also install fastest, often in under five hours.
1. Shoulder-Length Jumbo Knotless Braids
Parts roughly an inch and a half square produce about 40 to 60 braids total, which is the lowest count you will find in a full set. Fewer, thicker braids means less total extension hair and a noticeably lighter feel by the end of the first week. Four packs usually covers it.
2. Bob-Length Knotless Braids
Cut to just below the jaw and worn with a blunt perimeter, this version carries almost no load at all and moves like a real bob rather than a braided style. Round and fuller faces do well with the length set just past the jaw rather than at it. Seal the ends in hot water so the blunt line stays crisp.
3. Chin-Grazing Knotless Bob with a Middle Part
A center part through a short knotless set puts the visual weight evenly on both sides and keeps the whole style off the shoulders. Because there is so little length, the feed-in section at the root is a larger proportion of each braid, which means your own hair is doing more of the work and the extension less.
4. Large Knotless Braids to the Collarbone
The most practical everyday set on this list. Inch-wide parts and collarbone length give you a style you can tie back without a headache while keeping the braid count under 70. Ask for the parts to be squared rather than rushed, since large parts make any sloppiness in the grid obvious.
5. Shoulder-Length Knotless with Curly Ends
Leaving the last few inches unbraided and curled adds movement without adding much weight, because curly ends take up length rather than hanging straight down. Water-wave or loose-curl hair gives the softest result on a short set. Our gallery of knotless braids with curly ends covers which curl patterns hold up longest.
6. Half-Up Bun on Shoulder-Length Knotless
Gathering the top half into a loose bun lifts a portion of the weight off the nape and redistributes it across the crown, which is genuinely useful on a long day. Keep the bun loose enough to slide a finger under the gathering point.
7. Triangle-Part Knotless at Shoulder Length
Swapping square parts for triangles changes how the braids fall, letting them lie flatter against the head with fewer visible scalp lines. Thin or uneven density at the crown benefits most, since triangle parting hides gaps better than a square grid. Technically this stops being a box braid, so name the parting you want when you book.
8. Honey Blonde Knotless Bob
Pre-colored braiding hair in a honey tone against deeper natural roots keeps the contrast soft rather than striped, and at bob length the color is close enough to your face to brighten it. Blonde synthetic hair tends to be slightly coarser than black, so ask your braider to condition it before install.
Mid-Weight Knotless Box Braids
Mid-back length with medium parts is where most people land, and it is also where load starts to matter. A set here carries roughly double what a shoulder-length set does, and the four-week to six-week window becomes a real limit rather than a suggestion. Everything in this group is worth pairing with a scalp-check habit.
9. Medium Knotless Braids to Mid-Back
The benchmark version of this style: three-quarter-inch parts, around 100 braids, falling to the middle of the back. Six to seven packs and roughly six hours of chair time. Length-specific variations are covered in depth in our medium knotless braid gallery.
10. Knotless Braids with a Deep Side Part
Shifting the part well off center sends more braids to one side, which is flattering but doubles the weight on that half of your scalp. Alternate which side the part falls on between installs rather than keeping the same one for a year. Square faces get the most from the diagonal line a deep part creates.
11. Mid-Back Knotless with Wavy Ends
Unbraided wavy ends at mid-back length give the softness of a boho style without the loose pieces that tangle all the way up. The wave takes up about four inches of hanging length, so the finished set feels shorter than it measures. Dip the ends in hot water only to the point where the braid stops.
12. Burgundy Ombre Knotless Braids
Natural black at the root melting into burgundy from the mid-length down keeps color away from your scalp entirely, which is the practical advantage of coloring extension rather than your own hair. Deeper red tones hold their intensity longer in synthetic hair than brighter ones.
13. Knotless Braids with Two Feed-In Rows at the Front
Two cornrowed rows framing the face, with the rest of the head in individual braids, gives a styled front without the tension a full braided-back pattern puts on the hairline. The rows should start behind your baby hairs, never through them. This front treatment is borrowed from Ghana braid parting and works well on a knotless base.
14. Mid-Back Knotless in a High Ponytail
Worn up, the entire set’s weight concentrates at one gathering point, which is the most tension-heavy thing you can do with braids. Keep it to occasional wear rather than a daily habit, and use a large fabric-covered elastic rather than a small one. A mid-height gather is safer than a very high one.
15. Caramel Highlighted Knotless Braids
Alternating caramel and natural-black braids across the head creates dimension that a single-color set cannot, and it looks especially good in an updo where the two tones cross. Mix the colored braids in at random rather than in blocks so the effect stays soft.
16. Knotless Braids with Gold Cuffs at the Mid-Length
Placing cuffs halfway down rather than at the ends adds visual interest without adding weight where it does the most damage. Metal cuffs are heavier than they look, so keep the count under fifteen across the whole head. Slide them off before washing to avoid trapping water against the braid.
17. Diamond-Part Knotless Braids
A diamond grid across the crown turns the parting itself into the design, which means the style still looks finished when worn simply down. Because diamond parts distribute pull in four directions rather than two, they can be gentler on a scalp that has felt sore in a square grid before.
18. Knotless Braids with Boho Curls Left Out
Loose curly human hair left hanging alongside each braid softens the whole set, at the cost of daily detangling on those loose pieces. The curly hair adds real weight, so drop your length by a few inches compared to a plain set. The full technique is covered in our guide to boho knotless braids.
The Heaviest Knotless Box Braids
Waist length, hip length, and anything with very small parts all belong here. These sets look striking and they are the most demanding thing you can ask your scalp to carry, because small parts multiply the braid count while long lengths multiply the hair hanging from each one. Four weeks is the honest ceiling on most of them, and a scalp check every few days is not optional.
19. Waist-Length Medium Knotless Braids
Medium parts at waist length is the most commonly requested heavy set, needing eight to nine packs and seven or more hours. The braids are long enough to sit on when you lean back, which pulls the nape section constantly. Gather them forward over one shoulder when seated for long periods.
20. Small Knotless Braids to Mid-Back
Half-inch parts push the braid count past 180, and although each individual braid is light, the combined total is high and the install runs eight hours or more. What you get for it is the most natural movement of any version, close to loose hair. Our gallery of small box braids covers the same part size with the traditional knot.
21. Hip-Length Knotless Braids
The longest length most braiders will install without a conversation about weight. Nine to ten packs, and the braids will reach past where you can comfortably reach to moisturize your own scalp.
22. Micro Knotless Braids at Bra-Strap Length
Quarter-inch parts and 250 or more braids produce the finest, most hair-like result available, and the install can run twelve hours across two days. The takedown alone is a four-hour job, which is worth knowing before you commit. Shorten the length to compensate for the count.
23. Waist-Length Knotless with Curled Ends
Curling the last six inches shortens the visual length while keeping the drama, which makes this slightly kinder than a straight waist-length set. Rod-set the ends in hot water rather than using a flat iron, since synthetic hair melts at temperatures your own hair tolerates.
24. Knotless Braids in a Full Updo at Waist Length
Taking a long set entirely up into a crown wrap or bun removes the drag on the nape but transfers everything to the anchor points holding it. Use several pins spread across the head rather than a single elastic, and take it down at the end of the day rather than sleeping in it. Striking for an event, difficult to justify as a default.
25. Tailbone-Length Knotless Braids
Beyond hip length the set becomes genuinely heavy enough to affect how you hold your head, and most braiders will suggest a shorter version. If you want this length, go up a part size to keep the braid count down.
26. Small Knotless Braids with Beads at the Ends
Beads concentrate weight at the very end of each braid, which is the position with the most leverage on the root. Limit beads to a portion of the set rather than every braid, and choose plastic over glass or metal. The sound and movement are the appeal, and half a head of beaded braids gives you both at half the load.
Part Size, Packs and Chair Time
Three numbers decide almost everything about a knotless set: how wide the parts are, how long the braids run, and how many packs that combination needs. Booking with those three settled saves the conversation happening in the chair, when the braider has already started.
| Part Size | Braid Count | Packs at Mid-Back | Chair Time | Safe Wear |
|---|---|---|---|---|
| Jumbo, 1.5 in | 40 to 60 | 4 to 5 | 4 to 5 hrs | 5 to 6 weeks |
| Large, 1 in | 60 to 80 | 5 to 6 | 5 to 6 hrs | 5 to 6 weeks |
| Medium, 0.75 in | 90 to 120 | 6 to 7 | 6 to 7 hrs | 4 to 5 weeks |
| Small, 0.5 in | 160 to 200 | 7 to 8 | 8 to 10 hrs | 4 weeks |
| Micro, 0.25 in | 250 and up | 8 to 10 | 12 hrs or two days | 4 weeks |
Add one to two packs for every step in length beyond mid-back, and subtract one for shoulder length or shorter.
How to Check the Tension Before You Leave the Chair
Tension problems are easiest to fix in the first hour and nearly impossible afterward, so the checks below belong in the appointment rather than at home that evening. None of them are rude to ask for. A good braider expects them.
Raise your eyebrows. If your forehead skin moves freely and the braids near your hairline do not tug, the front is fine. If raising your brows pulls at the roots or you can see small bumps forming around the braid bases, that section is too tight and needs to come out now. Small white bumps at the base of a braid are a stress response from the follicle, not a normal part of the process.
Then tilt your head forward and back. Real soreness at the nape during install predicts soreness for the next two weeks, because that section carries the most drag when you sleep. Finally, run a finger along your part lines: you should feel your own scalp and hair at the base of each braid, not a hard ridge of extension.
Stylist tip: Ask your braider to leave your first row entirely out of the extensions and braid it with your own hair only. That row takes the most strain from every movement of your head, and removing the extension from it costs you almost nothing visually while noticeably reducing the pull on your hairline. Our guide to baby hairs and edge health explains why that front row matters more than the rest.
What to Tell Your Braider
Book with numbers rather than a photo. A request that removes all ambiguity: “Medium parts, about three-quarter inch, knotless, finishing at mid-back. Square parts. Please leave the front row without extension and no gel on my edges. I would rather have it looser than neat if there is a choice.”
That last sentence matters more than the rest. Many braiders pull firmly because a tight install looks cleaner in photos and lasts a week longer, and they will happily work looser if you say so at the start. Saying it after two rows are done means undoing work, which nobody enjoys.
Stylist tip: Wash and deep condition two days before your appointment, not the night before. Braiding hair that is still slightly damp at the root traps moisture inside the braid for days and is the most common cause of the musty smell people blame on the extension hair. Two days gives the scalp time to dry fully and return a little of its natural oil.
Maintenance and When to Take Them Down
Knotless braids need less daily work than almost any other style, which is precisely why they get left in too long. Set a takedown date when you book the install and put it in your calendar, because the decision made six weeks later when your hair still looks fine is not a reliable one.
| Task | How Often | What to Use |
|---|---|---|
| Moisturize the scalp | Every 2 to 3 days | A light oil in a nozzle bottle, applied to the part lines |
| Wash | Every 2 weeks | Diluted clarifying shampoo, worked along the parts only |
| Night protection | Every night | A satin scarf or bonnet large enough not to compress |
| Scalp check | Weekly | A mirror; look for redness, bumps or widening part lines |
| Rest between sets | 1 to 2 weeks minimum | Loose hair, a protein treatment, no tension styles |
When Knotless Box Braids Are Not the Right Choice
- Your edges are already thin or receding. Any hanging weight makes an existing problem worse, even without a knot. Wigs and low-tension styles let the hairline recover, and a dermatologist visit is worth booking before another install.
- You have an itchy, flaking or sore scalp right now. Braids cover the problem for a month and make it harder to treat. Clear the scalp first and book afterward.
- You want a style for longer than six weeks. Knotless sets slip at the root as your own hair grows, and the braid loosens where the extension was fed in. Past six weeks you are wearing a style that is no longer secured at the base.
- You cannot sit for the install. Micro and small parts run eight to twelve hours. Large parts at shoulder length get you a similar look in a third of the time.
- You have very fine or chemically relaxed hair. The feed-in start relies on your own strands to anchor the first inch, and fine or weakened hair cannot carry the extension without breaking. Go larger on the parts and shorter on the length.
FAQ
Are Knotless Braids Actually Better for Your Hair?
At the root, yes: the feed-in start removes the concentrated pull a knot creates, and that is a real reduction in tension at the follicle. What it does not reduce is the weight of the extension hanging below, which is its own source of strain. The honest summary is that knotless braids are gentler than traditional box braids at the same length and part size, but a long, small-parted knotless set can still cause damage.
How Long Do Knotless Box Braids Last?
Four to six weeks, with lighter sets at the top of that range and heavy ones at the bottom. The limiting factor is usually root slippage rather than appearance, since the extension is not knotted in and works loose as your natural hair grows. Anything beyond six weeks means the new growth at the base is unprotected and matting inside the braid.
How Many Packs of Hair Do I Need?
Four to five packs for shoulder length with large parts, six to seven for medium parts at mid-back, and eight to ten for waist length or very small parts. Buy one extra pack beyond your estimate, since running short mid-install means either a smaller set than planned or a trip to the shop. Unused packs keep indefinitely.
Why Do Knotless Braids Slip Out at the Root?
Because nothing anchors the extension except the braid pattern itself, and that grip weakens as your own hair grows past the feed-in point. Very fine, silky or freshly washed hair slips fastest, which is one reason braiders prefer to work on hair washed two days earlier. Some braiders use a light mousse on the first inch to add grip, which helps without adding tension.
Can I Wash Knotless Box Braids?
Yes, roughly every two weeks. Dilute a clarifying shampoo in a bottle of water, apply it directly along the part lines rather than lathering the braids, and rinse thoroughly. The part that matters most is drying: sit under a hood dryer or use a blow dryer on cool, because a braid that stays damp at the root for two days develops odor and softens the hold.
Do Knotless Braids Hurt Less Than Box Braids?
Most people find them noticeably more comfortable on the first night, which is the clearest practical difference between the two. Be careful how you use that information, though: comfort tempts people into longer lengths and longer wear, and both of those add back the strain the knotless method removed. Treat the comfort as permission to sleep well, not as permission to keep them in for two months.
What Is the Difference Between Knotless Braids and Box Braids?
Box braids describe the square parting; knotless describes how the extension is attached. A knotless box braid has both: square parts and a feed-in start. You can also get knotless braids in triangle or diamond parts, at which point they are no longer box braids, which is why the two terms cause so much confusion when booking. Our wider collection of braided styles covers the other parting patterns.
Knotless box braids are the gentler install, and choosing a length and part size your scalp can carry for four to six weeks is what turns that into an actual benefit. Decide the three numbers before you book, ask for the front row without extension, and put the takedown date in your calendar on the same day you make the appointment.
Hair results vary based on your natural hair type, texture, density, and condition. Always consult with a licensed hairstylist before making significant changes, especially with chemical treatments or dramatic length changes. Photos may show styled results that require professional tools and products to replicate.