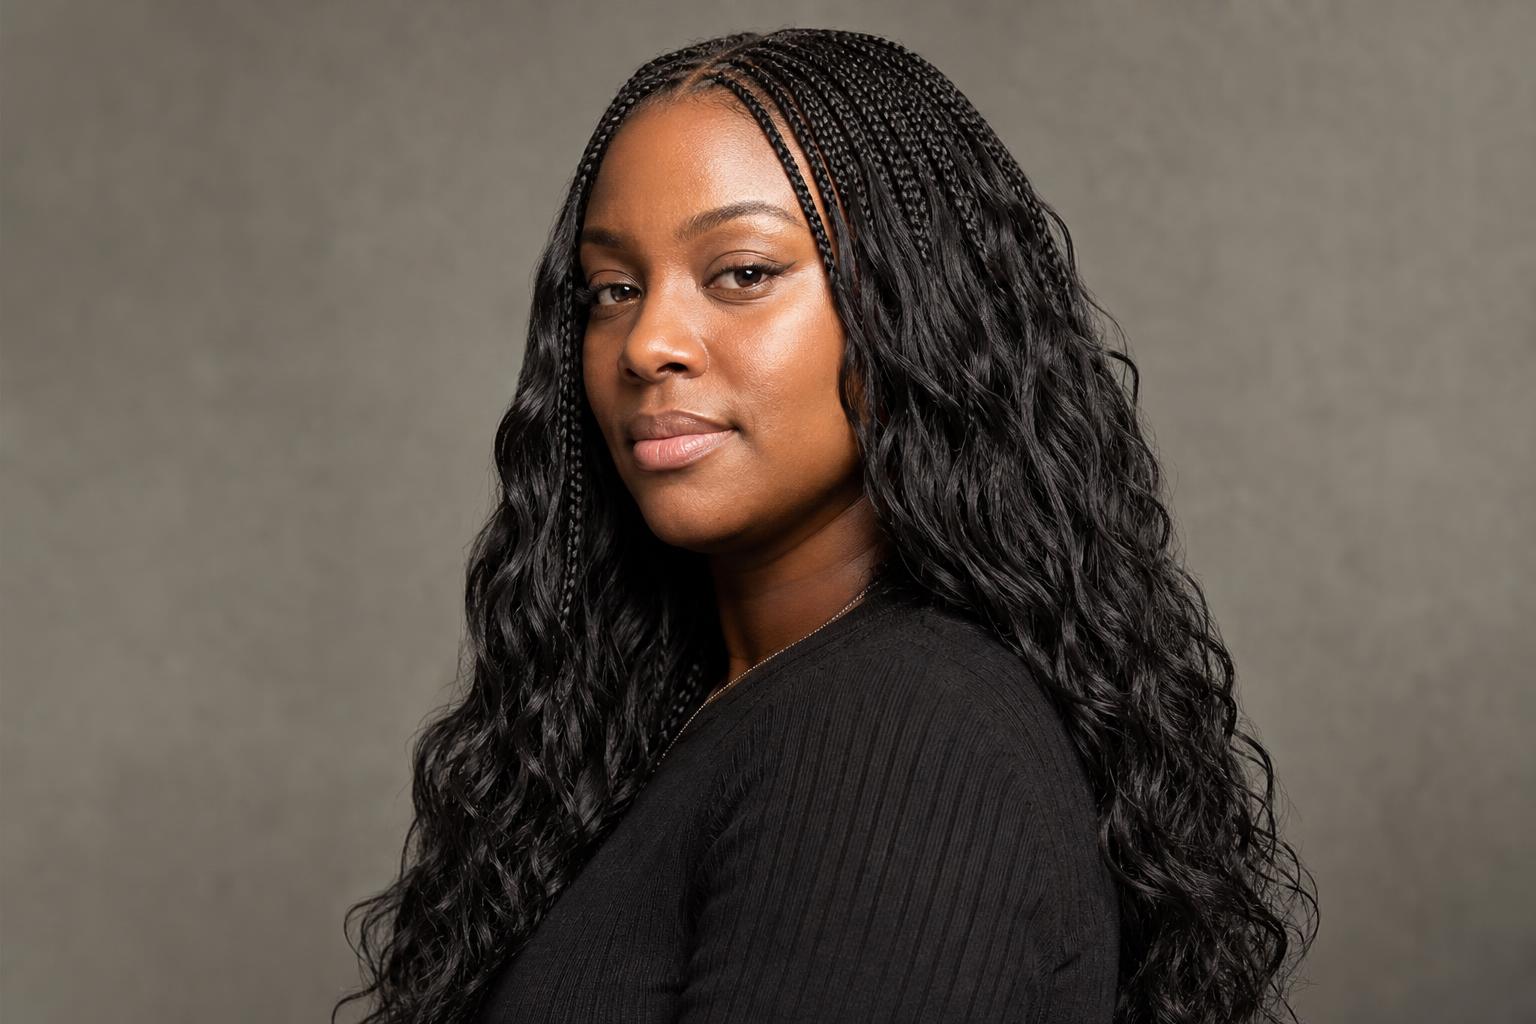
Bora Bora braids are the only braid style where the braid itself is the shortest part of the look.
A Bora Bora braid is knotless at the root, braided down only as far as your own hair reaches, usually four to eight inches, and then released into long wavy human hair that hangs completely free. That short braided anchor is the whole point: from the front the style looks closer to a sew-in or a curly wig than to box braids, because almost none of the braid is visible. Below are 24 variations sorted by length, plus the hair quantity, install time and price band each one realistically takes.
The style was named by hairstylist Omobolanle Ajao, who built it around 100 percent human wavy hair rather than the synthetic fiber most braid styles use. That choice drives everything else about the style, from the cost to the wash routine to how long it survives. This collection covers shoulder through hip length, part sizes from jumbo to small, color and styled variations, a comparison against the braid styles people confuse it with, face shape guidance, salon language and an honest section on who should skip it.
Shoulder and Bob-Length Bora Bora Braids
Short Bora Bora installs are the cheapest entry into the style because length drives the hair bill more than part size does. They also carry the least weight, which matters when the braided anchor is only a few inches long and the free hair has nothing holding it down. If your natural hair is shorter than four inches, this is the length band to start in.
1. Shoulder-Length Bora Bora With a Center Part
The braider works a clean center part down the crown, then feeds wavy human hair into each knotless braid so the free ends begin at roughly ear level. Because the release point is high, the waves stack and look full even in a modest two-pack install. Unlike the curly-tipped knotless braids people often compare it to, a center part here keeps the density symmetrical, which makes any unevenness in the feed obvious enough to fix during the appointment.
2. Collarbone Bora Bora on Fine Natural Hair
Fine or fragile natural hair does better at collarbone length than anywhere longer, since the free wavy hair adds pull without the braid having enough grip to carry it. Round faces gain the most here, because the waves widen at the jaw and then stop, which keeps the silhouette from going spherical. Ask for larger parts than you think you want, so fewer braids each carry a lighter load.
3. Bob-Length Bora Bora With Jumbo Parts
Jumbo parts at bob length turn a normally six-hour appointment into something closer to two and a half, and the visual result stays dense because the wavy hair fills the gaps between rows. Coarse 4b and 4c textures hold the knotless anchor best at this size, and one pack is often enough.
4. Shoulder Bora Bora With Curtain-Style Framing
Two front braids get released an inch higher than the rest, so the waves fall forward against the cheekbones instead of behind them. Separate those two sections with your fingers each morning and mist them lightly with water before the rest of the head, since they lose shape fastest from contact with your face.
5. Neck-Length Bora Bora for a First Install
A neck-length version is the honest trial run: you get the full texture and the full wash routine at the lowest hair cost, and if the weight bothers your scalp you have only committed to a short wear. Plan on roughly three weeks before the anchors begin to loosen at this length.
Mid-Back Bora Bora Braids, the Standard Install
Mid-back is where most Bora Bora installs land, and it is the length the original studio version was built around. Three packs of 18-inch bulk wavy human hair, about 300 grams, is the standard recommendation for this band. Everything in this section assumes that quantity unless the entry says otherwise.
6. Classic Mid-Back Bora Bora in Medium Parts
Medium parts give the balance the style was designed around: enough rows for the free hair to look like one continuous mass, few enough that the install finishes inside a working day. The braided section stops just below the ear on most people, so the top three inches of the head stay neat while everything under it moves loose.
7. Small-Part Mid-Back Bora Bora
Small parts produce the most convincing sew-in effect, because the higher row count hides the scalp completely once the free hair falls over it. The trade is time and money, since small is the most expensive size at every studio that prices by part width. Coily textures carry small parts better than relaxed hair, which tends to slip out of a small knotless anchor.
8. Mid-Back Bora Bora With a Deep Side Part
A deep side part throws most of the volume to one side, which softens a square jaw by breaking the horizontal line across the face. Square and rectangular face shapes gain more from this than from any center-parted version. Ask the braider to angle the first three rows toward the heavy side rather than parting them straight back, or the sweep flattens out by day two.
9. Jumbo Mid-Back Bora Bora for a Fast Install
Jumbo parts at mid-back length cut the chair time roughly in half against a small install while still using close to three packs, because the hair quantity follows length, not part size. That is the counterintuitive part of Bora Bora pricing that catches people out: going bigger saves labor, not hair.
10. Mid-Back Bora Bora on Relaxed Hair
Relaxed hair can take this style, but the anchor has to be longer than it would be on natural texture, because processed strands grip less. Six inches of braid rather than four gives the feed something to hold. Skip the install entirely if your last relaxer was inside four weeks.
11. Loose-Wave Mid-Back Bora Bora
Loose wet-and-wavy bulk hair produces a softer, beachier fall than the tighter curl patterns, and it detangles with far less effort at the end of a long wear. Mist with a water and leave-in mix, then finger-separate from the ends upward. Gels and strong-hold products stiffen this texture and dull it within a day, so leave them out.
12. Tight-Curl Mid-Back Bora Bora
A tighter curl pattern in the bulk hair shrinks the apparent length by several inches while adding a lot of visible density, so an 18-inch pack lands closer to mid-back than waist. Heart-shaped faces do well with it, since the volume gathers below the cheekbones and balances a wider forehead. Budget an extra 20 minutes per wash for detangling.
13. Mid-Back Bora Bora With a Braided Crown Row
One cornrowed row across the crown, feeding into the loose sections behind it, gives the style a defined top instead of a uniform curtain. It also solves the flatness some people get at the crown when every braid is released at the same height. Bring a photo that clearly shows where the cornrow stops, because braiders interpret this detail differently.
Waist-Length and Hip-Length Bora Bora Braids
Long Bora Bora is where the cost and the weight both climb steeply, since the free hair does not taper the way a braid does. Four packs is common past waist length, and the hair bill alone can outrun the labor. Check the maintenance section before committing to this band.
14. Waist-Length Bora Bora in Medium Parts
Waist length with medium parts is the most photographed version of the style and the one most people mean when they say Bora Bora. The braided anchor stays the same four to eight inches regardless, so the ratio of braid to free hair is at its most dramatic here. Expect close to four packs and a full day in the chair.
15. Hip-Length Bora Bora With Layered Ends
Cutting soft layers into the bottom six inches after the install stops hip-length hair from hanging as a single heavy block. Ask the braider to cut the layers dry with the hair hanging as you will wear it, not gathered forward. Layering also buys you a few extra weeks of wear, because the ends thin out gradually instead of going visibly ragged all at once.
16. Waist-Length Bora Bora on Short Natural Hair
A two-inch TWA can carry waist-length Bora Bora, but the anchor is then too short to hold a heavy feed, and the braider has to compensate with smaller parts and a lighter pack count. Oval faces carry the extreme length ratio best. This is the version most likely to loosen early, so plan for four to five weeks rather than eight.
17. Extra-Full Waist Bora Bora in Four Packs
Four packs at waist length produces the wig-like density the style is known for, with no scalp visible from any angle. The extra pack adds real weight, roughly a third more than the standard three, and you will feel it at the hairline by the end of the first week. Wear it down rather than gathered for the first few days so the roots settle.
18. Waist-Length Bora Bora With a Middle Part
A middle part at this length creates two long vertical columns of waves that narrow the face considerably, which is useful on round and full face shapes and less so on already-long ones. Tell the braider you want the part to hold all the way to the crown, since a partial part collapses under the weight of the feed.
Color, Parting and Styled Bora Bora Variations
Because the hair is human, Bora Bora takes color in a way synthetic braid styles cannot, and the packs can be pre-colored or dyed before installing. Styled variations work differently here too, since only a short braided section can actually be gathered or pinned. These six cover both.
19. Honey-Blonde Bora Bora on Dark Roots
Leaving the braided anchor in your natural color and feeding honey-blonde wavy hair gives a grown-in root effect that no synthetic braid can replicate convincingly. Warm honey tones flatter deeper skin better than ash blonde, which can go grey against warm undertones. Wash this version with a sulfate-free cleanser or the blonde dulls fast.
20. Burgundy Bora Bora With Natural-Black Braids
Deep burgundy against black anchors gives a strong color break at the release point that highlights the structure of the style rather than hiding it. Red pigment is the first to wash out of human hair, so a color-depositing conditioner every second wash keeps the depth for the full wear.
21. Copper Bora Bora in Medium Parts
Copper is the boldest color in common use for this style and the one that most clearly signals the hair is human rather than kanekalon, because synthetic copper flattens in daylight. Use a heat-free routine throughout. Any flat iron work on colored bulk hair shortens its usable life by weeks.
22. Half-Up Bora Bora With a Top Knot
Only the braided section can be gathered cleanly, so a half-up knot pulls from that short anchor and leaves the free waves hanging. Keep the knot loose and low rather than high and tight, because a tight half-up puts all the weight of the free hair onto the hairline braids at once.
23. Bora Bora in a Low Gathered Ponytail
A low nape-level gather is the only way to get the whole length off your neck without stressing the anchors. Use a fabric scrunchie rather than an elastic and gather at the nape, not the crown.
24. Zigzag-Part Bora Bora With Accent Beads
Zigzag parting across the crown hides the scalp between rows better than straight parting, which suits anyone whose density is thinner at the front. Beads go on the braided anchor only, never on the free hair, since a bead on loose wavy hair tangles the section around it within a day.
How Much Hair a Bora Bora Install Actually Takes
Bora Bora braids are the most expensive common braid style, and the reason is the hair rather than the labor. Synthetic fiber is not an option here in the way it is for other styles, because the free section is long, unsecured and handled daily, and synthetic wavy hair mats under those conditions within about two weeks. The table below shows what each part size typically requires.
| Part Size | Packs at Mid-Back | Chair Time | Relative Cost |
|---|---|---|---|
| Jumbo | 3 packs, about 300 g | 2.5 to 4 hours | Lowest labor charge of the four |
| Large | 3 packs, about 300 g | 4 to 5 hours | Often the studio entry price |
| Medium | 3 packs, about 300 g | 5 to 7 hours | Roughly a third above large |
| Small | 3 to 4 packs | 7 to 10 hours | Highest of the four, often double large |
Published salon menus for the style in the United States have run from roughly $275 for a large install to $700 for a small one at the studio that originated it, with the hair bought separately. Regional pricing varies enormously, so treat those figures as a shape rather than a quote.
Stylist tip: Buy the packs yourself and buy them all at once from the same vendor and batch. Wavy human bulk hair varies in wave pattern between production runs, and a fourth pack bought a month later to top up an install rarely matches the first three closely enough to blend.
Bora Bora Braids Compared With Boho, French Curl and Goddess Braids
These four styles all mix braided sections with loose hair, which is why they get confused constantly in salon bookings. The difference comes down to where the loose hair begins and how long the braid runs. Book by the structure in this table rather than by the name, because vendors and braiders use the trend names inconsistently.
| Style | Where the Braid Stops | Hair Used | Overall Effect |
|---|---|---|---|
| Bora Bora | At your own hair length, 4 to 8 inches | 100 percent human wavy, 3 packs | Closer to a sew-in than to braids |
| Boho knotless | Braid runs full length, curls added alongside | Synthetic or human, mixed | Braid stays clearly visible throughout |
| French curl | Braid runs most of the length, curl at the end only | Synthetic French curl fiber | A braid with a defined curled tip |
| Goddess braids | Braid runs full length, cornrowed to the scalp | Synthetic, wavy pieces added in | Flat scalp braids with loose wave escaping |
If what you want is the visible braid pattern with texture running through it, loose wavy boho knotless braids give you that at a fraction of the hair cost. If you want a defined curl at the bottom of a long clean braid, French curl braids and the fiber they use are the closer match. Bora Bora is the one to book when you want almost no braid visible at all.
How to Choose Part Size and Length for Your Face Shape
Because the braided section is so short, face shape guidance for Bora Bora works differently than it does for box braids. The free wavy hair does nearly all the framing, and where it starts falling matters more than how thick the braids are. The higher the release point, the more the volume gathers near the face.
| Face Shape | Best Parting | Best Length | Avoid |
|---|---|---|---|
| Oval | Center or side, both work | Any, including hip length | Nothing structural, choose on lifestyle |
| Round | Middle part, held to the crown | Waist or longer | Shoulder length with a high release point |
| Square | Deep side part | Mid-back | Blunt-cut ends at jaw level |
| Heart | Center with soft front framing | Mid-back with a tighter curl | Heavy volume above the cheekbone |
| Oblong | Side part with front sections released high | Collarbone to mid-back | Hip length, which lengthens the face further |
| Diamond | Zigzag or off-center | Waist with layered ends | Slicked flat crown with no top volume |
What to Tell Your Braider
The single most important thing to agree on before the first section is parted is where the braid stops. Braiders coming from a box braid or feed-in Ghana braid background often braid further down out of habit, and once a row is braided to mid-back the look is no longer Bora Bora. Say it in inches, not in style names, the same way you would specify row count when booking any long-wear braided style.
Useful sentence to bring: “Knotless at the root, feed the wavy hair in, and stop braiding at the end of my own hair, about five inches down. Everything below that hangs loose. Medium parts, three packs of 18-inch wet-and-wavy bulk.” That covers the four decisions that actually change the result.
Ask two questions at the consultation. First, whether they charge separately for installing hair you supply, because many studios do. Second, whether they will cut layers into the ends after the install, since not every braider offers this and it changes how the length hangs.
Stylist tip: Bring the packs to the consultation, not just to the appointment. A braider can tell from handling the bulk hair whether the wave pattern will hold up to daily separating, and a bad pack is far cheaper to replace the week before than to discover mid-install.
Maintenance and How Long Bora Bora Braids Last
Published wear ranges for this style run anywhere from three weeks to three months, which is a wide enough spread to be useless as planning information. The realistic figure for a well-installed mid-back set with daily care is six to eight weeks. What ends the wear is almost never the braid failing. It is the free hair matting at the release point, where loose waves rub against the braided anchors all day.
Daily routine is short. Separate the free sections with your fingers from the ends upward, mist with a water and leave-in conditioner mix or a setting mousse, and leave it alone. Gels and firm-hold products are the most common mistake people make here: they stiffen human wavy hair, dull the shine and accelerate the matting the routine is meant to prevent.
Wash every two weeks at most, focusing on the scalp between the braided rows rather than the loose length. Sleep in a satin bonnet large enough to hold the full volume, or a satin pillowcase if the length will not fit. Take the style down at eight weeks even if it still looks fine, because the matting at the release line gets harder to reverse the longer it goes, and a difficult takedown is where most of the breakage from any braid style actually happens.
When Bora Bora Braids Are Not the Right Choice
This style asks more of your hairline than most braid styles, because the weight of long unsecured human hair hangs from a short anchor rather than being distributed along a full-length braid. Skip it if any of the following apply.
- You have a receding or thinning hairline. The load concentrates at the front rows, and edge recession from tension is slow to reverse and can become permanent. A flat cornrowed style spreads the same weight across the scalp instead.
- Your natural hair is under two inches. There is not enough length to build an anchor that will hold a heavy feed, and the braids loosen within three weeks. Grow to four inches first, or choose a crochet style with a cornrow base. The shorter Fulani braid patterns also lie flat enough to work on very short natural hair.
- You relaxed your hair within the last month. Freshly processed strands have not recovered their strength, and a heavy install on them is how breakage at the line of demarcation starts.
- Your budget is under about $200 all in. The hair alone is the majority of the cost and it cannot be substituted with synthetic without losing the style. Water-wave passion twists give a similar loose texture on synthetic fiber for far less.
- You cannot commit to daily finger-separating. Left alone for four or five days, the free waves knot at the release point and the set is finished early.
FAQ
What Are Bora Bora Braids Exactly?
Bora Bora braids are knotless braids that stop at the length of your own hair and release into long loose wavy human hair. The braided portion is usually only four to eight inches, which is why the finished look resembles a curly sew-in more than a braided style. The name comes from the French Polynesian island and was coined by the hairstylist who developed the technique.
Can You Use Synthetic Hair for Bora Bora Braids?
Not successfully. The defining section of this style is long, loose and handled every day, and synthetic wavy fiber tangles and mats under that handling within roughly two weeks. Human wet-and-wavy bulk hair detangles and re-wets cleanly, which is what makes a six to eight week wear possible. If synthetic is the budget you have, choose a style where the loose texture is added along a full-length braid instead.
How Many Packs of Hair Do I Need?
Three packs of 18-inch bulk wavy human hair, roughly 300 grams, is the standard for a mid-back install at any part size. Waist length and longer usually needs a fourth pack. Part size barely changes the quantity, because the hair requirement follows the length you want rather than the number of rows.
How Long Do Bora Bora Braids Last?
Six to eight weeks with daily separating and a wash every two weeks. Claims of three months usually describe hair that has matted at the release point and is being worn gathered up to hide it. Take them down at eight weeks regardless of how the length still looks, since takedown difficulty climbs sharply after that.
Do Bora Bora Braids Damage Your Hair?
They carry a higher tension load than most braid styles because long unsecured hair hangs from a short anchor, and that load lands hardest on the front rows. Repeated tight installs at the hairline are associated with traction alopecia, which starts as thinning at the temples and becomes permanent if the tension continues. Keep the front rows deliberately looser than the rest, take a four-week break between installs, and stop the appointment if you feel pulling rather than pressure.
Can I Wash Bora Bora Braids?
Yes, every two weeks, working a diluted cleanser into the scalp between the braided rows with your fingertips and letting the runoff rinse the loose length. Do not scrub the free hair, which is where matting starts. Dry the braided anchors thoroughly before bed, because damp knotless anchors held under a bonnet overnight can develop a smell within a couple of wears.
Are Bora Bora Braids the Same as Boho Braids?
No, though they are frequently sold under the same booking. Boho braids keep the braid running the full length and add loose curly pieces alongside it, so the braid pattern stays visible from root to tip. Bora Bora stops the braid early and releases everything below, which is a different structure and a different hair requirement. The overlap in vocabulary is exactly why you should book by describing the stop point.
Bora Bora braids reward anyone who wants the density of a sew-in without gluing or sewing anything to their hair, and they punish anyone who books them expecting box braid pricing or box braid upkeep. Decide on your stop point and pack count before you book, buy all your hair from one batch, and keep the front rows loose. Browse the rest of our protective styles and braided looks if you want to compare this against a lighter option, and bring two reference photos to the consultation so the braider can see exactly where you want the waves to begin.
Hair results vary based on your natural hair type, texture, density, and condition. Always consult with a licensed hairstylist before making significant changes, especially with chemical treatments or dramatic length changes. Photos may show styled results that require professional tools and products to replicate.