

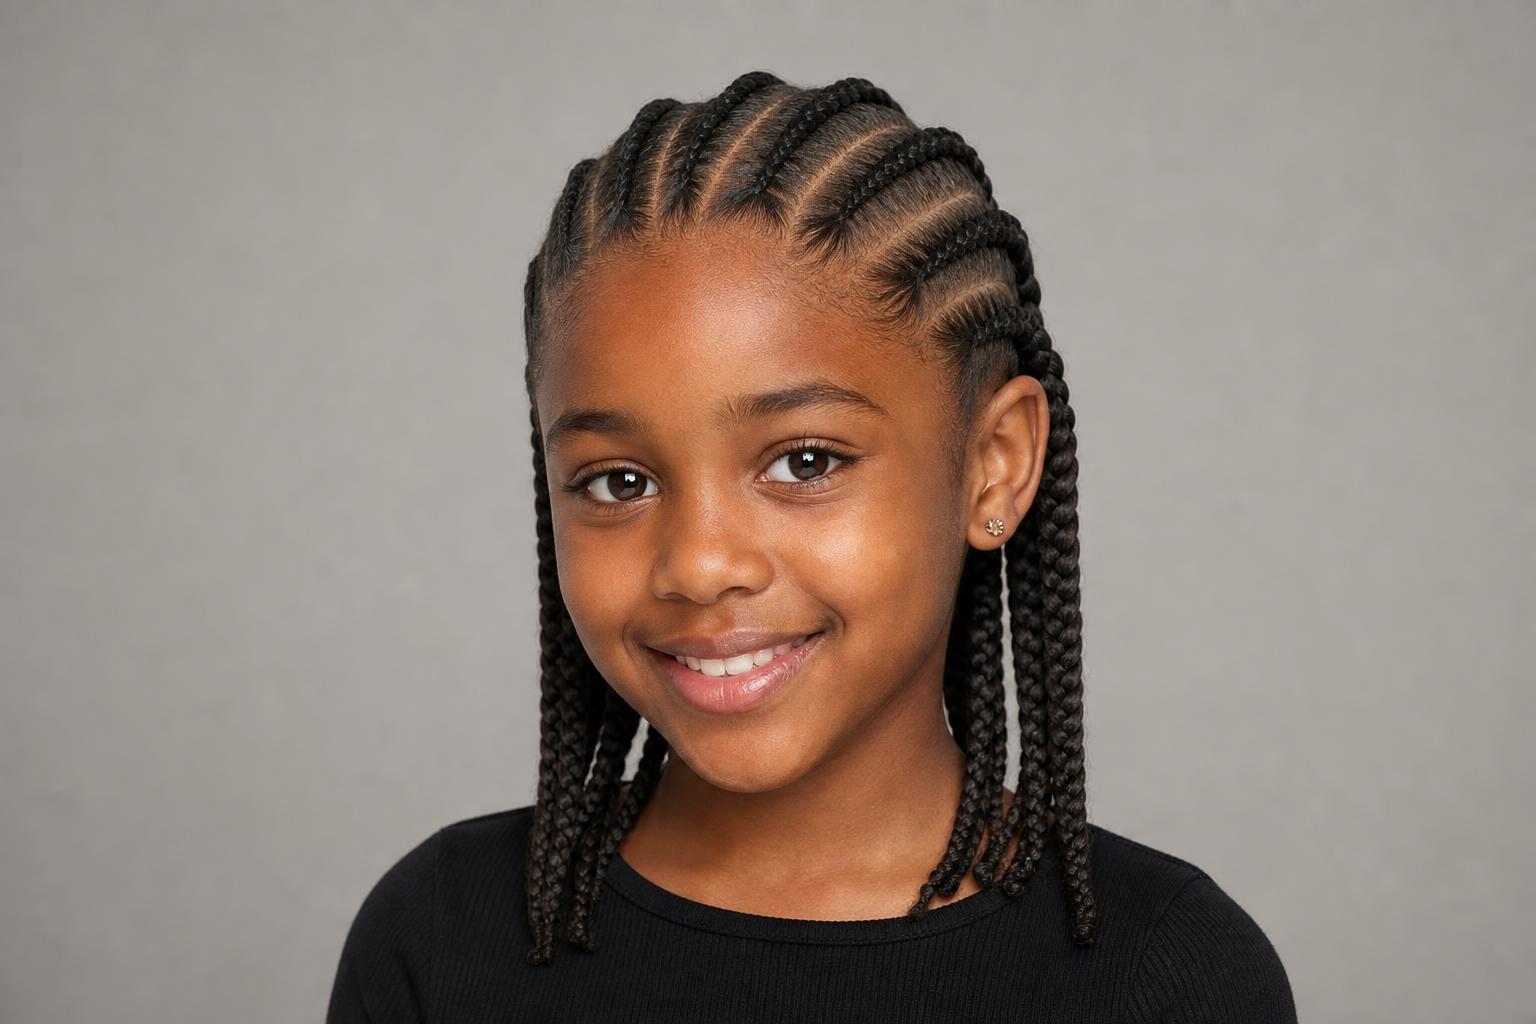
The right braid style for a girl is the one her scalp can tolerate, her patience can sit through, and her nighttime routine can actually maintain.
Braided hairstyles for Black girls work best when the parts are wide enough to avoid tension at the hairline and the length stays short enough to stay out of the way at school. Below are 30 styles sorted by how they are worn, from everyday cornrows that last a school week to occasion updos, each with a realistic install time and upkeep note.
The gallery covers everyday scalp braids, cornrow patterns, beaded and accessorized styles, and special occasion updos. After the styles you will find an age-and-sitting-time table, the exact language to use with a braider, honest guidance on tension and edges, and a wear-time schedule that tells you when to take each style down.
| Factor | Details |
|---|---|
| Best for | Type 3c to 4c hair with healthy edges and no active scalp irritation |
| Wear time | 2 to 6 weeks depending on braid size and new growth |
| Nightly upkeep | Satin bonnet or scarf, 2 minutes; scalp oil along parts twice a week |
| Avoid if | Edges are already thinning, the scalp is flaking or sore, or she cannot sit still safely |
| Chair time | 45 minutes for simple cornrows up to 7 hours for a full micro-braid set |
Everyday Braids That Hold Up Through a School Week
Everyday styles have one job, which is to survive five days of gym class, playground time, and sleep without needing a full reinstall. That means larger sections, sealed ends, and no extension weight pulling on the front hairline. The styles in this section all fall in the 45-minute to 3-hour install range, which is realistic for a school-night appointment.
1. Two-Strand Twists with Rounded Ends
Two-strand twists trade the three-section braid for a simple rope pattern, which cuts install time by roughly a third across a full head. Rounded, sealed ends stop the twists unravelling against a backpack strap or a car seat. Most braiders finish a shoulder-length set on a seven-year-old in about 90 minutes.
2. Four-Cornrow Feed-In Ponytail
Ask for four straight-back feed-in cornrows gathered into one ponytail at the crown, with added hair introduced gradually after the second stitch rather than at the root. That gradual feed keeps weight off the hairline where a child’s edges are thinnest. One nightly re-tie carries the style through a full school week.
3. Chunky Box Braids at Shoulder Length
Dense 4b to 4c hair carries chunky box braids well because each section holds enough of her own hair to anchor the braid without heavy extension. Larger parts mean fewer braids overall, so the appointment runs two hours instead of six. Shoulder length keeps the ends out of a lunch tray and off the floor during play.
4. Halo Braid Around the Crown
Damp hair and a light leave-in are all this needs before the braider works one continuous cornrow around the head. Tuck the tail under the starting section and the shape holds through gym class without pins working loose. A satin bonnet at night keeps the top edge smooth for four or five days.
5. Knotless Braids in Medium Size
Knotless braids begin with her own hair and add extension gradually, so no hard knot presses against the scalp at the root. Expect four to six weeks of wear before new growth makes the parts look fuzzy. A light scalp oil along the parts twice a week is the entire upkeep routine, and our guide to knotless braids finished with curly ends covers the softer variation.
6. Zigzag Part Pigtail Braids
Where a straight center part gives two plain pigtails, a zigzag part turns the same two braids into a pattern without adding an hour in the chair. The angled sections also disguise a thin patch along the middle of the scalp better than a straight line does. A good pick when time is short but the occasion calls for more than basic.
7. Flat Twists into a Low Puff
Two flat twists running from the hairline to the nape end in a gathered natural puff, which leaves her own curl pattern and color on display instead of covering it. Small gold cuffs where the twists meet the puff add shine without weight. Works best on hair that has never been colored and still has good elasticity.
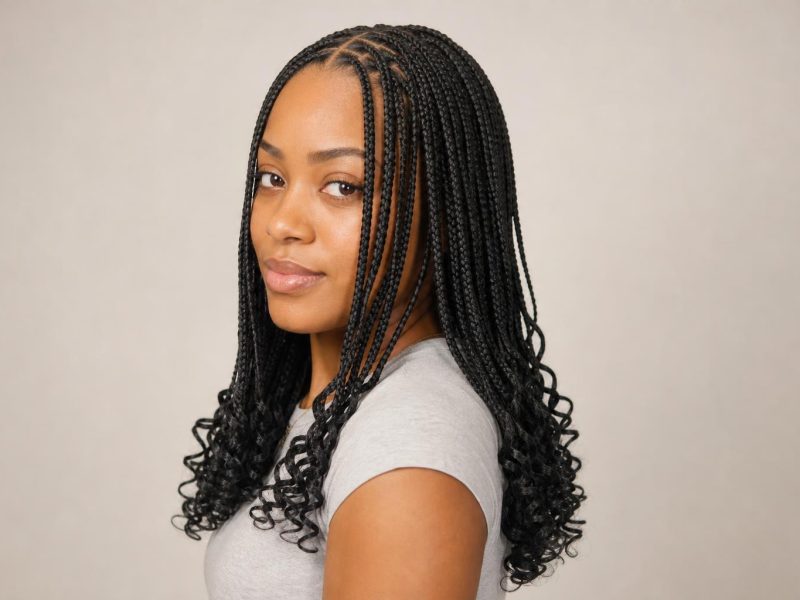
8. Mini Braids with Curly Ends
Suited to girls around ten and up who can manage a long install and handle their own nightly wrap. Leaving the last two inches loose and curly softens the look compared with a full straight-back set. Budget five to seven hours and split it across two days if she cannot sit that long in one go.
Cornrow Patterns and Scalp Braids
Cornrows lie flat against the scalp, which makes them the most secure option for active kids and the easiest to keep tidy between washes. The pattern is where the personality lives, and a braider can turn a plain style into something memorable by changing the parting alone. Every style here keeps the braid weight distributed across the whole head rather than concentrated at the front.
9. Straight-Back Cornrows in Even Rows
Six to ten even rows running from the hairline to the nape is the foundation every other cornrow pattern builds on. The braider tensions each row consistently so no single row pulls harder than its neighbors. Finished at the nape with small elastics, this lasts two to three weeks on most kids.
10. Heart-Shaped Cornrow Design
Ask for a heart outline parted at the back of the crown with the surrounding rows feeding into it, and bring a photo because the phrase alone leaves too much to interpretation. Braiders usually add 30 to 45 minutes to a standard cornrow appointment for a shaped design. Worth booking for a birthday rather than a regular Sunday.
11. Stitch Braids with Defined Ridges
Coarse, dense hair holds the raised ridge of a stitch braid far better than fine or loosely curled hair, where the definition flattens within days. The technique uses horizontal partings within each row to build that stepped texture. Our full gallery of stitch braid patterns and parting layouts covers the range this style spans.
12. Cornrows into a High Bun
Gather all rows into a single high ponytail and wrap the loose braid length around its own base, securing with two or three pins underneath. Five minutes in the morning resets it if it has loosened overnight. Keeps hair completely off the face and neck, which matters for sport and warm weather.
13. Lemonade Braids Swept to One Side
Side-swept cornrows look effortless but pull unevenly, with all the weight landing on one side of the hairline. Take these down at four weeks rather than six, and alternate the sweep direction at the next install so the same edge never carries the load twice. The side-swept lemonade braid variations we cover elsewhere include lower-tension parting options.
14. Fulani-Inspired Center Braid with Side Cornrows
Unlike a plain straight-back set, this places one braid down the center part with cornrows angling in from both sides, breaking the uniform rows with a focal line. The center braid also gives a natural spot for a cuff or a bead without crowding the style. Traditional Fulani braid patterns and their variations use the same center-parting logic at several scales.
15. Beaded Cornrow Tips in Alternating Colors
Two alternating bead colors along the row ends give a graphic finish that photographs well and costs nothing in extra chair time. Keep beads to the last two inches so the weight stays away from the scalp. Plastic beads are lighter than glass or wood, which matters on a young child.
16. Six Simple Cornrows for a First Braiding Session
Best for a girl under six, or any child at her first full braid appointment. Six wide rows take about 45 minutes, which is close to the limit of what most young children tolerate before the session turns unpleasant. Starting here builds tolerance for longer appointments later.
Braids with Beads, Cuffs, and Color
Accessories are how a simple braid becomes an occasion style without adding hours to the install. The trade-off is weight and noise, both of which a child notices more than an adult does. Keep hardware light, keep it low on the braid, and count the pieces at take-down so none are lost in the hair.
17. Beaded Box Braid Ends with Rubber Stoppers
Rubber stoppers below each bead hold it in place without the knot that a folded braid end creates, which makes take-down considerably faster. Three to four beads per braid is the practical ceiling before the ends start to swing heavily. Cut the stoppers off rather than pulling them through at removal.
18. Honey-Toned Ombre Braids
Ask for pre-stretched braiding hair in a dark root with a honey blonde transition beginning around ear level, and confirm the braider is using pre-colored synthetic hair rather than dyeing her own. The color lives entirely in the extension, so her natural hair takes no chemical processing at all. Specify where the transition should start, because braiders default to a midpoint that may land longer than you want.
19. Bantu Knots with Braided Bases
Tightly coiled 4c hair holds a bantu knot without pins, while looser 3c curls usually need one pin per knot to stay put overnight. Braiding the base before coiling adds grip and keeps the parting crisp for longer. Unravelled the next day, the knots leave a defined wave that lasts another two or three days.
20. Braided Headband with Loose Curls
A single braid runs from ear to ear across the front while the rest of the hair stays loose and diffused. Set the loose section with a curl cream on damp hair and diffuse on low heat before the braid goes in. Best for a half-day event rather than a full week of wear.
21. Small Knotless Braids with Wavy Ends
Small braids look delicate but carry the longest wear window in this section, holding four to six weeks with the ends re-dipped in hot water once. Because the braids are fine, new growth shows sooner at the parts than it does on a chunky set. Plan the take-down date at the time of install so the style does not overstay.
22. Chunky Twists with a Defined Wave Pattern
Where classic plaits keep a flat three-strand surface, chunky two-strand twists produce a rounder rope and unravel into a defined wave rather than a crimp. That gives two looks from a single install, braided for the week and released for the weekend. The rope pattern also grips better on freshly washed hair with little product buildup.
23. Cuffed Braids in Rose Gold and Silver
Mixed metal cuffs spaced along a handful of braids rather than all of them look deliberate instead of cluttered. Position them at staggered heights so the eye moves down the length. Squeeze each cuff closed with flat pliers rather than fingers so it does not slide down and catch during play.
Special Occasion and Updo Braids
Occasion styles get one thing everyday styles cannot afford, which is fragility. Because these are worn for a day rather than a month, the braider can use finer sections, softer tension, and finishes that would not survive a school week. Book these for the morning of the event where possible, since most look best within the first 12 hours.
24. Braided Crown for a Flower Girl
Appropriate from about age four upward, since the install runs under an hour and needs no stillness afterward. Small flowers tucked into the crown braid at intervals hold with a single pin each. Ask for the crown to fall slightly forward of the hairline so it stays visible in photographs taken from the front.
25. Fishtail Braid Down the Back
A fishtail alternates thin outer strands from each half rather than crossing three sections, which produces a tighter woven texture that holds without much product. It works on blow-dried natural hair and on hair with extensions already installed. Finish with a light hold spray rather than gel so the surface stays soft.
26. Braided Ponytail with a Wrapped Base
Ask for the ponytail to be secured with an elastic first and then wrapped with a section of braiding hair to hide it, since a visible elastic is the detail that makes an otherwise polished style look unfinished. Confirm the height before the braider starts, because moving a wrapped base means starting over. Our braided ponytail styles and base-wrapping options cover several heights and finishes.
27. Half-Up Braided Top Knot
Looser 3c curls suit this best because the loose bottom half keeps its shape without needing a set, while tightly coiled hair usually needs a twist-out underneath first. The top section braids back into a knot at the crown and the rest hangs free. More half-up styles for natural Black hair follow the same top-section logic.
28. Two French Braids with Ribbon Woven Through
Feed a length of satin ribbon in as a fourth strand from the second stitch onward, keeping tension on the ribbon even so it does not bunch. Satin slides against the hair with less friction than grosgrain, which matters on a style worn all day. Trim the ribbon tails at an angle so they do not fray by the afternoon.
29. Goddess Braids with Loose Waves
Large cornrows with wavy hair left free at the ends look elaborate but are one of the shorter-lived styles here, holding neatly for about two weeks before the loose sections tangle at the roots. Detangle the free ends nightly with fingers and a light oil. Treat this as a two-week style and plan accordingly rather than stretching it to a month.
30. Jumbo Braided Bun for a Recital
Compared with a standard braided bun, the jumbo version uses two or three thick braids coiled together, which builds height without pinning small pieces that work loose mid-performance. The larger braids also mean the whole style goes in under an hour. Secure with U-pins pushed horizontally into the coil rather than straight down.
How to Match a Braid Style to Her Age and Sitting Tolerance
The single most common reason a braid appointment goes badly is a style that takes longer than the child can sit for. A four-year-old managing 45 minutes is normal; expecting three hours from her is not. Match the style to the sitting window first, then pick the pattern within what that window allows.
| Age | Realistic Sitting Window | Styles That Fit | Avoid |
|---|---|---|---|
| 3 to 5 | 30 to 45 minutes | Six wide cornrows, two-strand twists, pigtail braids | Extension work and beaded ends that add weight |
| 6 to 8 | 1 to 2 hours | Feed-in cornrow ponytail, chunky box braids, halo braid | Micro braids and full shaped-design patterns |
| 9 to 11 | 2 to 4 hours, with breaks | Medium knotless braids, stitch braids, shaped cornrow designs | Waist-length installs that strain the neck during wear |
| 12 and up | 4 to 7 hours, split across two days if needed | Small knotless braids, mini braids, goddess braids | Any style she cannot wrap herself at night |
Stylist tip: Book the appointment for the morning, not the afternoon. Sitting tolerance drops sharply after lunch, and a braider working against a restless child rushes the tension on the last rows, which is exactly where hairline damage starts.
What to Tell the Braider
Braiders work from photographs and from precise words about size and tension, not from adjectives. The two things worth stating explicitly at every appointment are the braid size and the tension limit, because those determine both comfort and scalp health. Say them at the start rather than after the first row is finished.
Useful phrasing to bring with you: “Medium knotless braids, shoulder length, with the perimeter rows a size larger than the rest.” For tension, say “Please keep the front two rows loose, she has fine edges” before the braider starts, and check in after the first row is done. On parting, “Straight-back rows, about a finger’s width apart, no baby hair laid” tells a braider more than any photograph does.
If a child says a section hurts during the install, that section needs redoing rather than settling. Tension pain does not fade as the braids settle, which is the most common thing parents are told and the least accurate. The broader collection of braided styles for Black women covers the adult versions of most patterns here if you want a sizing comparison.
Stylist tip: Ask the braider to leave the first quarter-inch at the hairline out of the braid entirely. Those short, fine hairs break under any tension and give nothing structural to the style, so including them costs edge density for no benefit.
Tension, Edges, and Scalp Care Between Styles
Traction alopecia is the real risk with children’s braids, and it develops from repeated tension in the same places rather than from one tight install. The edges and the nape take the load in most styles, so rotating the parting direction between appointments matters more than any product you apply. Give the scalp two weeks of loose, unbraided wear between protective styles wherever the schedule allows.
Between washes, a light oil applied along the parts with a nozzle bottle keeps the scalp comfortable without saturating the braids. Wash braided hair every two to three weeks with a diluted clarifying shampoo applied to the scalp only, then dry the roots properly, since damp braids at the scalp are what causes the mildew smell parents notice around week four. A satin bonnet every night is not optional on braided hair, because cotton pillowcases wick moisture out of both the hair and the scalp.
When Braids Are Not the Right Choice
Protective styling is not automatically protective, and there are situations where braiding causes more damage than leaving hair loose would. Postpone the appointment if any of the following apply.
- Edges are already visibly thinner than they were six months ago. Braiding over receding edges accelerates the loss, and the hairline needs three to six months of no-tension wear to recover.
- The scalp is flaking, sore, or has any open irritation. Braids trap product and moisture against an inflamed scalp and make the condition harder to treat.
- She has had a relaxer within the past two weeks. Chemically processed hair is at its most fragile immediately after service, and braid tension on top of that breaks strands at the root.
- She cannot or will not wear a bonnet at night. Without a nighttime wrap, braids frizz within days and the style needs redoing far sooner, which multiplies the tension exposure.
- The style needs more chair time than she can manage safely. A rushed second half of an install is where uneven tension and hairline damage happen.
Take-Down and Wear-Time Schedule
Every braid style has a point past which it stops protecting the hair and starts stressing it, usually when new growth at the root has twisted enough to lock loose shed hair into the braid. Taking a style down on schedule is what keeps the take-down itself from causing breakage. Use these windows as the outer limit rather than a goal.
| Style | Take Down By | Wash Frequency | Rest Before Next Style |
|---|---|---|---|
| Simple cornrows, no extension | 2 to 3 weeks | Every 2 weeks | A few days |
| Chunky box or knotless braids | 4 to 6 weeks | Every 2 to 3 weeks | 1 to 2 weeks |
| Small or mini braids | 6 weeks maximum | Every 3 weeks | 2 weeks |
| Goddess braids with loose ends | 2 weeks | Every 2 weeks | A few days |
| Twists and bantu knots | 2 to 4 weeks | Every 2 weeks | A few days |
FAQ
How Long Should Braids Stay in a Child’s Hair?
Four to six weeks is the ceiling for braids with extension, and two to three weeks for braids using only her own hair. Past that point new growth at the root traps shed hair inside the braid, which turns take-down into a breakage event rather than a simple unravel. Smaller braids can technically hold longer, but the risk scales with wear time rather than braid size.
Do Braids Make a Child’s Hair Grow Faster?
No, braids do not change the rate hair grows from the follicle, which stays around half an inch a month regardless of style. What braids do is reduce daily manipulation and breakage, so more of that growth stays on the head and becomes visible length. A badly tensioned braid style has the opposite effect and costs length at the hairline.
What Braid Size Is Best for a Young Child?
Medium to large sections work best for anyone under about nine, both for comfort and for install time. Small and micro braids concentrate more tension per follicle and take four to seven hours to install, which is beyond what most young children tolerate. Larger sections also come down faster, which matters because take-down is often harder on a child than the install was.
Can Braids Be Washed While They Are In?
Yes, and they should be, roughly every two to three weeks. Dilute a clarifying shampoo with water in an applicator bottle, apply along the parts rather than to the braid lengths, and rinse thoroughly without scrubbing the braids themselves. Drying matters more than washing here, since braids left damp at the scalp develop an odor and can irritate the skin.
How Do I Know If Braids Are Too Tight?
Small white bumps around the hairline, visible skin tenting at the base of a braid, or complaints of pain that persist past the appointment all mean the tension is too high. Any of these calls for taking the affected rows out that day rather than waiting to see whether they settle. A well-installed braid is noticeable for the first few hours and comfortable by bedtime.
Are Beads Safe for Toddlers?
Beads are generally fine from about age three, but stay with lightweight plastic and keep them to the last two inches of the braid. Wooden and glass beads add enough weight to pull on the scalp during sleep, and any bead is a choking risk on a child who still puts things in her mouth. Count them at install and again at take-down.
How Often Should She Go Without Braids?
Plan one to two weeks of loose, unbraided wear between protective styles, and longer if the last style was worn to its full six weeks. That gap lets the scalp recover and gives you a chance to see the actual state of her edges, which braids hide. Deep condition during that window rather than immediately before the next install.
Choosing among braided hairstyles for Black girls comes down to three practical questions, which are how long she can sit, how much tension her edges can take, and who is wrapping her hair at night. Bring a reference photo and a stated braid size to the appointment, ask for the front rows to stay loose, and put the take-down date in your calendar the same day the style goes in. A style that comes down on schedule protects far more hair than a style that simply lasted a long time.
Hair results vary based on your natural hair type, texture, density, and condition. Always consult with a licensed hairstylist before making significant changes, especially with chemical treatments or dramatic length changes. Photos may show styled results that require professional tools and products to replicate.
2 responses