

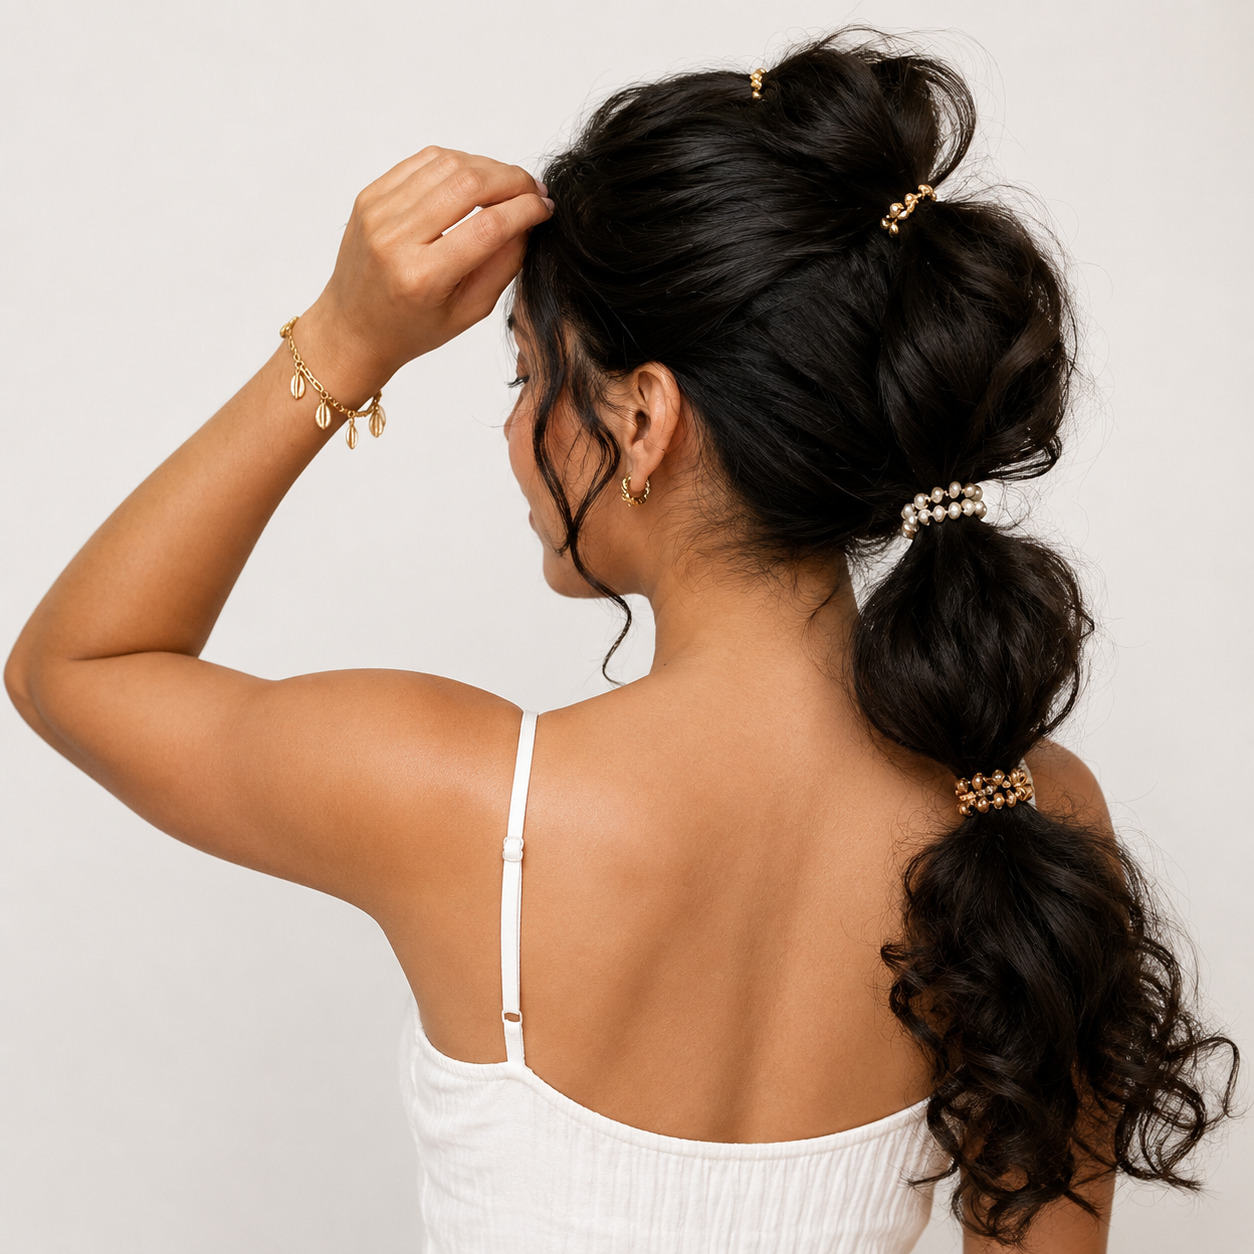
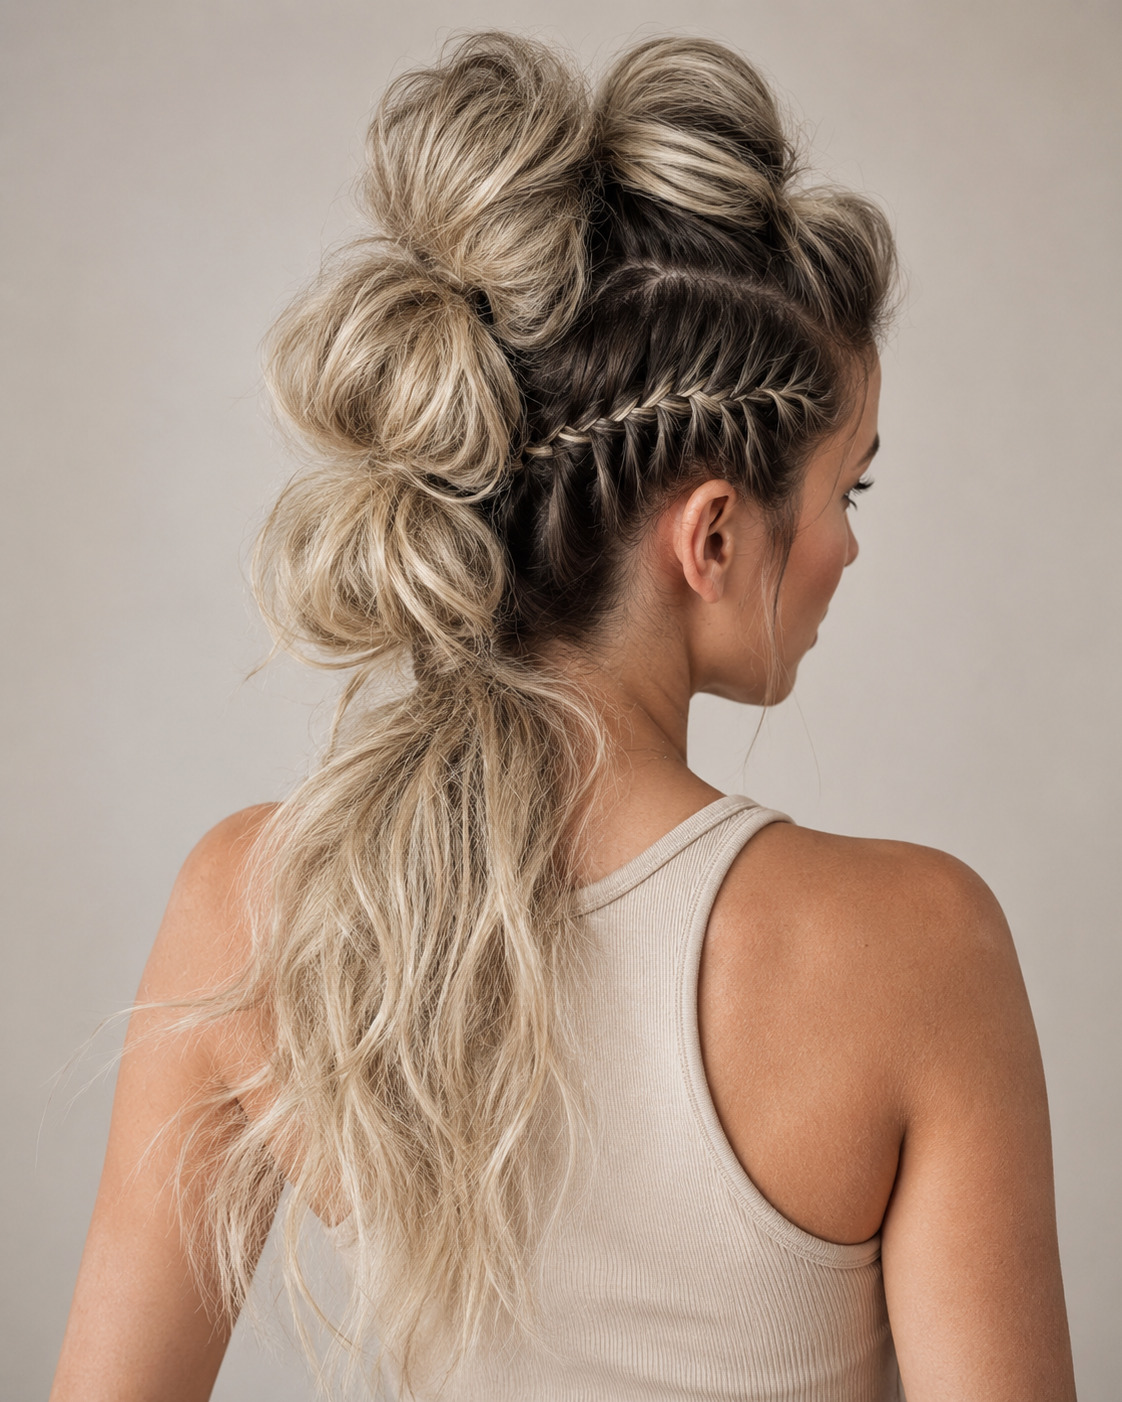
Bubble braids are not actually braids — they are ponytails with elastic ties placed at even intervals and each section pulled outward between the ties to form a rounded, bubble-like shape, which is why anyone can do them in under 10 minutes regardless of technical braiding skill.
The base technique works on every hair type from straight to 4c coily, requires only a ponytail holder and a handful of clear elastics, and produces a style that looks significantly more complex than the steps involved. Here are 30 variations covering single-strand ponytail versions, double and twin setups, mini bubble braid rows, and crown and half-up configurations — plus a face shape compatibility table, per-texture hair type guide, and a step-by-step technique breakdown.
The gallery runs through four categories by structure. Guidance sections follow on what bubble braids actually are, how hair type changes the technique, face shape placement, accessories, maintenance by variation, and the conditions where the style works against you.
| Factor | Details |
|---|---|
| Skill level | Beginner: no braiding technique required; ponytail and elastics only |
| Works on | All hair types: straight, wavy, curly, coily; minimum 4 to 6 inches of ponytail length |
| Time to style | 8–12 minutes for a single or double; 30–60 minutes for a full mini braid set |
| Longevity | Single ponytail: 1–2 days; mini braid set: 4–6 days with overnight care |
| Key tools | Clear or matching elastics, tail comb, edge control or texture spray, optional accessories |
Single Bubble Braid Ponytail
A single bubble braid starts from one gathered ponytail at any position (high, mid-back, low, or side) with elastics placed at equal intervals and each section puffed outward between the ties. Eight entries here cover technique fundamentals, face shape placement, texture-specific adjustments, styling additions, second-day maintenance, color interactions, positioning variations, and how the style compares to a standard ponytail.
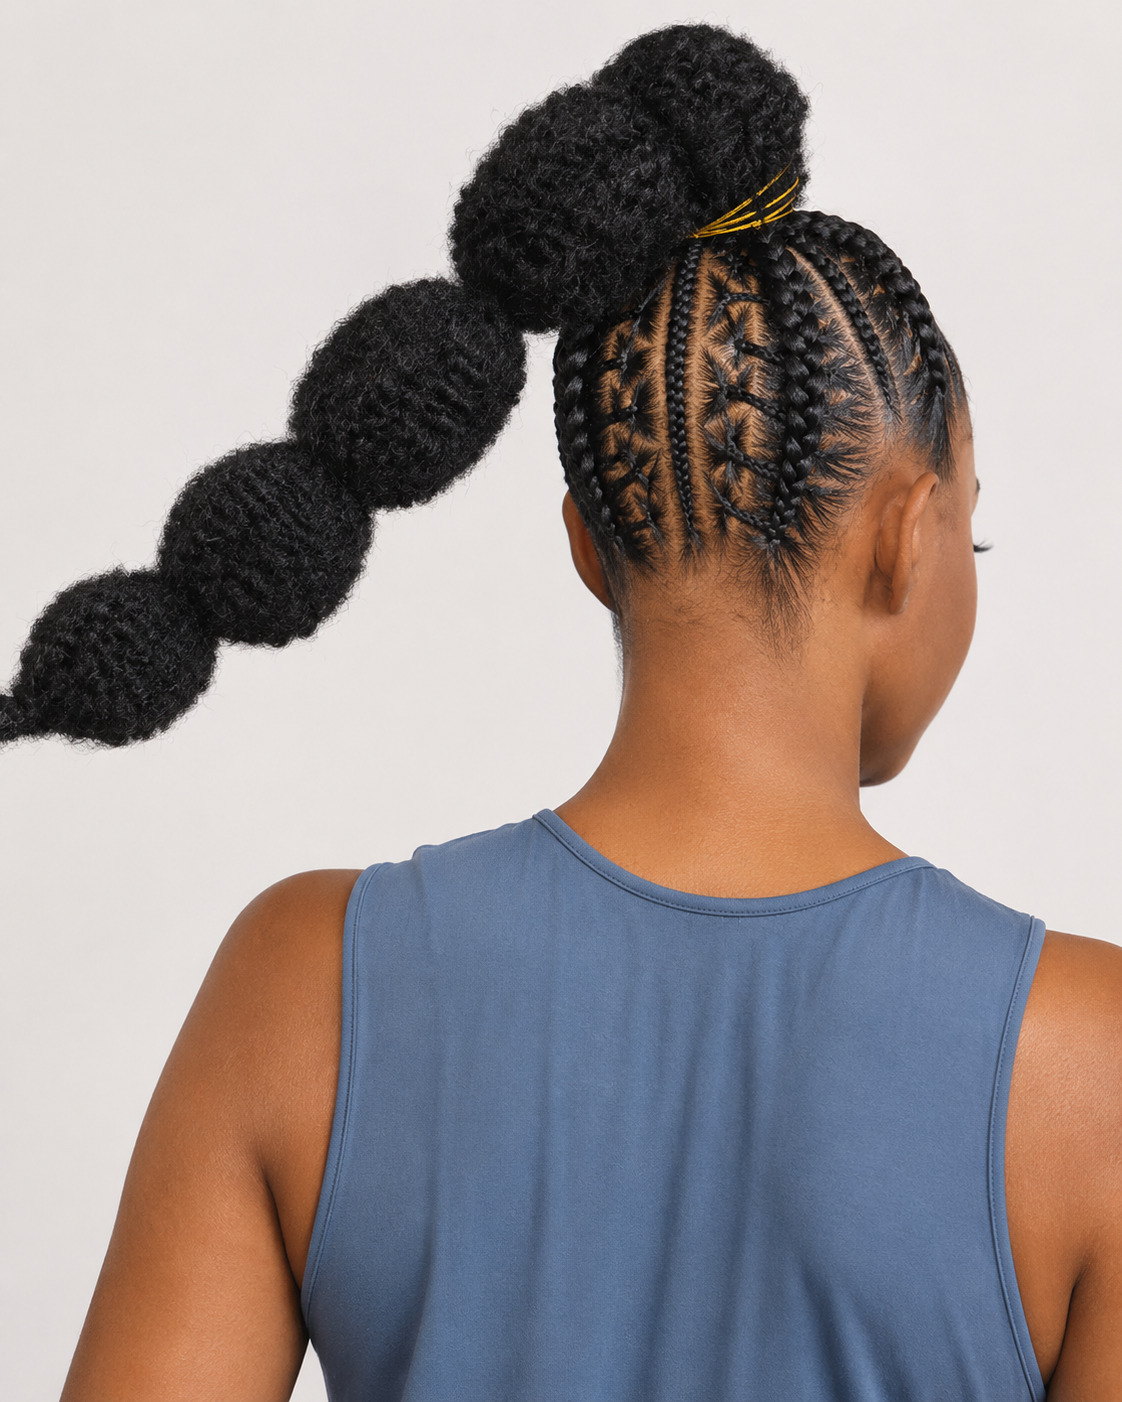
1. High Ponytail Bubble Braid with Even Spacing
Gathering the hair at the crown before adding elastics gives the bubble sections room to expand outward in all directions rather than pressing flat against the neck; this placement matters most on medium-length hair where each section has limited volume to work with. Position the first elastic 1.5 to 2 inches below the base tie, then add each subsequent tie at the same interval. The consistency of spacing is what separates a deliberate bubble braid from a ponytail with hair ties added arbitrarily. After each elastic is placed, pinch the hair from all four sides and pull outward until each section rounds into a visible sphere shape.
2. Bubble Braid Ponytail for Oval Faces
Placing the ponytail base at the crown or upper-back head position works cleanly on oval faces because the high placement adds height without widening the temples, since the bubbles cascade downward rather than extending sideways. Oval face proportions can accommodate nearly any bubble size and spacing; the main decision is ponytail height, where a slightly lower placement reads more relaxed while a crown placement suits more polished settings. Both work without distorting the face’s natural balance.
3. Tightly Coiled 4c Bubble Braid Pony
Coily 4c hair builds the most dramatic bubble shape of any texture because each coil’s spring contraction resists pulling flat, filling outward naturally as soon as each section is loosened from around the elastic. At 3 to 4 inches of stretched length, 4c hair creates bubbles that look significantly larger than their actual measured section because the coil density fills the space from within. Before gathering, apply a small amount of edge control along the hairline and a light shea butter through the length to manage frizz without flattening the coil pattern.
4. Satin Scrunchie-Accented Bubble Braid
Replacing standard clear elastics with satin or velvet scrunchies turns the tie points into styling elements rather than functional hardware; the fabric adds texture contrast at each interval and reduces friction on the hair shaft compared to rubber bands. Alternate two different scrunchie colors for a visible pattern that runs the length of the braid, or use a single accent scrunchie at the base tie while keeping the remaining intervals clear for a subtler effect. On natural and curly textures, scrunchies with smooth interiors reduce breakage at the contact points.
5. Second-Day Bubble Braid Refresh
A bubble braid from the previous day needs about two minutes to restore: lightly mist each section with water or a refreshing spray, gently re-puff the hair around each elastic from all sides, and reset any ties that have slipped. Frizz along the hairline on the second day responds well to a small amount of edge gel applied with a soft brush, smoothed only to the hairline and not through the bubble sections themselves. Fine and straight hair types need more refresh product than coily or wavy textures, which tend to maintain their shape with minimal intervention.
6. Highlighted Bubble Braid on Brunette Base
Face-framing highlights on a brunette base catch light as the hair wraps around each elastic, adding visual dimension to each bubble section even on a style where the hair is not manipulated as much as a traditional braid. On a level 4 to 5 brown base with level 8 to 9 highlights, the contrast between sections becomes visible from behind as the lighter strands surface and recede with each bubble’s curve. Balayage placement specifically benefits this style: strands painted toward the mid-lengths and ends are exactly where each bubble section sits, making the color most visible.
7. Low Side-Swept Bubble Braid
Pulling the ponytail low and off-center rather than centered at the nape creates a directional pull that changes the bubble braid’s silhouette; each bubble falls at a slight diagonal rather than straight down the back, which adds visible movement on shoulder-length and longer hair. Securing the base with a covered elastic at the nape on one side, then angling each subsequent elastic slightly inward, keeps the braid tracking along the side of the neck rather than drifting back to center. For a salon or braiding studio appointment, request this version as: “single bubble braid with the base at the left nape, elastics every two inches, loose and low.”
8. Bubble Braid vs Single Elastic Ponytail
A single elastic ponytail holds the hair back with no additional structure; the bubble braid adds 4 to 8 more elastics and the effort of puffing each section; the total time investment is about 8 minutes versus 1 minute, and the visual result is several times more structured. The comparison matters most to people who want an elevated look without a full styling session: the bubble braid is the highest return-per-minute style in the ponytail family, producing a textured, multi-section silhouette with a small number of affordable materials. Anyone who can do a ponytail can do a bubble braid; no braiding technique transfers.
Double and Twin Bubble Braids
Splitting the hair into two sections before adding elastics doubles the visual complexity and creates a style that looks significantly more involved than a single ponytail version. The spacing between bubbles can match on both sides for a symmetrical look or vary deliberately for a looser aesthetic. These eight entries cover technique for achieving symmetry, face shape guidance, texture-specific approaches, accessory options, extended-wear maintenance, color integration, low-placement variations, and how the style compares to other two-strand options.
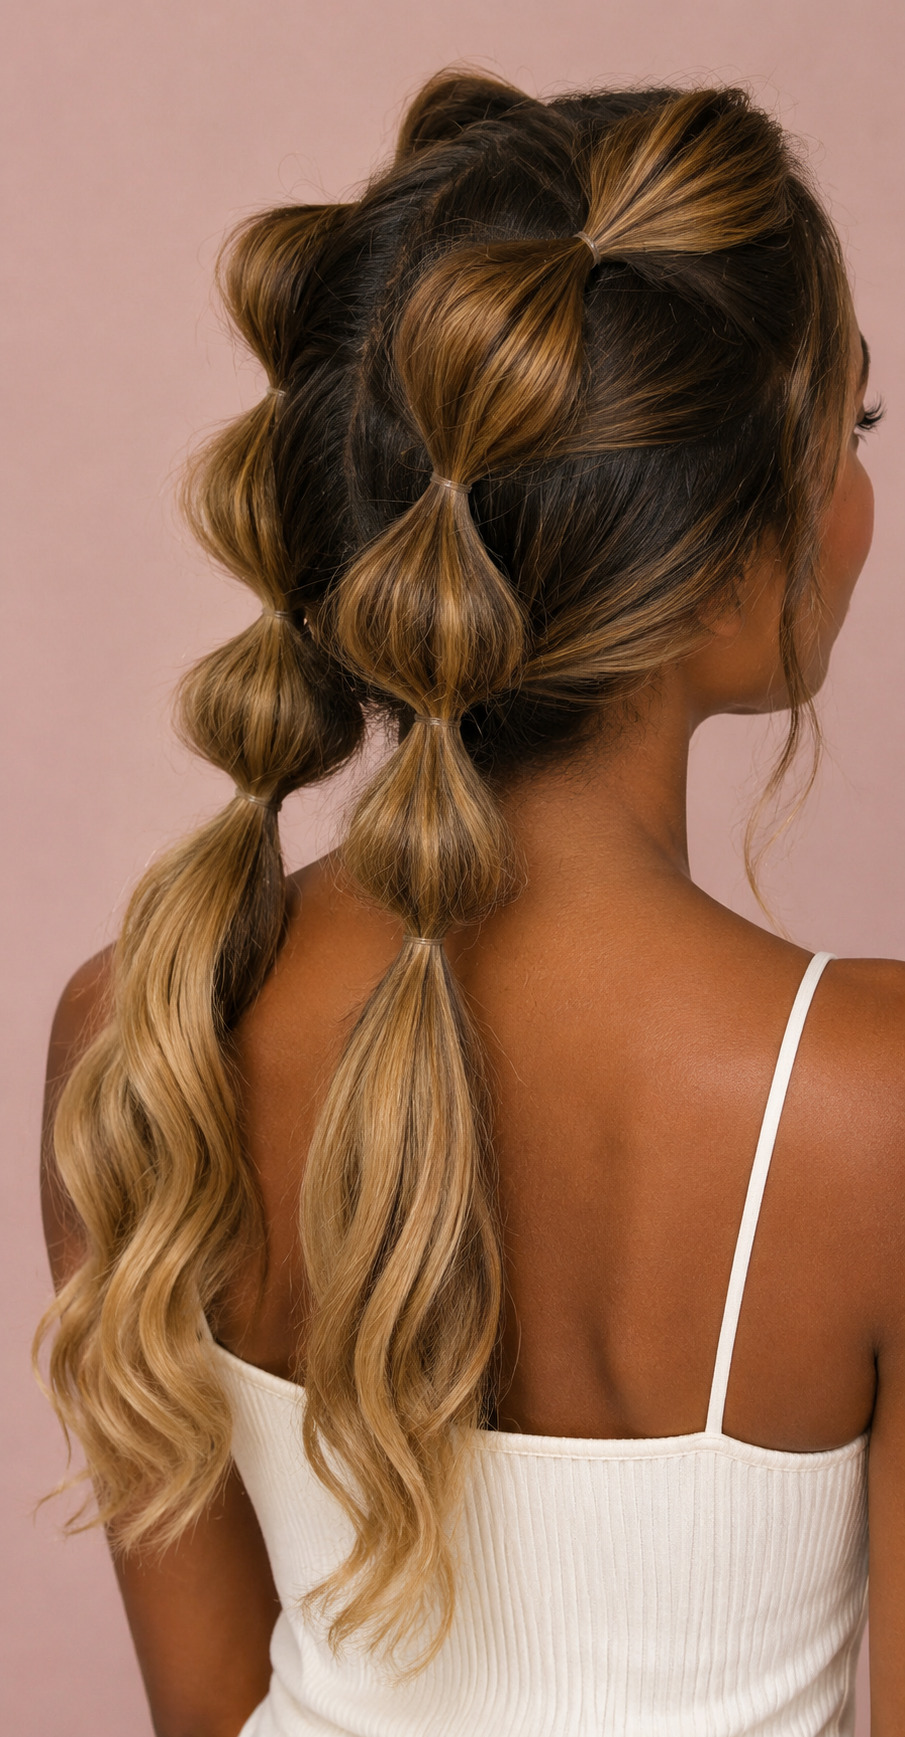
9. Symmetrical Twin Bubble Braids
Creating matching bubble braids on both sides requires a center part that holds cleanly during styling: on fine or straight hair, use a tail comb to draw a precise line rather than finger-parting. Once each section is in its base elastic, add the subsequent ties on both sides at the same time rather than completing one side fully before starting the other; building the elastics in parallel makes it easier to match the height of each corresponding bubble. Place each new elastic 1.5 inches below the previous, puff both sides at the same time, and adjust if one bubble looks noticeably larger before moving down.
10. Double Bubble Braids for Round Faces
Twin braids placed high — base ties at the top of the head rather than mid-section or low — add vertical height that counterbalances a round face’s natural horizontal emphasis. Each bubble cascades downward from the crown, drawing the eye up and along the braid’s length rather than across the face’s widest points. Wearing the base ties slightly behind the ears rather than at the very top of the head prevents the style from looking too casual for settings beyond everyday wear.
11. Wispy Double Bubble Braids on Wavy Hair
Wavy hair in a double bubble braid setup produces naturally uneven bubble shapes; the waves cause sections to fill differently on each side, creating a loosely textured pair of braids that looks relaxed rather than constructed. Rather than trying to fight the asymmetry, leave a few face-framing waves loose from the base and let the bubble sections hold their natural imperfection. On 2a to 2c wave patterns, the style holds for about 24 hours before the waves loosen the elastics; re-securing the ties and lightly spritzing each section with a curl refresher spray extends the look another half day.
12. Pearl-Pin Double Bubble Braids
Bobby pins with pearl ends, threaded through each bubble section at the point where the elastic sits, frame each bubble with a small decorative detail that changes the style’s register from casual to occasion-appropriate. Place two pearl pins per section (one on each side of the elastic), angled inward so the pins secure through the hair rather than resting on the surface. Gold or silver pearl pins on dark hair create the strongest contrast; pearl pins on lighter or highlighted hair appear more subtle but add texture at each tie point.
13. Extended-Wear Double Bubble Braids
Applying a thin layer of edge control along each part line and a light sealing oil through the length before adding elastics extends the wear of double bubble braids from one day to two or three; the product reduces frizz at the sections and keeps the part clean without requiring a full re-style. Wrapping the braids in a silk bonnet at night rather than leaving them loose prevents the bubbles from compressing against a cotton pillowcase, which flattens them and adds frizz at the contact points. In the morning, a light mist and a finger re-puff of each section restores the shape in under three minutes.
14. Dual-Tone Double Bubble Braids
Two-tone hair (whether achieved through full color, highlights, or clip-in extensions in a contrasting shade) creates a visual rhythm in double bubble braids because the color alternates between sections as each bubble rotates around the elastic. On dark natural bases with warm honey or caramel pieces, the depth change from bubble to bubble becomes part of the style’s visual interest rather than just background color. Adding clip-in extension wefts in a contrasting tone, blended at the base before parting, creates the same effect without a permanent color commitment.
15. Low-Placement Double Bubble Braid Ponytails
Low double bubble braids, where the base ties fall at the nape rather than the crown, create a different silhouette than the classic high placement; the braids hang forward over the shoulders rather than down the back, which suits round and square faces better than crown placement. When doing these yourself, create the center part first, pull each section back and slightly downward before securing the base elastic, and check the back of the part with a handheld mirror before adding the first tie. Request this version at a stylist by saying: “low double bubble braids, base elastics at the nape, loose enough to hang in front of the shoulders.”
16. Double Bubble Braids vs Space Buns
Space buns twist or coil the hair at the top of each section into a bun secured with pins; double bubble braids use elastics to create structure along the full length of the hair rather than gathering it up. Space buns remove the hair’s length from view entirely; bubble braids use that length as the canvas for the style’s structure. On hair longer than mid-back, bubble braids have a clear advantage because there is more length available for multiple bubbles; space buns on very long hair require significant pinning to contain all the length, while bubble braids at that length produce the most substantial versions of the style.
Mini Bubble Braids
Mini bubble braids divide the head into multiple narrow sections, each with its own elastic intervals and bubble structure; the effect looks more intricate than a single or double version and lasts significantly longer when done with care. These six entries cover technique for creating clean parallel sections, face shape guidance, texture-specific approaches, accessory options, protective longevity, and color integration.
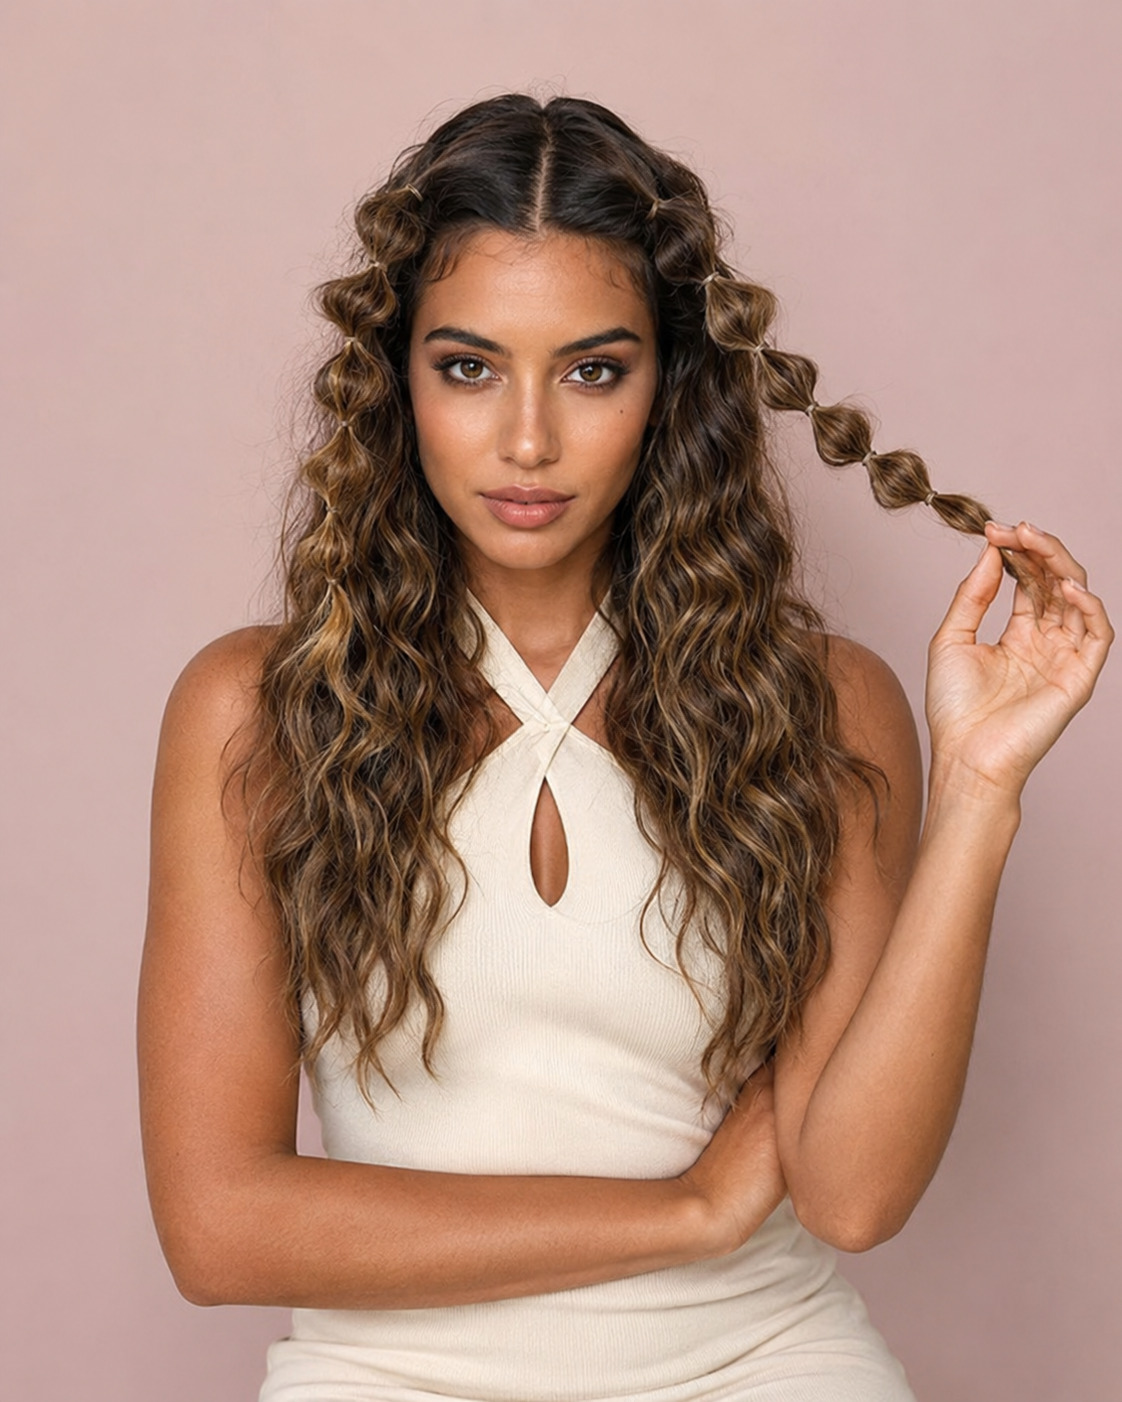
17. Mini Bubble Braid Cornrow Rows
Creating mini bubble braids that run in parallel rows requires sectioning the hair into even horizontal rows using a rat-tail comb (typically five to seven rows from the hairline to the nape). Within each row, the hair is gathered into a thin ponytail at the scalp and then secured at 1 to 1.5 inch intervals down the length, with each section puffed outward after each elastic. The key technique distinction from a standard cornrow: mini bubble braids are raised from the scalp rather than flat against it, and the bubble sections give each row visible dimension that flat cornrows do not have.
18. Half-Down Mini Bubble Braids for Heart Faces
Heart-shaped faces have wider foreheads and narrower chins; leaving the front sections out of the mini bubble braid pattern and letting them fall loosely as face-framing pieces reduces the visual width at the forehead while the braided back adds structure. Starting the mini braid rows from behind the temples rather than from the hairline keeps the front of the silhouette soft and prevents the style from emphasizing the forehead’s width. Back sections can be braided fully to the ends for a longer wear option while the front sections are pinned back or left loose depending on the occasion.
19. Mini Bubble Braids on Loose 3a Curls
3a loose curls add natural volume to each mini bubble braid section without extension hair; the curl pattern fills out each bubble from within rather than relying on the density of packed-in fiber. On natural 3a texture, the row width needs to be slightly wider than on straight hair to account for the curl’s natural contraction after styling, which reduces visible length and makes each row appear shorter than it measured when wet. A light curl cream applied before sectioning defines the curl pattern within each bubble and reduces frizz at the elastic contact points.
20. Beaded Mini Bubble Braids with Gold Cuffs
Sliding a small metal cuff over each elastic tie before securing it, then threading a wooden or resin bead onto the hair at the end of each row, creates a fully adorned mini bubble braid set that works from casual to formal occasions. Gold cuffs against dark hair produce the highest contrast; silver cuffs suit lighter or highlighted hair. The beads at the ends add movement when the braids shift, which particularly suits outdoor, festival, and event styling where the style is likely to be seen in motion, a look that connects naturally to broader Black hairstyles traditions of using beads and cuffs as decorative elements.
21. Five-Day Mini Bubble Braid Protective Set
Mini bubble braids on natural hair can hold for four to six days with the right nightly routine: applying a light braid spray or diluted leave-in conditioner to the roots before wrapping in a satin bonnet prevents the scalp from drying out and reduces frizz at the part lines overnight. On days two and three, re-moisturizing the scalp with a light oil applied through a nozzle applicator keeps the style looking fresh; by day four, focusing product on the hairline and exposed roots maintains the neat appearance without touching the bubble sections themselves. Removing carefully at the end of the wear period — sliding each elastic off rather than cutting — prevents breakage at the contact points and makes mini bubble braids one of the lower-damage options among protective hairstyles of comparable complexity.
22. Copper Ombre Mini Bubble Braids
A copper ombre that transitions from natural black roots through warm auburn mid-lengths to copper at the ends maps onto mini bubble braid sections with the color shift visible in each individual bubble as the lighter ends surface around the elastic. On medium and deep skin tones, copper ombre adds warmth that contrasts with the natural base in a way that reads differently at each section of a mini bubble braid than it would in a loose style. The ombre requires a partial bleach and tone to achieve on dark bases; maintaining the copper brightness means toning every 4 to 6 weeks as warmth shifts toward brass.
Crown, Half-Up, and Creative Variations
The bubble braid concept extends well beyond straight ponytail placements; crown versions, half-up configurations, and hybrid styles with buns or updos use the same elastic-and-puff technique in non-linear arrangements that change the silhouette entirely. These final eight entries cover half-up technique, comparisons with other updo styles, creative hybrid forms, face shape guidance, texture-specific adjustments, accessory options, overnight preservation, and color-block applications.
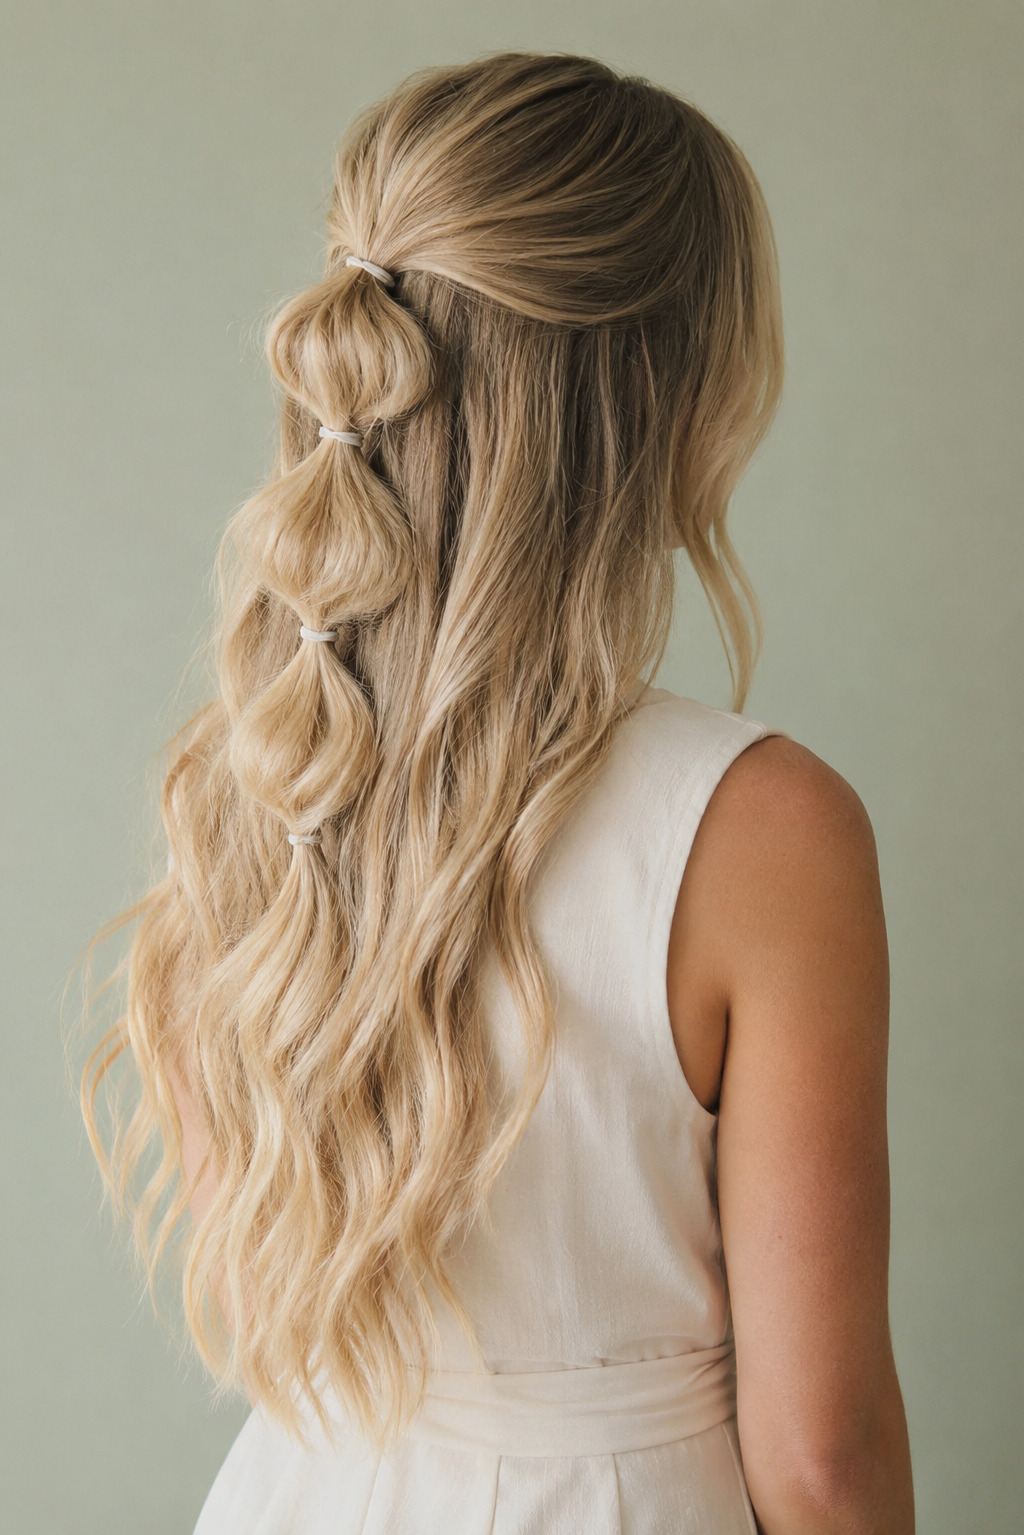
23. Half-Up Crown Bubble Braid
Taking the top half of the hair into a single ponytail at the crown, then applying the bubble braid technique to just that section while leaving the lower half loose, creates a half-up style where the bubble braid runs across the top of the head as a textured crown. The technique difference from a standard ponytail bubble braid: the base elastic rests higher and further back, and each bubble expands horizontally rather than vertically because gravity pulls at a different angle. Apply a firm-hold mousse to the gathered section before adding elastics to prevent the bubbles from loosening as the day progresses.
24. Crown Bubble Braid vs Halo Braid
A halo braid wraps around the entire perimeter of the head in a single flat-braided strand; a crown bubble braid covers only the top portion of the head in a raised, puffed configuration that requires no traditional braiding technique. The halo requires knowing how to French or Dutch braid and takes 20 to 30 minutes to execute cleanly; the crown bubble braid takes under 10 minutes and requires only elastics. On long hair, the halo looks more intricate from every angle; on shorter hair, the crown bubble braid is the more achievable option because it does not require enough length to wrap the full perimeter of the head.
25. Bubble Braid into Loose Low Bun
Running the bubble braid technique down a ponytail for 4 to 5 sections, then gathering the remaining length into a loose twisted bun secured with the final elastic, creates a hybrid updo that combines the structured bubble sections with a relaxed bun finish. The bun anchors the braid from swinging and adds a polished endpoint that makes the style appropriate for more formal contexts than a trailing ponytail version. On thick medium or long hair, this combination works well as a no-heat updo for work or event settings where a full trailing ponytail reads too casual.
26. Square Face Half-Up Bubble Braid with Volume
Square faces have strong, equal-width foreheads and jaws; a half-up bubble braid with volume built into the crown section softens the horizontal evenness by adding height at the top of the silhouette. Lightly backcomb the gathered section at the base tie before adding the elastics, which gives the first bubble more lift and creates visible height. Leaving the sides loose rather than pulling all the hair back prevents the style from emphasizing the jaw’s width, which a fully gathered style tends to do on square face shapes.
27. Fine-Hair Bubble Braids with Extension Volume
Fine hair under medium density does not naturally fill out bubble sections; the hair pulls through the elastics without expanding, producing flat sections rather than round bubbles. Adding clip-in extension wefts to the ponytail base before starting the elastics increases the section density enough for the hair to hold bubble shapes. Alternatively, applying a volumizing mousse to dry hair before gathering and back-combing each section lightly after puffing adds texture that helps fine hair hold the round shape between elastics without extension volume.
28. Jeweled Festival Bubble Braids
Threading small adhesive gems or chain-link accessories through the hair at each elastic position turns a standard bubble braid into a festival or event-appropriate style. Position gems or chain links in each bubble’s center rather than at the elastic tie, so they appear embedded in the hair rather than sitting on top of the hardware. On dark hair, silver or holographic gems catch light most effectively; on lighter or highlighted hair, gold gems create a warmer effect that suits evening events without looking overdone in daylight.
29. Overnight Silk-Wrap Bubble Braid Method
Sleeping in a bubble braid is the fastest way to compress the bubbles and add frizz; the elastics shift, the sections flatten against the pillow, and the result needs significant re-puffing to restore. Wrapping each completed bubble braid individually in a small piece of satin fabric before covering with a bonnet, or using a satin pillowcase alongside a bonnet rather than a cotton pillowcase alone, prevents most of the compression damage. On natural coily and kinky textures, wrapping with a satin scarf and pinning the braids flat against the head maintains the style’s integrity through one night and reduces the morning refresh routine to a mist and re-puff.
30. Two-Section Color-Block Bubble Braids
Dividing the hair into two horizontal zones (upper and lower) and coloring each section a different shade before styling creates a color-block bubble braid where each of the two ponytails runs a distinct color through its bubbles. The visual result from behind is a horizontal divide between two colors that the bubble structure makes more visible by alternating the colored sections at each elastic interval. On naturally dark bases, the upper section can be lightened to a warm blonde while the lower stays at natural depth, with the bubble structure framing the color boundary at each tie point.
What Bubble Braids Actually Are
Despite the name, bubble braids are not braids in the technical sense; no hair is interlaced, crossed, or woven. The technique: gather hair into a ponytail, add elastic ties at regular intervals down the length of the ponytail, and pull each section between the ties outward until it forms a rounded, bubble-like shape. The result looks significantly more complex than it is, which is why the style gained widespread popularity across every hair type and texture once it started circulating widely.
The elastics do all the structural work. Once tied at equal intervals, they hold each section in place while the puffing gives each segment its characteristic sphere shape. Remove the elastics, and the hair returns to its ponytail base — this is also why bubble braids are considered a lower-damage styling option, as the elastics are not pulled tight and the technique requires no heat, no root tension beyond a standard ponytail, and no chemical processing.
The style works on natural and relaxed hair, on extensions, on synthetic hair, and on hair ranging from 4 inches to 24-plus inches of length. Every curl and wave pattern from straight to 4c coily can produce the bubble effect — the only true prerequisite is enough length to create at least two elastic intervals, roughly 4 to 6 inches from the base of the ponytail.
Stylist tip: “The most important decision is elastic placement: consistent spacing creates a deliberate, polished look, while inconsistent spacing makes the style look unfinished. Measure the first interval with your fingers, then match every subsequent elastic to that distance rather than eyeballing each one independently,” says a licensed braiding stylist and THP contributor.
Hair Type and Texture Guide
The bubble effect works differently depending on hair texture; the amount each section expands, the product needed to prevent frizz, and whether the bubbles hold their shape through the day all vary significantly by texture type. The guide below covers straight through coily hair with specific technique adjustments for each.
| Hair Type | Natural Bubble Size | Best Base Product | Key Technique Note |
|---|---|---|---|
| Straight (1a–1c) | Flat without assistance; needs back-combing or mousse | Volumizing mousse or dry shampoo before styling | Back-comb each section lightly before pulling outward; use hairspray to set |
| Wavy (2a–2c) | Moderate; waves fill sections naturally | Curl refresher or light hold cream | Let sections dry completely before adding elastics; wet waves compress rather than puff |
| Curly (3a–3c) | Full; curl contraction fills each bubble | Light curl cream or leave-in conditioner | Cut section length slightly longer than intended; curls shrink when dry |
| Coily (4a–4c) | Very full; coil density creates maximum bubble volume | Shea butter or dense leave-in through length; edge control at hairline | Measure elastic intervals on stretched length; coil contraction makes each bubble appear larger than measured |
| Fine (any pattern) | Minimal; hair pulls flat through elastics | Volumizing mousse; or add clip-in extension wefts to ponytail base | Extensions add density needed to hold round shape; without them, keep bubbles small and close together |
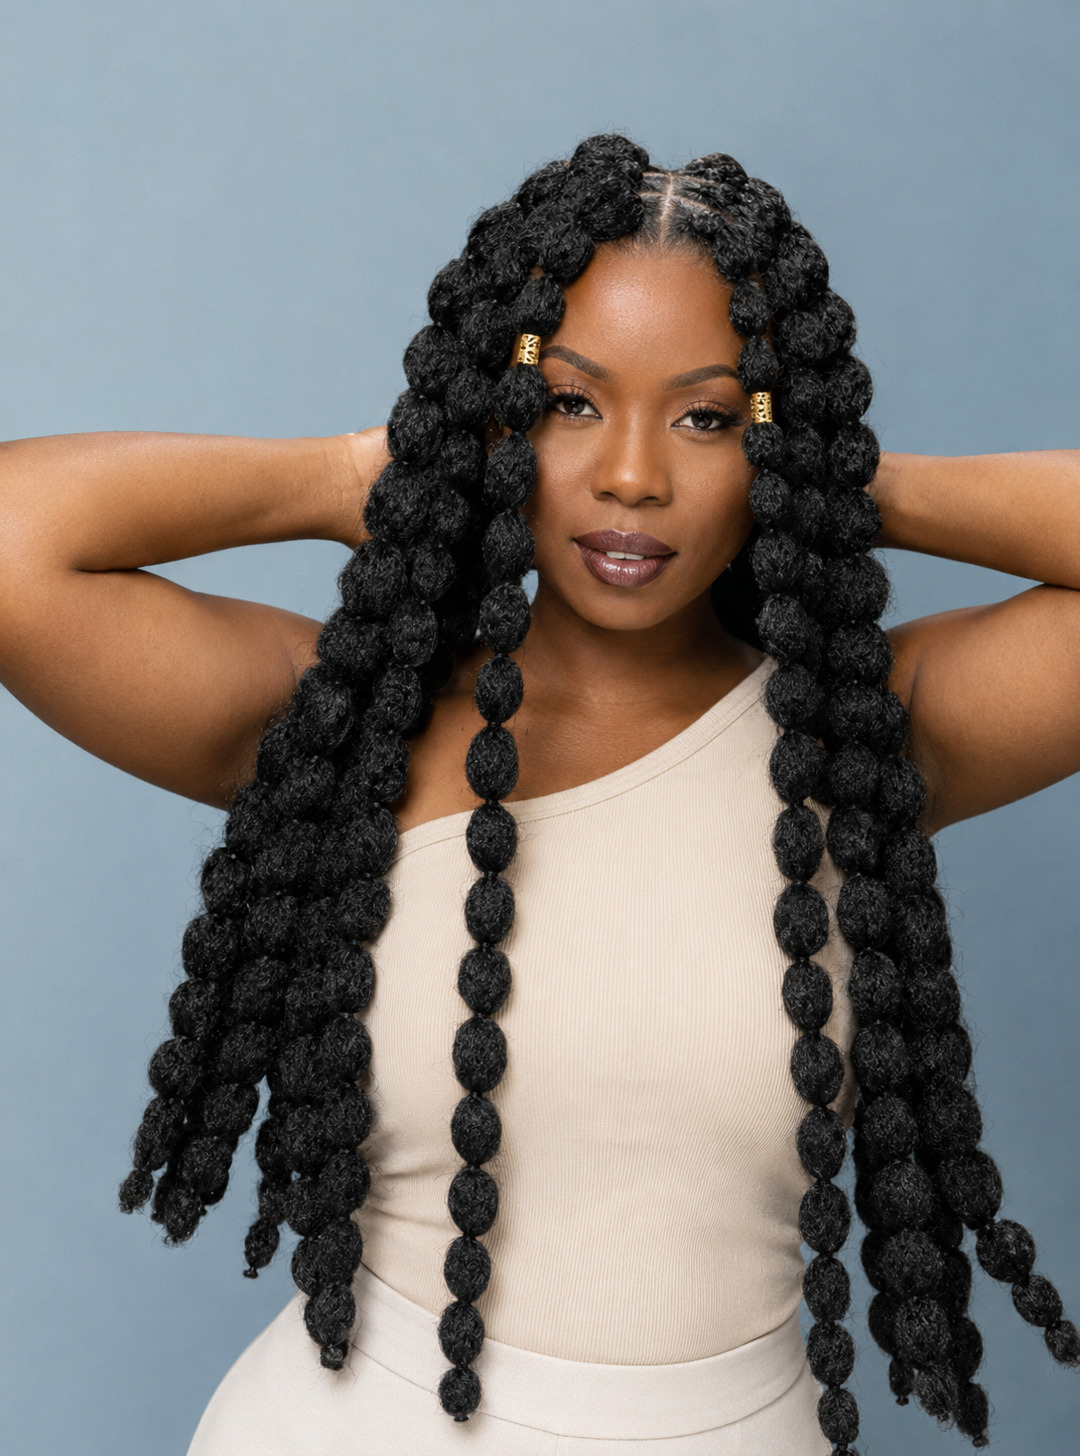
How to Do Bubble Braids Step by Step
The following steps produce a clean single bubble braid ponytail. The same sequence applies to double and mini versions; the difference is how many sections you create before starting.
Step 1: Prep the hair. Start on dry hair; bubble braids done on wet or damp hair compress rather than puff, and the bubbles flatten as the hair dries. Apply a small amount of your texture product (mousse for straight hair, curl cream for curly or coily textures) and brush or detangle fully before gathering. Smooth the edges with edge control if you want a clean hairline at the base.
Step 2: Gather your ponytail. Pull the hair to your chosen position (high, mid-back, low, or side) and secure with a covered elastic or scrunchie. For double or twin bubble braids, create your center part first and secure both base ponytails before adding any elastics.
Step 3: Measure your first interval. Use your fingers (typically two finger-widths below the base elastic) to find the position for the first additional tie. Keep this measurement consistent for every subsequent elastic, as even spacing is what gives the style its structured appearance.
Step 4: Add the first elastic and puff the section. Place the elastic at your measured interval. Then, using both hands, pinch the hair above the new elastic and pull outward from all four sides (left, right, front, and back) until the section fills into a rounded sphere shape. Repeat this puffing step for every elastic before moving to the next one, rather than placing all elastics first and puffing at the end, which produces less consistent bubble shapes.
Step 5: Continue down the length. Repeat steps 3 and 4 for each subsequent elastic until you reach the end of the hair. For a clean finish, secure the very end with a small elastic that matches your hair color, or fan the ends out below the last bubble section. Set the style with a light hold hairspray along the length if you want the bubbles to hold through activity.
Stylist tip: “Most people pull the bubbles too hard and create sections that look stretched rather than round. The puffing motion should be a gentle outward expansion from the center of each section, not a forceful tug. If a section looks flat after puffing, add a little more volume spray and re-puff before the next elastic rather than pulling harder,” says a licensed braiding stylist and THP contributor.
Face Shape Compatibility
Ponytail placement is the primary face shape variable for bubble braids — a high placement adds height and suits faces that need vertical emphasis, while low and side placements add width or reduce width depending on the face’s proportions. Bubble size and the number of sections are secondary considerations that can refine the silhouette further.
| Face Shape | Best Placement | Avoid | Why |
|---|---|---|---|
| Oval | Any placement; high is most versatile | No major restrictions | Balanced proportions suit any bubble size and ponytail position |
| Round | High ponytail placement; tall bubble sections | Low or wide-swept ponytails; very large bubbles at the widest face zone | High placement adds vertical height; tall bubbles draw the eye upward rather than across the face’s widest points |
| Square | Half-up with volume at the crown; low-nape double braids | Tight, fully gathered ponytails that expose the full jaw | Crown volume softens the angular jaw-forehead evenness; leaving some hair loose prevents emphasizing the jaw’s horizontal line |
| Heart | Low or nape placement; half-down with loose front sections | Very high ponytails that add width at the already-wider forehead | Low placement draws volume downward, balancing a wide forehead against a narrower chin; loose front sections soften the hairline |
| Oblong | Side-swept or low double braids; half-up with wide bubbles | Very high placement with elongated bubble sections | Side placement and wider bubble shapes add horizontal visual interest; tall bubble columns on already-long faces emphasize the length further |
| Diamond | Crown half-up or high ponytail; add face-framing pieces | Very tight gathered ponytails that fully expose wide cheekbones | Face-framing pieces soften prominent cheekbone width; crown placement draws attention upward rather than across the face’s widest point |
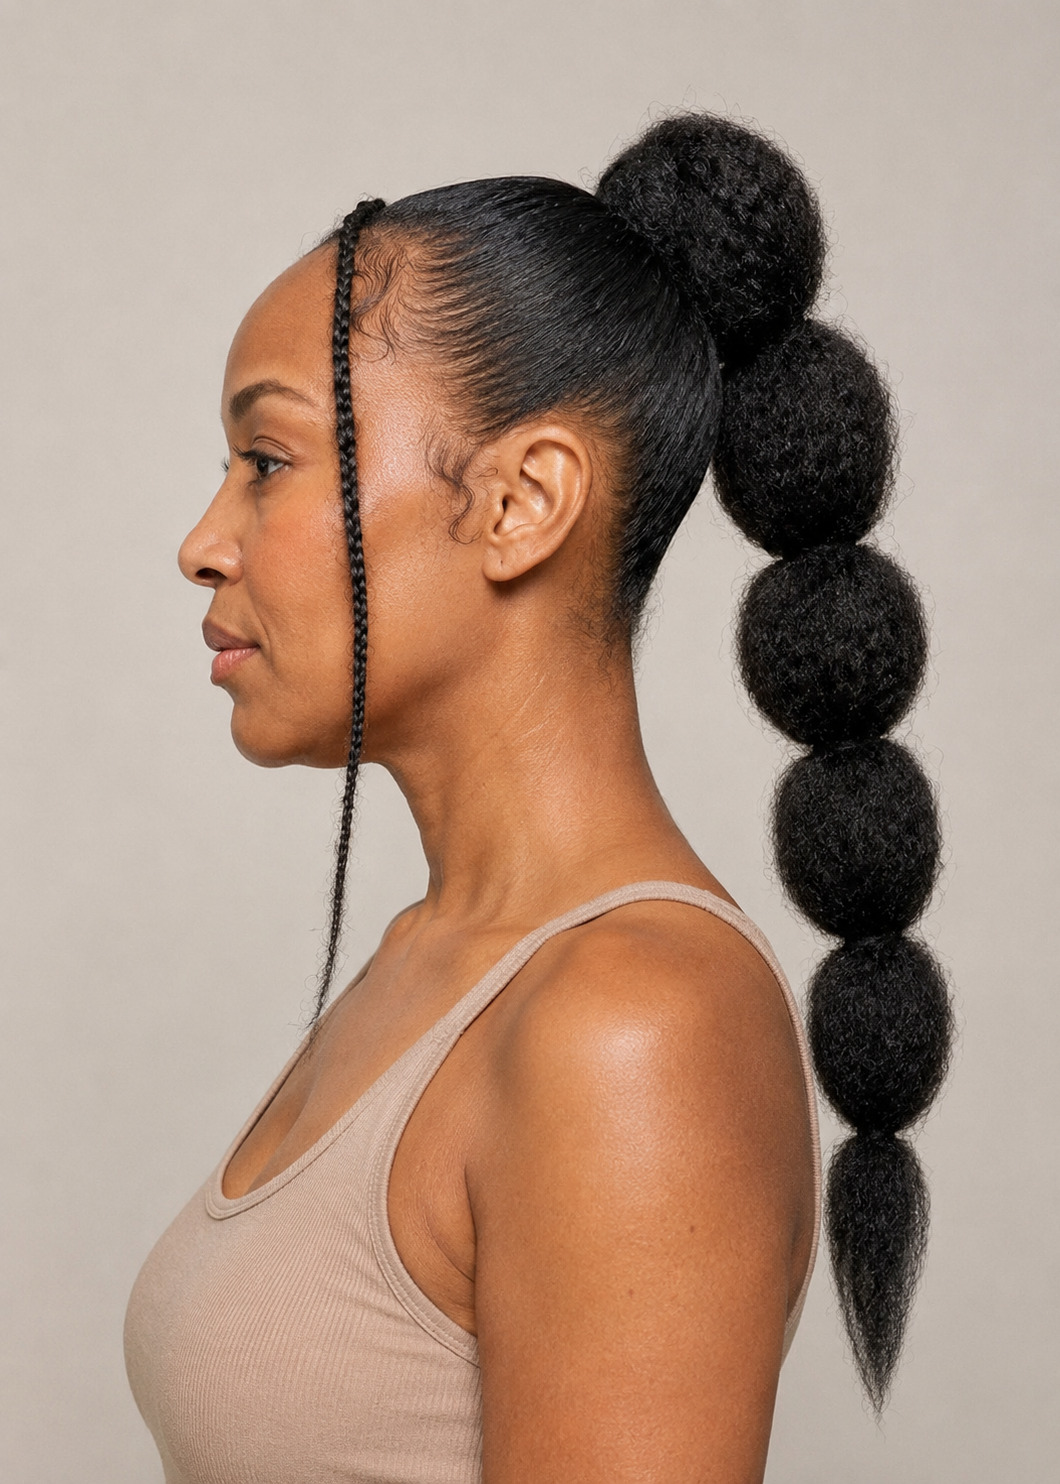
Accessories and Customization
The hardware at each elastic point is the easiest place to personalize bubble braids. Clear elastics minimize the tie’s visibility; matching hair-color ties blend in entirely; scrunchies, satin ties, and fabric bands each add a different texture. Metal cuffs, pearl pins, and hair rings transform each elastic position from functional to decorative. Beads threaded onto the ends of mini rows add movement and sound. Color ribbons woven into the ponytail before adding elastics surface at each bubble and add a stripe effect through the length.
The scale of customization can range from a single accent scrunchie at the base to a fully adorned set with cuffs at every tie and beads at every end. Less is often more for everyday wear; one or two accent elements tend to look more considered than hardware at every point. Event and occasion styling is where maximum accessory density works best, since the style is designed to be seen from multiple angles as you move.
For braided styles in the broader braided hairstyles category, the accessory tradition varies: pop smoke braids and box braids use cuffs, rings, and beads similarly, and the same hardware that works on those styles applies directly to bubble braids.
Stylist tip: “Always use covered elastics or satin-lined ties rather than bare rubber bands, especially on natural and textured hair. Rubber bands grip the hair shaft, create friction at the contact point, and cause breakage when removed — particularly in mini bubble braid sets where each row has multiple contact points,” says a licensed braiding stylist and THP contributor.
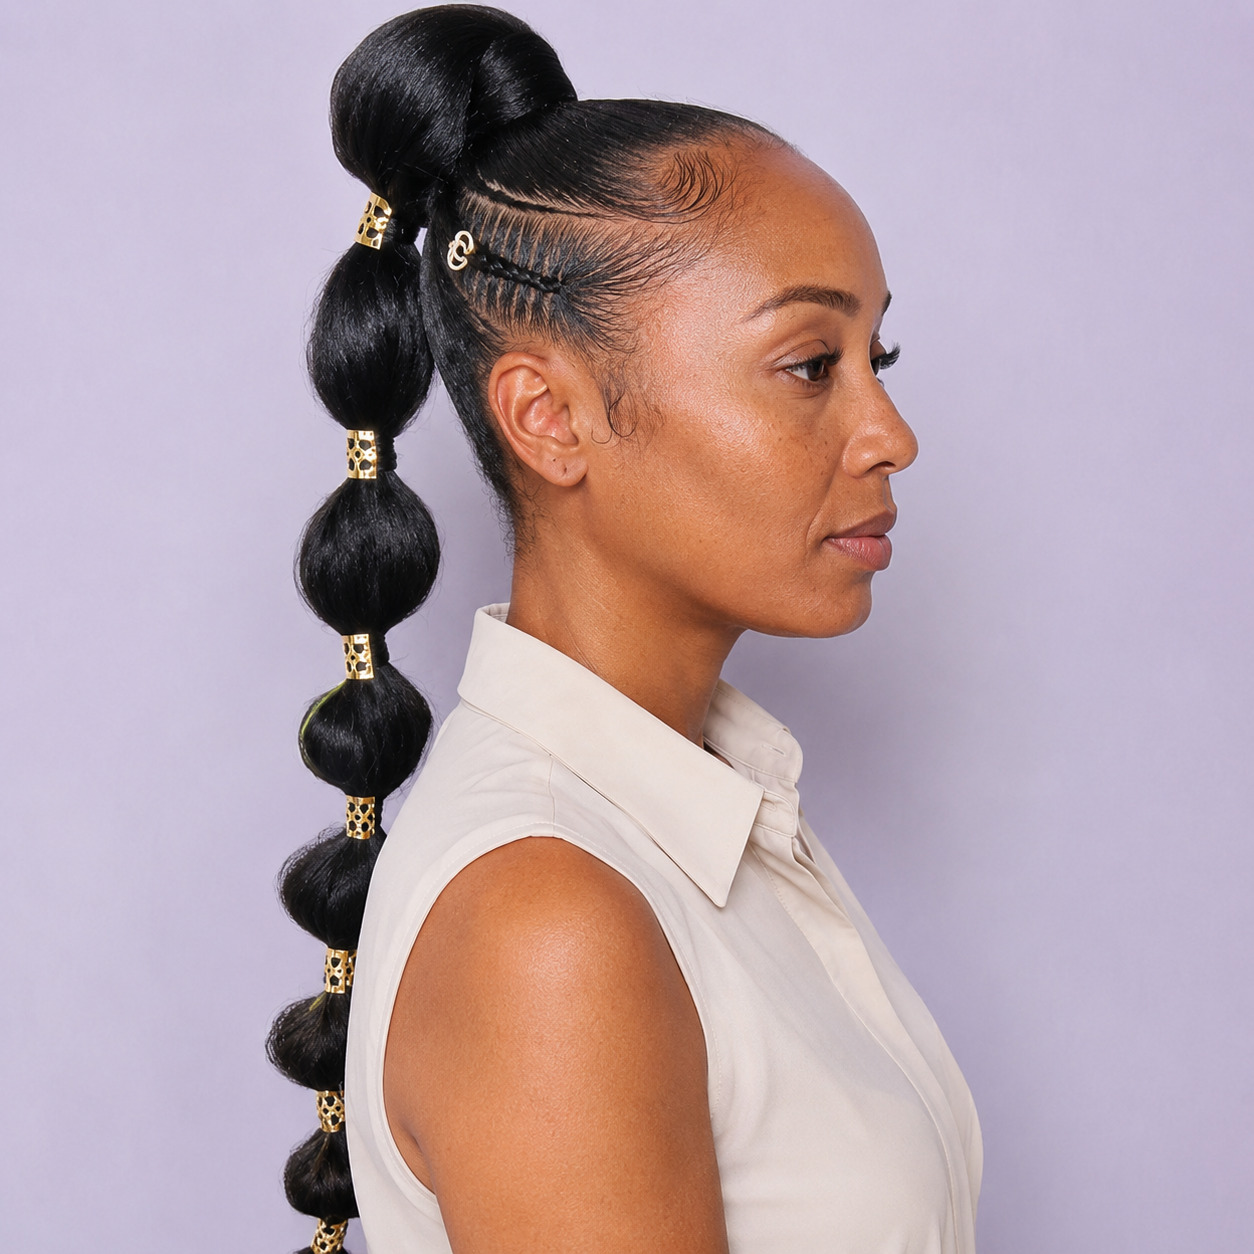
Maintenance and Longevity
How long a bubble braid holds depends on the variation, hair texture, overnight care, and how much activity the style has to survive. Single ponytail versions last one to two days; mini braid sets on natural hair can hold four to six days with the right routine. The table below covers expected duration and the key re-style routine for each variation.
| Variation | Typical Duration | Overnight Care | Re-style Routine |
|---|---|---|---|
| Single bubble braid (straight/wavy) | 1–2 days | Satin bonnet or pillowcase | Mist and re-puff; refresh hairline with edge control |
| Single bubble braid (curly/coily) | 2–3 days | Satin bonnet; pin braid flat to head | Mist with water, re-puff, apply light curl cream to frizzy sections |
| Double/twin bubble braids | 1–2 days | Silk bonnet or individual satin wraps | Re-secure any slipped elastics first, then mist and re-puff both sides together |
| Mini bubble braids (natural hair) | 4–6 days | Satin bonnet nightly; braid spray on roots | Days 1–3: scalp oil through nozzle; Days 4–6: edge control on hairline only |
| Crown/half-up bubble braid | 1 day (re-create daily) | Remove before sleeping; quick to redo in the morning | Re-create takes under 10 minutes; not designed as an overnight style |
When Bubble Braids Are Not the Right Choice
The style’s low technique barrier and universal texture compatibility make it genuinely accessible to almost anyone, but several conditions work against it:
- Very fine low-density hair without extensions: The bubble effect requires enough density in each section to hold a round shape. Fine hair with low density passes through elastics without expanding; the sections look flat and limp rather than rounded. Adding extension volume fixes this, but the base style on very fine hair alone consistently underperforms the look that inspired the attempt.
- Hair under 4 inches of ponytail length: Each bubble section needs at least 1 to 1.5 inches of length to puff outward. Hair that is shorter than 4 to 6 inches from the base of the ponytail cannot produce more than one or two bubble sections before running out of length; the result looks incomplete rather than structured.
- Freshly washed and wet hair: Bubble braids done on wet hair compress as the hair dries, flattening the sections and producing a result that is significantly less full than the intended look. The style requires fully dry hair to hold the puffed shape; even 10 to 20 percent residual moisture affects the bubble’s ability to hold its round form.
- High-sweat or high-humidity conditions for formal occasions: Single ponytail bubble braids on straight hair are among the higher-maintenance styles in terms of humidity and sweat response; the sections can wilt within a few hours in hot, humid conditions. For formal events in warm weather, mini bubble braids on natural hair or a version with a firm-hold setting spray will hold significantly longer than a standard single ponytail version on straight or fine hair.
FAQ
What hair type is best for bubble braids?
Curly and coily textures produce the fullest, most dramatic bubble shapes because the curl and coil patterns fill each section outward without additional product. Straight hair can achieve the same result with back-combing and volumizing product, but it requires more effort to hold the shape. All hair types can wear bubble braids; the technique adjusts more than the outcome does. For detailed per-texture guidance, the natural hairstyles section covers curl-specific styling principles that apply directly to bubble braid technique on textured hair.
How long do bubble braids last?
Single ponytail versions typically last one to two days with proper overnight care; mini bubble braid sets on natural hair can hold four to six days. The main factor is overnight maintenance: a satin bonnet prevents compression and frizz that compress the bubble sections overnight. Without overnight care, even a well-set bubble braid will need significant re-puffing by the second day.
Can you do bubble braids on short hair?
Yes, provided there is at least 4 to 6 inches of ponytail length from the base tie. Hair shorter than that cannot produce enough bubble sections to make the style visually distinct from a short ponytail with one or two hair ties. The minimum length requirement is why many people with short hair add extension volume before styling; the added length creates enough sections for the bubble effect to read clearly.
Do bubble braids damage your hair?
Bubble braids are among the lower-damage updo options when done correctly; they require no heat, no chemical processing, and no root tension beyond a standard ponytail. The main damage risk is using rubber bands rather than covered elastics, which grip the hair shaft and cause breakage at the contact points. Mini bubble braid sets with many contact points over multiple days should use only covered elastics or satin-lined ties, and each elastic should be slid off rather than cut or pulled at removal. For natural hair specifically, this style compares favorably to higher-tension options within the broader knotless braids and protective style family.
What is the difference between bubble braids and regular braids?
Regular braids interlace strands of hair (three-strand, four-strand, French, Dutch, or cornrow) and create structure through the weaving of hair over and under itself. Bubble braids use only elastics and puffing; no strand interlacing occurs at any point. The result looks braid-like from a distance because of the segmented structure, but the construction technique is completely different. This is why bubble braids are accessible to anyone who can do a ponytail, while traditional braids require specific technique and practice.
How many elastics do you need for bubble braids?
For a single bubble braid on mid-length hair, plan for 5 to 8 elastics total: one for the base and 4 to 7 for the bubbles depending on hair length and your chosen bubble spacing. Very long hair may need 10 or more. Double braids double the count. Mini braid sets with 6 or more rows require significantly more: multiply the number of rows by the number of elastics per row. Having 30 to 50 clear elastics on hand before starting a mini braid set prevents having to stop mid-style.
Bubble braids work because the technique is almost entirely accessible; the same elastic-and-puff method that produces a clean single ponytail scales from beginner attempts on wash day to fully adorned mini rows with cuffs and beads. Whether you are doing a five-minute single braid for everyday wear or a structured mini set as a multi-day protective style, the face shape placement, texture adjustments, and accessory choices in this guide give you the variables needed to get the right version for your hair and setting.
Hair results vary based on your natural hair type, texture, density, and condition. Always consult with a licensed hairstylist or braiding professional before making significant changes. Photos may show styled results that require professional tools and products to replicate.
1 response