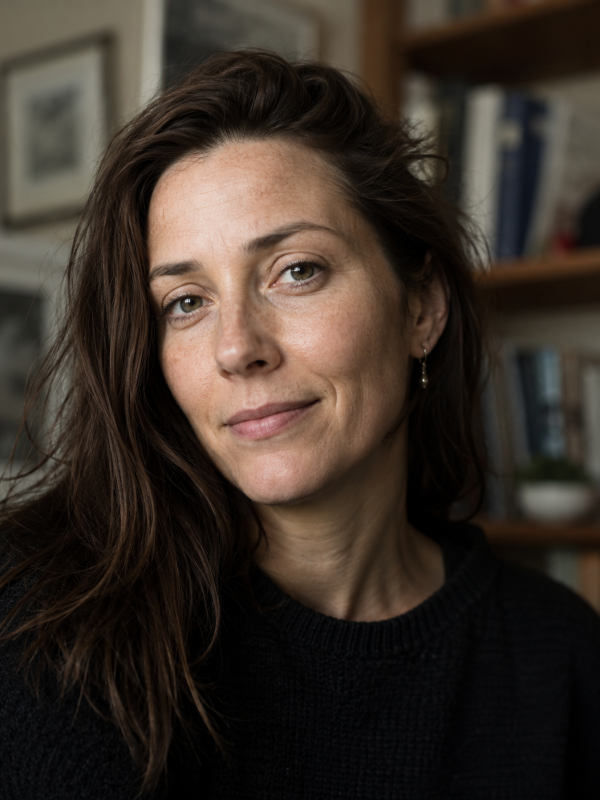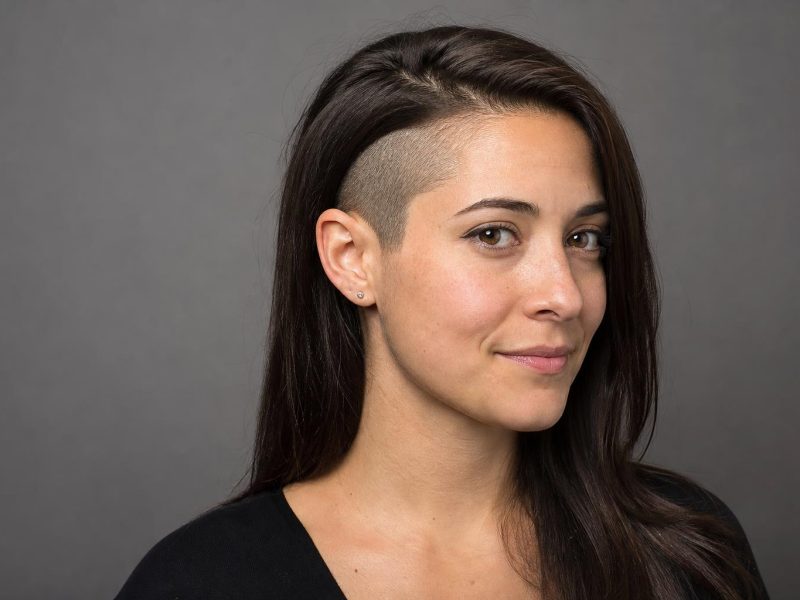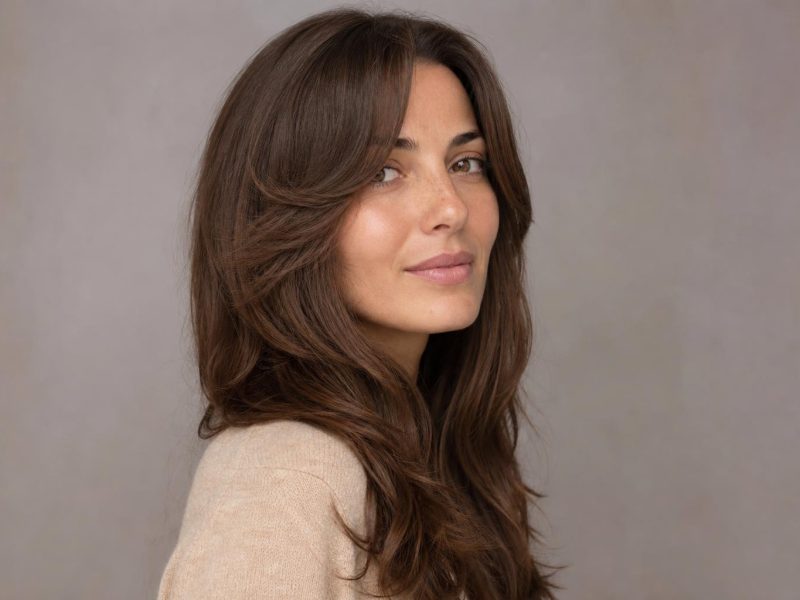
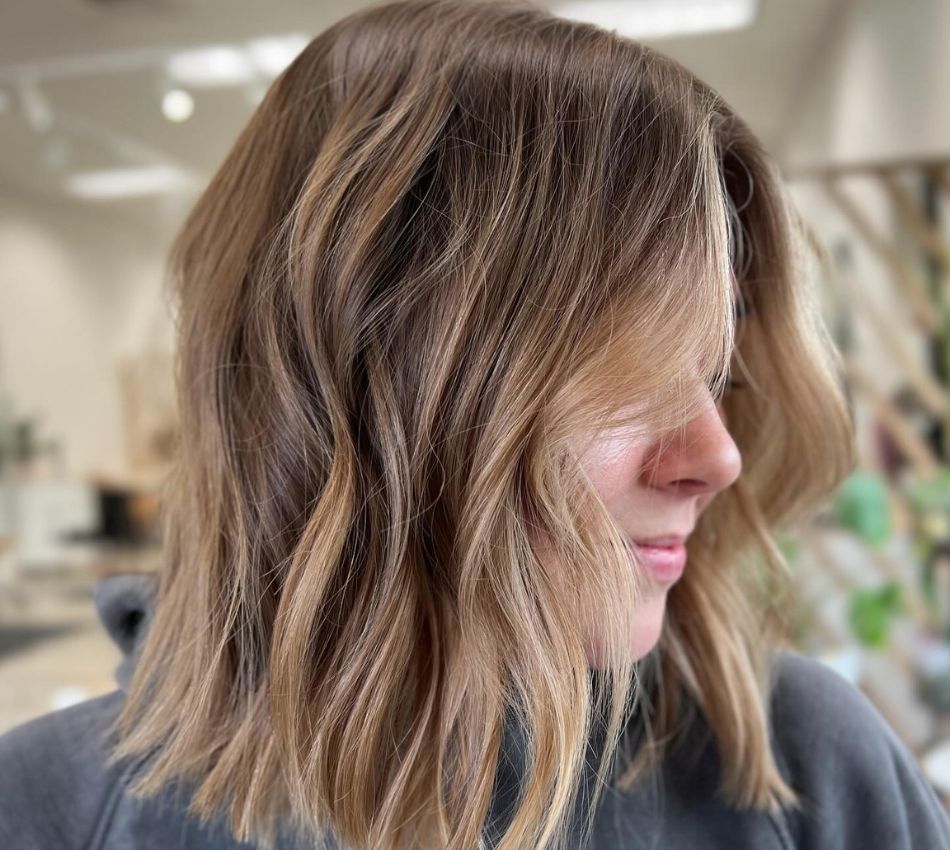
Fifty stylist-approved medium layered haircuts organized by hair texture, face shape, and color, each with notes on who it suits and how to ask for it.
Medium layered haircuts add movement, reduce bulk, and reshape shoulder-length hair without losing its length. The right layering technique makes the difference between a cut that swings naturally and one that falls flat. Whether you have fine hair that needs volume, thick hair that needs weight removed, or wavy texture that needs defined shape, the 50 variations below cover every combination of texture, density, and personal style.
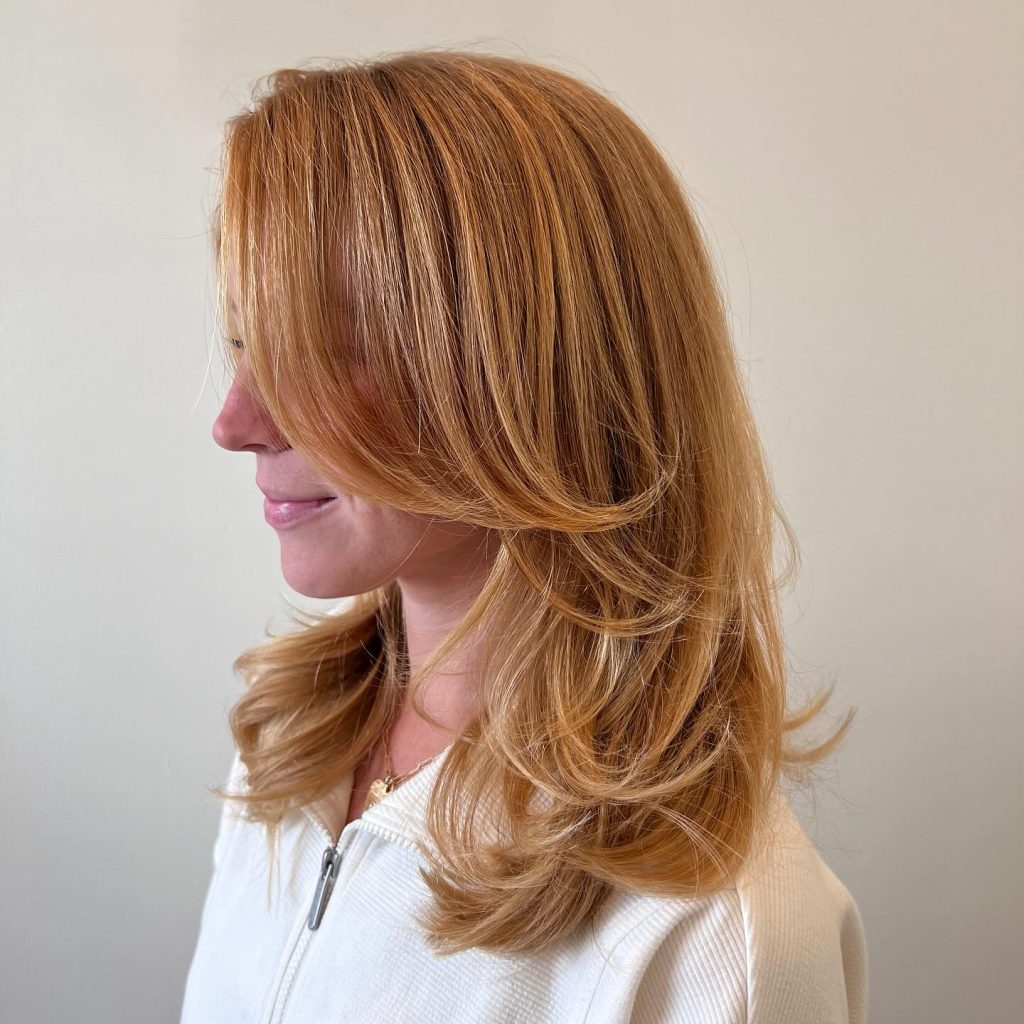
You’ll find options sorted by hair texture (straight, wavy, thick, fine), plus dedicated sections for layered cuts with bangs and layered cuts with color techniques. Each entry includes what makes the cut distinct, who it flatters, and what to tell your stylist. Below the gallery, a face shape compatibility guide, salon communication tips, and a maintenance breakdown will help you walk in confident and walk out with exactly the cut you wanted.
| Feature | Details |
|---|---|
| Best For | Shoulder-length hair (collarbone to 2 inches above), all textures |
| Maintenance Level | Low to moderate: trims every 6–10 weeks depending on layer type |
| Works With | Straight, wavy, curly, fine, thick, and medium-density hair |
| Avoid If | You want a single-length blunt look or are growing out a very short cut |
Medium Layered Haircuts for Straight Hair
Straight hair shows every layer with precision, which means the cutting technique matters more here than with any other texture. The cuts in this section rely on point cutting, razor work, and internal layering to create movement without making straight strands look disconnected or stringy at the ends. Most work best when blow-dried with a round brush or air-dried with a light styling cream.
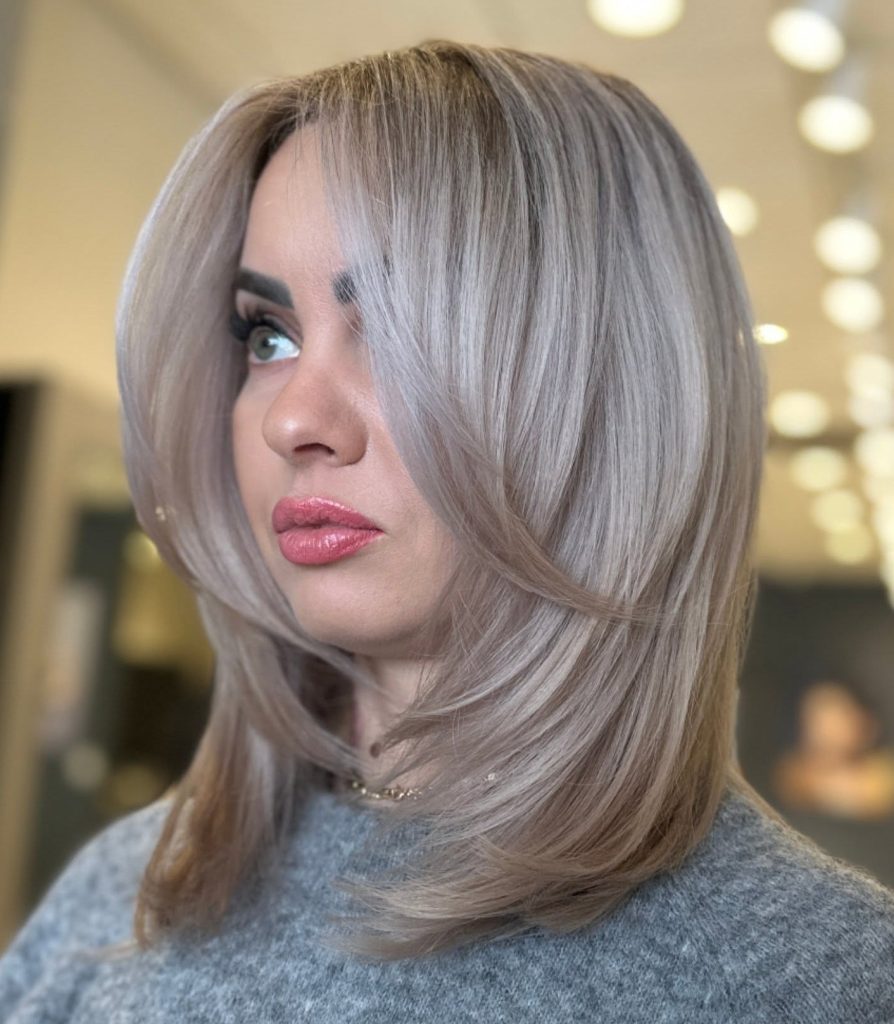
1. Classic Long Layers with a Center Part
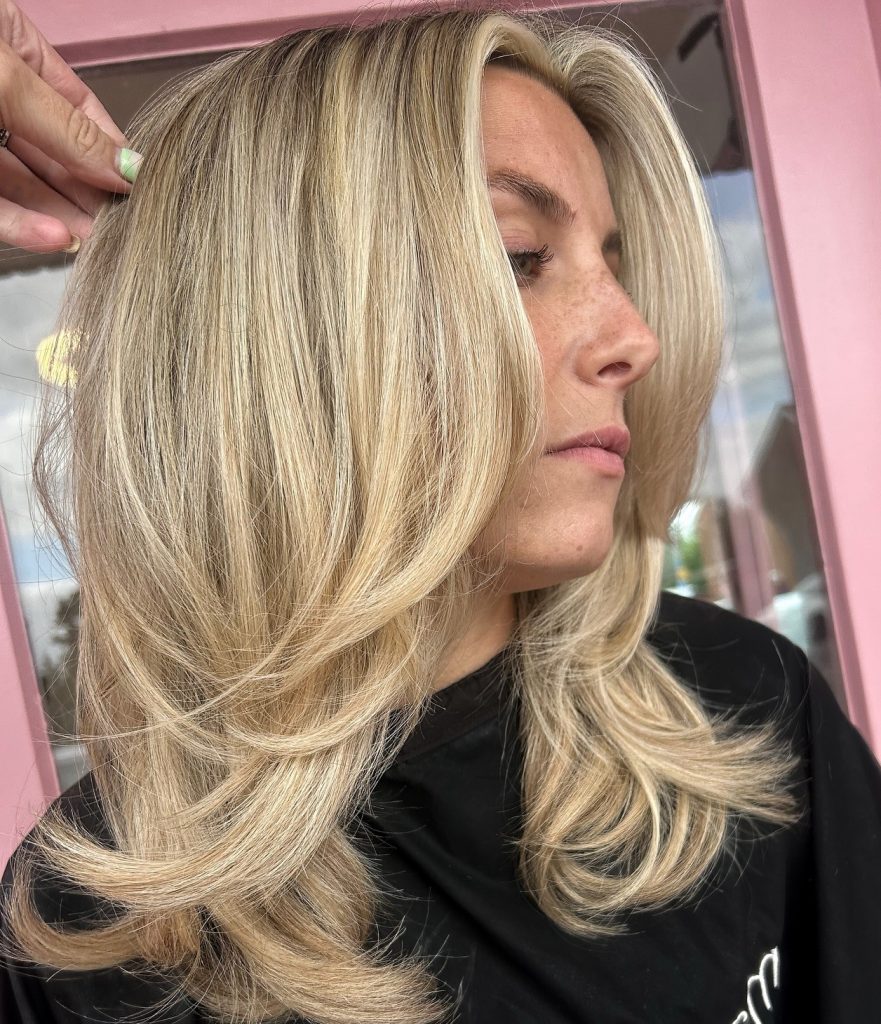
Layers start about three inches below the chin and graduate softly toward the ends, keeping the overall shape uniform. The center part opens up the face and works particularly well on oval and oblong face shapes. Minimal styling needed — this cut looks polished after a simple blow-dry.
2. Razored Ends on a Straight Lob
A razor-cut finish gives each strand a slightly tapered, wispy edge that softens a blunt collarbone-length cut. Ideal for medium-density straight hair that looks heavy at the bottom. Ask your stylist for razor texturizing only on the last two inches. Going higher risks creating a shaggy silhouette that doesn’t suit everyone.
3. Face-Framing Layers Starting at Cheekbone Level
Short interior pieces begin at the cheekbone and blend into the main shoulder length, creating a curtain effect around the face. Round and square face shapes benefit most because the diagonal lines visually elongate the jawline. Stylists often cut these dry to see exactly where each piece falls against the face.
4. Blunt Base with Hidden Internal Layers
From the outside, the perimeter looks like a clean, blunt cut. Underneath, internal layers remove weight from the mid-shaft without disturbing the outline. A practical choice for anyone who wants a polished look with easier blow-dry time. Thick straight hair especially benefits from this approach.
5. Feathered Layers with Side-Swept Part
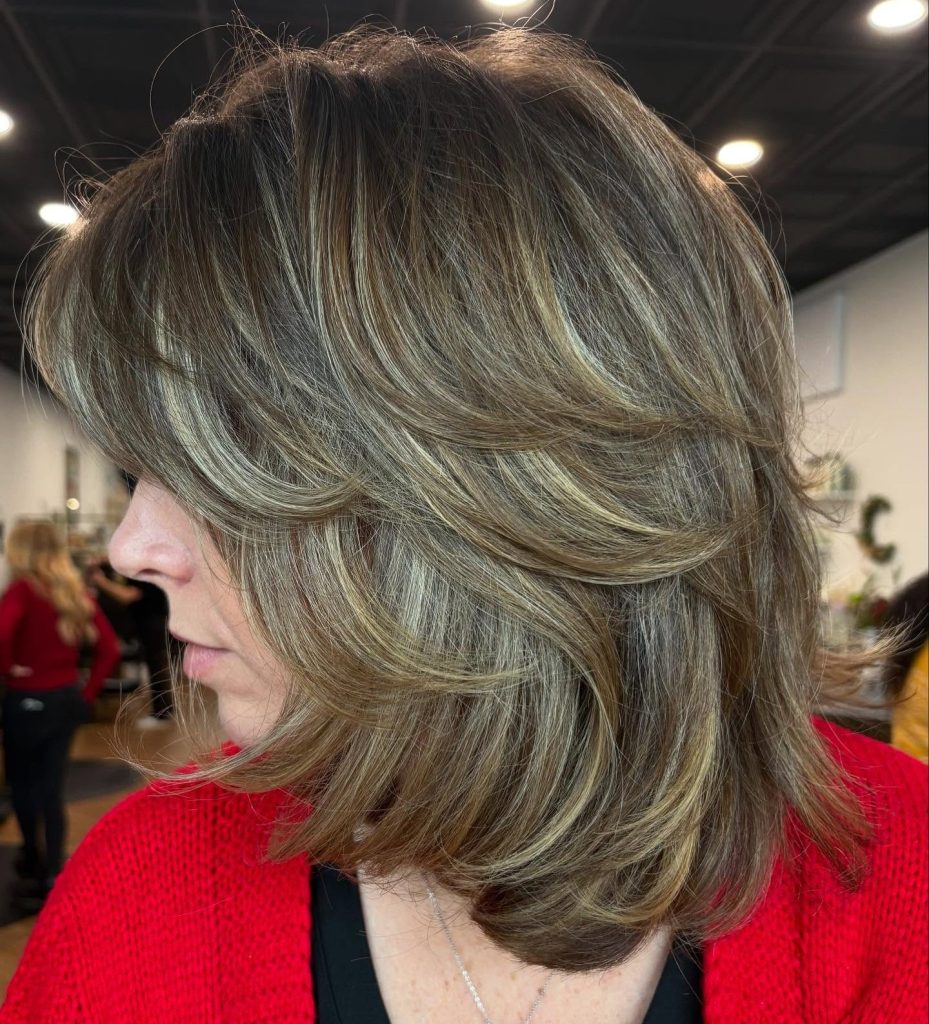
Feathering creates soft, outward-flipping ends reminiscent of a retro ’70s blow-out, updated with a modern side part. Works best on straight to slightly wavy textures with medium density. A round brush and medium-hold hairspray keep the flip intact throughout the day.
6. Textured Shattered Layers
Irregular point cutting breaks up the line just enough to give the ends a relaxed, livedin finish. Straight fine hair gains visual thickness from this technique because the uneven ends catch light differently. Low maintenance to style, though trimming every six weeks keeps the texture looking cohesive rather than just grown-out.
7. Graduated Layers Shorter in the Back
Layers are shorter at the crown and nape, gradually lengthening toward the front. The result is built-in volume at the back of the head. This approach is useful if your hair tends to lie flat against your skull. Heart-shaped and oval faces carry this shape well.
8. Sleek V-Cut Layers
Viewed from behind, the perimeter forms a soft V shape, with the longest point hitting mid-back and the shortest framing the collarbone. This creates movement on straight hair without short top layers. A flat iron and shine serum finish the look cleanly.
Medium Layered Haircuts for Wavy Hair
Wavy hair and layers are a natural pairing — the texture already has movement, and well-placed layers enhance the wave pattern. Cuts in this section are designed to work with your natural air-dried texture, not against it. If you’re exploring other layered hairstyle variations, wavy hair tends to be the most forgiving texture for experimentation.
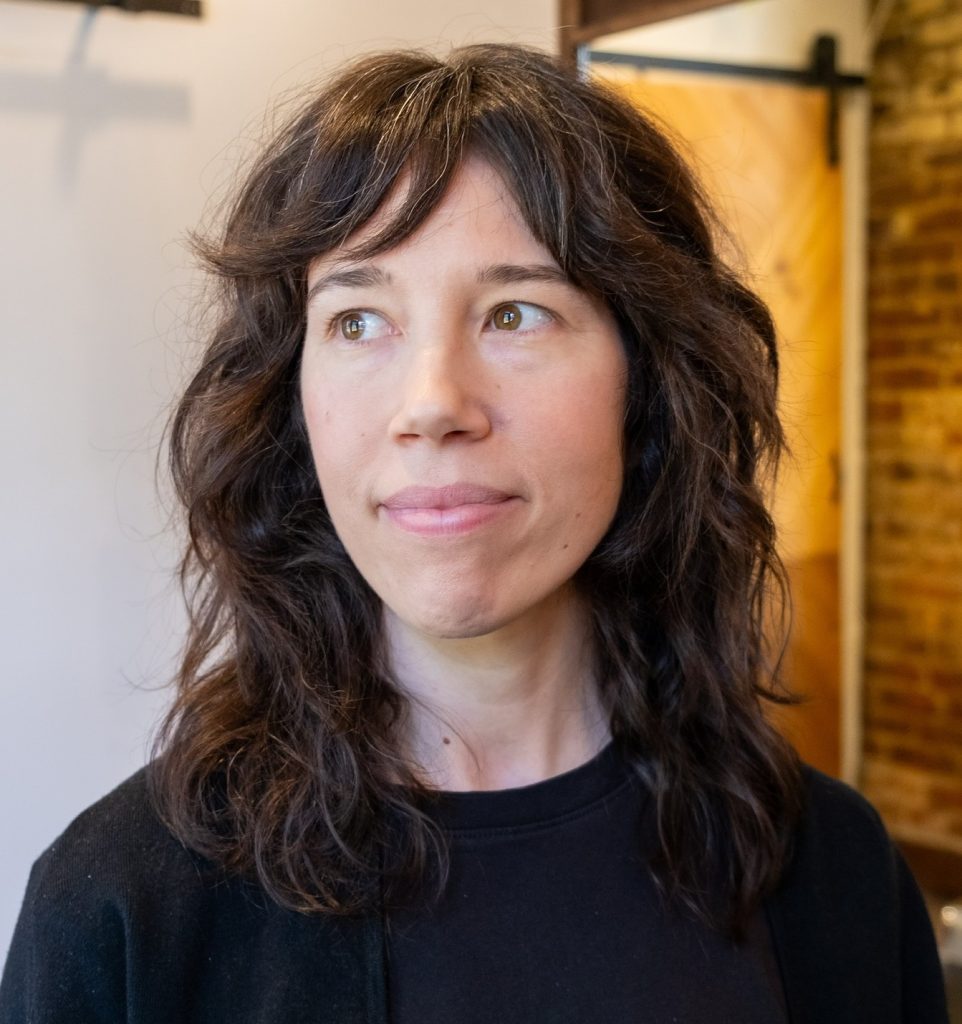
9. Lived-In Layers with Natural Wave
Barely-there layers placed through the mid-lengths let the wave pattern do all the work. No defined parting needed, just push it wherever it falls. A curl-enhancing cream scrunched into damp hair and left to air-dry delivers the best result with zero heat.
10. Choppy Layers on Wavy Texture
More aggressive layering removes weight and amplifies wave definition, especially in hair with type 2B or 2C curl pattern. The choppiness adds an undone, editorial edge. Expect to refresh with a water-and-leave-in-conditioner spritz on day two.
11. Beach-Wave Layers with a Deep Side Part
A deep part shifts volume to one side, creating asymmetry that pairs well with loose, tousled layers. The cut works on both natural waves and wand-curled texture. Oblong and rectangular faces benefit from the width this styling adds at ear level.
12. Soft U-Shape Layers on Wavy Hair
Rounded perimeter layering follows the natural curve of shoulder-length waves, keeping fullness at the ends rather than tapering them thin. Best for medium-to-thick wavy hair. Oval and heart-shaped faces suit the rounded silhouette.
13. Piece-y Layers with Texturizing Shears
Texturizing shears thin out individual strands without shortening the overall length, creating a separated, piece-y look on waves. If your hair gets triangle-shaped when it air-dries, this technique removes internal bulk at the exact point where puffiness happens. A common issue stylists solve with this approach.
14. Tousled Shag-Inspired Layers
More layers through the crown and shorter face-framing pieces give wavy hair a shag-inspired look without full shag commitment. Movement concentrates near the top, and the bottom keeps enough weight to avoid flyaway chaos. A diffuser on low heat enhances natural curl without frizz.
15. Loose Waves with Curtain-Layer Framing
Only the front pieces are layered; the rest remains one length for maximum density. Those curtain-framing layers start at jaw level and blend into the main body by the collarbone. Low maintenance for anyone who wants the layered effect only where it’s most visible.
16. Medium Waves with Long Disconnected Layers
A pronounced difference between the shortest and longest layer creates a more dramatic, intentional layered effect. Wavy hair softens the contrast naturally, preventing the cut from looking severe. Works best at shoulder length or slightly below, with medium to thick density.
Medium Layered Haircuts for Thick Hair
Thick hair without layers tends to sit heavy, resist styling, and take forever to dry. Layers solve all three problems, but the wrong layering approach can create unwanted volume in the wrong places. The cuts here use strategic weight removal to shape thick hair into something manageable and put-together.
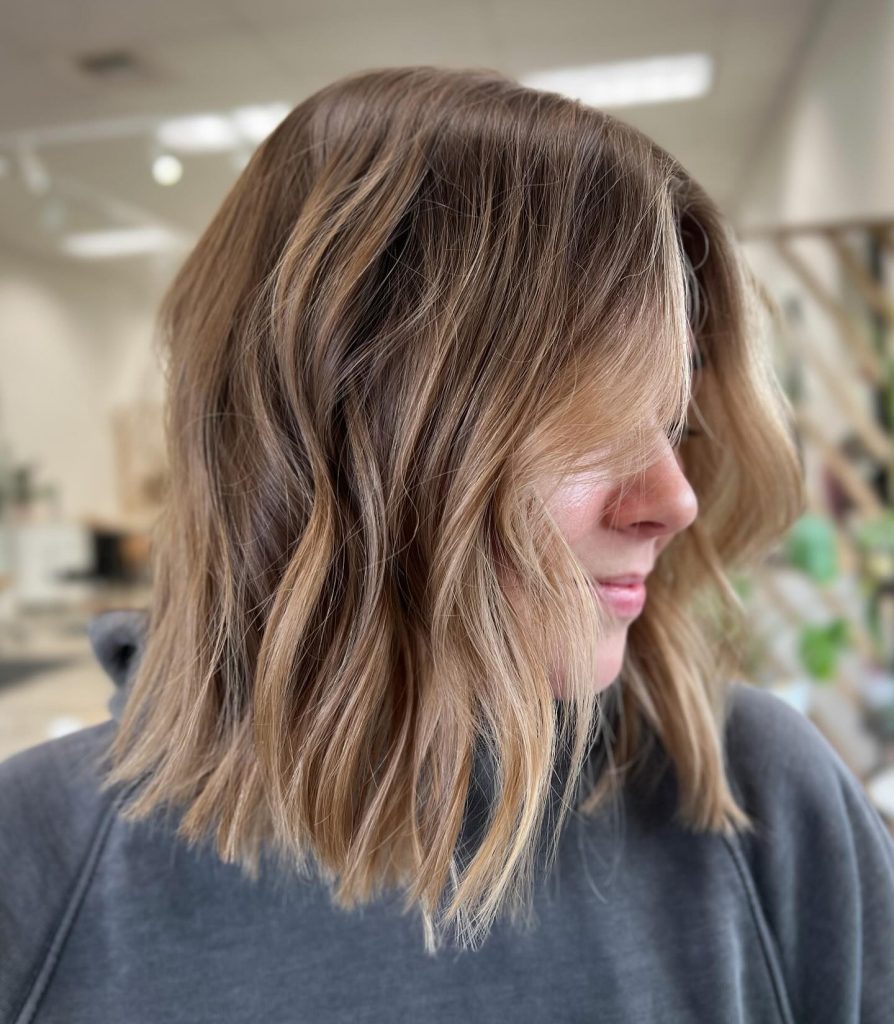
17. Weight-Removing Layers with Blunt Perimeter
Internal layers thin the mid-shaft while a solid, blunt edge at the bottom maintains the appearance of fullness. Thick, coarse hair benefits most, as the bulk reduction cuts blow-dry time by roughly a third. Ask your stylist to point cut the internal layers rather than using thinning shears, which can leave blunt notches on thick strands.
18. Thick Hair with Short Crown Layers
Shorter layers concentrated at the crown lift the top section and let it blend into longer lengths below. Creates a rounded, balanced silhouette rather than a flat-on-top, heavy-at-bottom shape. Square and round face shapes look particularly defined with this structure.
19. Chunky Layers for Maximum Movement
Wide, distinct layers create a bold, segmented shape with visible movement. The chunk factor works with thick hair’s natural density, turning heaviness into an asset. Needs minimal product; thick hair holds chunky shapes on its own.
20. Thinned-Out Layers with Razored Ends
Razor cutting on thick hair removes significant internal weight and creates tapered, soft ends. The result is a more relaxed silhouette that moves when you walk. Stylists typically recommend this approach when the goal is less volume overall, not just reshaped volume.
21. A-Line Layers Longer in Front
An angled cut is shorter at the nape and longer toward the collarbone in front, with layers added through the top half. Thick hair carries the angular shape well because density fills the silhouette evenly. Flatters round and square face shapes by drawing the eye downward.
22. Layered Thick Hair with Undercut
A hidden undercut at the nape removes the bottom-most section of density, which no one sees when the hair is down. Combined with top layers, this reduces drying time and heat in warm weather while keeping all the visible length. A practical solution that more clients are requesting, according to stylists working with thick-haired clients.
23. Flowing Layers with Soft Graduation
Gradual, finely blended layers create an almost imperceptible transition from short to long. Thick hair looks expensive and well-maintained with this approach — less dramatic than chunky layers, but more polished. Requires consistent trims every six to eight weeks to keep the blend seamless.
Medium Layered Haircuts for Fine Hair
Fine hair and heavy layering are a risky combination. Too many short layers thin out already-sparse ends and make the hair look wispy rather than textured. The cuts in this section use strategic, minimal layering to add movement and the illusion of volume without sacrificing the density fine strands need to look full. If you have thin hair that needs volume-boosting ideas, these approaches prioritize fullness over dramatic shape.
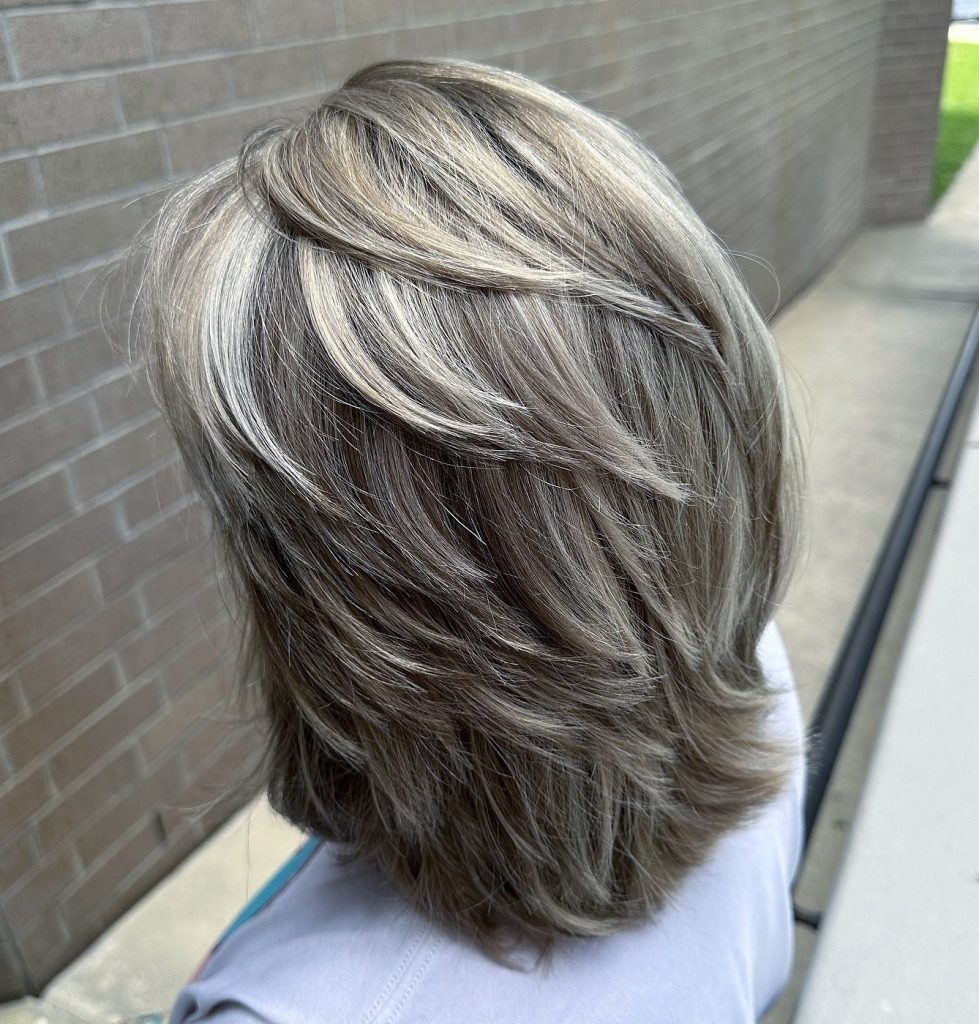
24. Long Layers That Preserve End Thickness
Layers begin only in the bottom third of the length, keeping the top and mid-shaft at one solid length for maximum density. The bottom layers add just enough movement to prevent a flat, lifeless look. A volumizing mousse applied at the roots before blow-drying gives fine hair the most lift without stiffness.
25. Point-Cut Layers for Fine Texture
Point cutting, where the stylist cuts into the ends vertically rather than straight across, removes minimal weight and creates soft texture. Fine hair keeps its bulk while gaining subtle dimension. Never ask for razor cutting on fine hair; it removes too much weight and leaves the ends see-through.
26. One-Length Base with Internal Volume Layers
The perimeter stays completely one-length for the appearance of thickness, while hidden internal layers at the crown create lift and airiness. When blow-dried with a round brush, the internal layers push the top section up and away from the scalp. A smart compromise for fine-haired clients who want movement without any visible thinning at the ends.
27. Subtle Face-Framing on Fine Hair
Just two to three shorter pieces at the front, starting at chin length, create a layered look with minimal overall layer count. The rest of the hair maintains one length. This keeps the ponytail thick while adding dimension when the hair is worn down.
28. Blunt Lob with Barely-There Layers
A collarbone-length blunt cut with only the faintest internal layering is enough to allow movement but not enough to see individual layers. Fine straight hair looks its thickest with this approach. Flat iron the ends slightly under for a polished, full look.
29. Stacked Back Layers for Fine Hair Volume
Graduated layering at the back of the head creates volume right where fine hair tends to fall the flattest. The front remains long and heavy. If the back of your head always looks deflated in photos, this is the cut that solves it.
30. Textured Ends on a Fine-Hair Midi
Light texturizing only at the last inch of the ends gives straight fine hair an intentionally undone finish. Pair with a salt-free texturizing spray. Regular sea salt sprays dry fine hair out over time. Trims every eight to ten weeks keep the textured tips from looking scraggly.
Medium Layered Haircuts with Bangs
Adding bangs to a layered cut changes the entire frame of the face, and the type of bang determines the effect. Curtain bangs blend into layers seamlessly; blunt bangs create a deliberate contrast. The combinations in this section cover the most requested bang-and-layer pairings for shoulder-length hair.
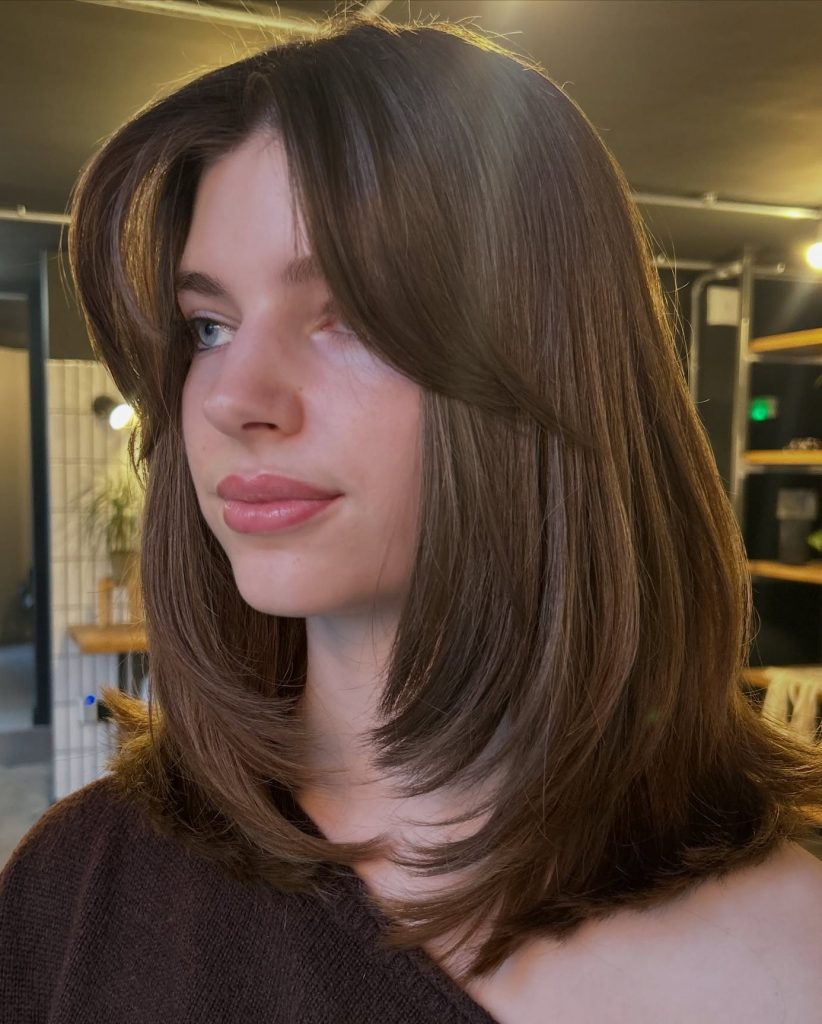
31. Curtain Bangs with Layered Lob
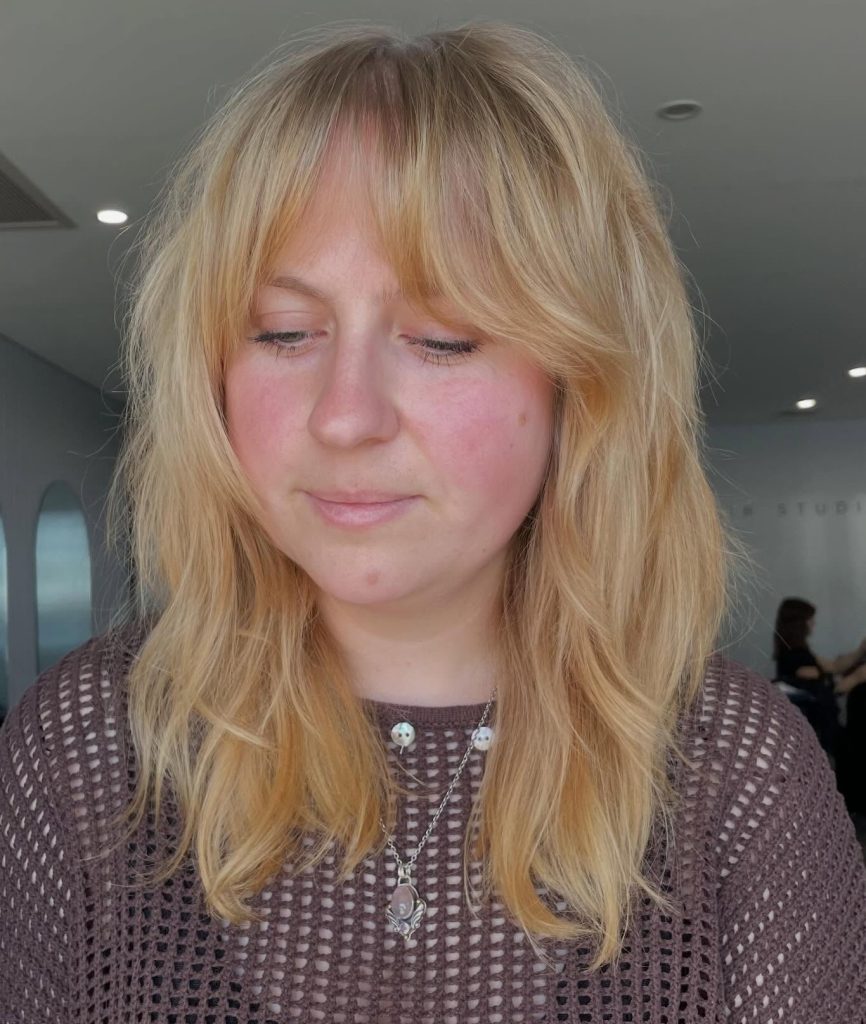
Chin-length curtain bangs part naturally at the center and blend into the first layer of a shoulder-length lob. Works on virtually every face shape because the part direction and bang length are adjustable. Expect to trim the bangs every four to five weeks. The rest of the cut holds its shape longer.
32. Blunt Micro Bangs with Soft Layers
Short, straight-across bangs sitting above the eyebrows pair with soft, rounded layers at shoulder length. A striking combination that draws attention to the eyes and cheekbones. Best suited for oval and heart-shaped faces; round faces may find the horizontal fringe line widens the face visually.
33. Wispy Bangs with Feathered Layers
Thin, see-through bangs complement feathered layers by maintaining the same lightweight, airy quality throughout the cut. Fine-to-medium hair textures suit this best. Thick hair can make wispy bangs look bulky unless the stylist thins the fringe aggressively. A dry shampoo touch-up on the bangs extends styling by a day.
34. Side Bangs Blending into Layers
Side-swept bangs that transition seamlessly into the first face-framing layer create a cohesive, soft silhouette. No hard lines or visible disconnection between the fringe and the body of the hair. Round and square face shapes benefit from the diagonal line the side sweep creates across the forehead.
35. Bottleneck Bangs with Medium Layers
Bottleneck bangs are shorter at the center of the forehead and gradually lengthen toward the temples, flaring out at about cheekbone level. They merge into medium layers naturally and frame the face with a soft, organic shape. They grow out gracefully into curtain bangs without an awkward stage.
36. Full Fringe with Choppy Layers
A thick, brow-grazing fringe paired with heavily layered shoulder-length hair creates an purposeful contrast between the solid top and the textured body. Requires the most maintenance of any bang style in this collection. Plan for trims every three weeks if you want the fringe sharp. Thick and medium-density hair carries this look best.
37. Birkin Bangs with Tousled Layers
Longer, slightly parted fringe inspired by the effortless French-girl aesthetic, paired with undone, tousled layers through the mid-lengths. Air-dried wavy textures suit this combination naturally. If your hair is straight, a quick pass with a wide-barrel wand adds the tousle without looking over-styled.
38. Arched Bangs with Layered Shoulder Cut
An arched fringe follows the curve of the eyebrows. It’s shorter in the center, slightly longer at the temples, and falls above well-blended shoulder-length layers. Opens up the eye area and pairs well with rounder face shapes. A small round brush and five minutes of drying time keep the arch defined.
Medium Layered Haircuts with Color
Color and layers work together: highlights follow the layer placement to create depth, and lowlights add shadow where layers overlap. The cuts in this section show how different color techniques enhance the dimension that layering builds.
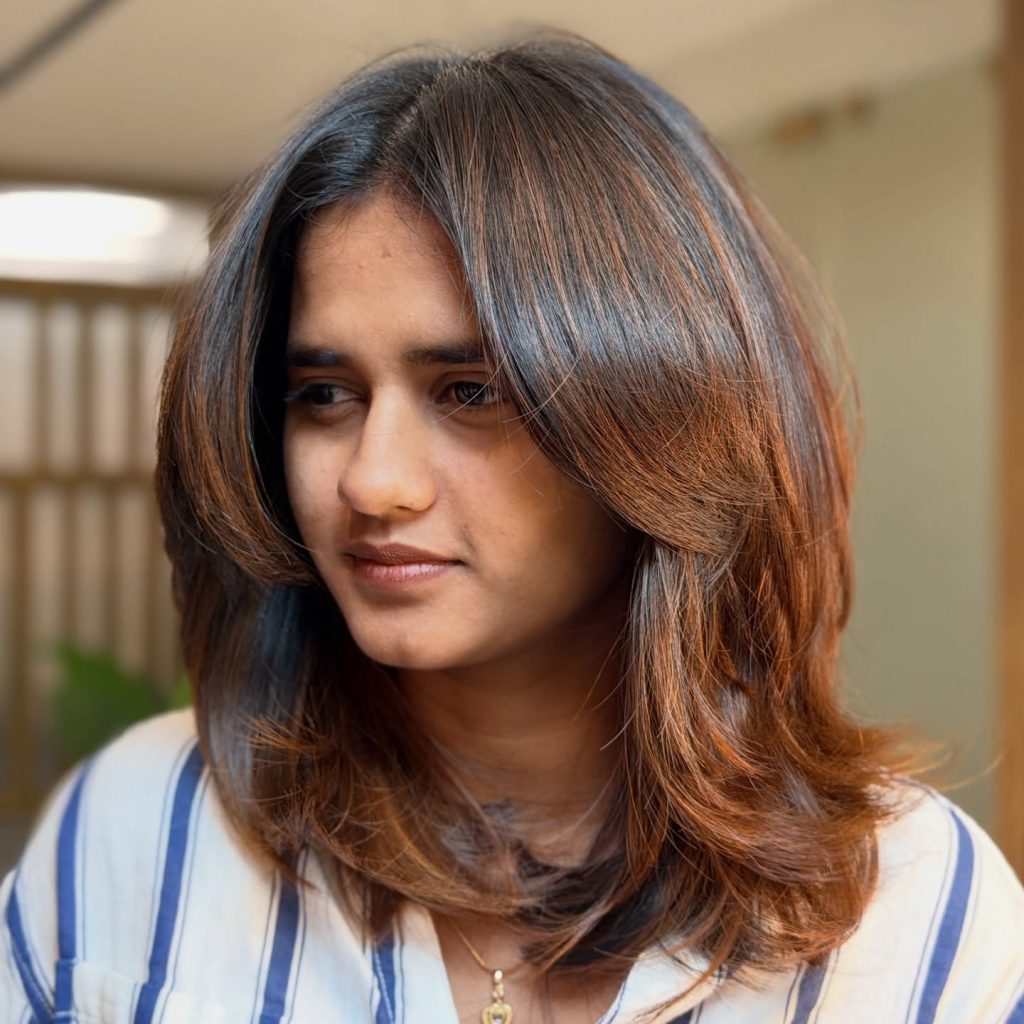
39. Balayage Highlights on Layered Brunette Hair
Hand-painted caramel highlights concentrated on the face-framing layers and mid-lengths create a sun-kissed effect that amplifies the shape of the cut. Darker roots maintain depth at the crown. Balayage on layered hair grows out seamlessly. Expect four to six months between color appointments.
40. Babylights on Fine Layered Hair
Ultra-fine highlights woven throughout fine, layered strands create a subtle, dimensional brightness that mimics natural childhood highlights. Adds the illusion of fullness because the eye reads the color variation as texture. Babylights fade naturally without harsh regrowth lines.
41. Copper Tone on Layered Medium Hair
An all-over warm copper shade emphasizes the movement of layers by catching light differently on each angled section. Warm skin tones with golden or peachy undertones suit copper best. Color-depositing conditioner between salon visits keeps the copper vibrant.
42. Money Pieces Framing Layered Face Sections
Bold, contrasting highlights on just the two front face-framing sections, while the rest stays darker, draw immediate attention to the layered frame around the face. High impact for minimal color application and maintenance. Works across all base colors from deep brown to medium blonde.
43. Dimensional Lowlights on Layered Blonde Hair
Adding darker strands beneath the surface layers of blonde hair creates shadow and depth that makes each layer visible as a distinct section. Without lowlights, layered blonde hair can read as one flat mass. Medium ash or golden lowlights blend naturally into most blonde bases.
44. Ombré Fade on Shoulder-Length Layers
A gradual color transition from dark roots to lighter ends follows the natural gradient of the layers, making the color shift look deliberate and connected to the cut’s structure. Best on medium-to-thick hair, where the density holds both tones without looking sparse at the lighter ends. Roots grow in as part of the design.
45. Platinum Ends on Dark Layered Hair
A high-contrast combination where dark brown or black at the top transitions sharply to icy platinum at the tips of the bottom layers. Requires multiple lightening sessions to achieve safely. Do not attempt this with box dye. The platinum sections need purple shampoo twice a week to prevent yellowing.
46. Natural Brunette with Subtle Ribbon Highlights
Wider foiled sections placed strategically along the top layers create thick, ribbon-like streaks of color against a darker base. More visible than babylights but less uniform than traditional highlights. The ribbon placement accentuates the layered movement — each highlighted section corresponds to a layer.
47. Red Velvet Tone with Soft Layers
A deep, burgundy-red all-over shade registers as rich and dimensional on layered hair because the varying angles reflect light differently. Cool to neutral skin tones carry deep reds best. Plan for color refreshes every four to five weeks as red fades faster than any other shade family.
48. Mushroom Brown Layers with Cool Tones
A cool, ashy brown with gray undertones that looks modern and deliberately muted. Layered medium hair gives mushroom brown dimension because the shadows between layers deepen the cool effect. Works on all face shapes and skin tones. It’s one of the more universally wearable shades in this collection.
49. Sun-Kissed Highlights on Dirty Blonde Layers
Warm, golden highlights concentrated at the face-framing layers and ends brighten a natural dirty blonde base without full color commitment. Looks like you spent the summer outdoors. Warm and neutral skin tones suit this most naturally, and the grow-out is virtually seamless.
50. Peekaboo Color Underneath Layered Sections
A vivid or contrasting shade (rose gold, electric blue, plum) hidden beneath the top layer, revealed only when the hair moves or gets tucked behind the ear. Layers make the peekaboo effect more dynamic because flashes of color appear at multiple levels. Office-friendly on top, expressive underneath — and when you’re ready to commit to something bolder, the color is already there.
How to Choose the Right Medium Layered Haircut for Your Face Shape
Layers redirect visual weight. They can elongate, widen, narrow, or soften the face depending on where they’re placed. The table below maps each face shape to the layering approach that flatters it most, plus what to avoid. If you’re unsure about your face shape, our guide to choosing haircuts based on face shape walks through how to identify yours.
| Face Shape | Best Layer Placement | Avoid |
|---|---|---|
| Oval | Almost any layering works: long layers, face-framing, choppy | Excessive volume at the crown |
| Round | Layers starting below the chin to create vertical lines; side parts | Short layers at cheekbone level that add width |
| Square | Soft face-framing layers at jaw level to soften angular edges | Blunt, one-length cuts that emphasize the jawline |
| Heart | Layers concentrated below the chin to balance a narrower jawline | Too much volume at the crown with nothing at the jaw |
| Oblong | Layers that add width at the sides, especially at ear-to-jaw level | Long, straight layers that pull the eye downward |
| Diamond | Chin-length face-framing layers to balance narrow forehead and jaw | Volume concentrated at the widest cheekbone area |
Stylist tip: Bring two or three reference photos that show the layer placement you want. Side and back angles give your stylist far more useful information than a single selfie-angle photo. In the salon, ask your stylist to hold sections at different lengths against your face before cutting so you can see where the layers will land.
What to Tell Your Stylist
Walking into the salon with the right vocabulary makes a noticeable difference in how accurately your stylist interprets what you want. Layers mean different things depending on technique, placement, and blending. Saying “I want layers” without specifics leaves a lot of room for a cut that doesn’t match your expectations.
Start with the overall shape: are you keeping the current length or cutting to the shoulder? Then specify where the shortest layer should start — cheekbone, chin, or jaw. Mention whether you want blended layers (gradual, barely visible transitions) or defined layers (distinct sections with visible length differences). If you have fine hair, specifically ask for point cutting rather than razor cutting. Point cutting preserves density while razor work can thin fine strands too aggressively.
Key phrases that communicate clearly: “I want face-framing layers starting at [specific point],” “keep the perimeter blunt and add internal layers only,” “I need weight removed from the bottom half, not the top,” and “I’d like the shortest layer to hit [chin/cheekbone/jaw].” Avoid vague requests like “just add some layers” or “do whatever you think looks good.” Specificity protects both you and your stylist from a disconnect.
Maintenance and Styling
Medium layered haircuts are generally lower-maintenance than short cuts (which lose their shape quickly) and easier to style than long layered hair (which takes longer to dry and style through). Expect trims every six to ten weeks depending on how precisely you want the layers to hold their original shape. Razored and heavily textured cuts need more frequent trims than long, blended layers.
Daily styling time ranges from five minutes (air-dry with a texturizing product) to fifteen minutes (round-brush blow-dry for polished finish). The products you’ll reach for depend on your texture: fine hair does best with volumizing mousse at the roots, thick hair benefits from a smoothing cream through the mid-lengths, and wavy hair responds to curl-enhancing cream or a light gel scrunched in while damp.
Stylist tip: If your layers start flipping in odd directions between trims, try blow-drying just the problem section with a round brush while directing the airflow downward along the hair shaft. Most rogue layers are caused by the ends growing past their original cut angle. A quick blow-dry technique can correct this until your next appointment.
FAQ
What Is the Difference Between Layers and Texturizing?
Layers are distinct sections of hair cut to different lengths that create visible shape and movement in the overall silhouette. Texturizing is a finishing technique — point cutting, razor work, or thinning shears — applied to the ends of layers or a single-length cut to add softness without changing the structural shape. A layered cut and a texturized cut can overlap, but they address different things: shape versus end finish.
How Many Layers Should I Ask for in a Medium Haircut?
The number of layers depends on your hair density and the effect you want. Fine hair typically needs only two to three long layers to avoid looking thin at the ends. Thick hair can handle five or more layers, including internal ones that remove weight. Rather than asking for a specific number, tell your stylist where you want the shortest layer to start and whether you want subtle blending or visible separation between lengths.
Do Medium Layered Haircuts Work on Curly Hair?
Yes, but the cutting technique needs to account for curl shrinkage. Curly hair should always be cut dry so the stylist can see where each layer actually lands when the curl is in its natural state. Wet cutting curly hair risks layers that end up much shorter than intended once the hair dries and springs up. Ask for longer layers and wider spacing between them. Curls already provide visual texture, so tight layering can create excessive volume.
Will Layers Make My Thick Hair Easier to Manage?
Layers reduce bulk, speed up drying time, and make thick hair more responsive to styling tools and products. However, the wrong layers (too short, too many, or placed too high) can create puffiness or a mushroom shape on thick hair. The key is strategic weight removal: internal layers at the mid-shaft, point-cut ends, and keeping the shortest layer at jaw level or below. Discuss the specific layering approach with your stylist rather than just requesting “layers.”
How Often Should I Trim Medium Layered Hair?
For layered cuts with precise, defined layers or textured ends, trim every six to eight weeks to maintain the shape. Long, softly blended layers hold their structure longer — every eight to ten weeks is typically fine. Bangs operate on their own schedule: every three to five weeks for blunt or micro bangs, every five to six weeks for curtain bangs. Skipping trims beyond ten weeks usually means the layers grow out into a shapeless one-length cut.
Can I Get Medium Layers If I’m Growing My Hair Out?
Absolutely! Medium layers actually make the growing-out process less awkward because they add shape to an in-between length that otherwise just hangs. Ask for long layers only (no short crown layers) so everything grows at a similar rate. Face-framing pieces can be adjusted every few months to keep the front looking cohesive while the back and sides catch up. Medium layered haircuts are one of the more flexible grow-out options for exactly this reason.
Should I Get Layers Cut Wet or Dry?
Straight hair can be cut wet or dry with predictable results — wet cutting gives clean, precise lines. Wavy and curly hair should be cut dry whenever possible because the natural texture changes the way layers fall once the hair is no longer weighed down by water. Dry cutting allows the stylist to see the final result in real time and adjust layer placement accordingly. If your salon only cuts wet, ask the stylist to check the layers again once your hair is dry before you leave.
Medium layered haircuts offer one of the most versatile foundations for shoulder-length hair, adaptable to every texture, face shape, and maintenance preference covered in this gallery. Whichever variation resonates with you, the key to getting it right is specific communication with your stylist, realistic expectations about upkeep, and an understanding of how your hair’s natural behavior will interact with the layering approach you choose.
Hair results vary based on your natural hair type, texture, density, and condition. Always consult with a licensed hairstylist before making significant changes, especially with chemical treatments or dramatic length changes. Photos may show styled results that require professional tools and products to replicate.