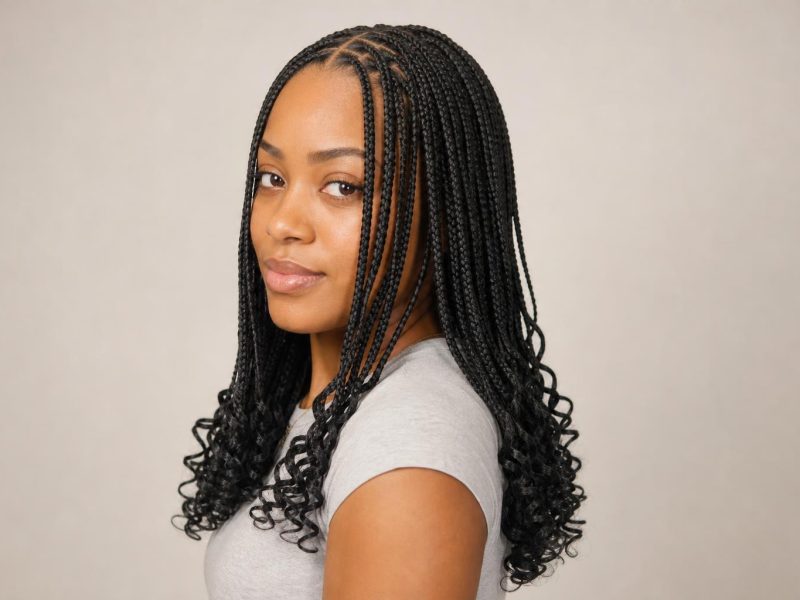


Spring twists pack a natural, bouncy texture into one of the most versatile and low-weight protective styles available for coily and kinky hair.
Unlike heavier braided extensions, spring twists use a lightweight coily extension fiber that mimics freshly twisted natural hair, resting close to the scalp without excessive pulling and lasting 6–8 weeks with proper care. The style works equally well as a short chin-length bob, a shoulder-length look with half-up styling options, or waist-length twists with maximum visual impact. Here are 25 spring twist hairstyle ideas organized by length and color, with a face shape guide, a comparison to similar protective styles, and a maintenance schedule included.
This collection covers spring twist bobs in entries 1–7, shoulder and collarbone lengths in entries 8–14, longer styles in entries 15–20, and color and ombre variations in entries 21–25. Guidance sections on face shape compatibility, how spring twists compare to passion twists and kinky twists, and what to tell your braider follow the gallery.
| Factor | Details |
|---|---|
| Best for | Natural hair types 3a–4c; any hair length starting at 4 inches |
| Maintenance | Re-moisturize scalp every 3–5 days; protective wrap at night; lasts 6–8 weeks |
| Works with | Fine to thick natural textures; bob through waist length |
| Avoid if | Edges are thinning or scalp is currently irritated or inflamed |
| Salon time | 3–5 hours for a bob; 6–10 hours for waist-length installs |
Spring Twist Bob Styles
The bob is the most requested spring twist length for practical reasons: the installation takes roughly half the time of a long style, the weight stays minimal even on sensitive scalps, and the finished look is compact enough to tuck away easily on active days. Spring twist bobs fall most naturally between the chin and jaw, though many wearers go slightly shorter to the earlobe or slightly longer to the collarbone depending on face shape and preference. The entries below cover the most versatile bob variations, from tightly uniform micro twists to voluminous stacked cuts.
1. Short Chin-Length Spring Twist Bob
The uniform coil texture of spring twist extension hair produces a bob shape with natural-looking volume at every length from ear to chin, without any curling iron work needed after installation. Each twist sits individually from root to end, so the bob moves and bounces rather than clumping together into a single mass. For a cleaner perimeter line, ask your braider to trim the ends after the install is complete rather than pre-cutting the extension hair before attaching it.
2. Side-Parted Spring Twist Bob with Asymmetrical Flow
A deep side part on a chin-length spring twist bob draws the eye diagonally across a round or square face, creating visual asymmetry that counteracts a symmetrical face width. The dominant side falls forward and frames the cheekbone, while the shorter side tucks behind the ear for a cleaner contrast. Heart-shaped faces benefit from the same placement because the forward-falling side softens a wider forehead without adding bulk at the jaw.
3. Micro Spring Twist Bob for Fine Natural Hair
Fine or sparse natural hair gets the best bob result from micro-sized spring twists, where smaller sections of both the natural hair and the extension fiber are used. Each small twist adds proportionally less weight while still delivering a full-looking bob silhouette, and the tighter the coil on the extension, the denser the finished install appears at these smaller sizes. Most micro spring twist bob installations run 4–6 hours because of the higher section count involved.
4. Flat Crown with Spring Twist Bob Ends
Achieve a sculpted, low-profile crown on a spring twist bob by asking your braider to cornrow the top sections close to the head and attach extension twists starting at ear level, leaving the crown flat and smooth. The braided base holds the style low-profile at the scalp while the spring texture flows freely from mid-length downward. This technique works especially well when you want the coily character of spring twists for a formal occasion but need a cleaner silhouette at the crown.
5. Stacked Nape with Longer Front Sections
A stacked spring twist bob keeps the nape shorter and lengthens gradually toward the front — a variation that holds its shape well even as the twists loosen slightly during weeks 5–7 because the shorter back provides natural structure. Re-moisturize the scalp and extension fiber every 3–4 days with a lightweight oil such as jojoba or grapeseed to keep both the natural hair and the extensions from drying at the roots. The rounded nape silhouette from stacking also adds visual width that flatters oblong face shapes by counteracting length.
6. Burgundy-Tipped Spring Twist Bob
Two-toned spring twist hair (dark brown or black at the root with burgundy or deep auburn at the ends) gives a bob a depth that looks genuinely natural because the color placement mimics how sun exposure actually lightens the ends of dark hair over time. This dip-dyed effect requires no bleaching of the natural hair since the color is pre-applied to the extension fiber. Burgundy ombre spring twist hair (commonly labeled T1B/99J) is widely available at most beauty supply stores.
7. Voluminous Spring Twist Bob vs. Senegalese Twist Bob
At the same chin length, a spring twist bob appears considerably fuller than a Senegalese twist bob because the coily extension fiber has natural volume built into its structure, while Senegalese fiber is smoother and creates less body. This volume difference makes the spring bob a stronger choice when thinning natural hair would otherwise be visible through sleeker extensions at the part lines. Micro spring twists in a bob give maximum density without going longer and are the most effective option for sparse hair.
Shoulder and Collarbone-Length Spring Twists
Medium spring twists offer the best balance of styling flexibility and installation time: long enough for half-up styles, loose buns, and pinned looks, but not so long that the install requires an all-day session. At shoulder to collarbone length, the spring coil texture has enough room to show its natural bounce without the weight that comes with extra-long extensions. This length is also a natural progression for wearers moving from shorter two-strand twist styles on natural hair who want more length and wear time without committing to a full long install.
8. Shoulder-Length Spring Twists with Even Sections
Spring twists installed to the shoulder move freely because each twist has enough length to swing and bounce independently. For even coverage at this length, ask your braider to take sections no wider than the diameter of a pencil — wider sections at shoulder length can separate and expose part lines as weeks pass. Consistent sizing from front to back and ear to ear is what distinguishes a polished medium spring twist install from one that thins out unevenly by week 4.
9. Collarbone-Length Twists for Oval Faces
Oval faces carry most spring twist lengths well, but collarbone-length twists are particularly balanced on this face shape because the extensions frame the face without covering the jawline, keeping the focus on already-proportional features. The natural movement of the coil fiber at this length creates a gentle layered effect without any additional styling. A center or side part both work equally well at collarbone length on oval faces.
10. Chunky Medium Spring Twists on Thick Natural Hair
Thick or high-density natural hair provides a broader foundation at each root section, which means chunky spring twists on thick hair stay firmly installed longer than the same size on finer hair. If your natural hair is 4b or 4c texture, large-section spring twists at medium length also stay neater at the roots for longer because the kinky base interlocks more securely with the coily extension fiber. The overall look is bold and full with visible movement from shoulder to collarbone.
11. Half-Up Puff on Shoulder-Length Spring Twists
Gathering the top half of shoulder-length spring twists into a loose puff or low bun is one of the easiest ways to refresh the style midway through the wear period. Because the spring twist fiber is lightweight, a single fabric-wrapped elastic or a few butterfly clips can secure the updo without stressing the root sections or pulling at the hairline. Leaving several front twists loose frames the face and keeps the look softer than a fully pulled-back style. Shoulder-length spring twists also adapt well to the half-up braided ponytail format popular on installed protective styles.
12. Scalp Care at Medium Length Through Week 5
Medium-length spring twists are easier to maintain at the scalp than extra-long styles because you can access the parts between rows without the twists tangling against each other. Apply a diluted peppermint or tea tree oil spray directly to the scalp every 5–7 days by using a rat-tail comb to part between rows for access. Most medium spring twist installations look fresh through week 6 before noticeable root frizzing and perimeter loosening begin.
13. Honey Blonde Medium Spring Twists
Honey blonde spring twist hair (commonly labeled T1B/27) catches natural light differently from black extensions because the lighter pigments reflect more warmth as the twists move. At collarbone length, the warm tones shift through the style as it swings, creating a sun-kissed dimensional effect that complements medium to deep skin tones especially well. These pre-colored extension packs require no additional dyeing and are available at most beauty supply stores.
14. Spring Twists vs. Passion Twists at Medium Length
Placed side by side at shoulder length, spring twists and passion twists look distinctly different: passion twist water-wave fiber is looser and fuller, making a passion twist medium style noticeably heavier and more voluminous. Spring twists are the better choice if scalp tension or pressure headaches from heavy installs are a concern, because the tighter, lighter coil places less downward pull on each root section. Spring twists also outlast passion twists by 2–4 weeks on average because the tighter fiber structure resists unraveling.
Long Spring Twists
Long spring twists starting at bra-strap length and reaching the waist or hip create one of the most dramatic effects of any protective style: the coily texture at this length produces a cascading, dimensional movement that smooth or straight extensions cannot replicate. Installation runs 6–10 hours, but the style delivers 6–8 weeks of flexible wear time. Wearers who prefer a looser, loc-adjacent texture at long lengths can compare spring twists directly to soft locs; the two differ most in the extension fiber used and the overall visual weight of the finished style.
15. Waist-Length Spring Twists with Natural Parting
Each waist-length spring twist carries significantly more extension fiber than shorter styles, which is why installation runs 6–10 hours rather than the 3–5 typical of a bob. Using pre-stretched spring twist fiber reduces installation time by 30–40 minutes because the stretching step is already done, and it also tends to produce a longer-wearing install because pre-stretched fiber creates less root tension. Ask your braider which brand of spring twist hair they work with most — experienced braiders develop preferences that directly affect installation quality.
16. Long Middle-Parted Spring Twists for Heart Faces
Heart-shaped faces are wider at the forehead and narrower at the chin, and long spring twists with a middle part address this proportion directly by drawing the eye downward toward the jaw, which visually adds width below the widest point of the face. High top knots or stacked crown styles work against this face shape by drawing attention upward toward an already-wide forehead. The natural movement of long spring twists provides built-in facial framing without additional styling required.
17. Boho Long Spring Twists with Loose Ends
Intentionally wispy, partially unraveled ends on spring twist extensions create a free-form boho version of the long style that falls between fully installed twists and freeform natural locs in aesthetic. This variation blends most seamlessly on looser curl patterns (2c–3b) where the natural hair at the tips merges more cohesively with the loosened fiber. On 4b–4c textures, the contrast between natural ends and the extension fiber is more pronounced and visible, particularly at the very tip of each twist.
18. Long Spring Twists in a High Ponytail
Because spring twist fiber is lighter than most braid extensions, a high ponytail at long lengths is more comfortable throughout the day — the downward pull from the crown is noticeably less than a comparable box braid ponytail at the same length. Use a fabric-covered elastic secured loosely to avoid stressing the root sections, and leave four or five front twists hanging free for a softer finish. The lightweight ponytail also works well as an overnight protective updo that doesn’t strain the edges during sleep.
19. Long Spring Twists at Weeks 7 and 8
Most long spring twist installations look best from weeks 1–6 before root frizzing and slight loosening at the part lines signal the transition into a lived-in look. Many wearers let long twists run through week 8, then deep condition the natural hair for 1–2 weeks before reinstalling. Leaving spring twists in beyond 10 weeks increases the risk of matting at the root base, which requires detangling that can cause breakage during removal, so building a takedown schedule before week 10 protects the natural hair underneath.
20. Soft Black (1B) vs. Jet Black (1) Long Spring Twist Extensions
Pre-packaged spring twist hair is sold in jet black (color 1) and soft black (color 1B), and the difference is most visible in outdoor natural light. Soft black contains a subtle dark brown undertone that blends more naturally with most natural hair, particularly for wearers whose hair has any warmth or brown in its base color. Jet black works best when natural hair is genuinely blue-black in tone; on anything slightly warmer, the high contrast at the part lines can look slightly mismatched in direct sunlight.
Spring Twists in Color and Ombre
One of the most practical advantages of spring twist extensions is access to color without chemical processing of the natural hair underneath. Pre-dyed spring twist packs range from subtle ombre gradients in black-to-caramel and black-to-burgundy to vivid colors in plum, copper, and teal. Understanding how to order the right color packs and how to brief your braider on mixing them produces a more natural-looking result than using any single color pack uniformly. Multi-toned extension approaches mirror the same dimension that well-placed highlights on black hair create — both work by layering tones rather than applying one flat color throughout.
21. Classic Black-to-Caramel Ombre Spring Twists
When ordering ombre spring twist hair, specify the color code for both the root and the tip. A T1B/30 label means soft black at the root graduating to medium auburn at the tips; T1B/27 gives a golden honey result at the ends. These packs are pre-dyed by the manufacturer so the gradient is already built in, and your braider installs them without additional coloring steps. Ask your braider to keep root sections consistently dark and avoid mixing ombre packs with solid-color packs near the root, which can interrupt the clean gradient closest to the scalp.
22. Auburn Brown Spring Twists at Medium Length
Warm copper auburn spring twist hair complements golden and warm undertones in medium to deep skin tones more than cooler shades like ash or platinum. At shoulder to collarbone length, the auburn color appears warm and dimensional rather than vivid, which makes it a lower-commitment color choice for first-time spring twist wearers. Sun exposure over 6–8 weeks will gradually soften the auburn at the exposed ends, though this shift is cosmetic and does not affect the structure or longevity of the twists.
23. Platinum or Golden Blonde Spring Twist Bob
Blonde spring twist fiber is high-contrast against darker natural hair at the scalp, which means part lines and braid bases are more visible unless the braider takes small root sections to minimize show-through. A stylist experienced with lighter extension colors will automatically tighten root sections and distribute the blonde packs evenly throughout the install. Pairing a blonde spring twist bob with defined edges and warm-toned accessories gives the look a finished, cohesive quality that makes the contrast feel deliberate.
24. Multi-Tone Highlighted Spring Twists
Spring twist packs containing four to six shades per bag, ranging from black to honey to light brown, produce a highlighted look that appears more natural than single-color extensions because real hair is rarely a flat, uniform shade. Mixing one pack of multi-tone twists with one pack of 1B at a 60/40 ratio keeps the effect subtle: the braider alternates extension packs section by section so the highlighted and natural-tone twists distribute evenly throughout. Avoid using the multi-tone packs exclusively at the crown, where higher contrast colors are most visible and can appear patchy if not blended carefully.
25. Bold Accent Colors in Plum or Teal
Vivid accent colors (plum, teal, rust, or copper) work best as scattered accent twists throughout a predominantly black or dark brown install rather than as an all-over color, which can look costume-like outside of a deliberately bold aesthetic. A practical approach is to ask your braider to place 4–6 accent twists framing the face and distribute 6–8 more through the back sections, alternating between packs as they work. The spring coil’s natural movement blends the accent sections into the darker base so the result looks curated and layered rather than random.
How Spring Twists Compare to Passion Twists and Kinky Twists
Spring twists, passion twists, and kinky twists are all installed using extension fiber over natural hair, but they differ significantly in texture, weight, longevity, and aesthetic. Knowing which style fits your hair and lifestyle before the appointment prevents arriving with a vision and leaving with something that doesn’t match it.
| Feature | Spring Twists | Passion Twists | Kinky Twists |
|---|---|---|---|
| Extension fiber | Tight coily spring bulk | Water wave or loose curl | Kinky or marley fiber |
| Texture | Tight, bouncy spiral | Loose, wavy coil | Tight, angular coil |
| Weight | Very light | Moderate to heavy | Light to moderate |
| Best length | Bob through long | Medium through long | Any length |
| Longevity | 6–8 weeks | 4–6 weeks | 6–8 weeks |
| Aesthetic | Natural, textured, lightweight | Boho, full, romantic | Classic, defined, neat |
Choosing Spring Twist Length for Your Face Shape
Face shape helps narrow down which spring twist length will frame you best, though it works alongside personal preference rather than as an absolute rule. The goal is to use length and parting direction to balance existing proportions or draw the eye toward features you want to highlight.

| Face Shape | Best Spring Twist Length | Parting Tip | Avoid |
|---|---|---|---|
| Oval | Any length, from chin to waist | Middle or side part both flattering | No major restrictions |
| Round | Shoulder length or longer | Middle or deep side part; high half-up puff adds useful height | Chin-length bob without a side part or crown height |
| Square | Shoulder to bra-strap length | Soft side part; twists falling forward soften the jaw | Very short bob with flat crown that emphasizes jaw width |
| Heart | Collarbone through waist | Middle part; length past the jaw adds visual width at the chin | High crown buns or top knots that widen an already-broad forehead |
| Oblong | Chin-length bob or shoulder length | Side part with no added crown height | Very long center-parted styles that add visual length |
What to Tell Your Braider
Arriving at a spring twist appointment with the right terminology prevents the most common installation issue: getting a style closer to passion twists or kinky twists than what you actually wanted. Braiders use these terms interchangeably in some regions, so being specific about fiber type and section expectations keeps the result aligned with what you had in mind.
Stylist tip from a THP contributor, protective style specialist: “Tell your braider the specific color pack you want before the appointment so they can source it in advance — spring twist hair in less common shades like teal or auburn runs out quickly at supply stores during peak season. The best installations come from braiders who pre-soak and dry the extension hair the night before, which removes any coating on the fiber and makes it significantly easier to install evenly.”
Use the following language at your consultation or appointment:
- Fiber type: “I want spring twists made with spring or kinky coil bulk, not passion twist water-wave hair and not straight marley fiber.”
- Section size: “I want [small / medium / large] sections throughout. Small for a denser look; medium for a natural balanced result; large for a chunkier statement style.”
- Length: “I want the finished twists to hit [chin / jaw / shoulder / collarbone / bra strap / waist].”
- Ends: “Please seal the ends so they don’t unravel; no loose boho finish unless I specify.”
- Color: “I’m using [color pack number, e.g., T1B/30]; please keep the dark root section visible and let the lighter tips show only at the ends.”
Spring Twist Maintenance and Care
Spring twists are low-maintenance once installed, but that refers to daily styling — not scalp and hair care. Neglecting moisture and scalp health underneath the extensions leads to breakage and dryness that shortens both the wear period and the condition of the natural hair after takedown. The schedule below covers a realistic 8-week maintenance routine for medium-length spring twists kept in good condition.
| Timing | Task | Product |
|---|---|---|
| Every 3–5 days | Scalp moisturizing | Lightweight oil (jojoba, grapeseed) or diluted leave-in spray applied directly between parts |
| Every night | Protective wrapping | Satin or silk bonnet (not just a pillowcase, which shifts and exposes the install during sleep) |
| Every 1–2 weeks | Scalp cleanse | Diluted apple cider vinegar rinse or dry shampoo applied between parts with a rat-tail comb |
| Weeks 4–5 | Edge maintenance | Light edge control applied gently; no re-styling that pulls on the hairline |
| Week 8 (takedown) | Removal and recovery | Detangling conditioner applied during removal; deep conditioning treatment before reinstalling |
Stylist tip: Sleep in a full satin bonnet rather than relying on a satin pillowcase alone. Pillowcases shift during sleep and leave sections of the install exposed to cotton friction — this causes root frizzing that makes spring twist installs look aged before week 6, and it is almost entirely preventable.
When Spring Twists Are Not the Right Choice
Spring twists are gentle and versatile, but they are not the right protective style for every hair situation. Knowing when to step back protects the natural hair and the time invested in the installation.
- Thinning or fragile edges: Root sections near the hairline carry tension regardless of how carefully the braider works. If edges are already thin or the hairline is receding from previous tight styles, spring twists on those front sections can worsen the damage. Ask your braider to leave the front perimeter of natural hair unattached, or consider stitch braids on a cornrow base, which avoids perimeter tension altogether.
- An inflamed or irritated scalp: Installing any extension style over open sores, severe dandruff flaking, or a psoriasis flare-up traps the issue under the extensions for 6–8 weeks. Resolve the scalp condition fully before booking a protective style appointment.
- Natural hair under 4 inches: Spring twist fiber needs at least 4 inches of natural hair to grip at the root. On shorter hair, the extension slips out quickly. Crochet spring twists are the better alternative: they attach over a braided cornrow base and do not require long natural hair for the extension to hold.
- A first appointment with an unfamiliar braider: Spring twists need consistent section sizing to look polished; uneven parts are immediately visible in the finished style. For a first appointment with a new braider, ask for a small test section before committing to a full head install.
FAQ
How long do spring twists typically last?
Spring twists installed at the correct tension and maintained with regular scalp moisturizing last 6–8 weeks. The first 4–5 weeks are usually the freshest; from week 6 onward, root frizzing and slight loosening at the part lines are normal. Removing spring twists before week 10 significantly reduces the risk of tangling and matting at the root base, which can cause breakage during takedown if left too long.
Can I wash my hair while wearing spring twists?
Yes, but the method differs from washing loose natural hair. Use a diluted sulfate-free shampoo applied directly to the scalp with a spray bottle or squeeze applicator, working in sections rather than scrubbing the twists together. The extension fiber holds water, so allow the twists to air dry completely before wrapping in a bonnet for sleep. Damp twists left overnight develop an unpleasant odor and loosen the fiber faster, which shortens the comfortable wear period.
Do spring twists damage natural hair?
Spring twists do not damage natural hair when installed at the correct tension and removed on time. The most common causes of damage are root sections installed too tightly, leaving the twists in beyond 10 weeks, and neglecting scalp moisture throughout the wear period. Natural hair should grow during the 6–8 week install provided the scalp stays moisturized and the edges are not over-manipulated.
What is the difference between spring twists and passion twists?
Spring twists use a tighter, coilier extension fiber that produces a compact, bouncy spiral and a lightweight feel. Passion twists use a looser, wavier water-wave fiber that creates a fuller, more boho aesthetic but is noticeably heavier. Spring twists also last longer on average: 6–8 weeks versus 4–6 for passion twists, because the tighter fiber structure resists unraveling. Choose spring twists for a lightweight, natural-texture result; choose passion twists for maximum fullness and volume.
How many packs of spring twist hair do I need?
Most full installs with medium sections require 5–8 packs depending on natural hair thickness and the length you want. A short bob may need 4–5 packs; waist-length installs can use 8–10. Always buy one extra pack in the same dye lot beyond your braider’s estimate; spring twist hair color can vary between production batches, and adding from a different lot mid-install can create visible color inconsistency in the finished style.
Can I style spring twists in updos and ponytails?
Spring twists are more updo-friendly than heavier braided extensions specifically because the lightweight fiber does not strain root sections when gathered upward. Half-up puffs, low buns, loose braided updos, and high ponytails all work at medium to long lengths. Avoid elastics with metal clips or teeth that grip the extension fiber tightly, as these can cause the twist to unravel at the middle rather than just at the tip end.
Spring twist hairstyles remain one of the most accessible and adaptable protective styles for natural hair because the lightweight coily fiber works across lengths, section sizes, and color options without requiring chemical processing of the hair underneath. Whether you’re trying spring twists for the first time or returning to a familiar style, matching the length to your face shape and giving your braider specific fiber and color terminology at the start makes a measurable difference in the finished result. Bring two or three reference photos from this collection to your next appointment to help your braider visualize exactly what you’re after.
Hair results vary based on your natural hair type, texture, density, and condition. Always consult with a licensed hairstylist before making significant changes, especially with chemical treatments or dramatic length changes. Photos may show styled results that require professional tools and products to replicate.