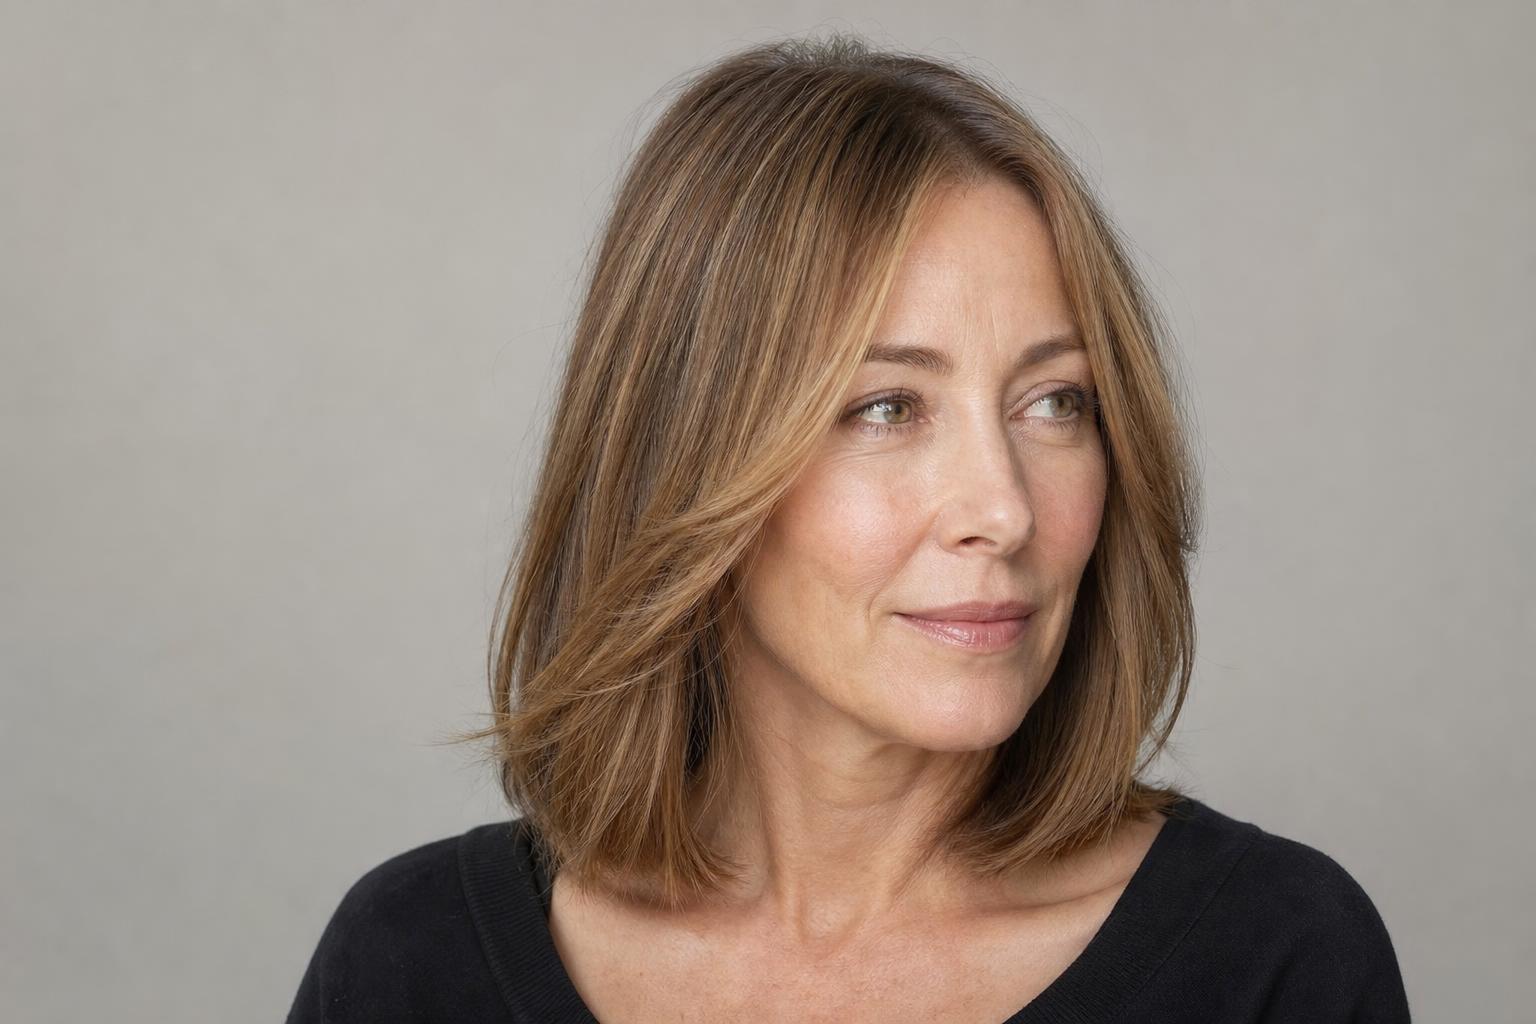
Thinning in your 40s usually starts at the part line, not the hairline, which is why the cut that flatters you now is probably shorter and blunter than the one you had at 30.
Hair density drops for most women somewhere between 38 and 48, and the giveaway is a part that photographs wider than it used to. The cuts that handle this share three traits: a blunt perimeter that keeps weight at the ends, layers placed only where lift is needed, and a length stopping between the chin and the collarbone. These 25 hairstyles are grouped by where thinning tends to show first.
Every entry names the cut, who it suits, and what to ask for. After the gallery: how fine hair and thinning hair differ (they need opposite things), a face shape table, exact salon language, realistic trim schedules, and an honest section on when a haircut will not solve the problem.
| Factor | Details |
|---|---|
| Best for | Low density at the crown and part line, softening front hairline, hair that has lost body since the mid-30s |
| Best length range | Ear length to collarbone; almost never past the bust line |
| Maintenance | Trims every 5 to 8 weeks depending on length; 5 to 15 minutes of daily styling |
| Avoid if | You want long hair with heavy layering, or you are hoping a cut will replace medical treatment for active shedding |
| Salon time | 45 to 75 minutes for a cut; add 2 to 3 hours if you are adding root shadow or fine highlights |
Short Cuts That Rebuild Volume at the Crown
When density has dropped at the top of the head, short hair has a mechanical advantage: less weight pulling down on the roots means the hair that remains stands up on its own. Cuts in this section keep length short enough that gravity stops working against you, and most can be styled in under ten minutes with fingers rather than a round brush. They suit women whose scalp shows through under overhead light but whose hairline is still intact, and they overlap heavily with the pixie shapes built for fine hair at any age.
1. Textured Pixie with a Lifted Crown
The crown section is cut about half an inch longer than the sides and point-cut at the tips, which lets the top stand away from the scalp instead of lying flat against it. Sides stay close but not shaved, so there is contrast between the lifted top and the tight perimeter. This is the single most effective cut for a visibly thin crown because it removes the weight that flattens that exact area.
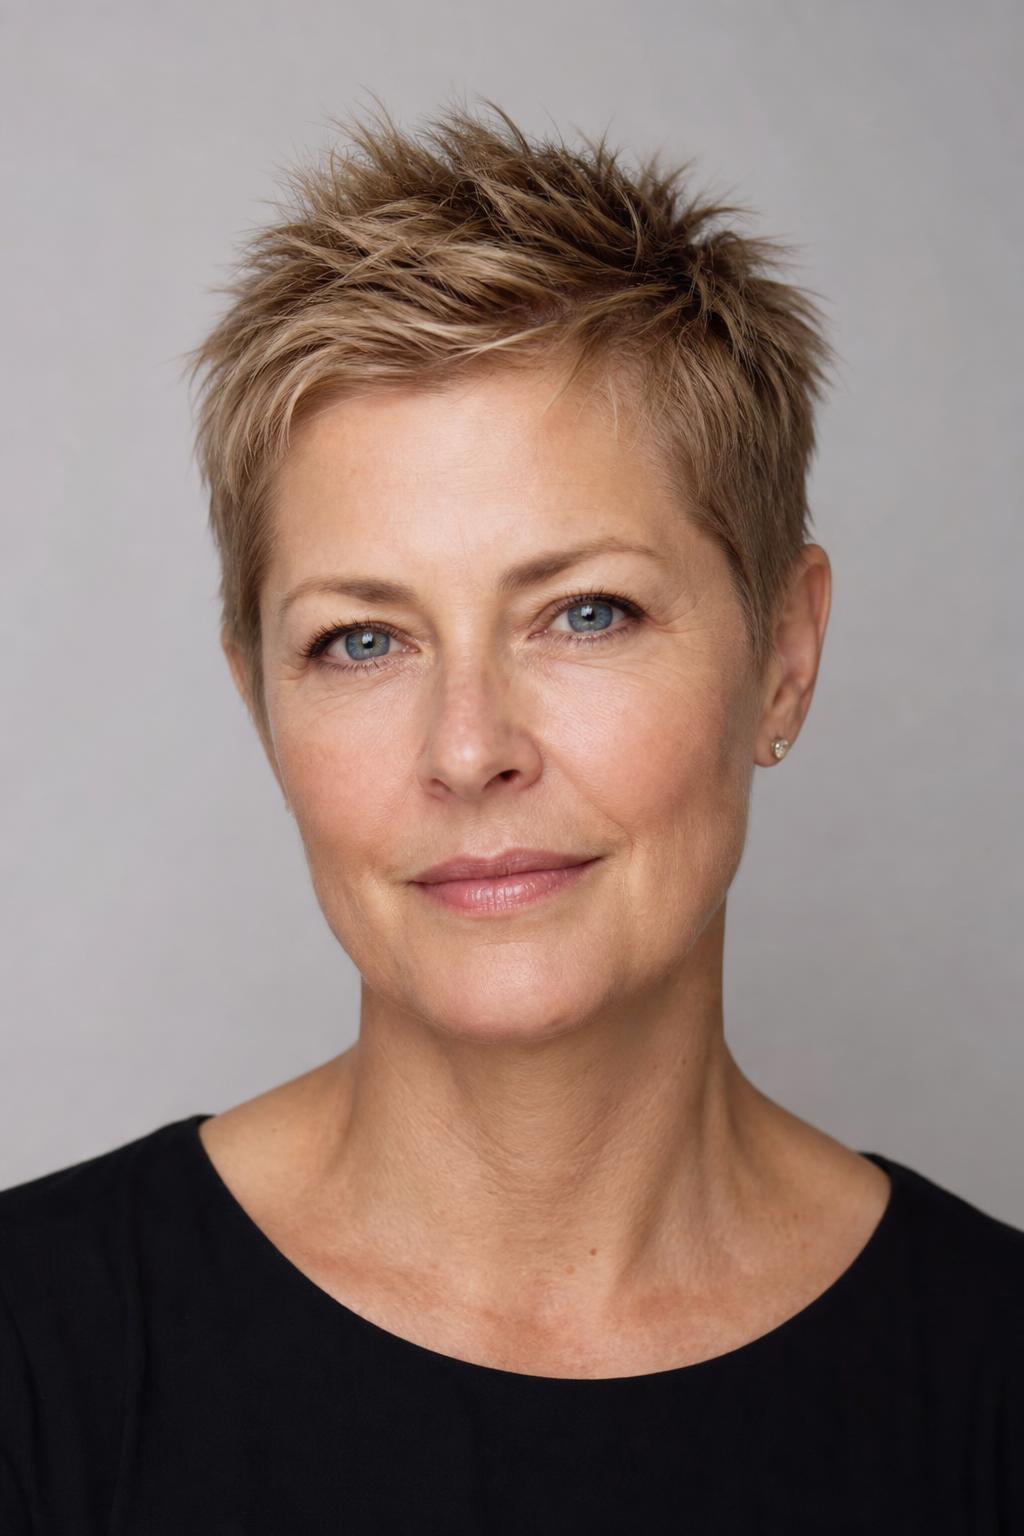
2. Soft Feathered Pixie for Round Faces
Height concentrated at the front third of the head adds vertical line to a round face, while the feathered sides stay flat against the temples instead of widening the silhouette. Ask for the length at the top to reach the middle of your forehead when combed forward, which gives enough hair to sweep back and up. Round faces should keep the sideburn area soft rather than squared.
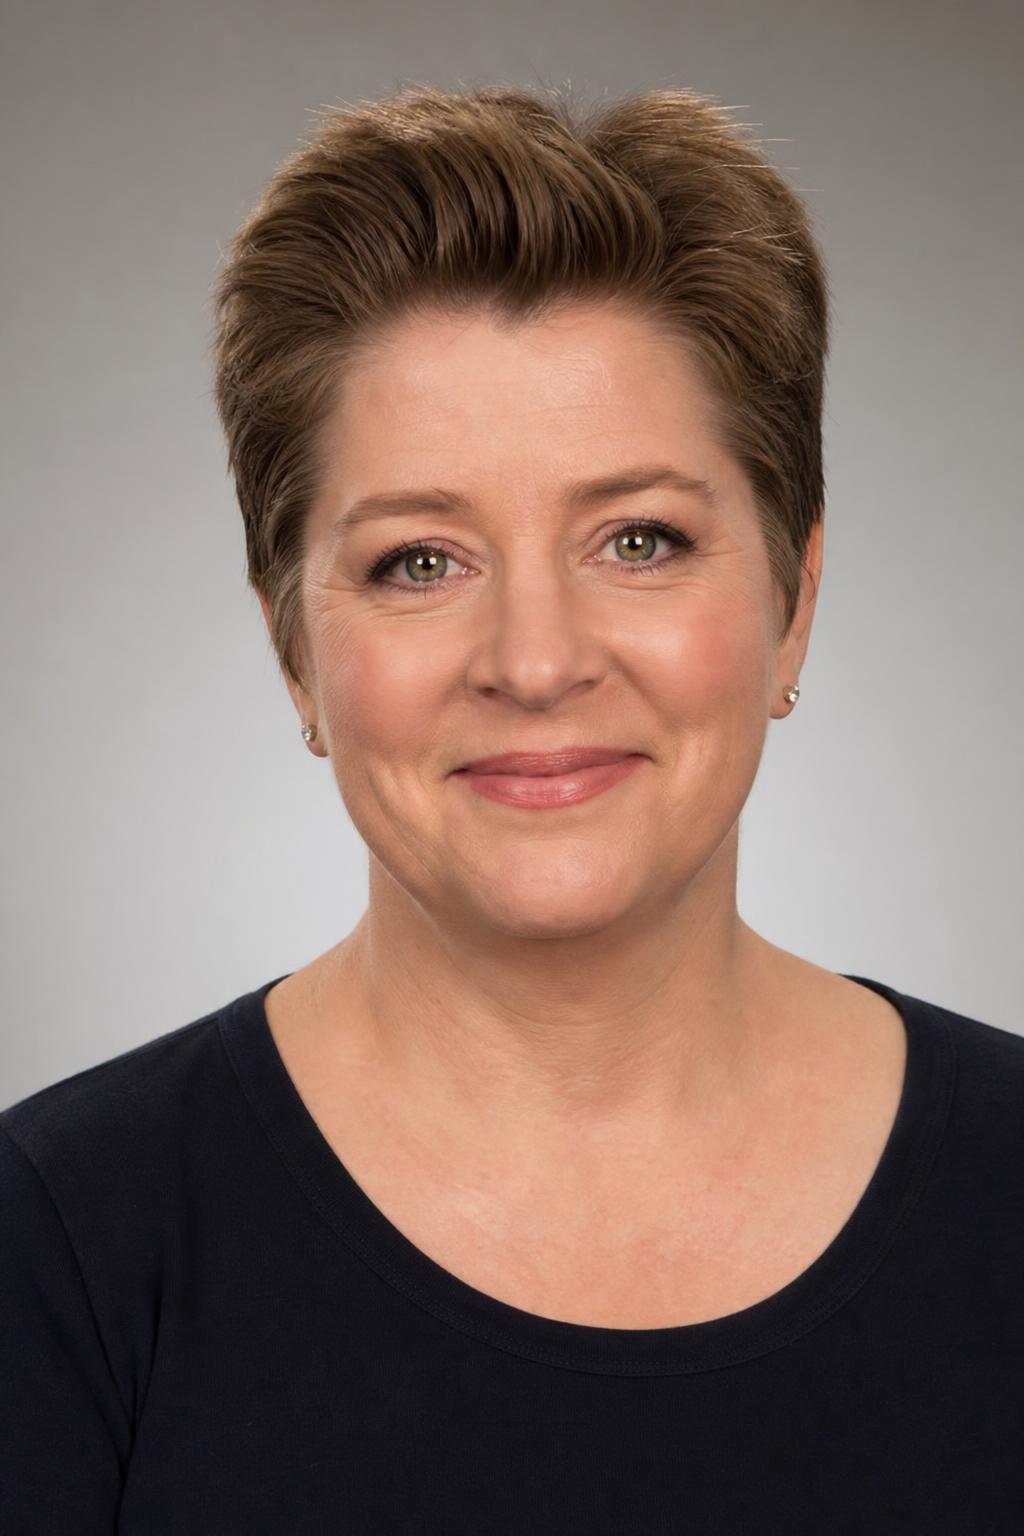
3. Cropped Pixie for Fine, Straight Strands
Fine straight hair has no natural texture to hold a shape, so this version relies on a blunt weight line around the perimeter and short internal graduation to build a rounded silhouette. Nothing is razored, because a razor thins already-fine ends into transparency.
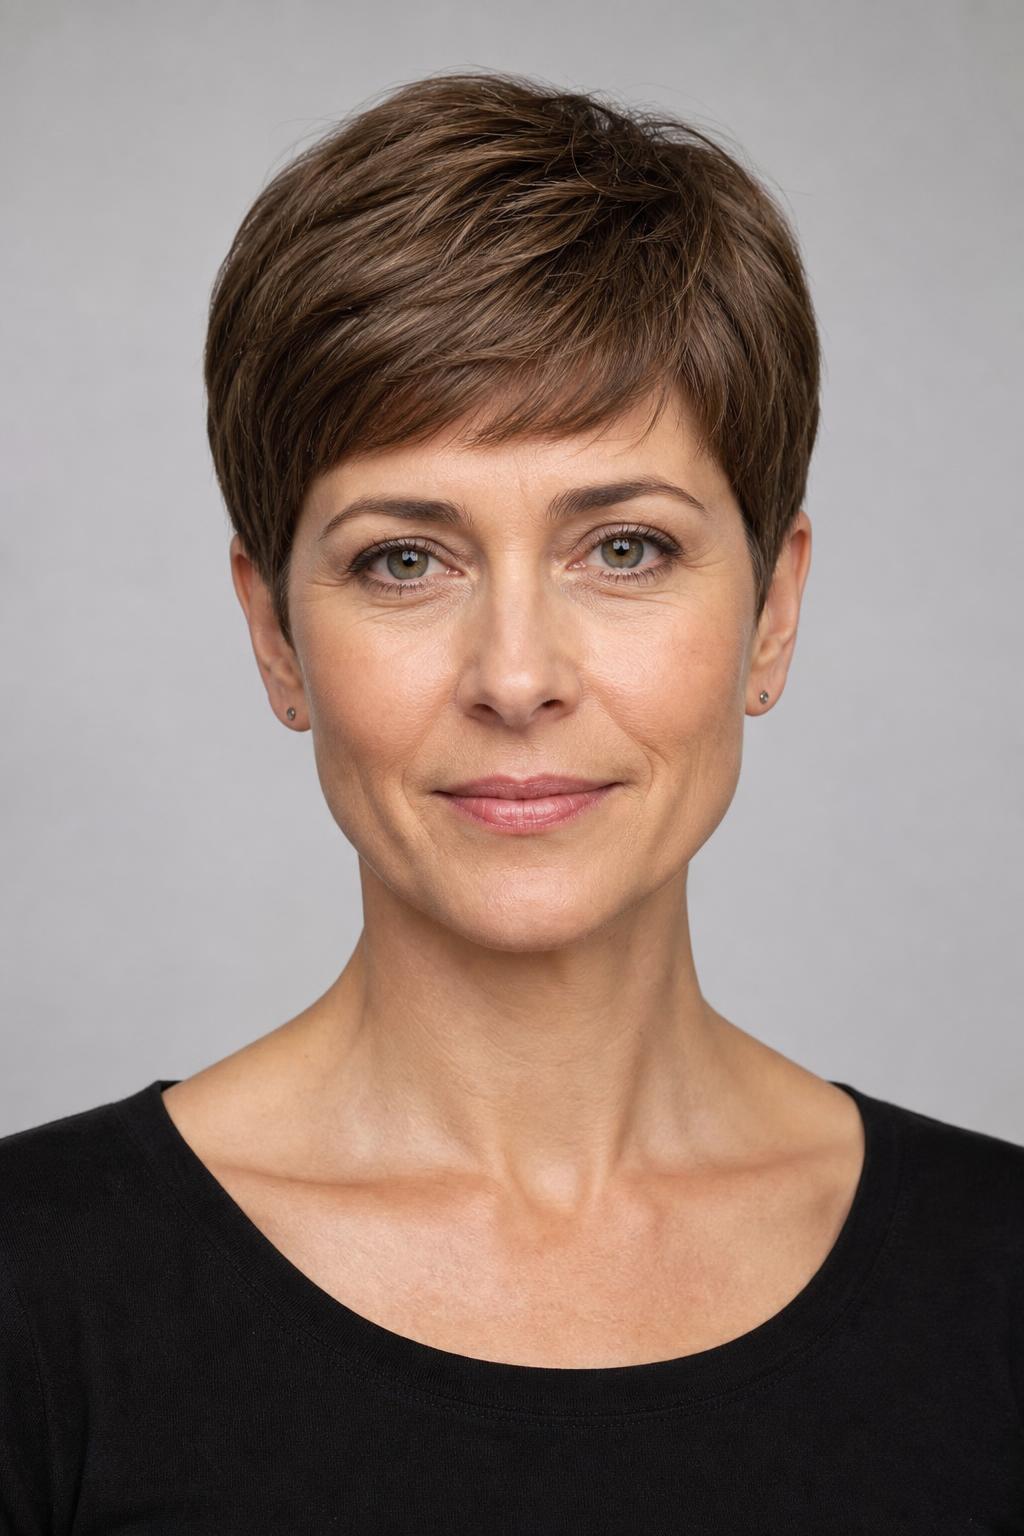
4. Piecey Pixie Styled with Clay
Work a pea-sized amount of matte clay between dry palms until it disappears, then press it into the top section and separate the ends with your fingertips. Clay grips fine hair without the shine that makes thin spots more obvious, and it does not drop the roots the way a pomade or wax does within an hour.
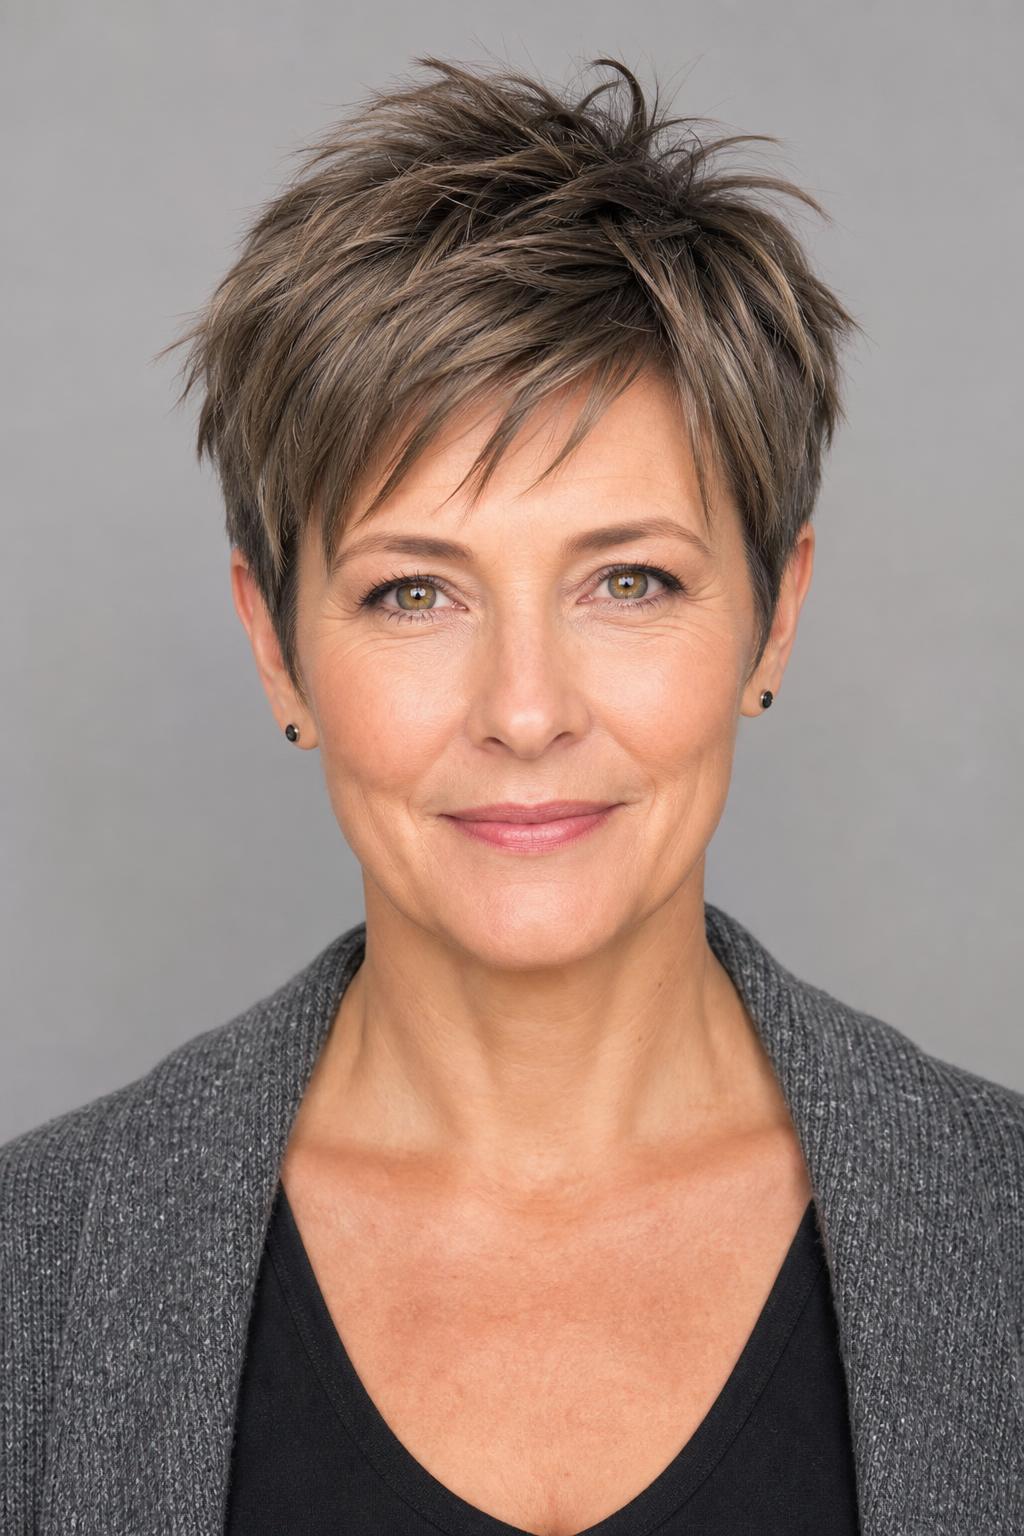
5. Grown-Out Pixie with a Blunt Weight Line
A pixie left to reach the earlobe stays wearable if the stylist keeps a blunt line around the bottom rather than feathering it into the neck. That line stops the grow-out phase from looking shapeless between weeks six and ten. Book trims every six weeks and ask for the perimeter only.

6. Ash Blonde Crop with Deeper Roots
Leaving the root two shades darker than the ends is the cheapest density trick in the salon, because contrast between scalp and hair is what makes thinning visible on camera. A cool ash blonde on the lengths with a soft natural root closes that gap without a hard line, and on a crop this short it grows out invisibly for about ten weeks.
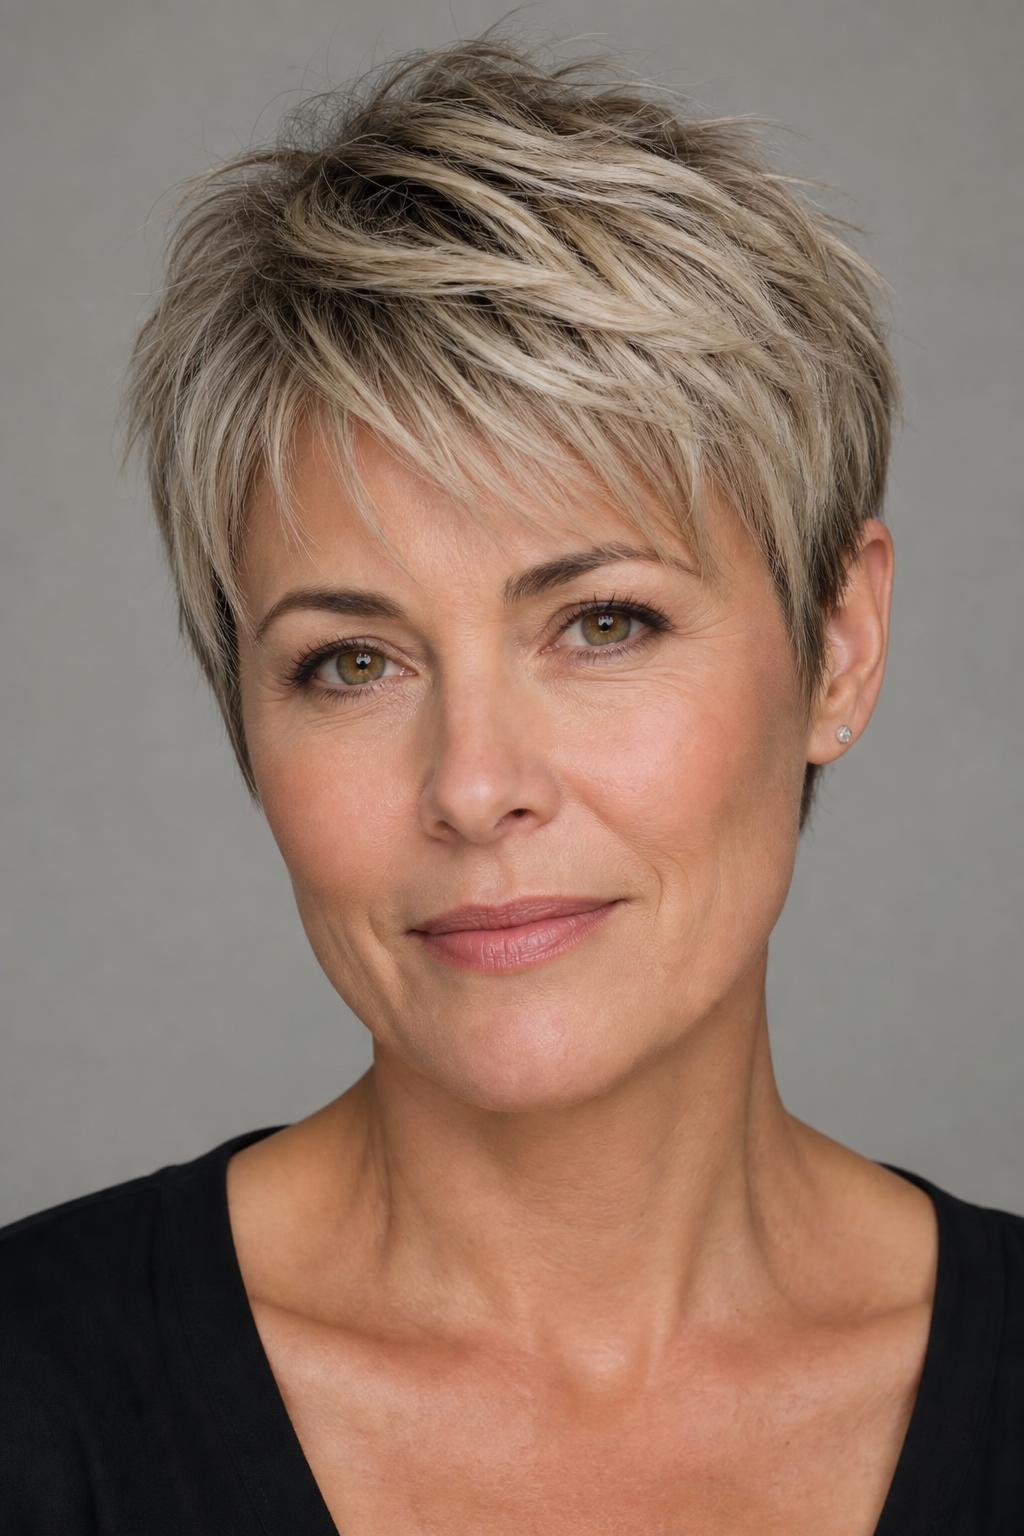
7. Tapered Pixie with a Longer Front Section
Ask for this one in these words: short and tapered through the back and sides, with the top left long enough to sweep across the forehead, and no thinning shears anywhere. Thinning shears are the most common reason a pixie on low-density hair ends up looking sparse rather than piecey. The longer front gives you something to move around when the part area feels bare.

Bobs That Give Thinning Hair a Strong Edge
A bob concentrates every strand you have into one horizontal line, and that line is what the eye reads as thickness. This is why a blunt bob looks denser than a layered bob of the same length on the same head of hair. The eight cuts below range from chin to collarbone and differ mainly in how much internal shaping they carry, which is the variable that decides whether your hair keeps body or goes limp by lunchtime.
8. Chin-Length Blunt Bob
Unlike a layered bob, which distributes weight up the hair shaft, a blunt bob keeps all of it at the ends and produces a heavier looking edge from one clean cut. There is no interior shaping at all, which is exactly the point on hair that cannot spare any. It needs a trim every five to six weeks, because the effect depends entirely on that line staying sharp.

9. Stacked Bob with a Graduated Nape
Graduation at the back builds a rounded shelf of hair above the occipital bone, so the shape holds volume where fine hair collapses first, while the front stays a touch longer and angles toward the jaw. Because the stacking is built into the cut, the volume survives air-drying without a round brush.
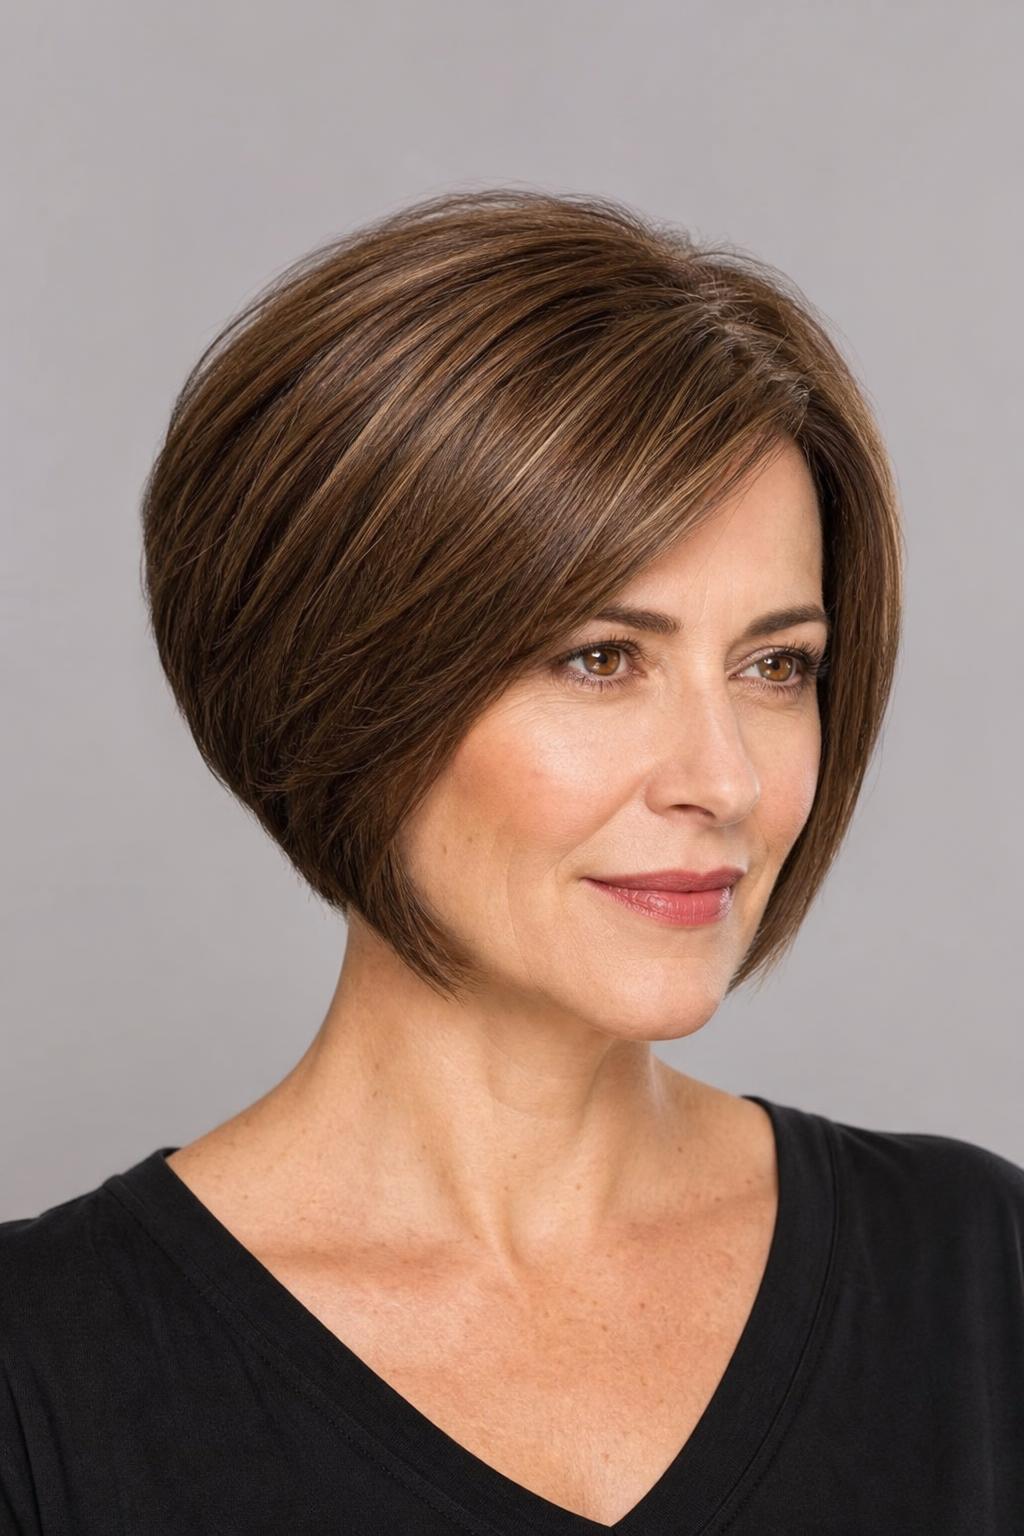
10. Jaw-Length Bob for Square Faces
A strong jaw needs the bob to end either above or below the jaw corner, never level with it, and above works better when density is low because the shorter length carries more apparent weight. Keep the ends slightly beveled inward so the perimeter curves rather than squaring off against the jaw. Add a soft side part to break the symmetry.
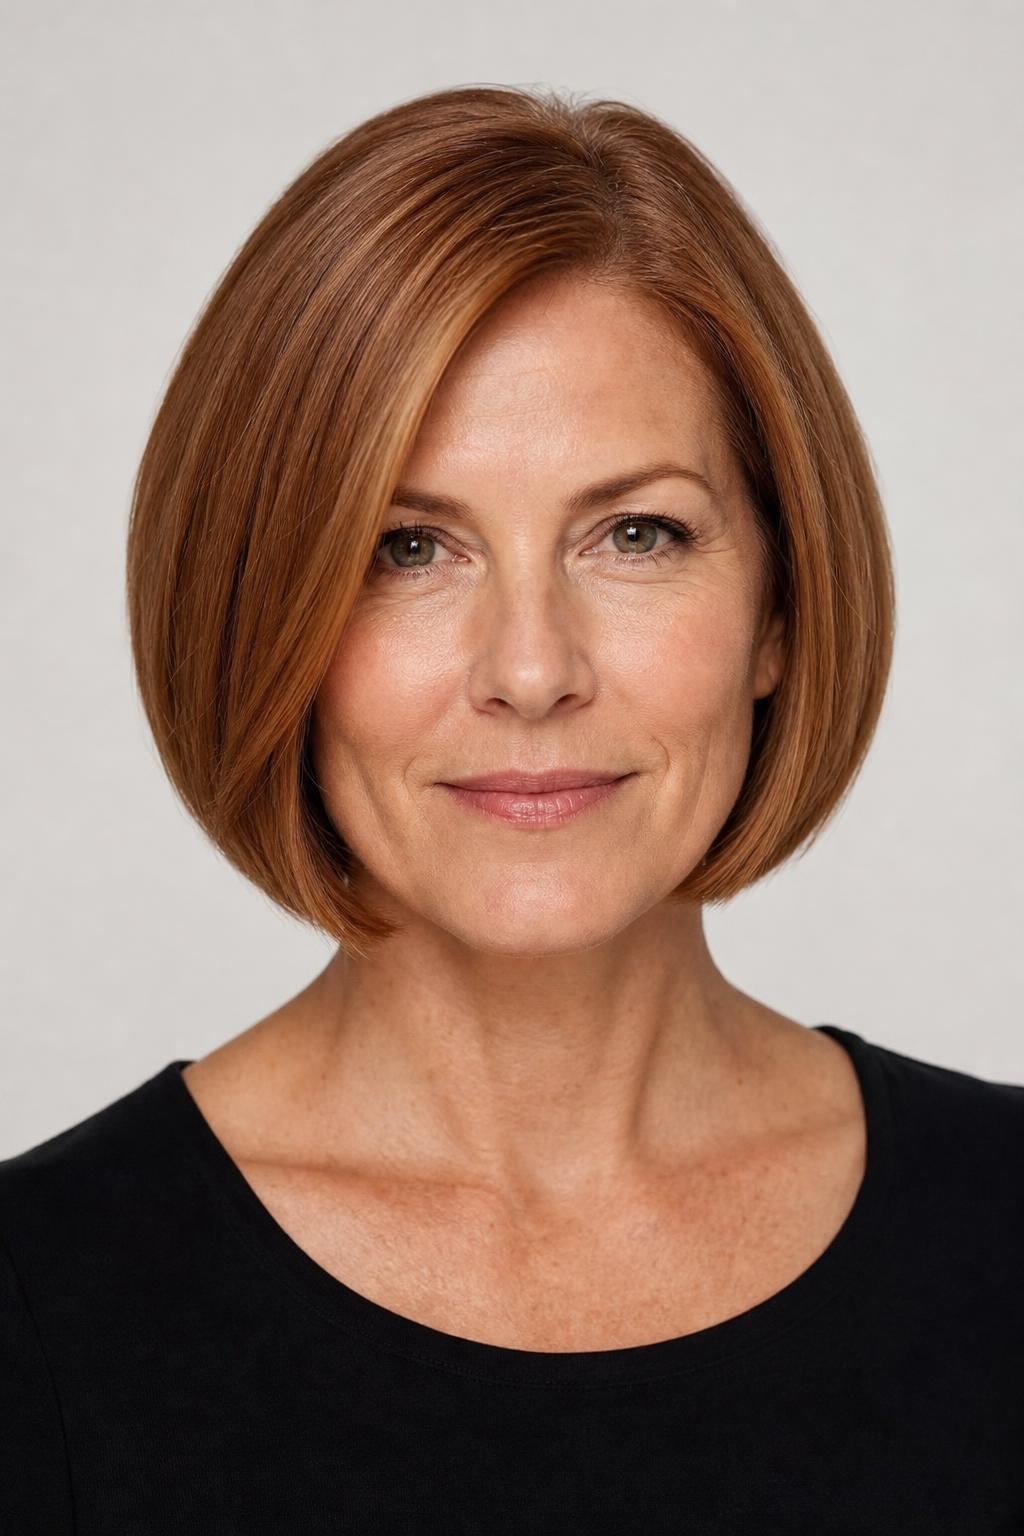
11. Choppy Bob for Very Fine Strands
Very fine hair reflects light in a flat sheet, which makes the scalp underneath easier to see; broken ends scatter that light instead. The stylist point-cuts only the last inch of the perimeter, leaving the interior untouched. It works on straight and slightly wavy hair, and it is a poor idea on anything curlier than a 2b.

12. Bob with Ends Bent Outward
Clamp a flat iron on the bottom two inches, rotate a quarter turn away from the face, and pull through; the flick pushes the perimeter away from the neck and makes the ends wider than the roots. Ten seconds per section is enough on fine hair, and any longer flattens it.

13. Collarbone Lob Kept on a Six-Week Cycle
A lob is the longest length that still holds a convincing weight line on thinning hair, and it only stays convincing with a trim every six weeks. Past week eight the ends taper on their own and the whole shape starts to look wispy at the bottom. Budget for eight cuts a year rather than four if you want to keep this length.

14. Lob with Fine Caramel Ribbons
Thin slices of caramel woven through a mid-brown base create the impression of two hair colors overlapping, and overlapping tones look like more strands. Keep the pieces narrow and start them below the root; broad chunky highlights do the opposite and separate the hair into visible gaps.

15. Angled Bob with a Deep Side Part
Tell your stylist you want a bob about an inch longer at the front than the back, with the part set roughly two inches off center on your fuller side. The deep part drags hair across the sparse area from a direction it does not normally fall, which covers a widening center part without any product. Ask them to cut the fringe area while the part is in its new position, not the old one.

Mid-Length Styles That Do Not Look Stringy
Most women in their 40s want to keep some length, and the honest answer is that you can, as long as the cut stops at the collarbone and the layers stay above the ears. What makes mid-length hair look thin is not the length itself but the tapered, see-through ends that develop when long hair goes six months without a cut. Every style in this section protects the perimeter and puts shaping only in the top half.
16. Shoulder-Grazing Cut with Weight Left In
Where a standard long layered cut removes bulk from the mid-shaft down, this one leaves the bottom four inches completely solid and takes shaping only from the crown and face-framing pieces. The difference is visible from behind, where a solid hem reads as a full head of hair and a layered one shows its own outline. This is the cut to request if you have been told your hair is too thin for length.

17. Internal Layers That Never Reach the Perimeter
The stylist takes a horizontal section from the crown, elevates it, and removes a small amount of interior bulk without touching the outer layer of hair. The outside stays one length; the inside gets just enough space to lift. It costs roughly 20 extra minutes in the chair.

18. Shoulder Cut for Heart-Shaped Faces
A heart-shaped face carries width at the temples and narrows to the chin, so the fullest part of the cut belongs at jaw level rather than at the top. Ending the length just below the jaw pulls attention away from a forehead that already looks wider when the part spreads. Keep the crown flat and let the bottom third do the work.

19. Mid-Length Cut for Wavy, Low-Density Hair
Natural wave is an advantage here, because a bend in the strand occupies more space than a straight one and fills a silhouette that low-density straight hair cannot. Cut it dry, at collarbone length, so the stylist can see where each wave actually falls, then air-dry with a light mousse.

20. Blow-Dried Bend at the Shoulder
Rough-dry to about 80 percent, then take three large sections and dry each over a two-inch round brush, rolling only the bottom third under and holding five seconds before releasing. The bend stops shoulder-length hair from hanging in a straight line, which is what makes it look sparse. Around eight minutes once you have done it twice.

21. Collarbone Cut on an Eight-Week Trim Schedule
This is the longest length worth keeping past 40 with thinning hair, and eight weeks is the outer limit between cuts before the ends thin out visibly. Half an inch off each time keeps the hem solid without ever losing overall length, since fine hair grows roughly half an inch a month. Skipping two appointments in a row is what turns a good cut into the stringy version everyone warns you about.

Fringe and Part Solutions for a Widening Part
A widening center part is the first sign of female pattern thinning that most women notice, and the American Academy of Dermatology’s hair loss resource describes exactly that pattern: thinning across the top of the scalp while the front hairline stays intact. Fringe and part placement are the fastest cosmetic answers, and they cost nothing. The four options below all redirect hair across the sparse zone rather than trying to add hair to it.
22. Shadow Root Under Lighter Lengths
A deliberately darker root melted into brighter mid-lengths puts a shadow over the scalp, and shadow is what hides the gap between strands. Colorists apply it in about 20 minutes at the end of a highlight service, and it buys four extra weeks between root appointments. Ask for one to two levels below your lengths, not three, which turns into a visible band.

23. Curtain Fringe Cut from Behind the Part
Ask for a curtain fringe taken from a section that starts about two inches behind your part line, not from the front hairline; pulling hair forward from further back drapes it over the widest section of the part itself. The shortest pieces should hit the outer corner of your eye and the longest should blend in at the cheekbones.

24. Side-Swept Wispy Fringe over a Wide Part
A full blunt fringe takes hair from the top of the head, the last place you can spare it; a wispy side-swept fringe borrows from the temple area instead and covers roughly the same ground. The pieces stay long enough to tuck behind an ear, and you can trim them yourself every three weeks with the hair dry and the scissors held vertically.

25. Deep Side Part with Lifted Roots
Set the part on damp hair, at least two inches from center, then dry the first inch of root while pushing it in the opposite direction with your fingers before letting it fall back. The root ends up standing rather than lying flat, and standing roots cast a shadow across the scalp. Nothing about this requires product, and it survives until your next wash.

Fine Hair and Thinning Hair Need Opposite Things
These two words get used interchangeably in salons and they describe different problems. Fine means each strand has a small diameter; thin means there are fewer strands per square inch of scalp. You can be fine and dense, thick and sparse, or both at once, and the correct cut changes depending on which applies. Most women in their 40s face a density drop on hair that was always on the finer side, which is why generic fine-hair advice only half works.
| Question | Fine Strands | Low Density |
|---|---|---|
| What you notice | Hair goes flat by midday and will not hold a curl | Part line looks wider and the ponytail circumference shrinks |
| Best length | Chin to shoulder; length is less critical | Ear to collarbone; shorter helps more |
| Layering | Light surface texture is fine and adds movement | Interior only; keep the perimeter completely solid |
| Color strategy | Multi-tonal lowlights add apparent strand thickness | Darker roots to reduce scalp contrast |
| Biggest mistake | Heavy conditioner from root to tip | Growing it long to compensate |
Stylist tip: Measure your ponytail circumference with a piece of string once a season and keep the string. It is the only home method that tracks density objectively, and it tells you whether you are actually losing hair or just noticing it more, which changes whether the answer is a haircut or a dermatologist. Our guide to choosing a haircut by hair density walks through the same measurement in more detail.
How to Choose the Right Cut for Your Face Shape
Face shape decides where the fullest point of the cut belongs, and on thinning hair you only get one fullest point to spend. Put it in the wrong place and the cut works against your proportions even if the density illusion succeeds. The table below assumes ear to collarbone length, which covers every style here.
| Face Shape | Best Variation | Ideal Length | Avoid |
|---|---|---|---|
| Oval | Blunt bob or solid-hem lob, either works | Chin to collarbone | Long tapered ends past the bust, which strip the shape |
| Round | Pixie with crown height, or an angled bob | Cropped, or just past the jaw | Chin-length with a center part, which widens the face |
| Square | Jaw-length bob with beveled ends and a side part | Just above or well below the jaw | A blunt line level with the jaw corner |
| Heart | Shoulder cut with fullness at jaw level | Jaw to shoulder | Volume piled at the crown, which widens the forehead |
| Oblong | Chin bob with a curtain or side-swept fringe | Chin length | Flat crown with no fringe, which lengthens the face further |
| Diamond | Grown-out pixie or ear-length crop with soft front pieces | Ear to chin | Slicked-back styles that expose a narrow forehead |
What to Tell Your Stylist
Say the word density out loud at the consultation, or most stylists will treat your hair as simply fine and reach for texturizing tools. Part your hair where you normally wear it and point out the area that concerns you under the salon’s overhead light, which is harsher than your bathroom mirror. Then use specific language rather than describing a feeling.
Useful sentences: “My density has dropped at the crown, so I want the perimeter left completely solid.” “No thinning shears and no razor anywhere in this cut.” “Interior layers only, nothing that shows on the outside.” “Cut this with the part where I actually wear it, not a center part.” If you are considering going shorter but are unsure, ask for the cut in two stages at the same appointment, stopping at the longer length first. Most stylists will do this without charging extra if you ask at the start rather than halfway through.
Stylist tip: Bring a photo of your own hair from three to five years ago rather than a celebrity reference. It shows the stylist what your hair does naturally at a higher density, which tells them far more about your growth pattern and cowlicks than a magazine image of someone else’s head. The same trick helps when discussing styles for hair that is growing back in patches, where the reference point matters just as much.
Maintenance and Styling Expectations
Every cut here trades salon frequency for daily ease, which is the deal thinning hair makes. Shorter shapes need more appointments and less morning effort; longer shapes reverse that only up to a point, because the moment the ends taper the illusion collapses. The numbers below assume hair growing at the typical half inch per month.
| Cut | Trim Frequency | Daily Styling | Key Products | Grow-Out Behavior |
|---|---|---|---|---|
| Textured pixie | 4 to 5 weeks | 5 minutes | Matte clay, light hold spray | Crown flattens first, around week 5 |
| Blunt chin bob | 5 to 6 weeks | 10 minutes | Volumizing mousse, heat protectant | Line softens by week 6 and looks unshaped |
| Stacked bob | 5 to 7 weeks | 8 minutes | Root lift spray, dry texture spray | Nape graduation blurs first |
| Collarbone lob | 6 to 8 weeks | 10 to 15 minutes | Lightweight leave-in, round brush | Ends taper visibly past week 8 |
| Curtain fringe | 3 to 4 weeks | 2 minutes | Light cream, small round brush | Grows into face-framing pieces cleanly |
Two counter-intuitive habits help. Wash more often, not less, because scalp oil weighs fine hair down at the root and a flat root exposes more scalp. And skip conditioner above the ears entirely, which keeps the roots free while still protecting the ends your trim schedule for shorter cuts is designed to preserve.
When a Haircut Is Not the Answer
A cut changes how existing hair looks. It cannot create hair. Being clear about that saves money and disappointment, and there are four situations where a salon appointment is the wrong first step.
- Hair coming out in noticeable amounts over weeks, rather than gradual thinning over years, points to a shedding event triggered by illness, a crash diet, thyroid change, or iron deficiency. That needs blood work before scissors.
- Visible patches of scalp with defined edges, rather than an evenly diffuse thinning, is a pattern a dermatologist should look at rather than a stylist.
- Thinning that started within three months of a new medication, including some blood pressure drugs and antidepressants, belongs with the prescribing doctor first, because the cut you commit to now may not suit the hair you have in six months.
- Wanting to keep bra-strap length while density drops means no cut will satisfy you, and the honest conversation is about extensions or topper pieces instead. Some women find the realistic timeline of regrowth options more useful than another salon visit at that point.
FAQ
Does Cutting Thinning Hair Short Actually Make It Look Thicker?
Yes, because shorter hair weighs less and stops flattening the roots, and because a short cut concentrates the same number of strands into a smaller area. The effect is real but it is optical, not biological, and it works best between ear length and the chin. Below the collarbone the same head of hair spreads out and the scalp becomes more visible again.
Should I Get Layers If My Hair Is Thinning?
Only internal layers, never layers that break the outside line. Interior shaping removes bulk you cannot see and lets the top lift, while surface layers subdivide the hair you have into thinner-looking sections and expose the ends. If a stylist reaches for thinning shears on low-density hair, ask them to stop and use point cutting instead.
Will Bangs Make Thinning at the Crown Worse?
A full blunt fringe will, because it borrows hair from the top of the head where you have the least to spare. A wispy side-swept or curtain fringe pulled from behind the part line does the opposite and covers the widest section of the part. The rule is to take fringe hair from the temple and mid-scalp area, never from the crown.
Can I Still Color My Hair If It Is Thinning in My 40s?
Color is one of the more useful tools here, as long as you keep the root darker than the lengths. Reducing the contrast between scalp and hair is what hides gaps, so shadow roots, lowlights, and narrow highlights all help. Full-head bleach at the root does the reverse and makes a widening part far more obvious.
How Often Should I Trim Thinning Hair?
Every 5 to 6 weeks for anything at chin length or shorter, and every 6 to 8 weeks at shoulder to collarbone length. Fine hair tapers at the ends faster than coarse hair does, so the solid perimeter that creates the density illusion breaks down sooner. Half an inch each visit maintains length while keeping the hem intact.
Is a Bob Better Than a Pixie for Low Density?
A bob suits diffuse thinning across the whole head; a pixie suits thinning concentrated at the crown. The bob’s blunt perimeter creates one heavy line, while the pixie removes all weight so the crown can stand up. If your part is the problem, the pixie wins; if your ponytail has shrunk overall, the bob does, and the bob shapes that carry into the next decade follow the same logic.
Do Volumizing Products Actually Work on Thinning Hair?
Root-focused products work; length-focused ones mostly do not. A mousse or root spray applied to damp roots and dried in place gives measurable lift for a day, while volumizing shampoos and conditioners applied all over tend to coat the hair and flatten it. Dry texture spray at the roots between washes buys another day before the next wash.
Choosing hairstyles for thinning hair in your 40s comes down to protecting the perimeter, keeping the length between your ears and your collarbone, and putting shaping only where you need lift. Take two photos into your next appointment, one of a cut from this gallery and one of your own hair a few years ago, and open the conversation with the word density rather than the word thin. The right cut will not give you the hair you had at 28, but it will make the hair you have now look like all of it is there.
Hair results vary based on your natural hair type, texture, density, and condition. Always consult with a licensed hairstylist before making significant changes, especially with chemical treatments or dramatic length changes. Photos may show styled results that require professional tools and products to replicate.