

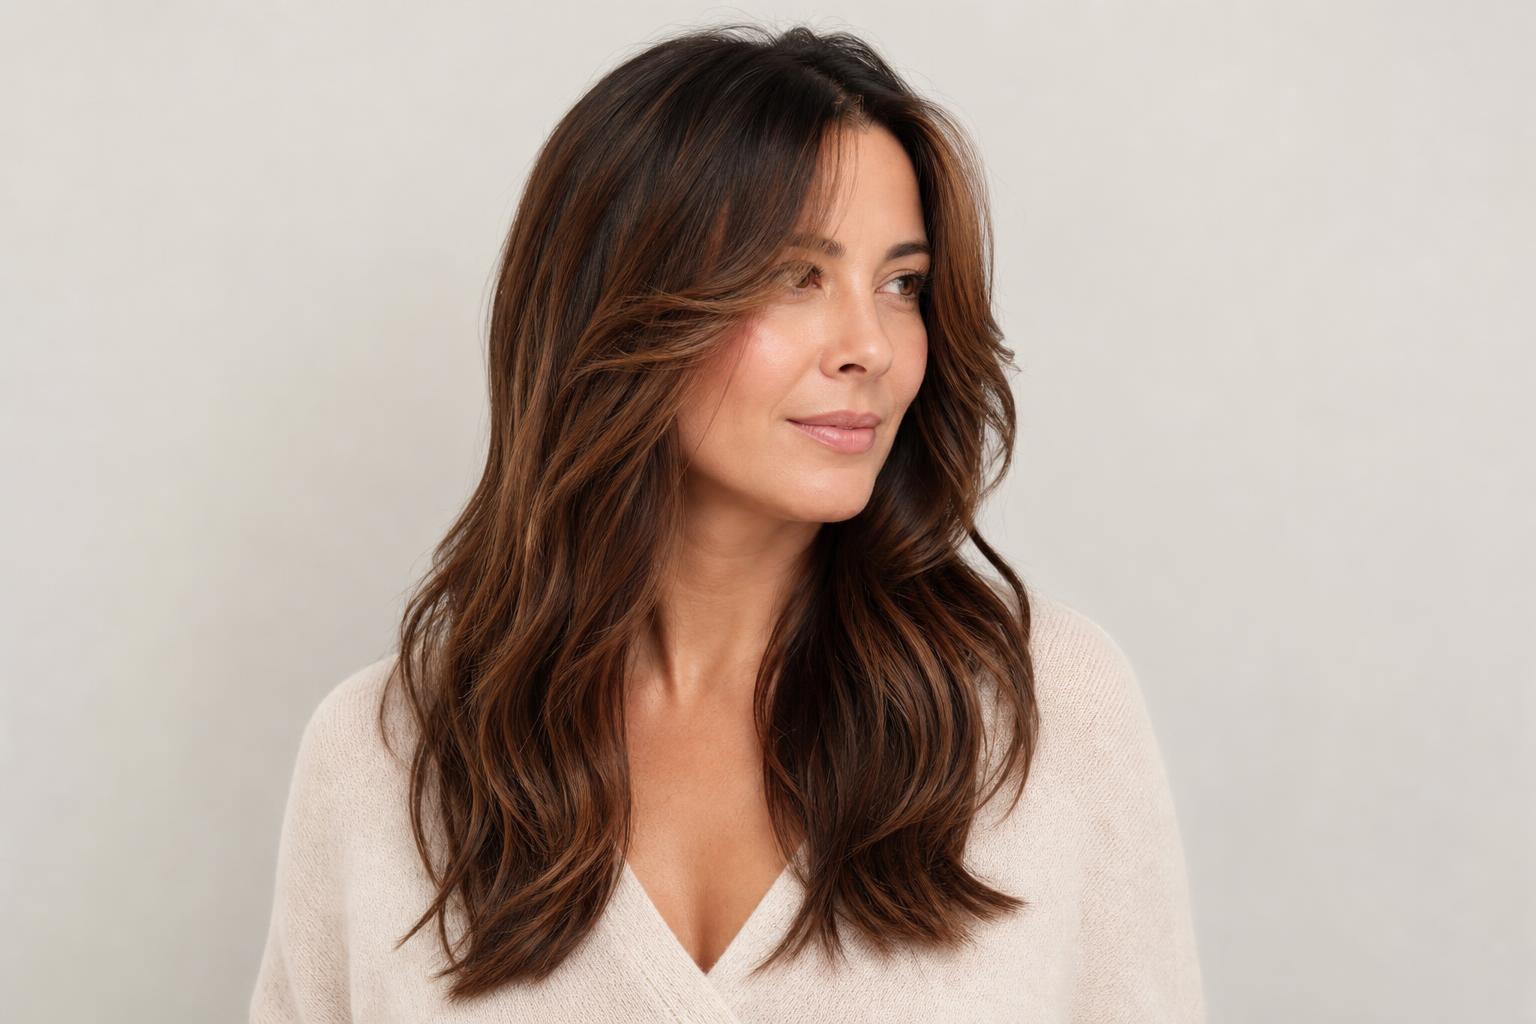
Long hair has one structural problem no other length has: everything below the shoulder carries weight, and weight is what flattens roots, drags out waves, and turns layers into a triangle.
Hairstyles for long hair split into two groups that need different decisions. The first is how the hair is cut, where layer placement and weight removal determine whether the length looks full or limp. The second is what you do with it on a given morning, which is where braids, twists, and half-up shapes turn one haircut into a dozen looks. This collection covers 32 options across both.
Entries are grouped by cut, everyday styling, braids and updos, and texture work, with each description naming the technique or tool behind it. After the gallery you get a face shape table, a weight-management section covering the specific problems long hair runs into, salon-ready language for layer placement, and an honest look at what long hair costs in maintenance.
| Factor | Details |
|---|---|
| Length range | Collarbone through mid-back and beyond |
| Best for | Medium to thick density; oval, heart, square, and round faces |
| Maintenance | Trims every 10 to 12 weeks; 2 to 25 minutes of styling depending on the look |
| Avoid if | Your hair is very fine and already flat at the root by midday |
| Salon time | 45 to 90 minutes for a layered cut, considerably longer with color |
Long Haircuts and Layer Shapes
The cut decides how the length behaves before any styling happens, and layer placement matters far more than overall length. Layers that start too high thin the mid-lengths and leave the ends sparse; layers that start too low do nothing at all. The right starting point depends on your density, and it is the single question worth settling at the consultation.
1. Long Layers Starting at the Collarbone
The shortest layer lands at the collarbone and each subsequent layer graduates down toward the ends, which removes bulk from the middle of the hair without touching the perimeter. Thick hair gets the most benefit because that is where the width builds. Fine hair should have the shortest layer set lower, closer to the bust line.

2. Blunt Long Cut with No Layers
Cutting the whole length to one line concentrates every strand in the perimeter, which is why this is the strongest option for fine hair despite looking like the least interesting one. The ends look dense because they are. Expect a trim every eight weeks, since the line loses its edge faster than a layered cut does.

3. Long Butterfly Cut
Short internal layers around the face are cut to land at chin and cheekbone level while the back stays long, so pinning the top half up creates the illusion of a much shorter cut underneath. Unlike a standard layered cut, the two lengths are deliberately disconnected rather than blended. Wavy hair carries the contrast best.
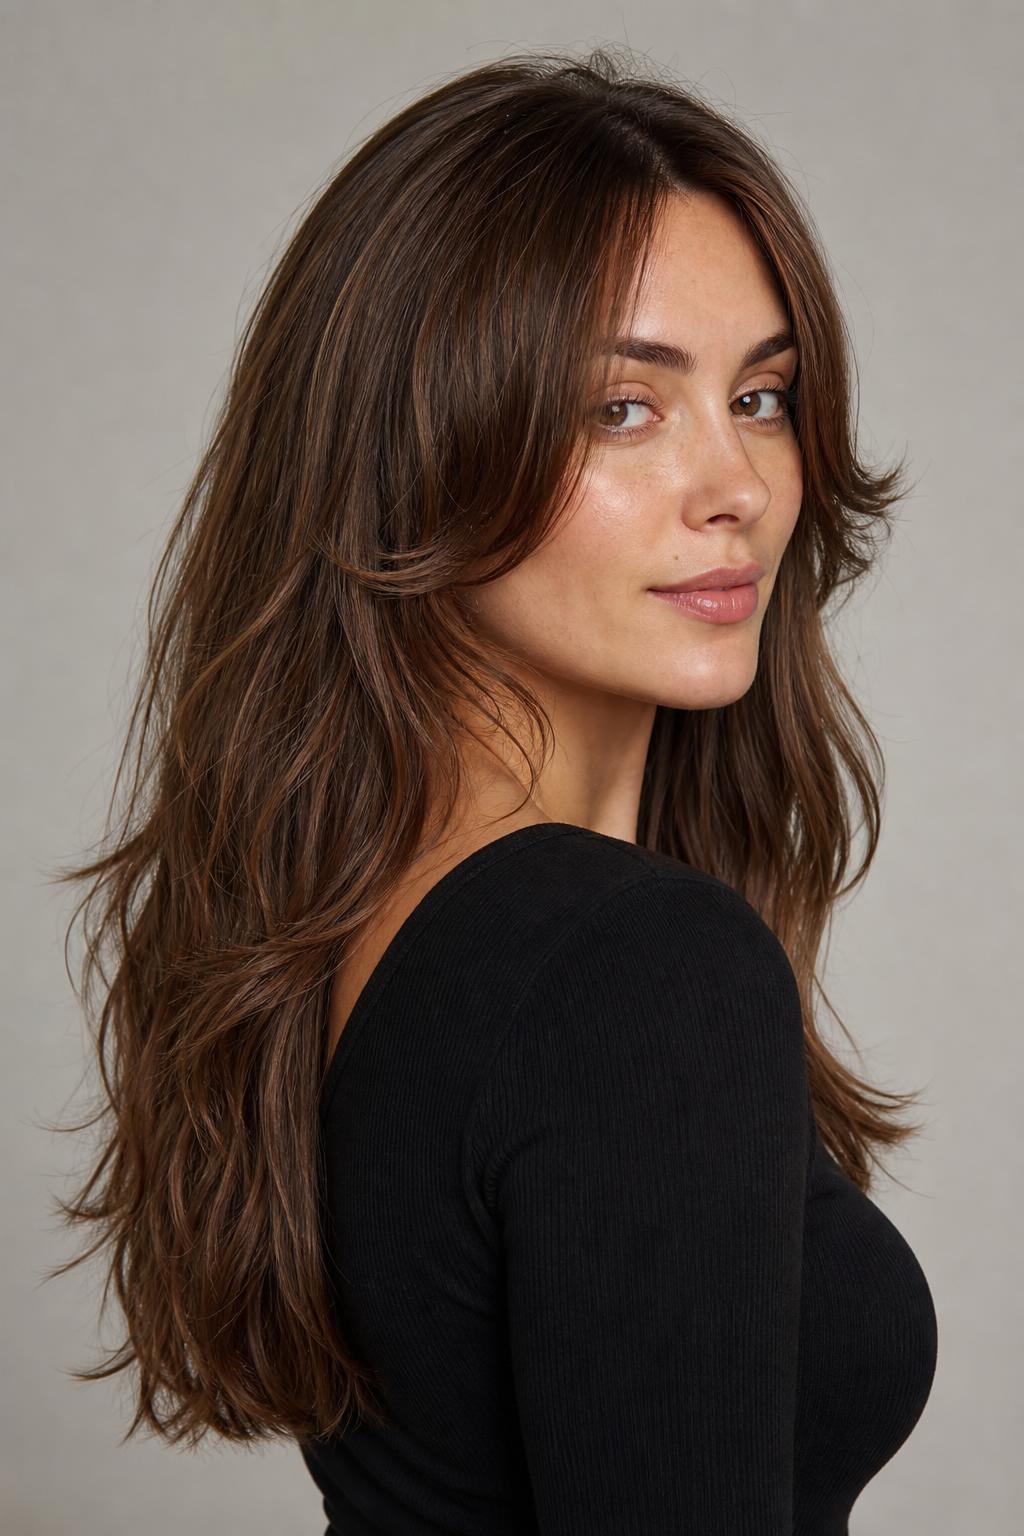
4. Long Shag with Stepped Layers
Layers cut in visible steps rather than blended graduations give long hair movement that survives air-drying, which is the appeal for anyone who does not want to blow-dry. The crown layers start highest, around the top of the ear. Medium to thick density holds the steps; on fine hair they collapse within a day.
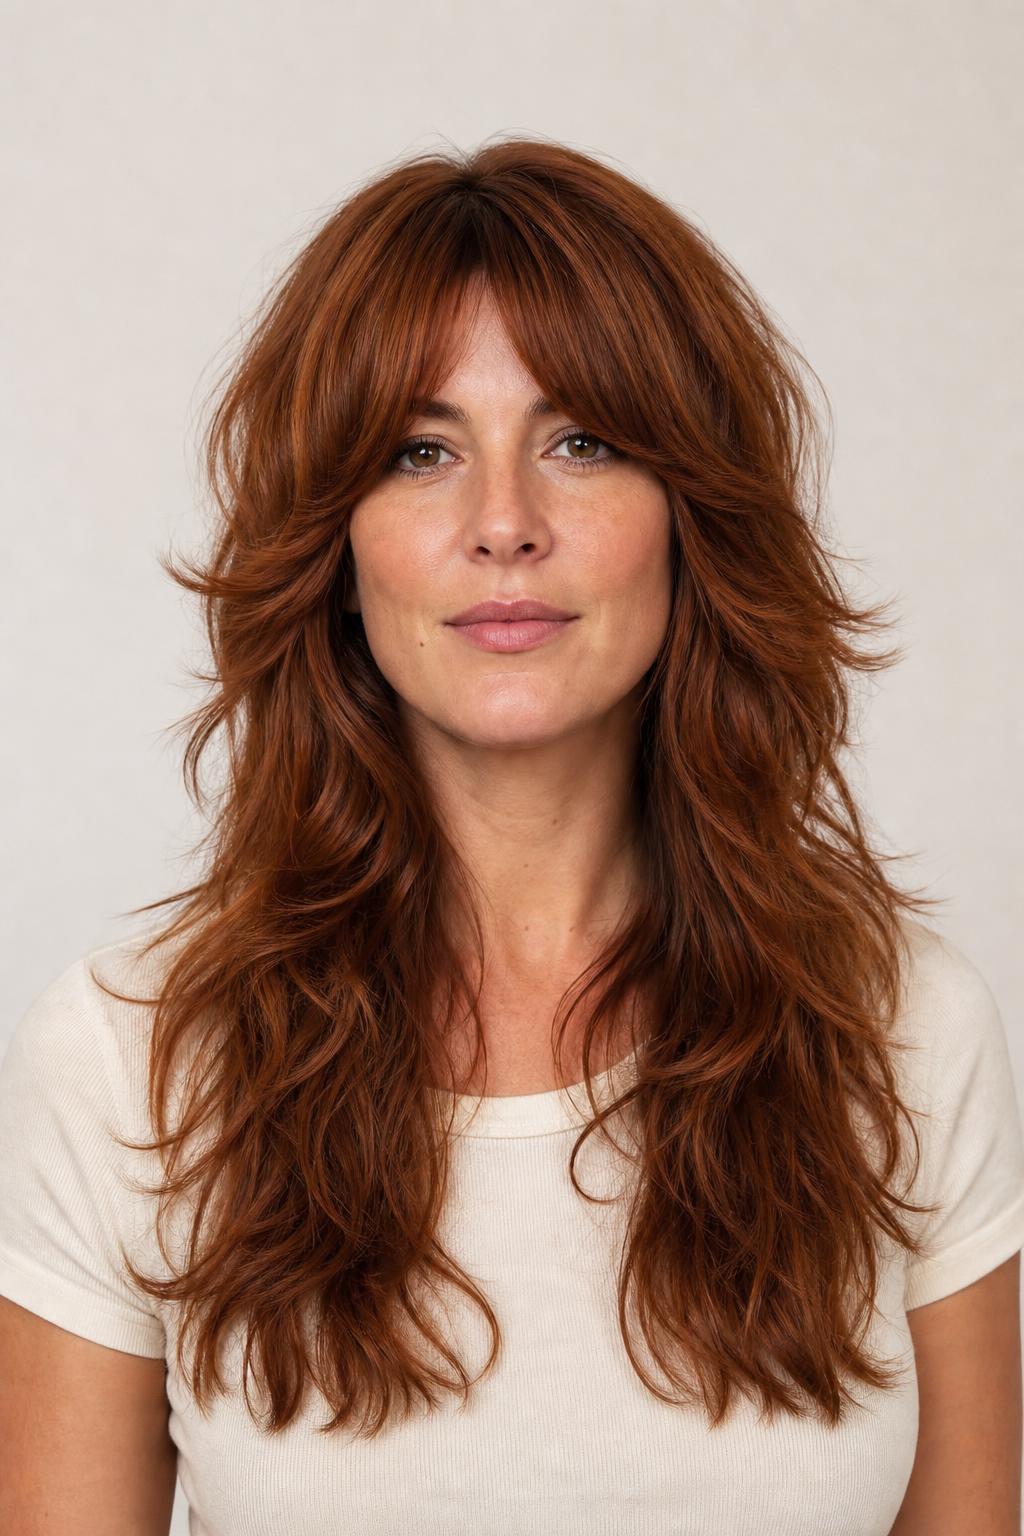
5. Long Hair with Curtain Bangs
Ask for a center-parted fringe with the shortest point at the cheekbone, graduating back into the length so there is no visible step. The phrase that matters is blend the bangs into my face-framing layers, which prevents the fringe from ending abruptly at the jaw. It grows out into longer face-framing layers rather than into an awkward stage.
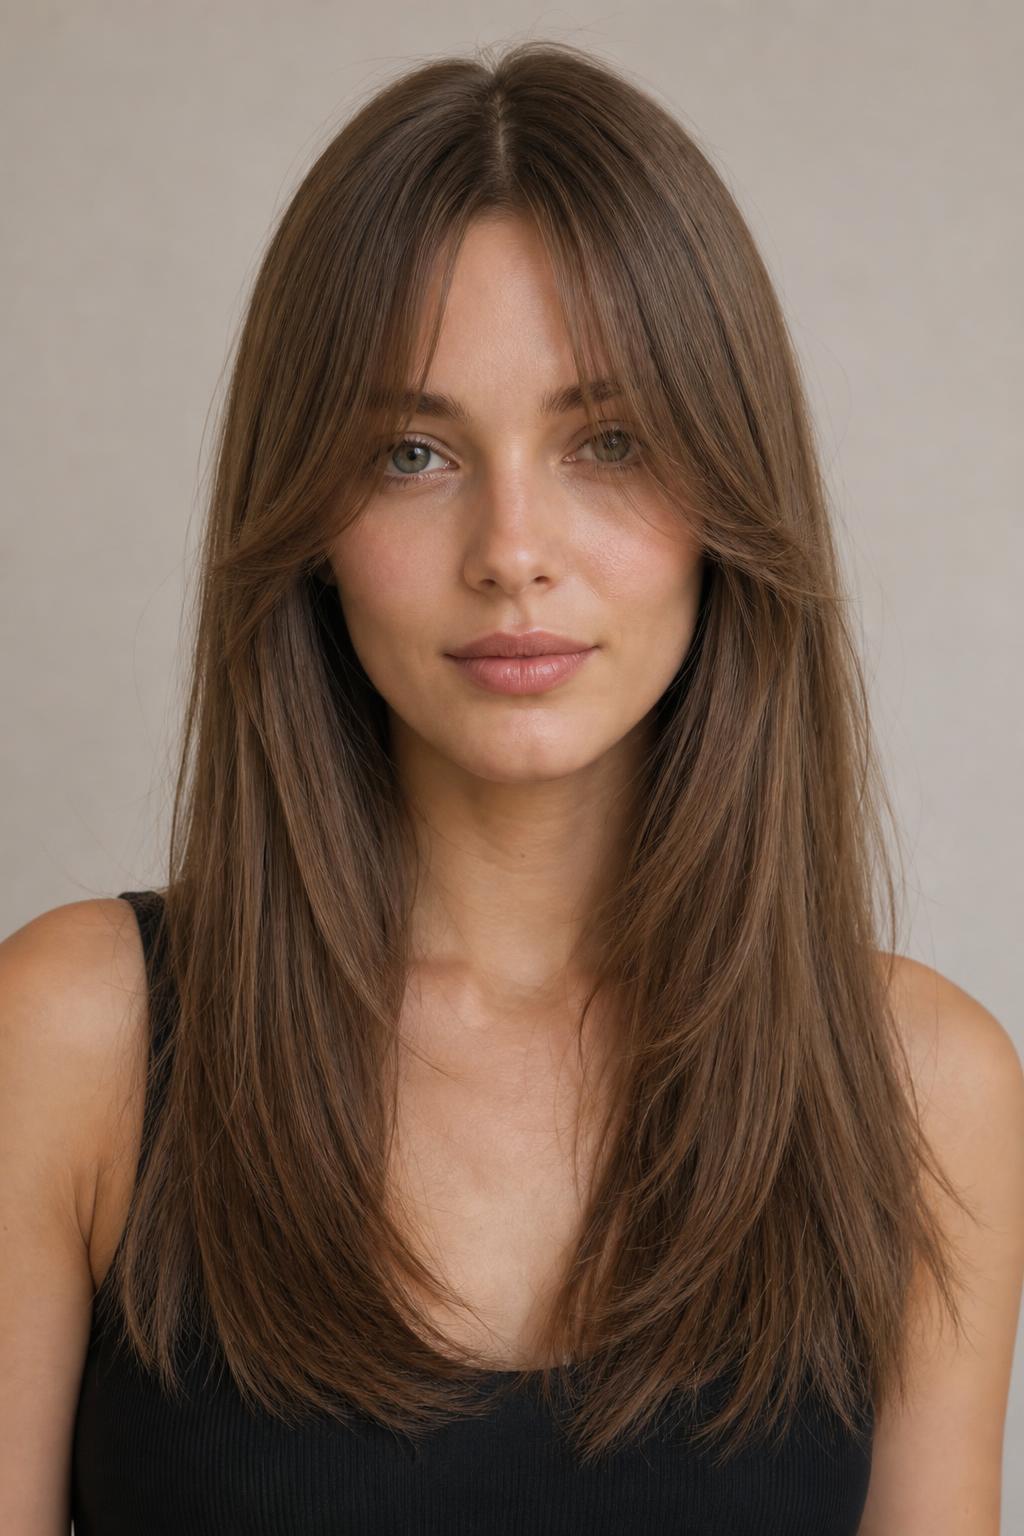
6. Long Hair with a Curved U-Shaped Perimeter
Cutting the back into a shallow U rather than a straight line means the sides fall slightly shorter than the center, which stops long hair from looking blocky across the back. It also spreads out the split ends that otherwise concentrate at the corners of a straight line.
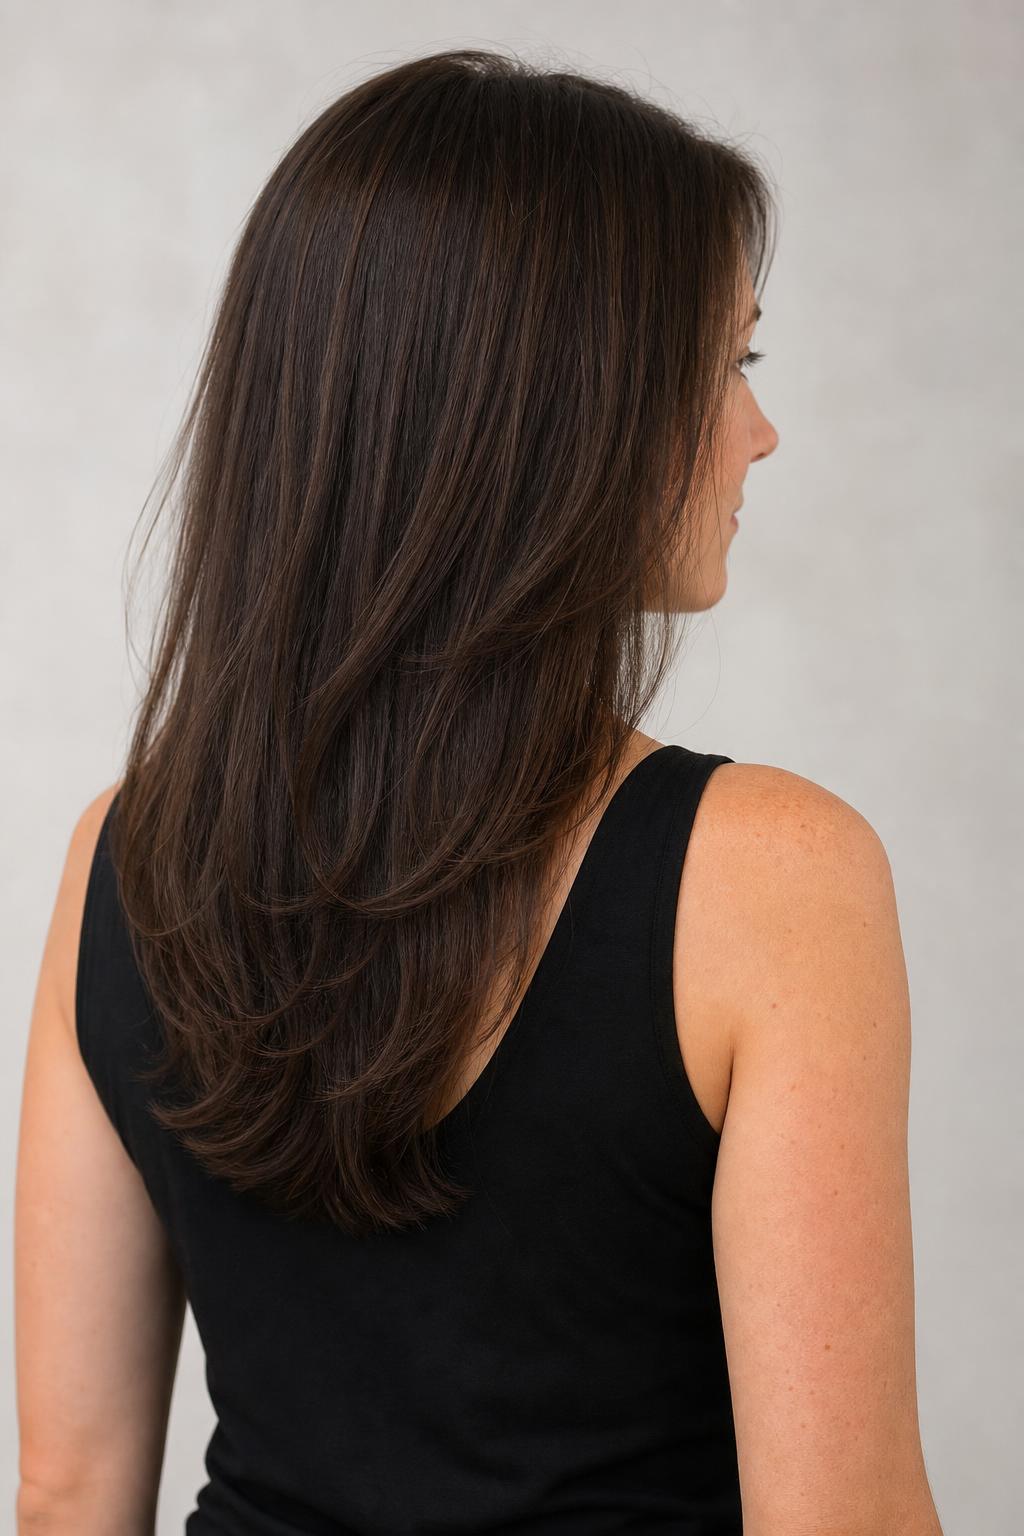
7. Long Curly Cut with Spaced Layers
On 3a to 3c curls, layers cut too close together stack the curls into a triangle, so the spacing between them matters more than the length. A dry cut lets the stylist see where each curl actually falls once it springs up. Expect two to four inches of shrinkage depending on your pattern.
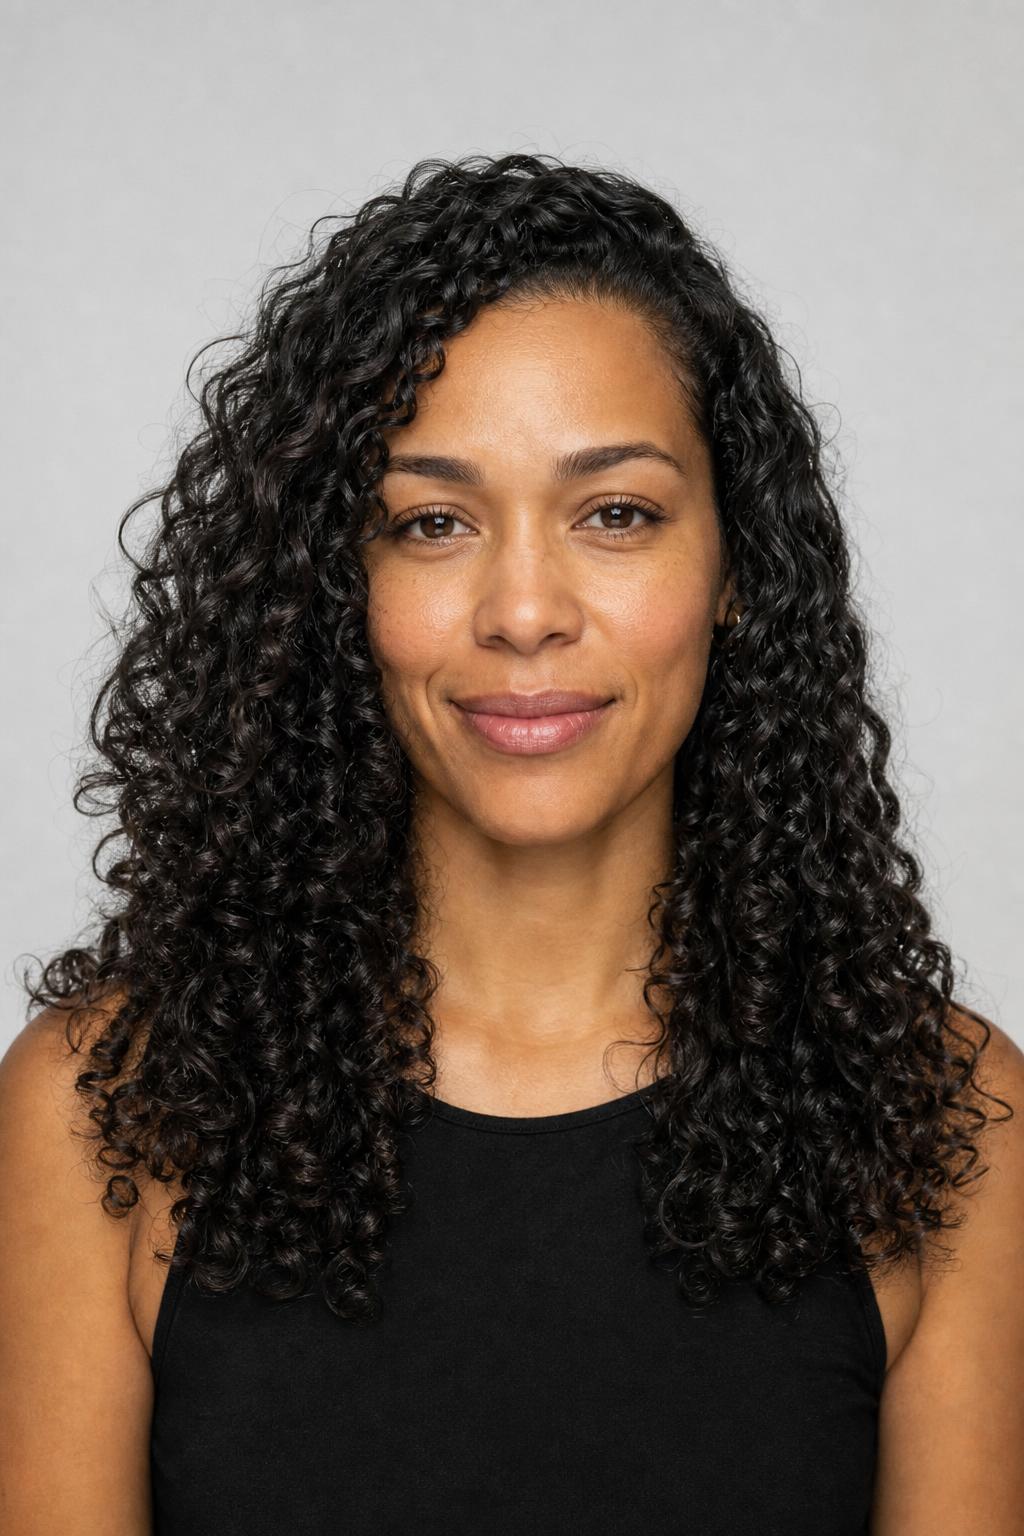
8. Long Hair with Internal Weight Removal
Thick hair often needs bulk taken from underneath rather than from the surface, which the stylist does by slide cutting or channel cutting the interior sections. The outer line stays intact so the hair still looks dense at the ends. The distinction between internal and visible layers is worth naming out loud at the consultation.
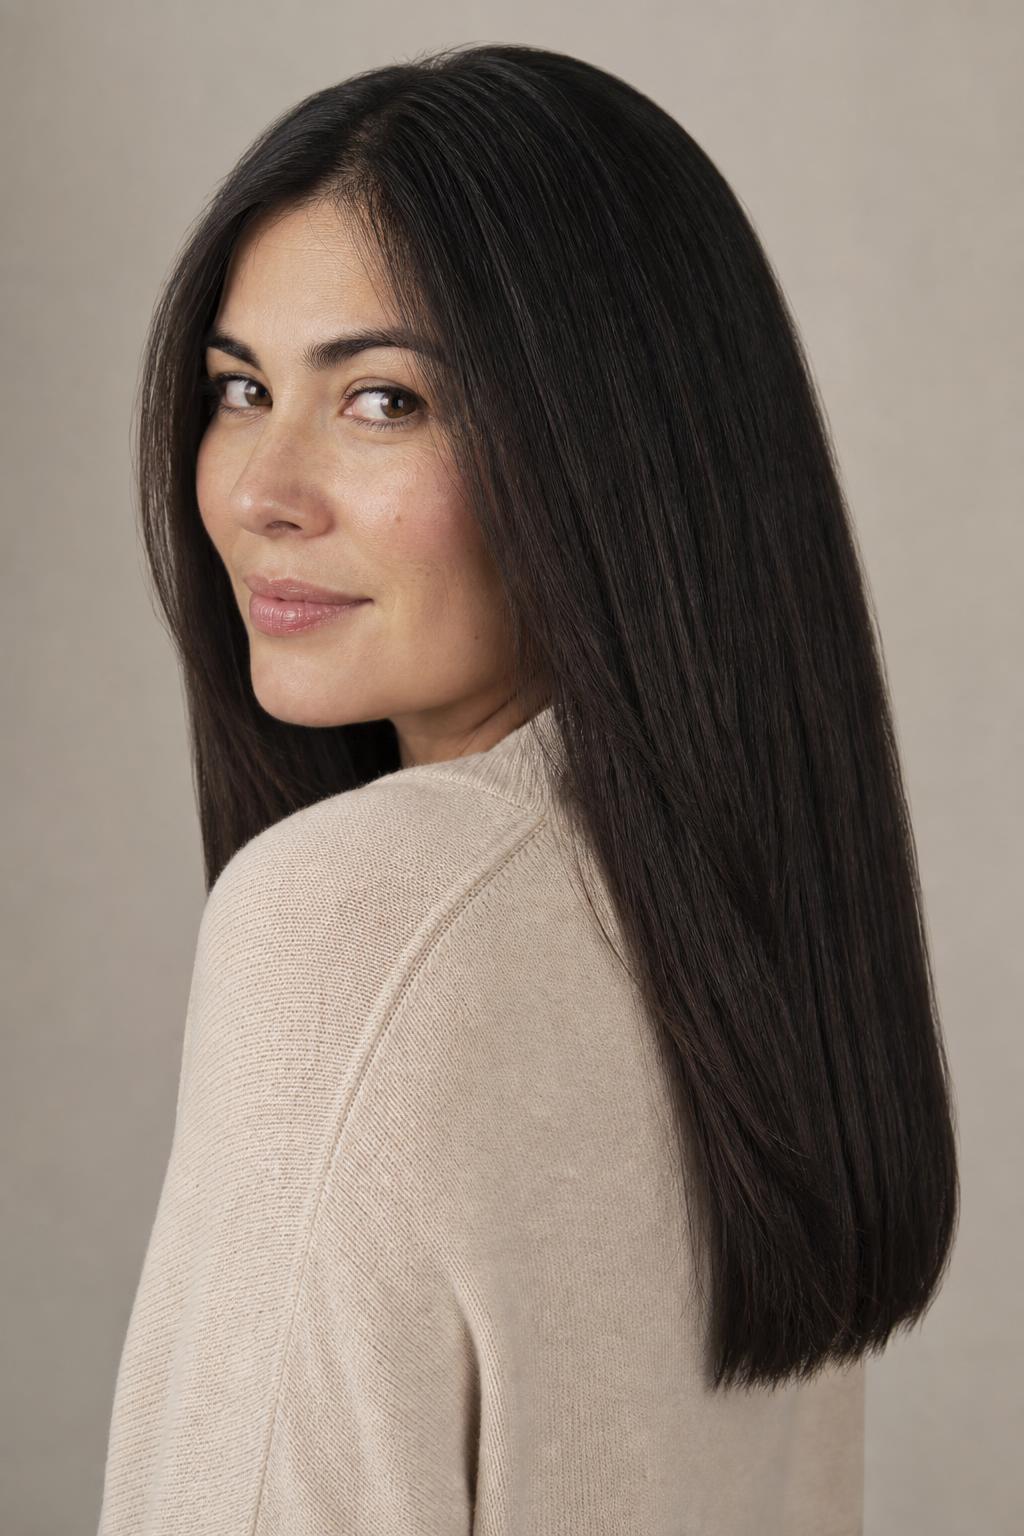
9. Long Hair with a Money Piece
Lightening only the two front sections by two or three levels brightens the face without committing to full highlights, and the regrowth line is easy to live with because it falls where a natural part would. On brunette hair the contrast lasts about ten weeks before it needs refreshing.
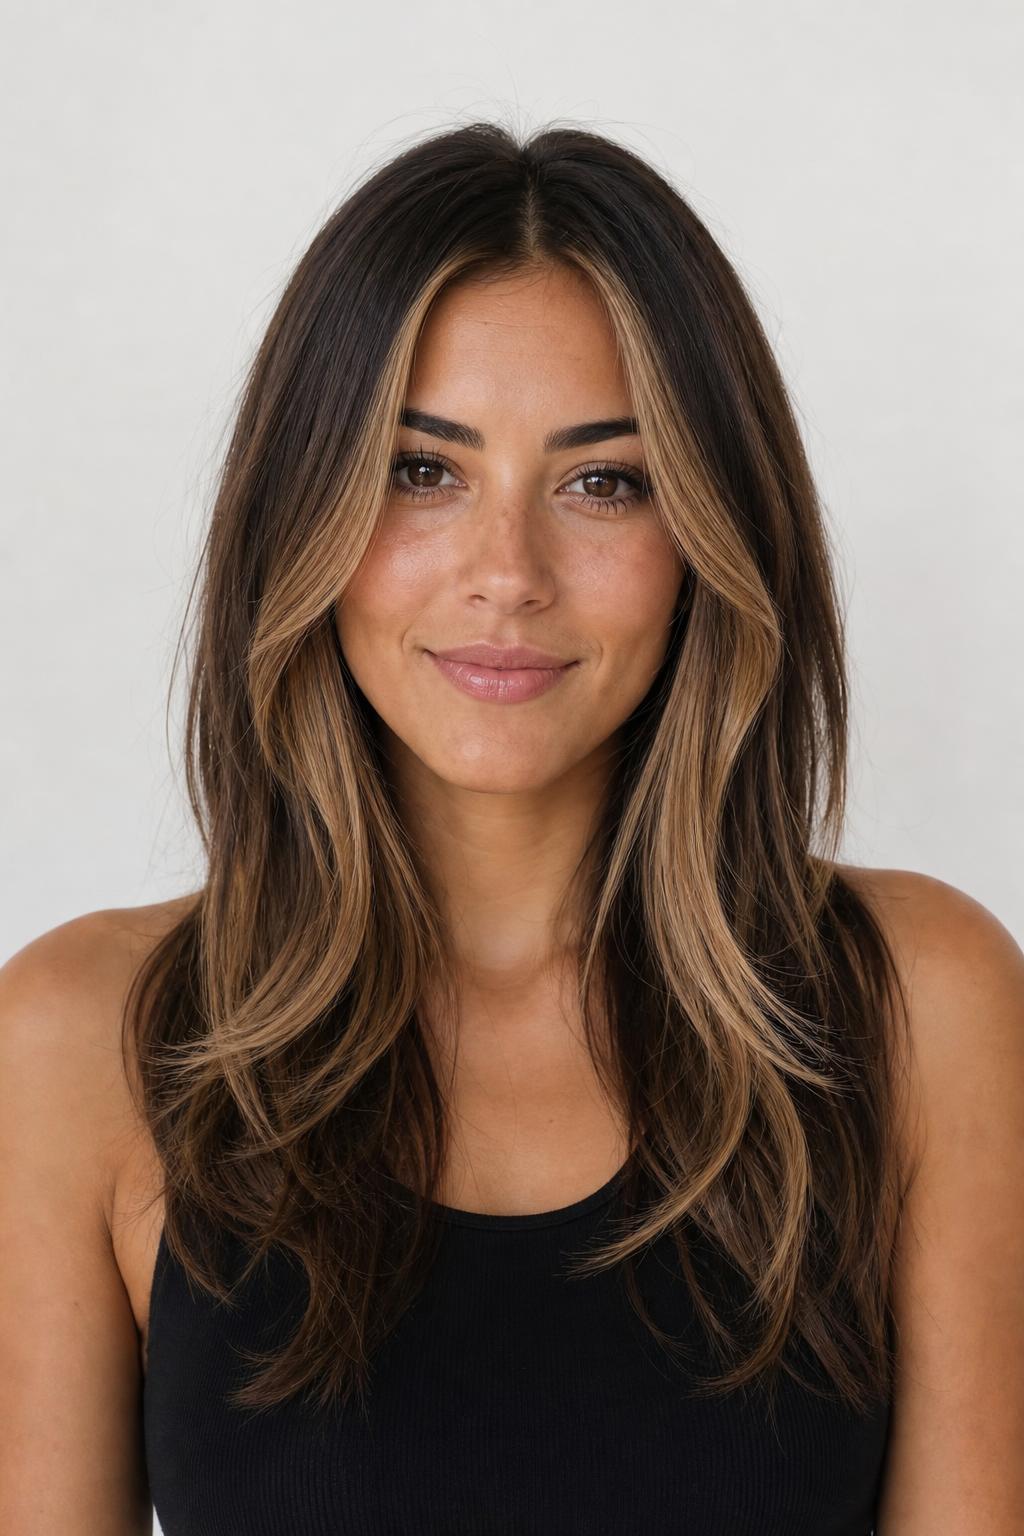
Everyday Styled Looks for Long Hair
These are the shapes that take under ten minutes and get worn on ordinary days. Each one solves a different problem: getting length off your neck, disguising a second-day root, or adding the volume a long cut loses by lunchtime. None of them needs a haircut change to work.
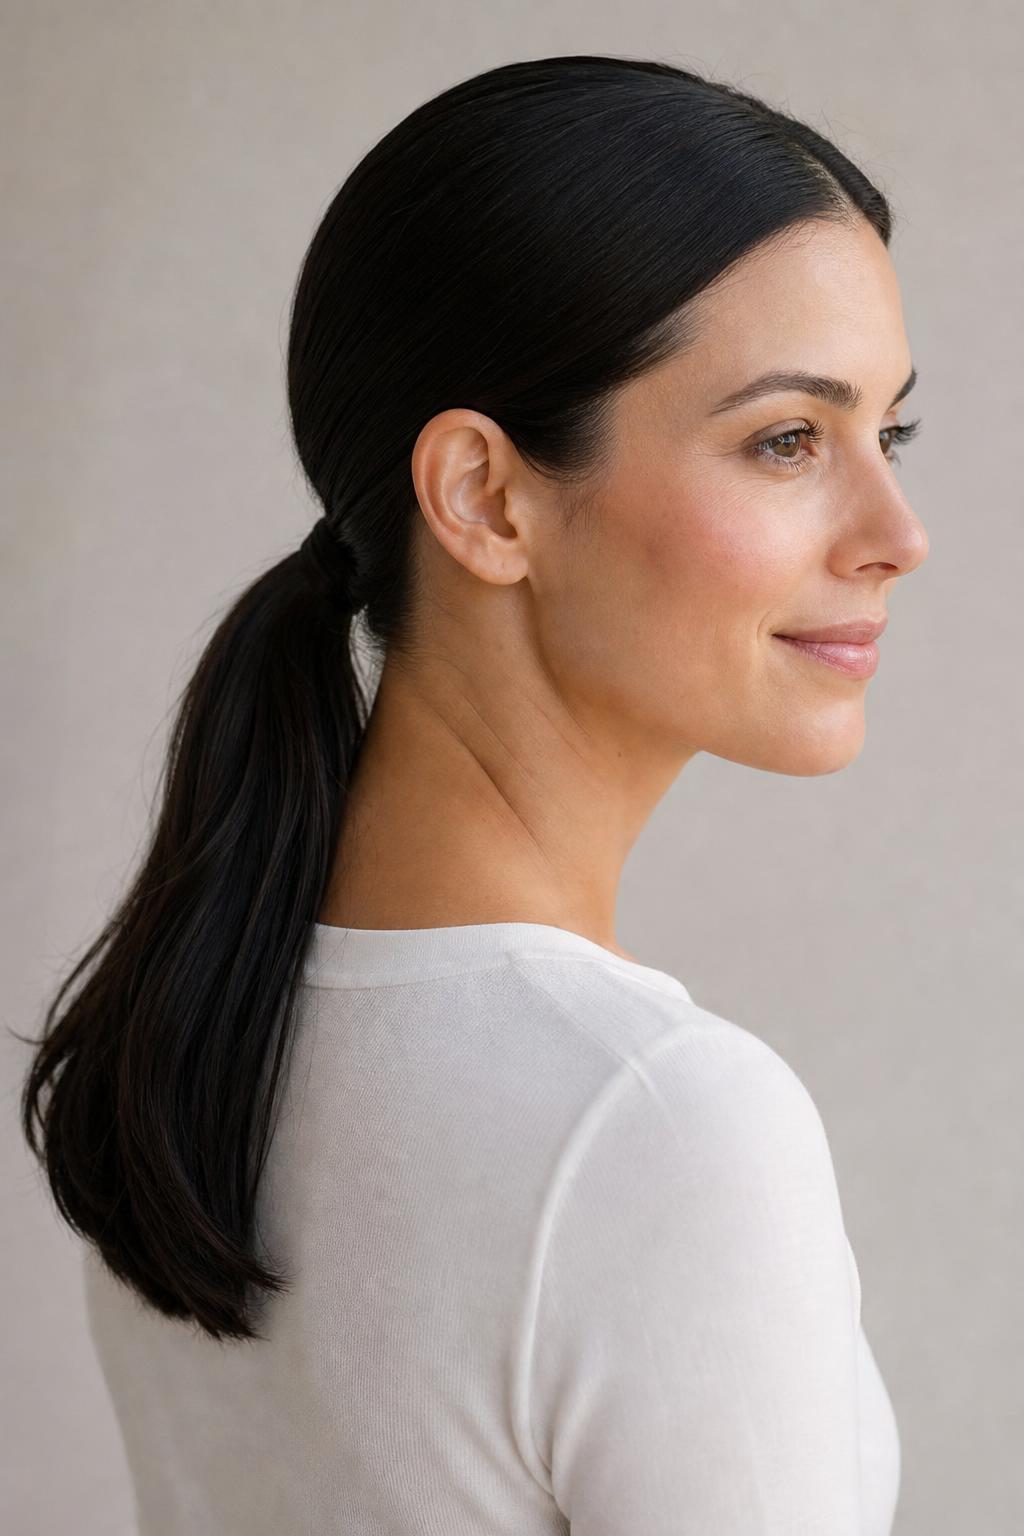
10. Sleek Low Ponytail
Brush the hair back from a center part while it is slightly damp, secure at the nape, and smooth the sides with a boar-bristle brush and a small amount of pomade on the palms. Working with damp hair rather than dry is what removes the bumps at the crown.
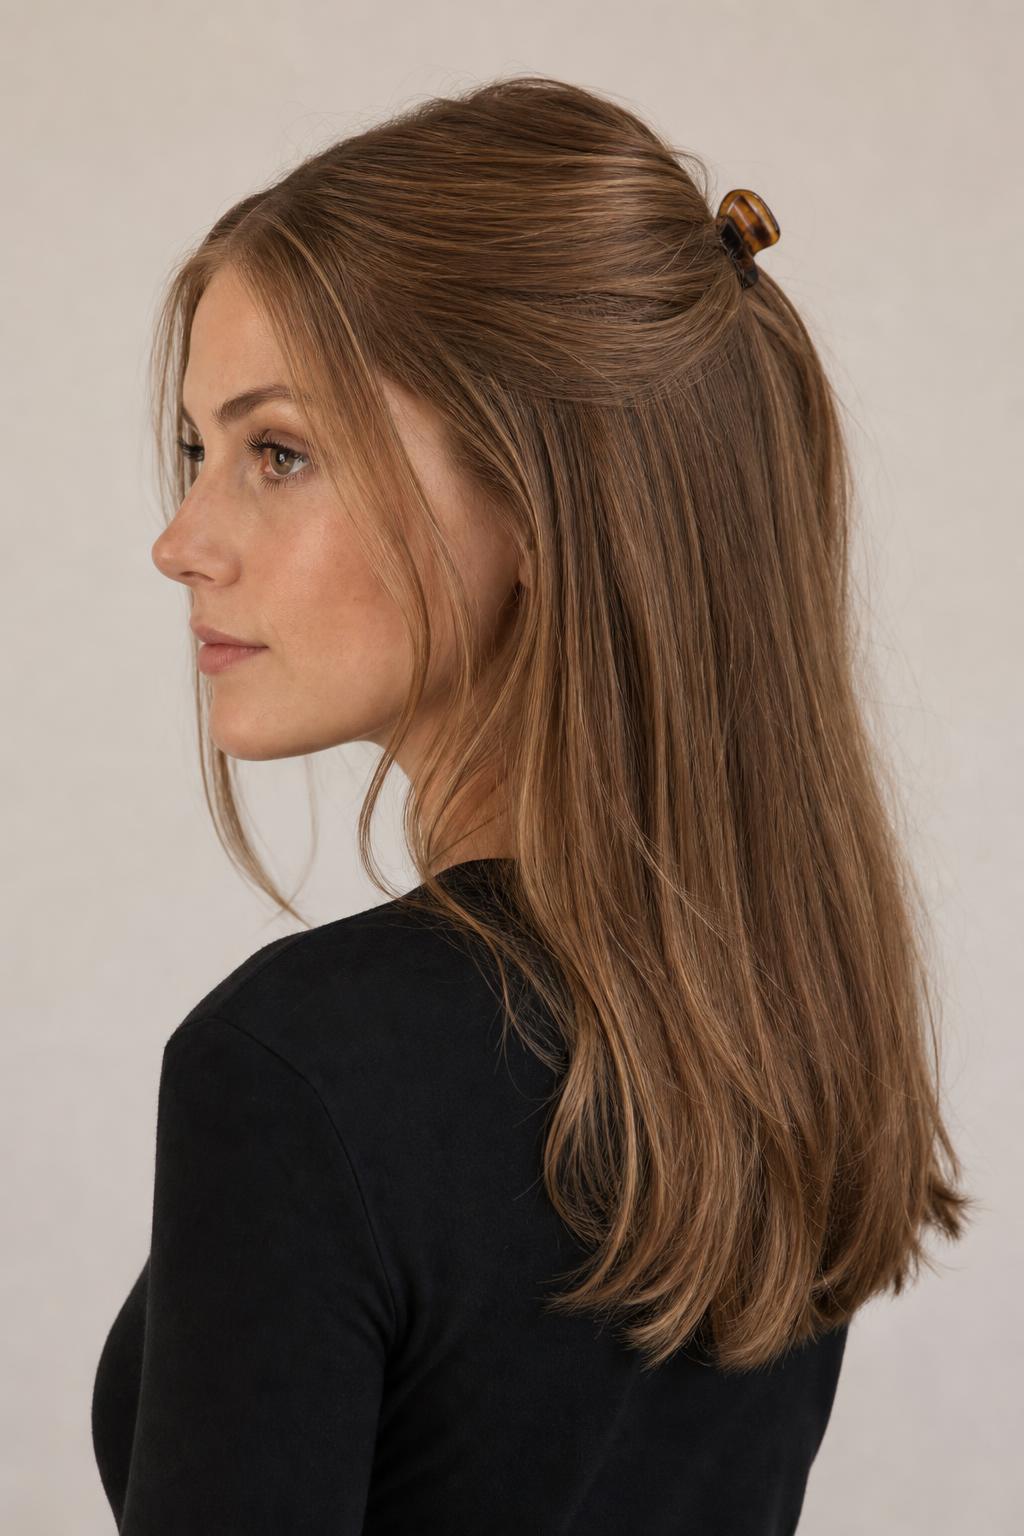
11. Half-Up Half-Down with a Clip
Fine hair benefits most from this one, because gathering the top section and securing it slightly back of the crown lifts the roots where fine hair goes flat first. Take the section from temple to temple and no further back, or the lift disappears.
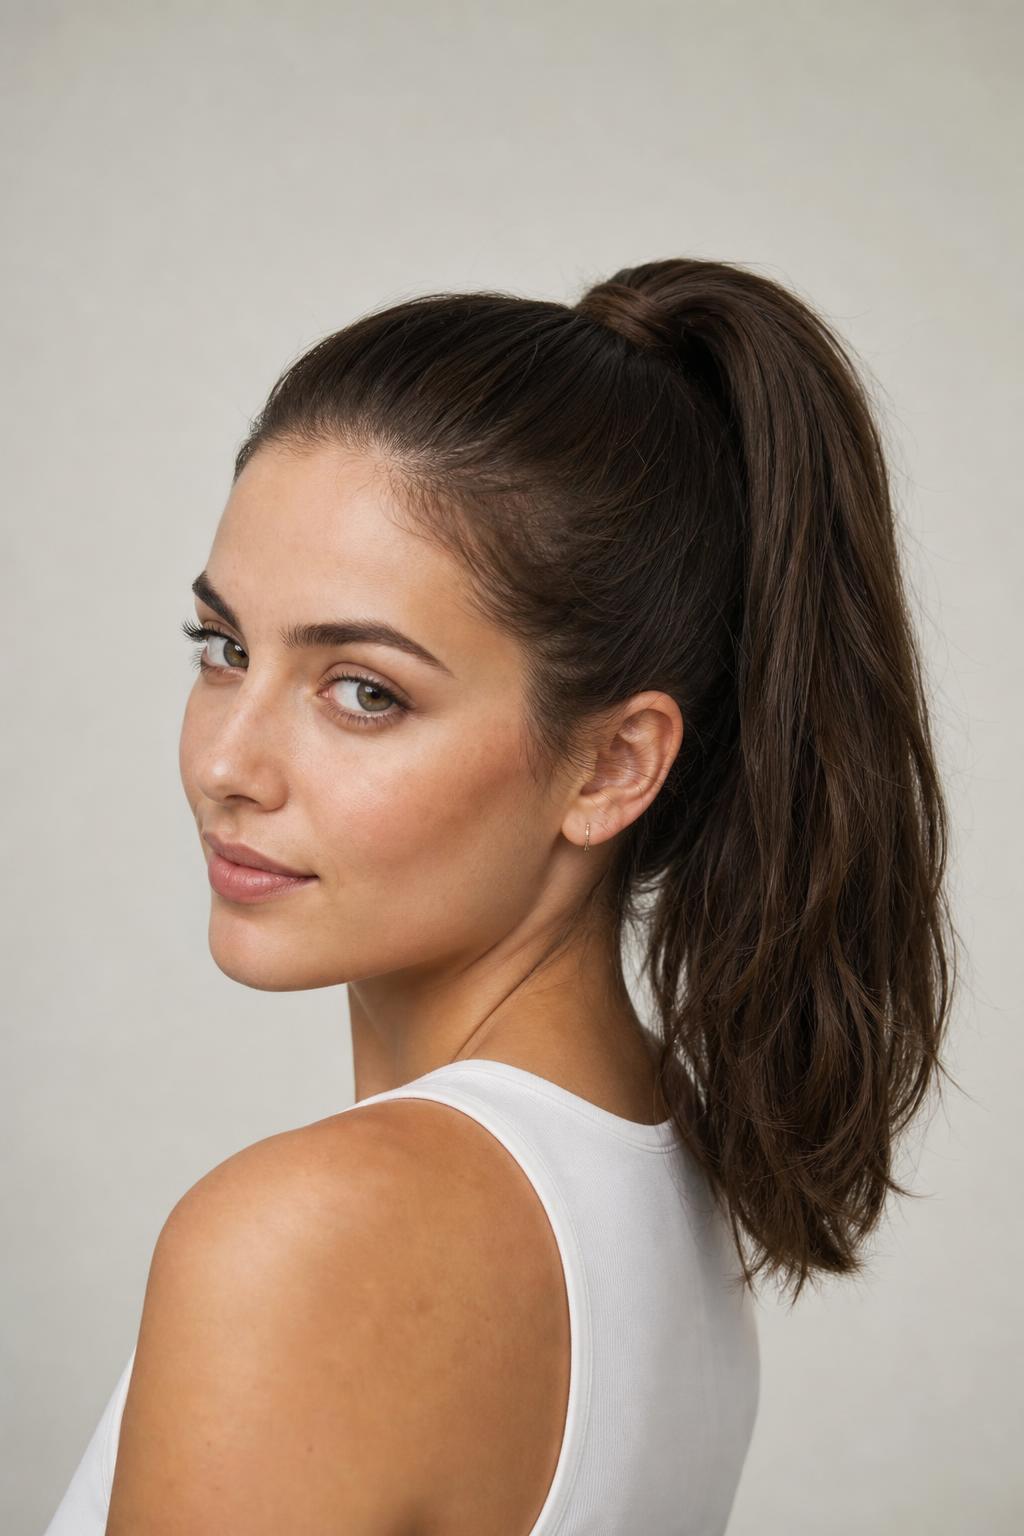
12. High Ponytail with a Wrapped Base
Tipping your head back while gathering the hair sets the ponytail higher than it will end up, which compensates for the drop that happens as the day goes on. Two elastics stacked hold long, heavy hair better than one doubled. Long faces should keep the base lower, since height at the crown lengthens further.
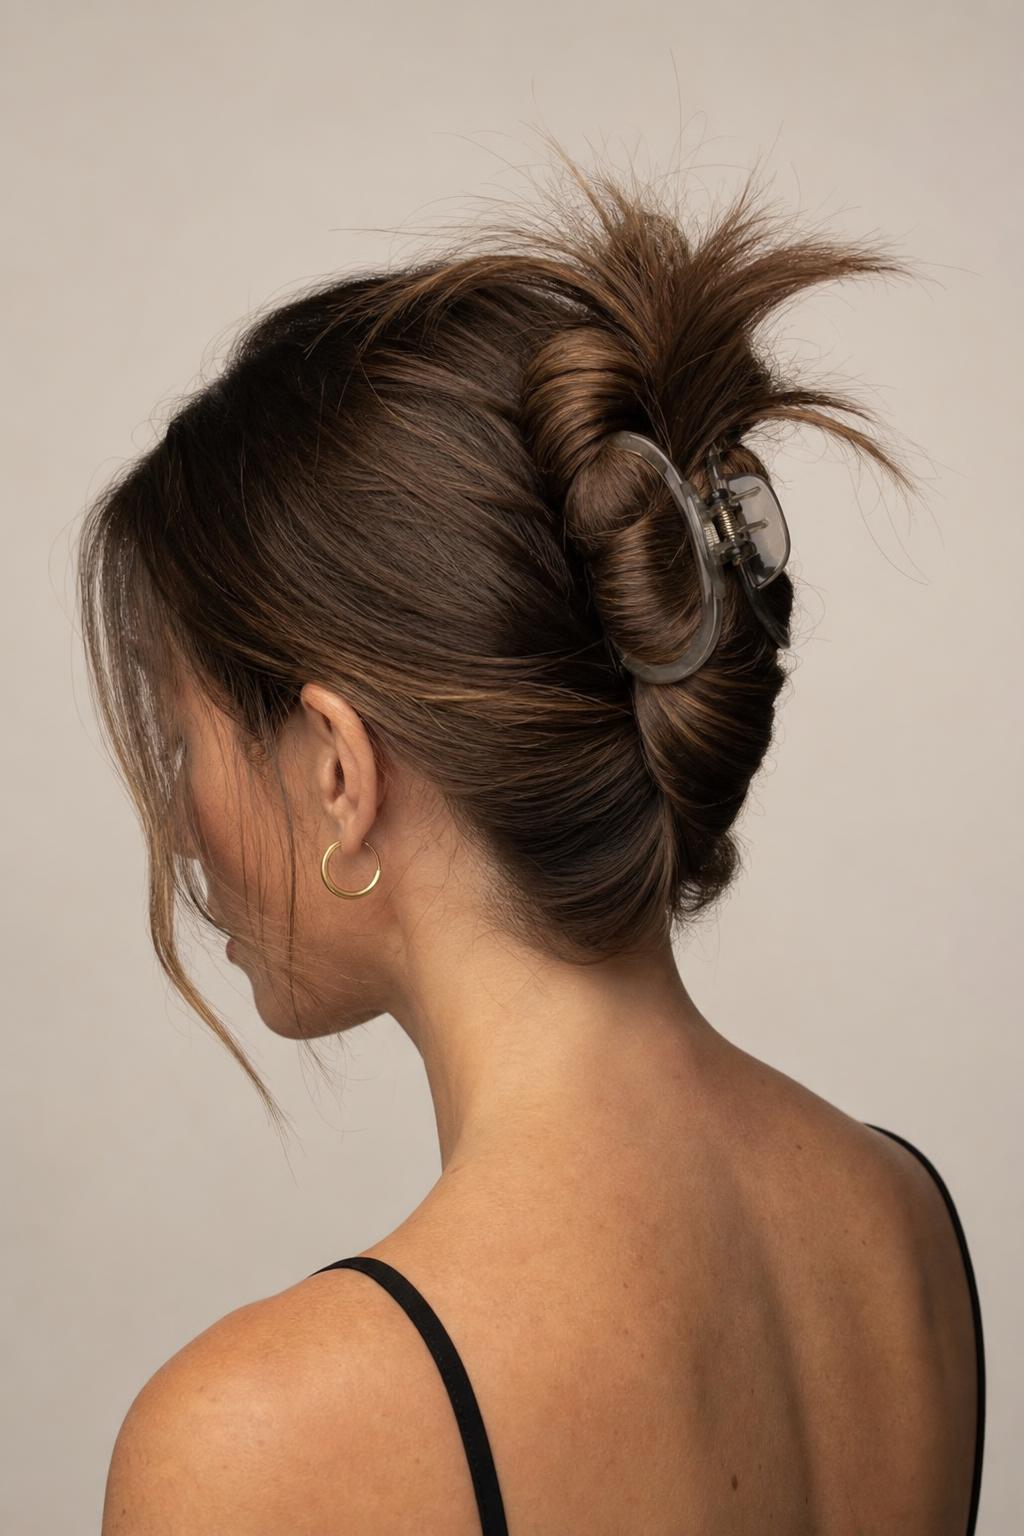
13. Claw Clip Twist
Twist the length into a loose rope, fold it up against the back of the head, and clip it so the ends fan out at the crown. It takes about fifteen seconds and holds all day on thick hair, which is unusual for a style this fast. On fine hair, add a light texturizing spray first so the twist has grip.
14. Deep Side Part with Volume at the Root
Moving the part two inches off center forces the hair on the heavier side to lift off the scalp, which is free volume with no product involved. It also creates an asymmetric line that softens a round or square face. Switching your part occasionally also prevents the flat channel that forms when hair falls the same way for years.
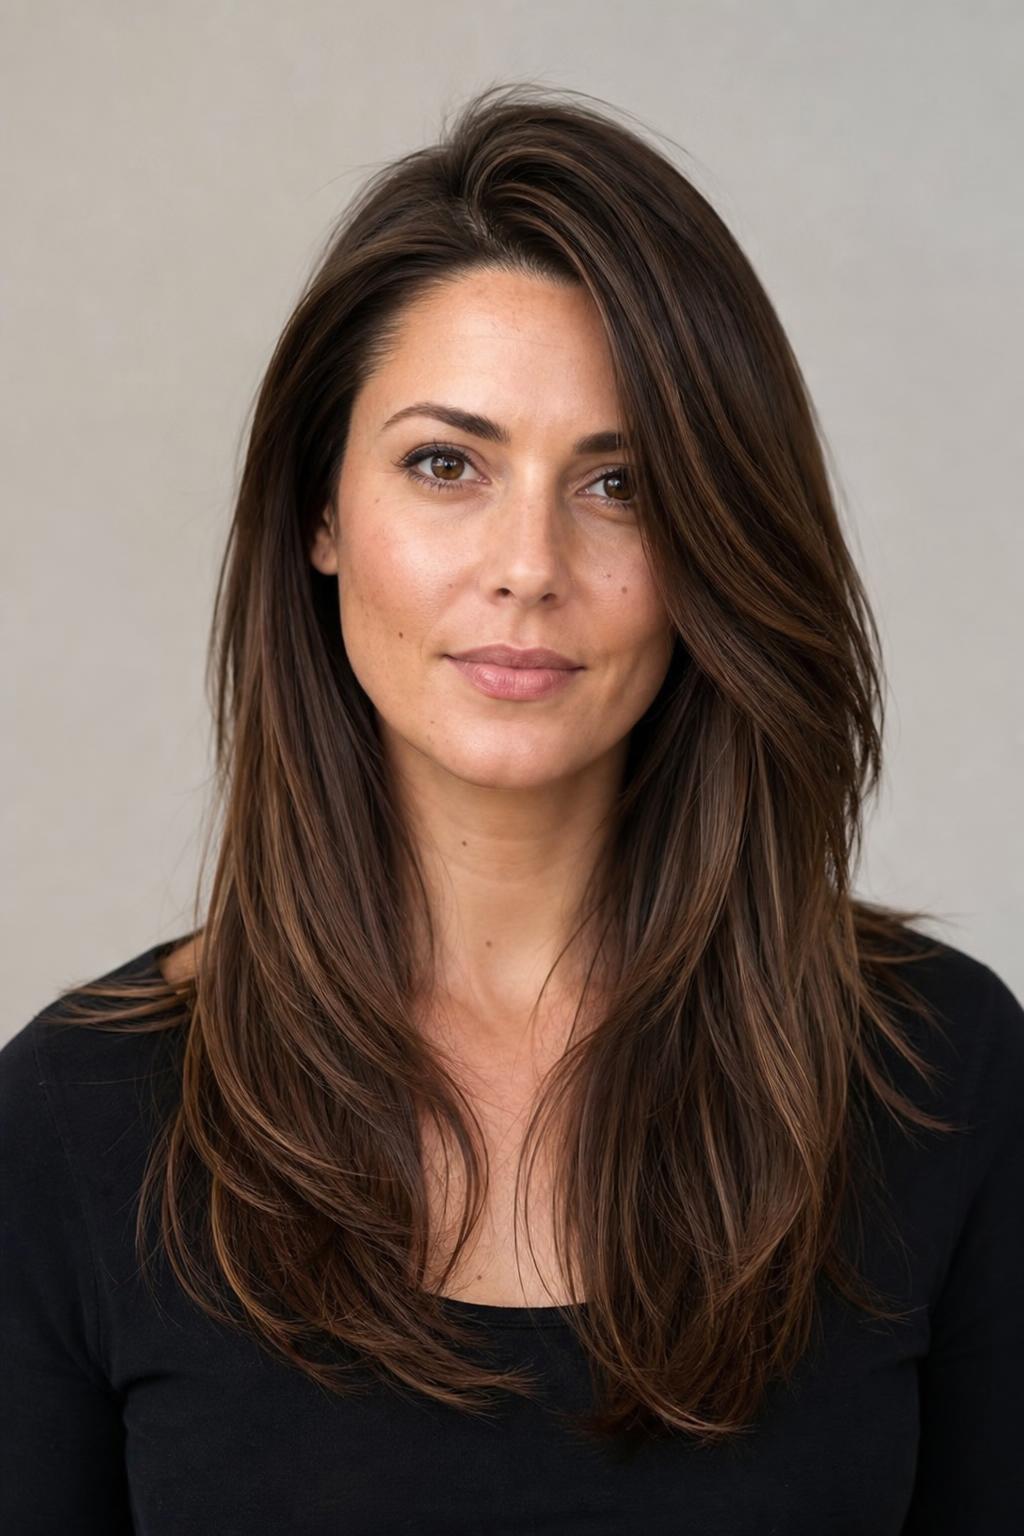
15. Low Bun with Face-Framing Pieces
Pull two thin sections free at the front before securing the bun rather than after, so they fall in the direction they naturally want to. Pulled out afterward, they kink where the elastic held them. The pieces should reach the jaw or below to soften the severity of a pulled-back shape.
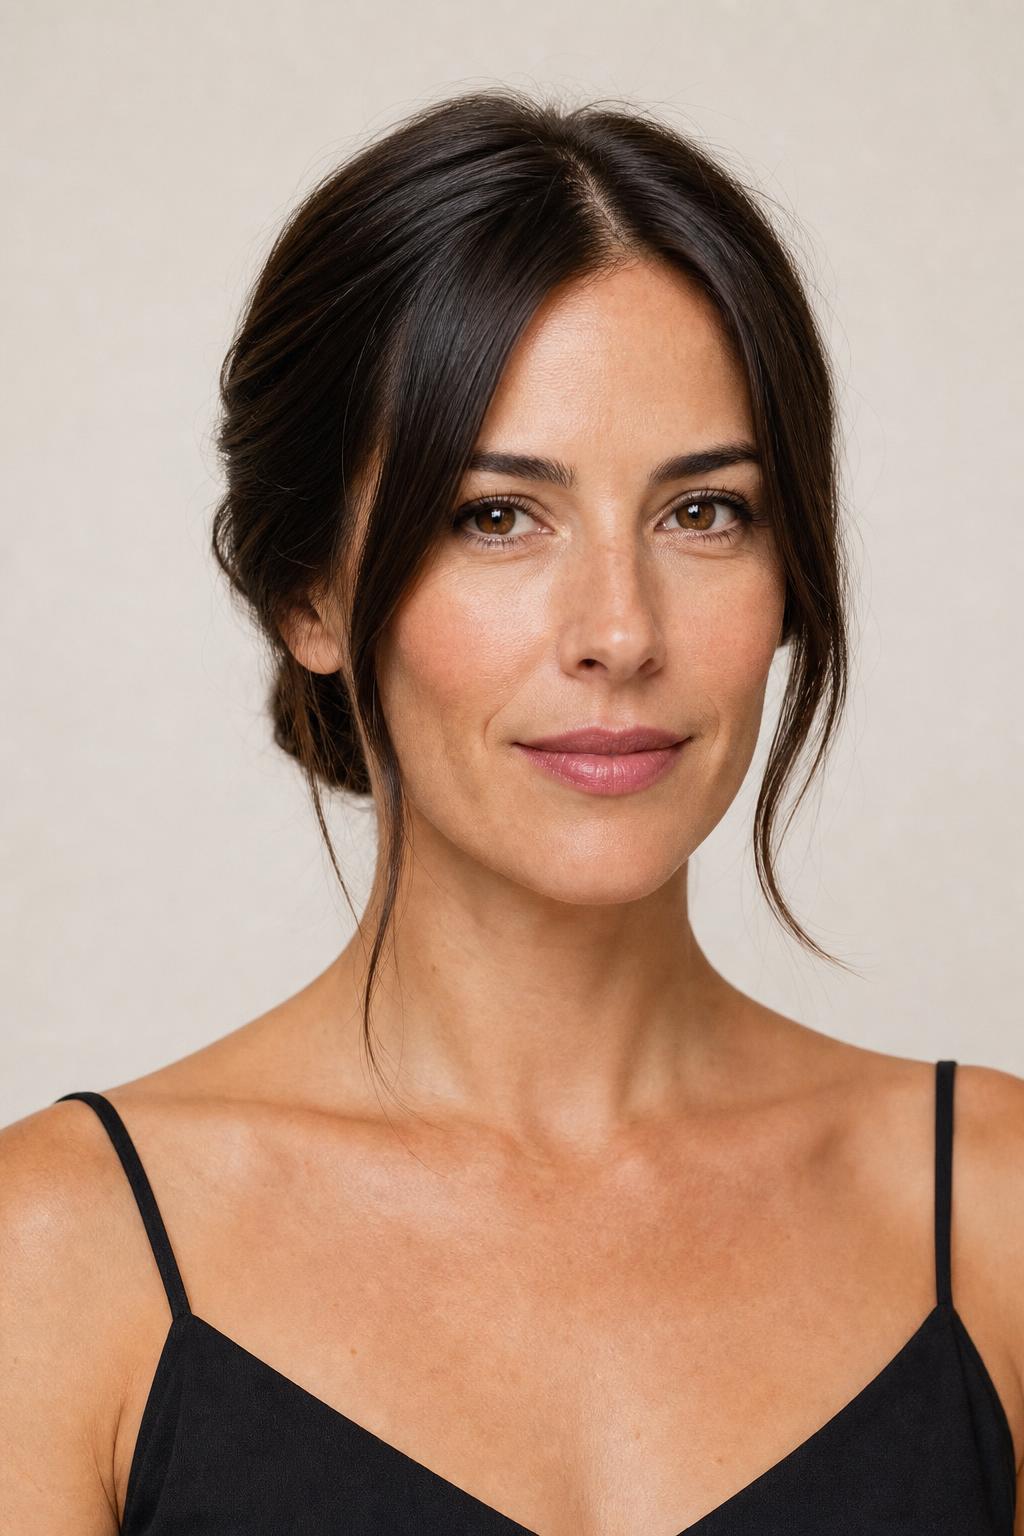
16. Slicked-Back Wet Look
Comb a strong-hold gel through soaking wet hair from the hairline back, then either leave it loose or secure it low. The single rule is that the hair has to be genuinely wet, not damp, or the comb leaves visible tracks as it dries.

17. Two-Section Bubble Ponytail
Elastics spaced every three inches down a ponytail, with each segment gently pulled outward to round it, turn a plain ponytail into structure without any braiding skill. Long, thick hair carries four or five bubbles; fine hair looks better with two or three larger ones. The bubble braid technique works on any texture that holds an elastic.
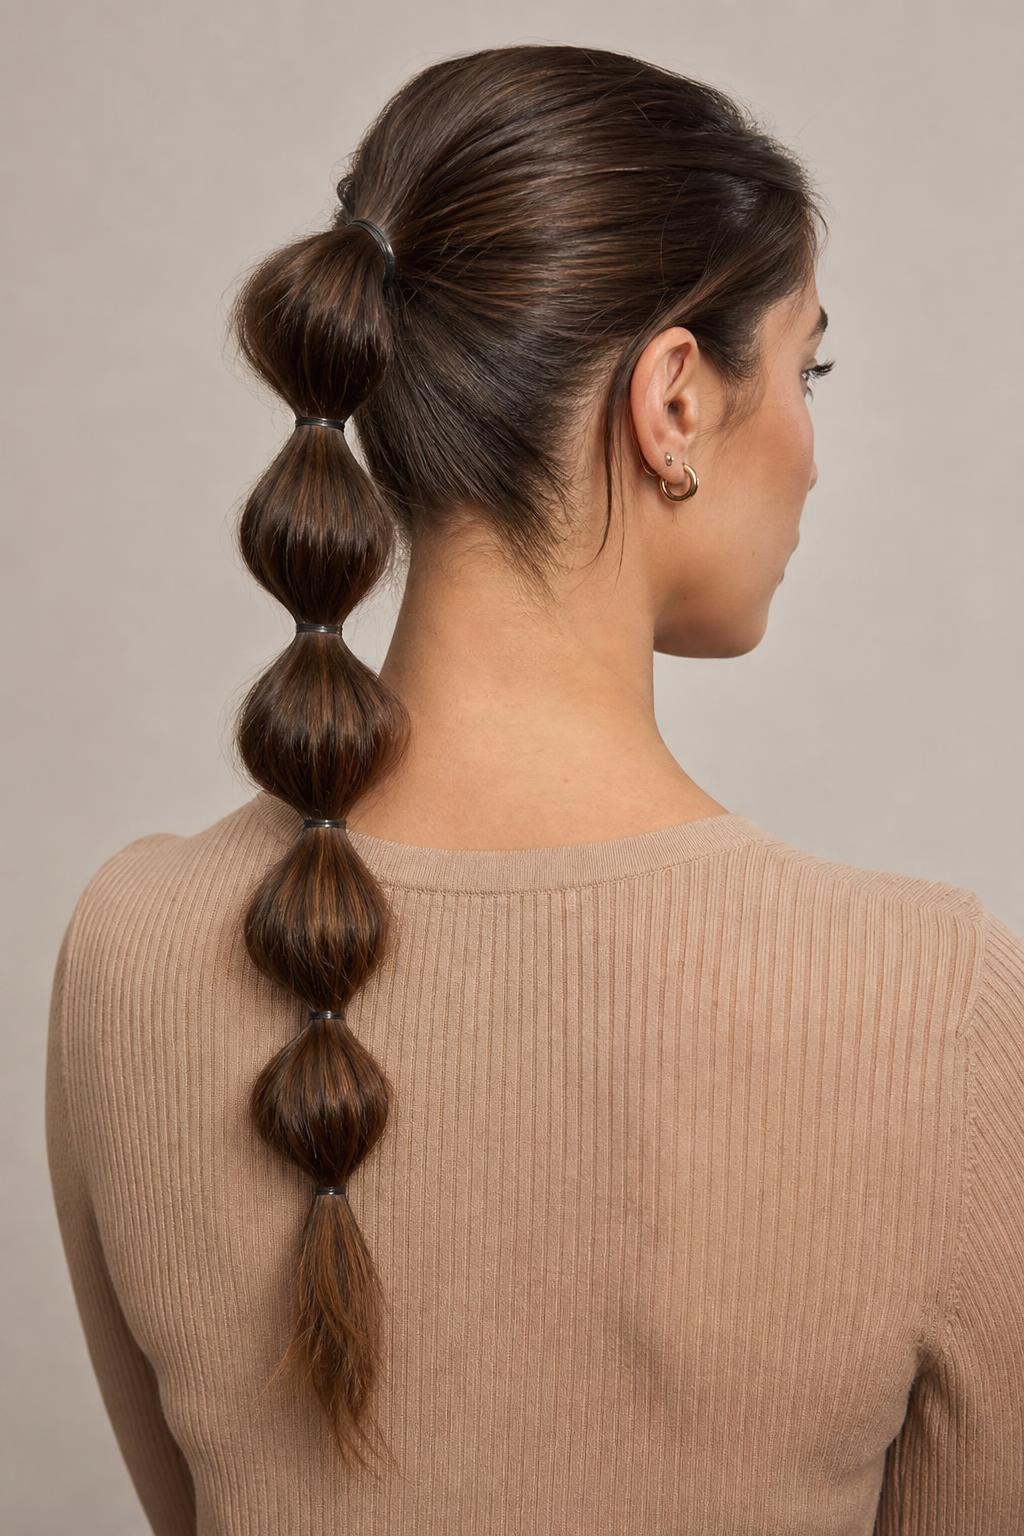
18. Headband Tuck
A wide fabric headband placed over dry hair, with the length tucked up and rolled around it section by section, produces a soft rolled shape at the nape in about three minutes. Second-day hair holds this better than freshly washed hair, which slips.
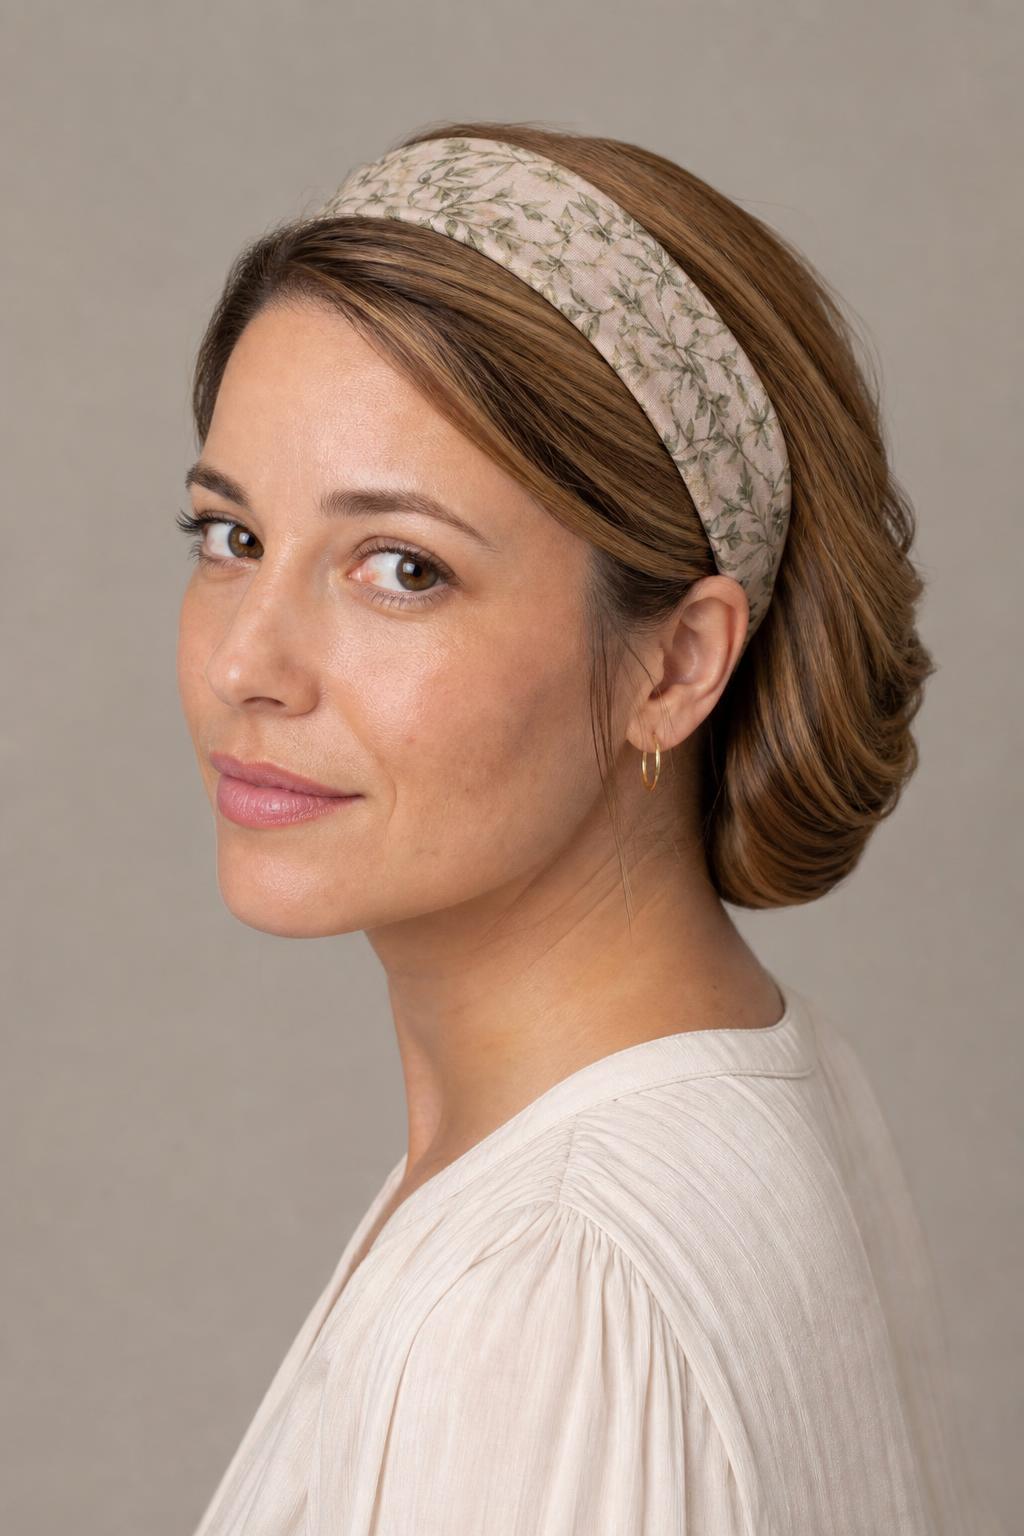
Braids and Updos for Long Hair
Length is the one thing braided and pinned styles genuinely require, which makes this the category where long hair has an advantage nothing else can match. The looks below range from a two-minute plait to shapes that take twenty, and most of them last through a second day if you sleep carefully.
19. Classic Three-Strand Braid
Braiding damp hair rather than dry produces a tighter, glossier plait, and unravelling it the next morning leaves a soft bend through the length. Start the braid lower than feels natural, around the nape, since a high start pulls on the hairline over a full day.
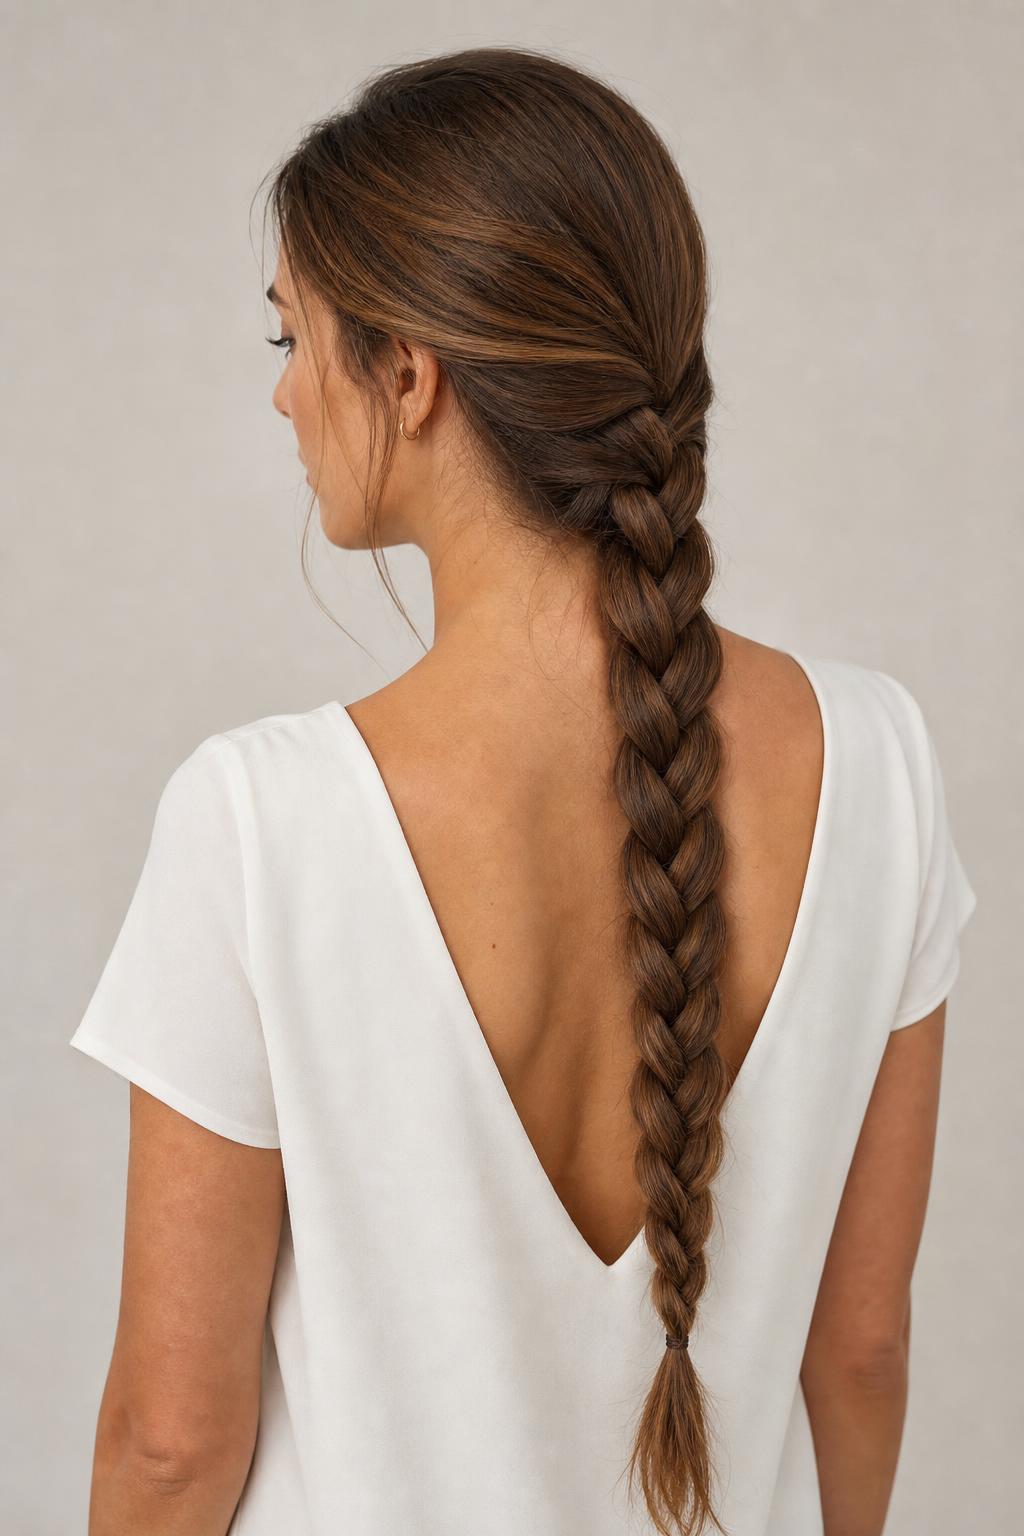
20. Dutch Braid Along the Hairline
Crossing the outer strands under the center rather than over it makes the braid stand up from the scalp instead of lying flat inside it, which is the whole difference between a Dutch and a French braid. Run it along the hairline and the raised effect frames the face.
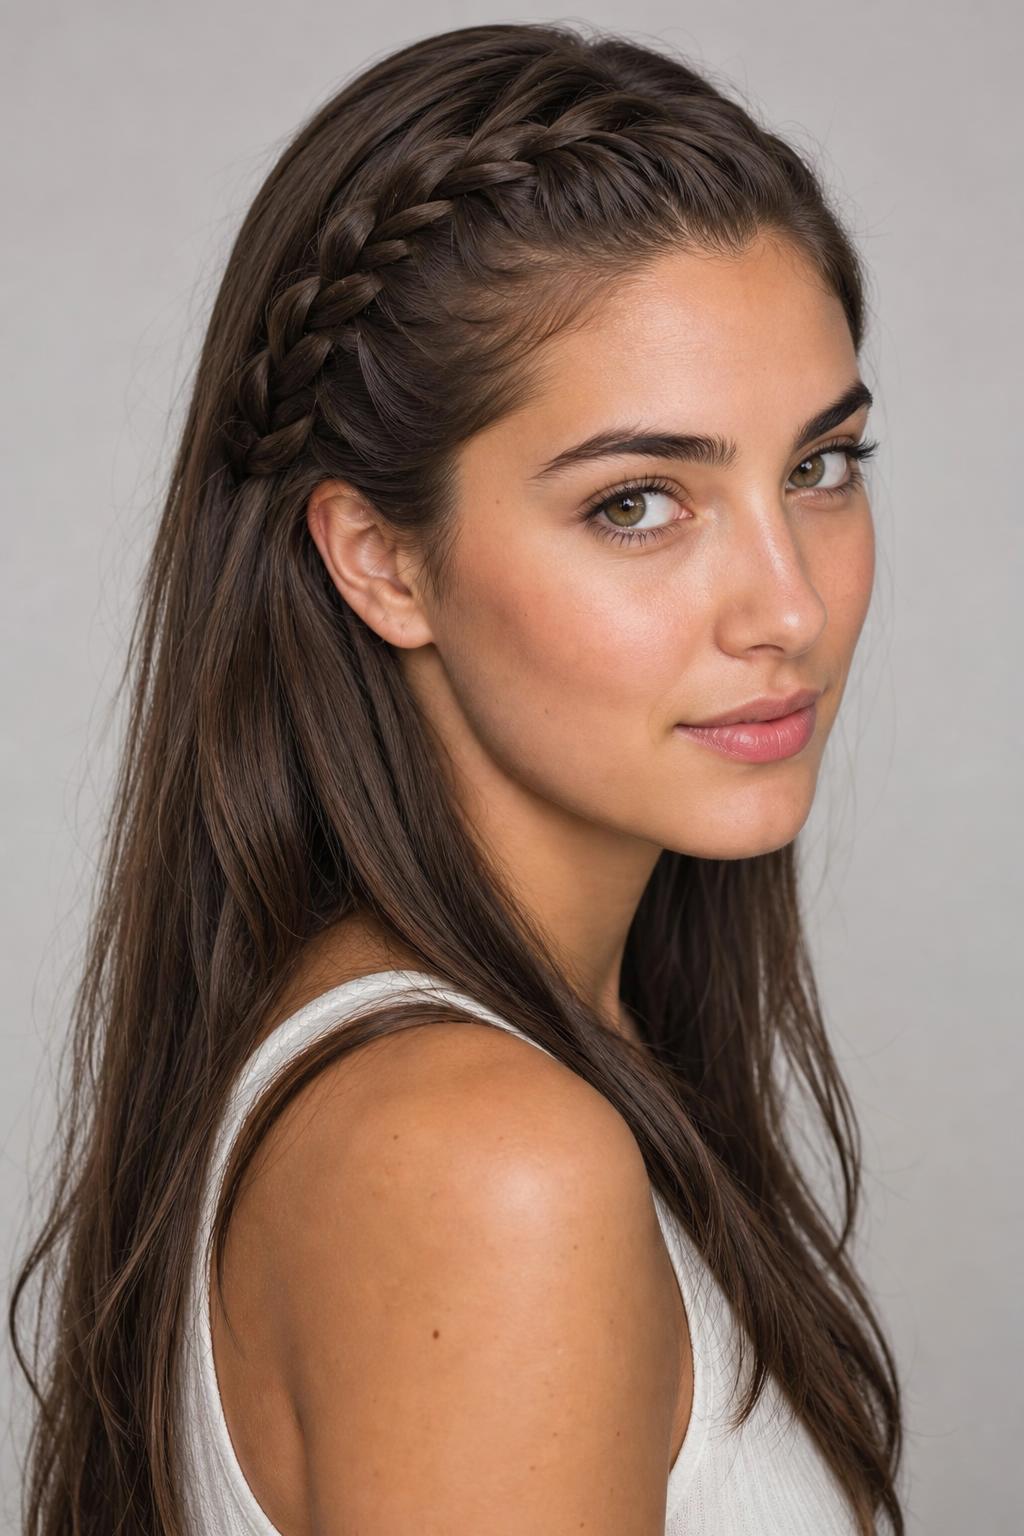
21. Fishtail Braid
Small sections crossed from alternating outer edges into the center create the woven texture, and thinner sections make a tighter, more detailed pattern. Fine hair looks better with a loosened fishtail, gently pulled wider once it is secured. This takes ten to fifteen minutes the first few times and about five once the motion is familiar.
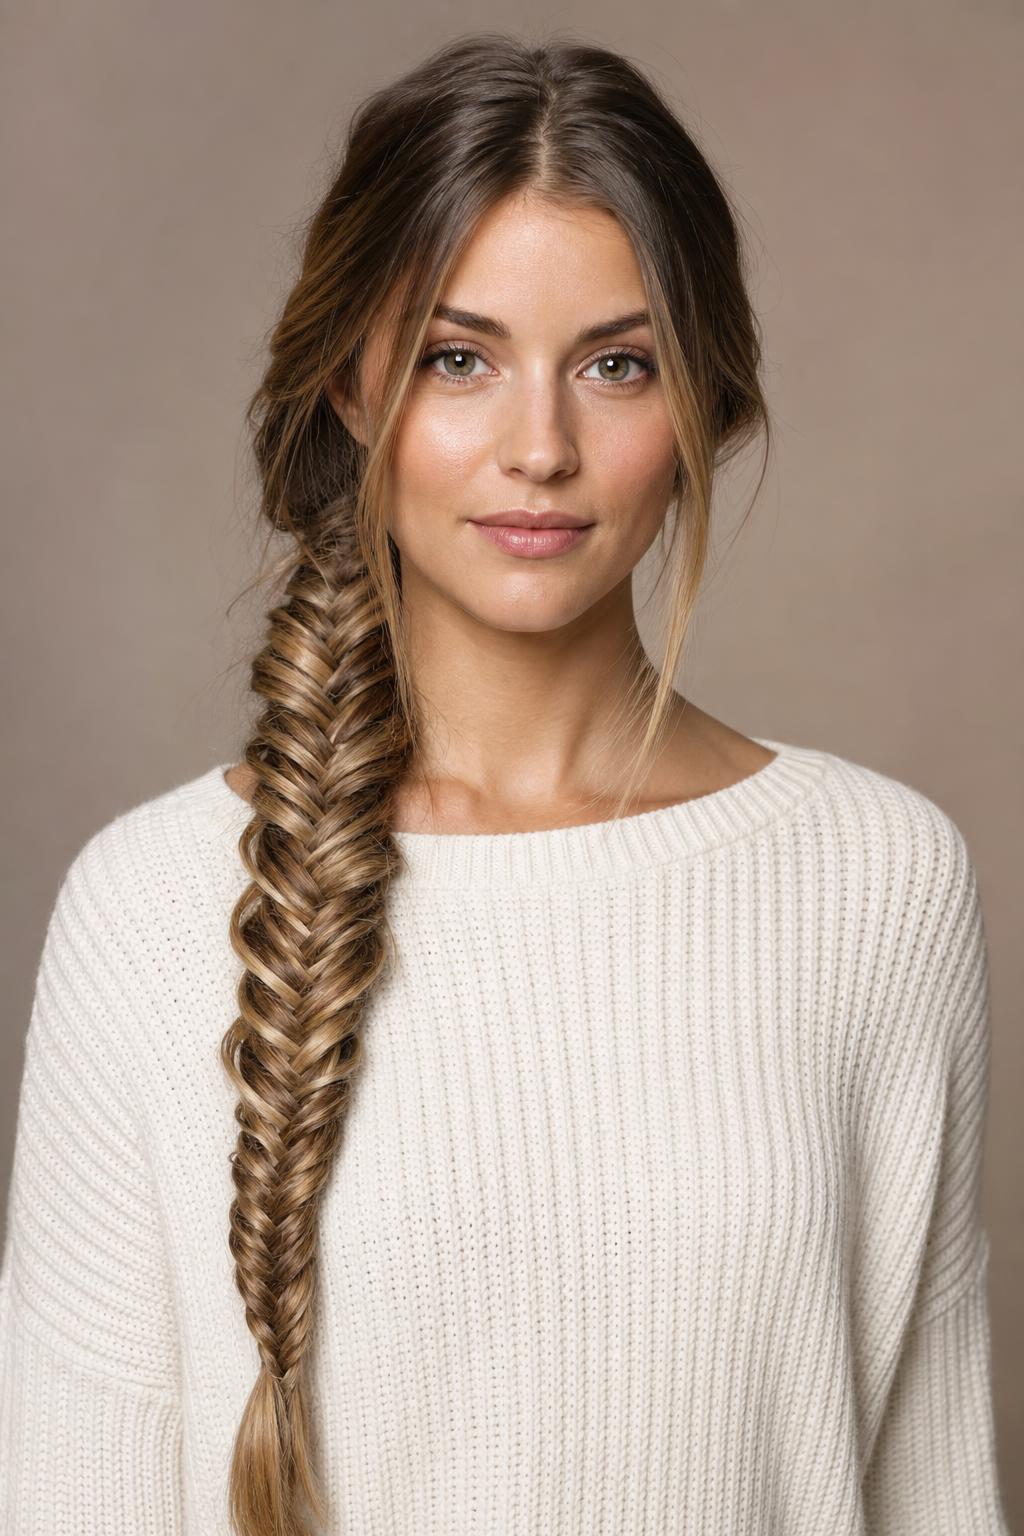
22. Braided Crown Around the Head
Two braids taken from behind each ear and crossed over the top of the head, pinned at the opposite temple, work best on hair that reaches at least mid-back so the braids meet without a visible gap. Bobby pins pushed in against the direction of the braid hold far better than pins pushed with it.
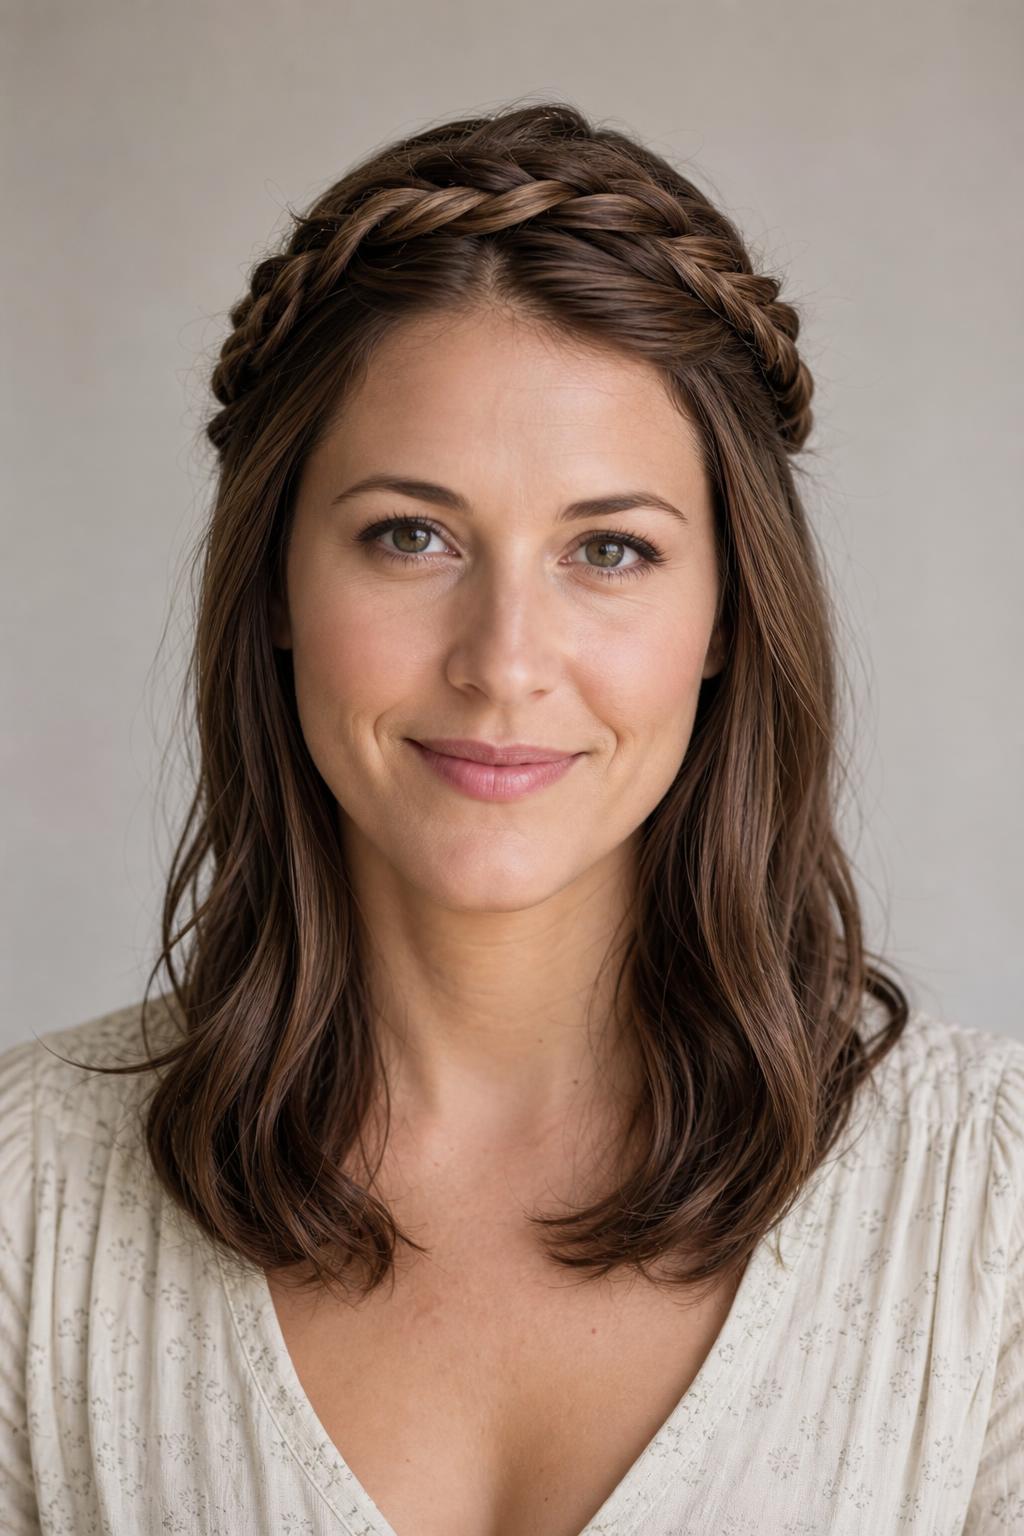
23. Knotless Box Braids
Starting each braid with your own hair and feeding extensions in gradually removes the tension knot at the root that traditional box braids create, which is why they are gentler on the hairline. Installation takes four to eight hours depending on size and they last six to eight weeks. Leaving loose curled ends softens the look further.
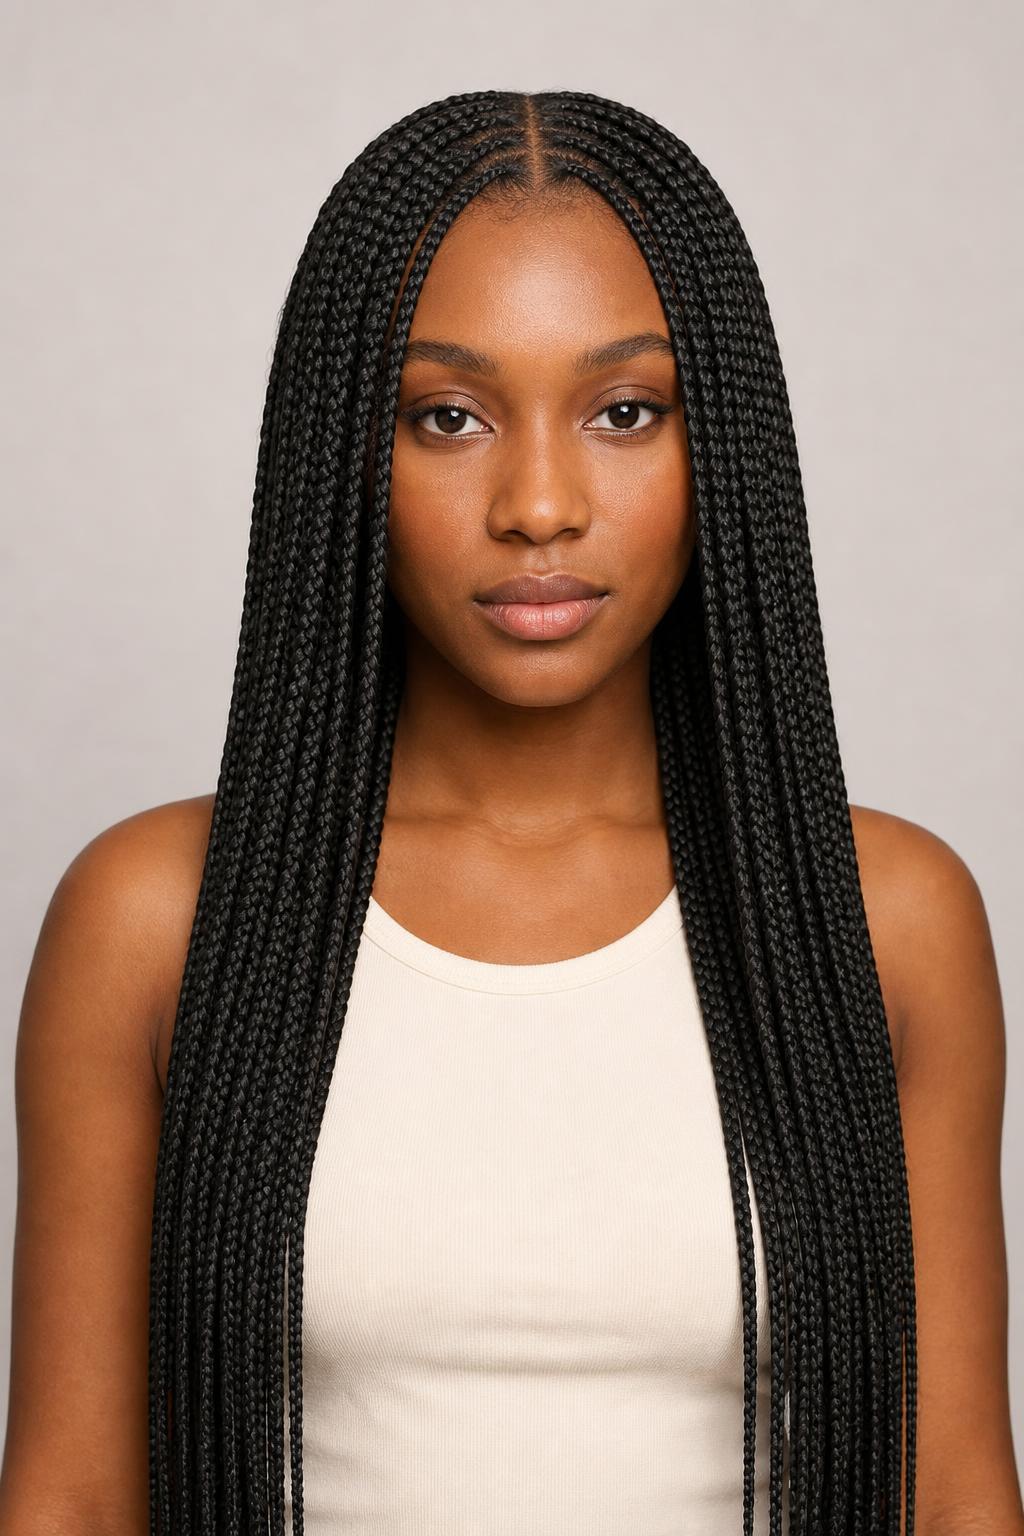
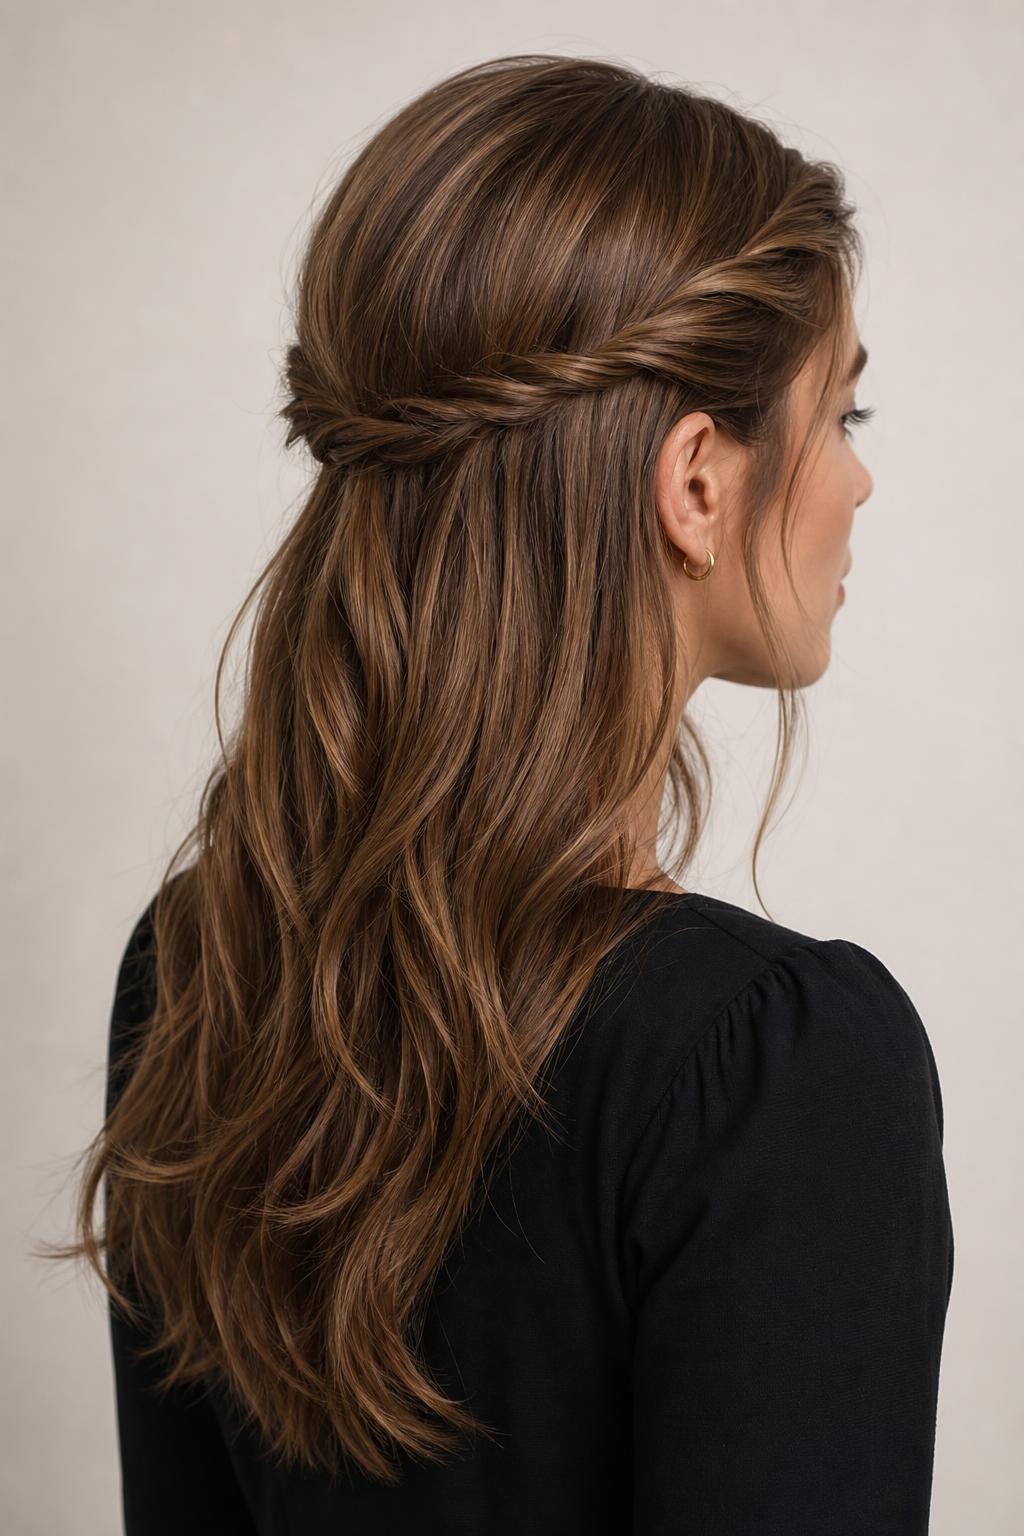
24. Twisted Rope Half-Up
Two sections twisted individually in the same direction, then wound around each other in the opposite direction, lock into a rope that holds without an elastic at the top.
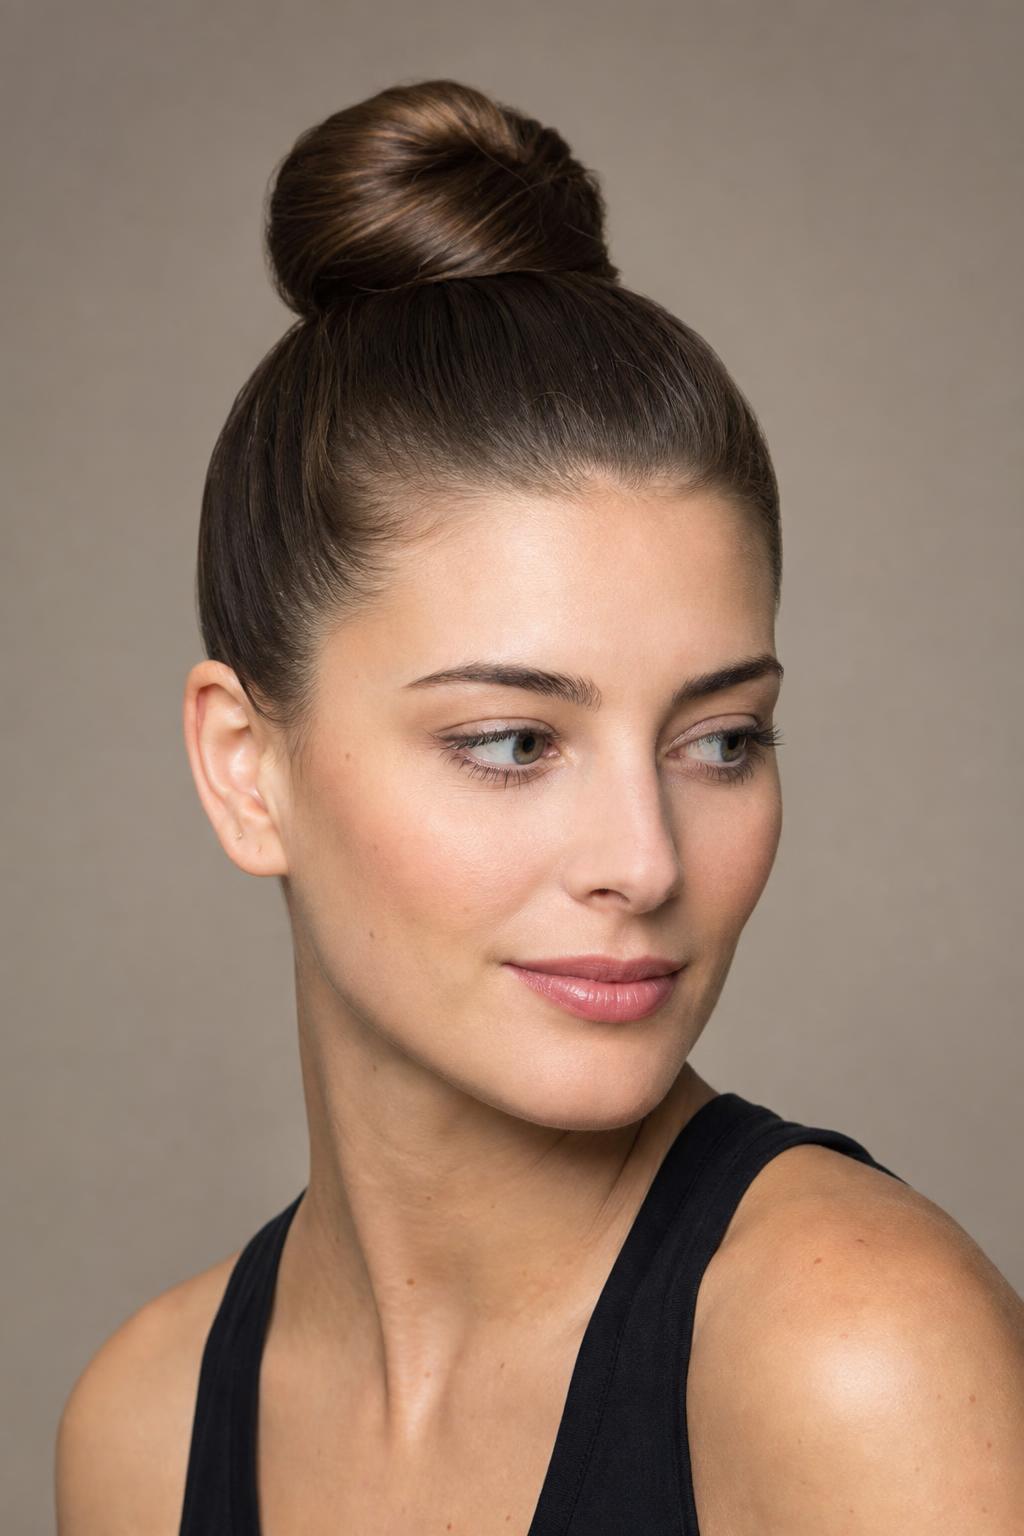
25. High Ballerina Bun
Very long hair coiled into a high bun puts real weight on a small area of the scalp, so a bun this size needs pins distributed around the perimeter rather than one elastic doing all the work. Alternating the height of your bun between days prevents the traction that shows up at the hairline after years of the same position.
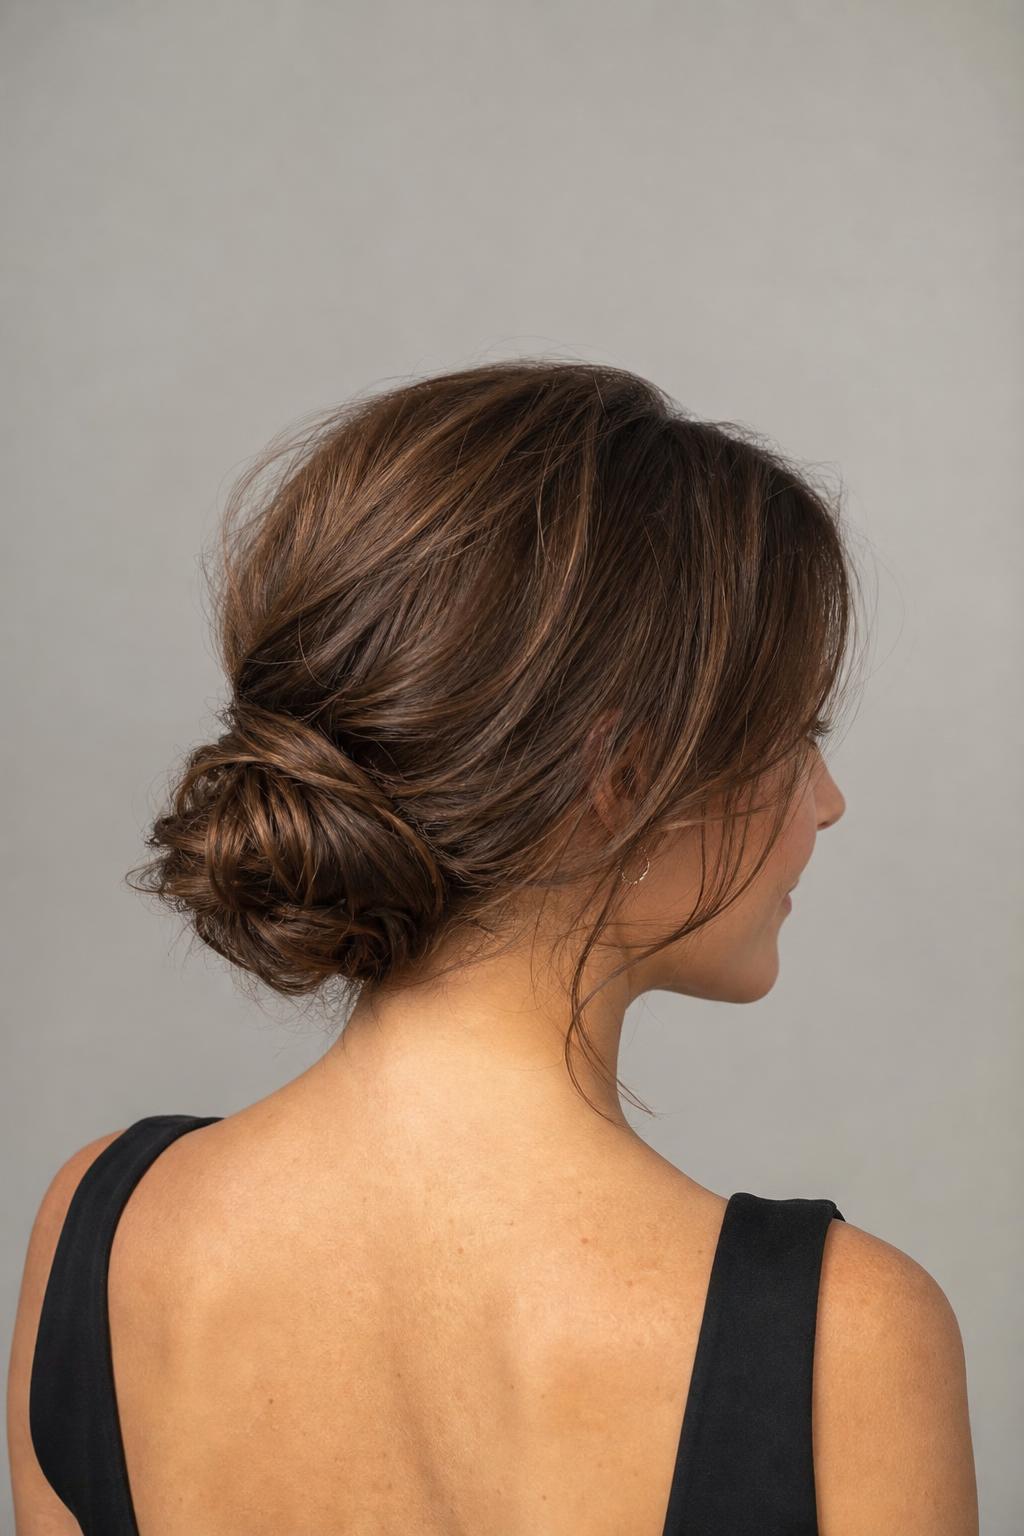
26. Loose Chignon with Pinned Ends
Where a ballerina bun is coiled tight and round, a chignon is folded loosely at the nape and pinned so the shape stays soft and slightly irregular. That looseness is what makes it wearable on a normal day rather than only for events.
Texture and Wave Styling for Long Hair
Long hair holds a wave badly compared with shorter lengths, because the weight below the bend pulls it out over the course of a day. Everything in this section is about getting texture to last, whether that means heat, an overnight set, or a cut that already has movement built into it. The heatless options are the ones that hold longest on thick hair.
27. Loose Waves with a Large Barrel
A 1.5-inch barrel is the smallest that produces waves rather than curls on hair past the shoulder blades, and anything under 1.25 inches will give you ringlets that drop out by noon. Alternate the wrap direction on each section and leave the last two inches straight.
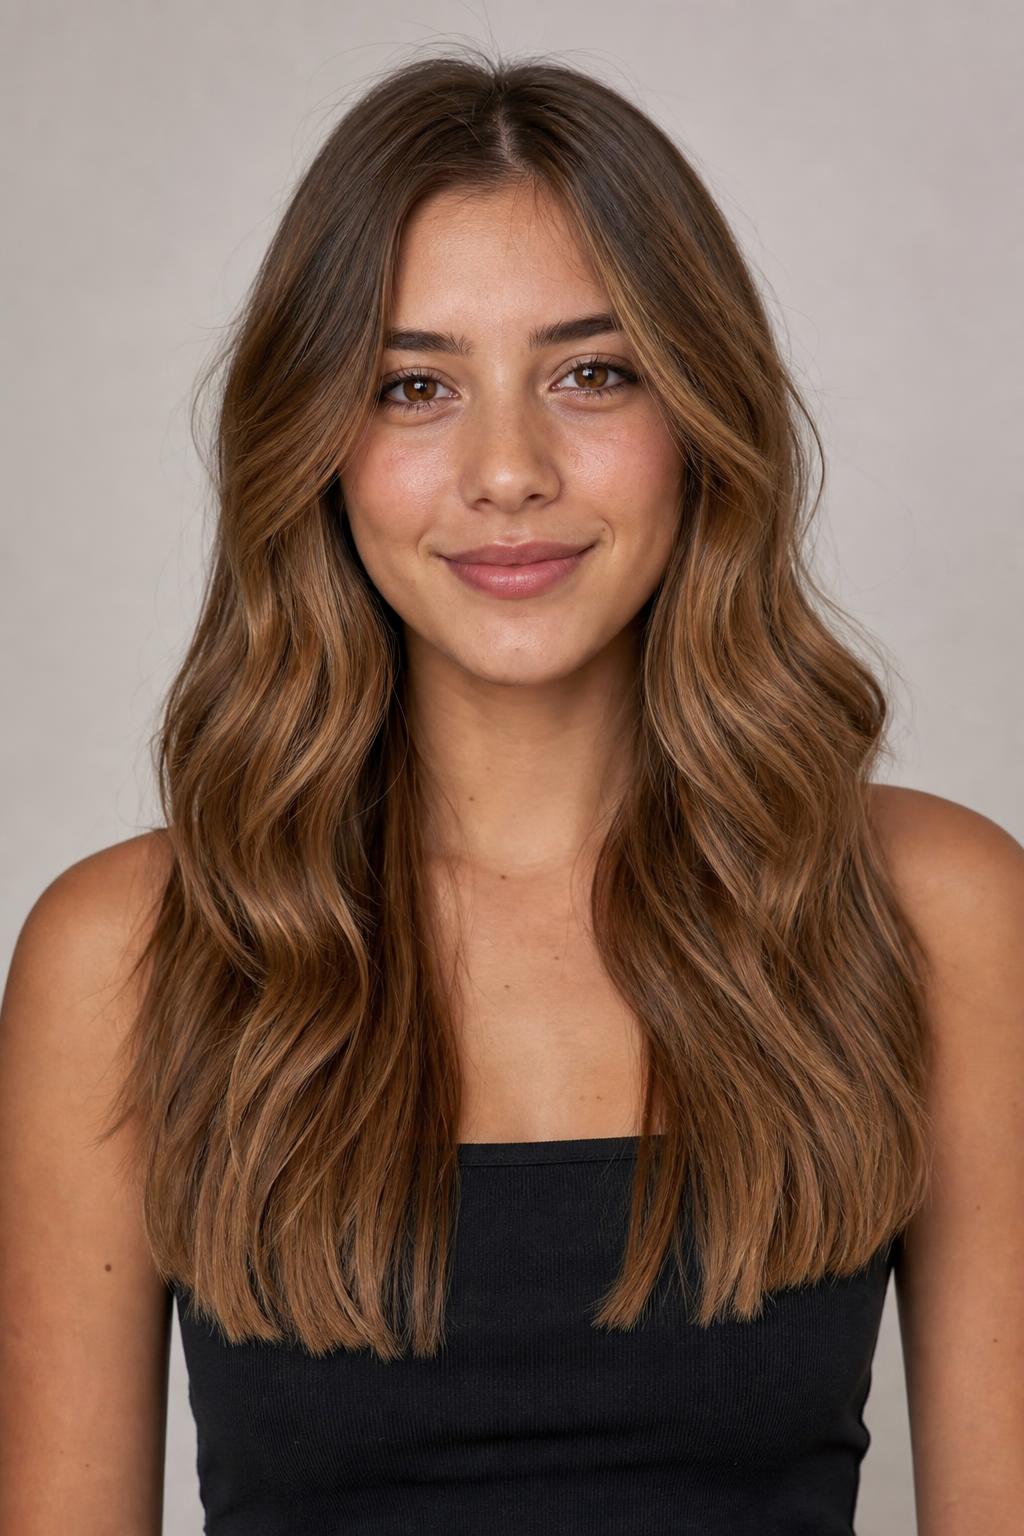
28. Overnight Heatless Curls
Wrapping damp hair around a fabric rod or a robe tie and sleeping on it produces a soft bend by morning with no heat at all, which matters most on hair that has already been colored. Damp rather than wet is the key: soaking hair will not be dry by morning and the curl will drop immediately. The overnight method holds two full days on thick hair.

29. Air-Dried Natural Waves
Wavy hair that is scrunched with a light mousse and then left completely alone produces a more open, irregular wave than any tool can imitate. Touching it while it dries is what creates frizz, so the discipline is doing nothing for two hours.
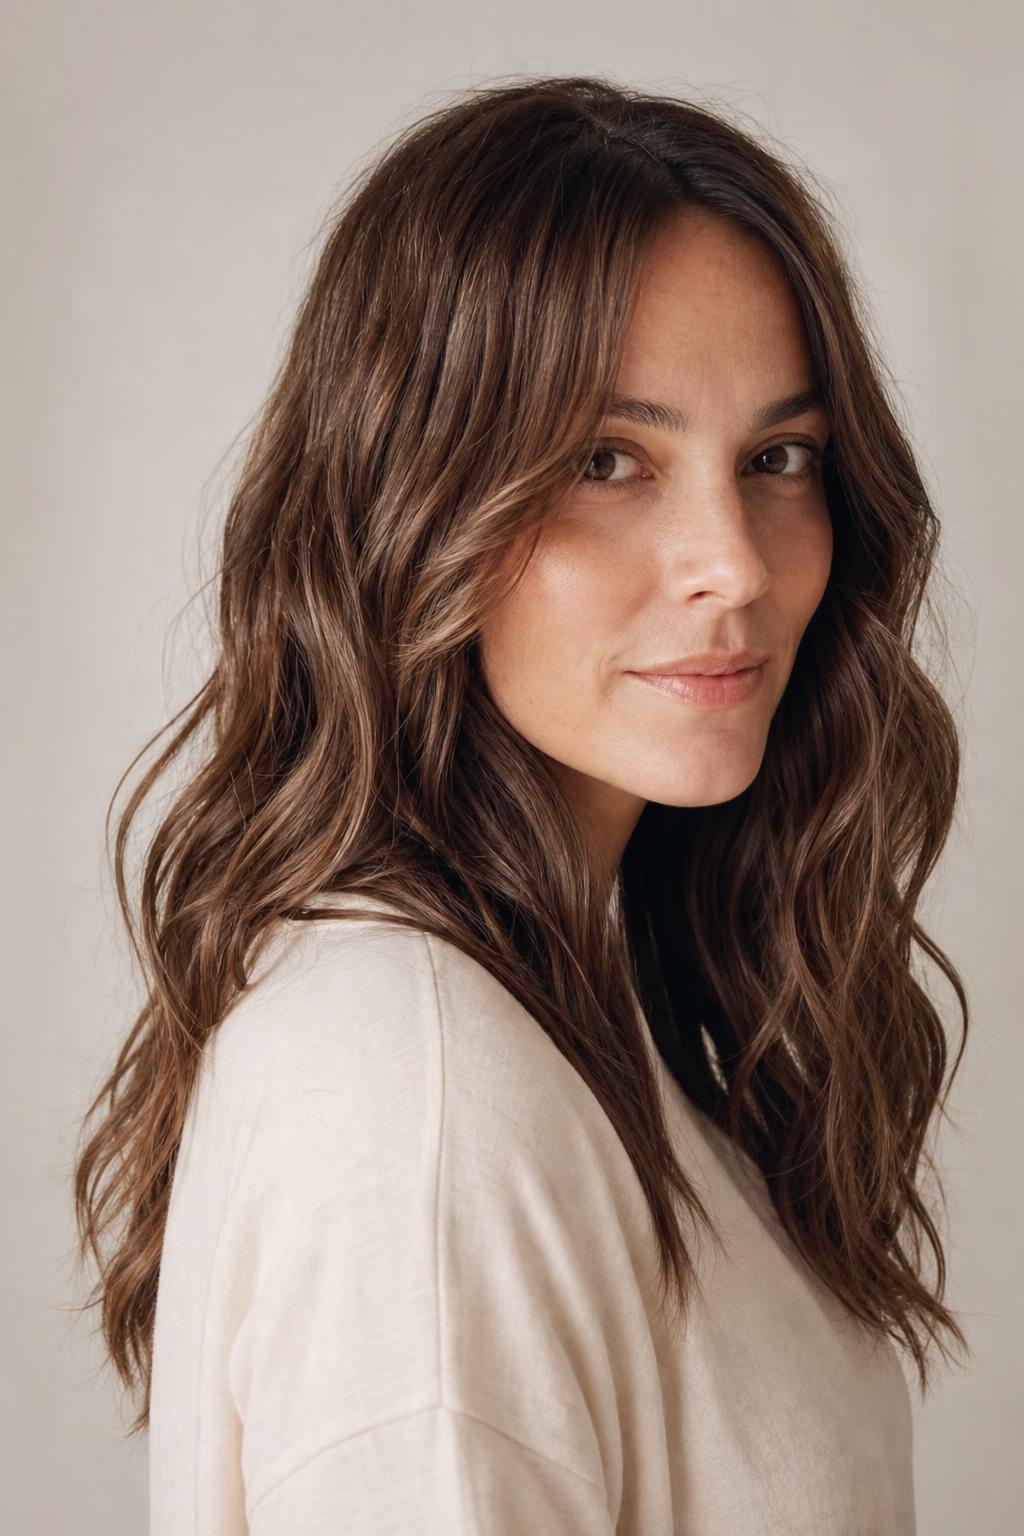
30. Long Hair Blown Out Straight with Root Lift
Dry the roots first with the hair lifted straight up off the scalp, then take the length section by section with a medium round brush. Doing the roots last is the reason most home blowouts go flat, since by then the roots have already air-dried in whatever direction they fell.
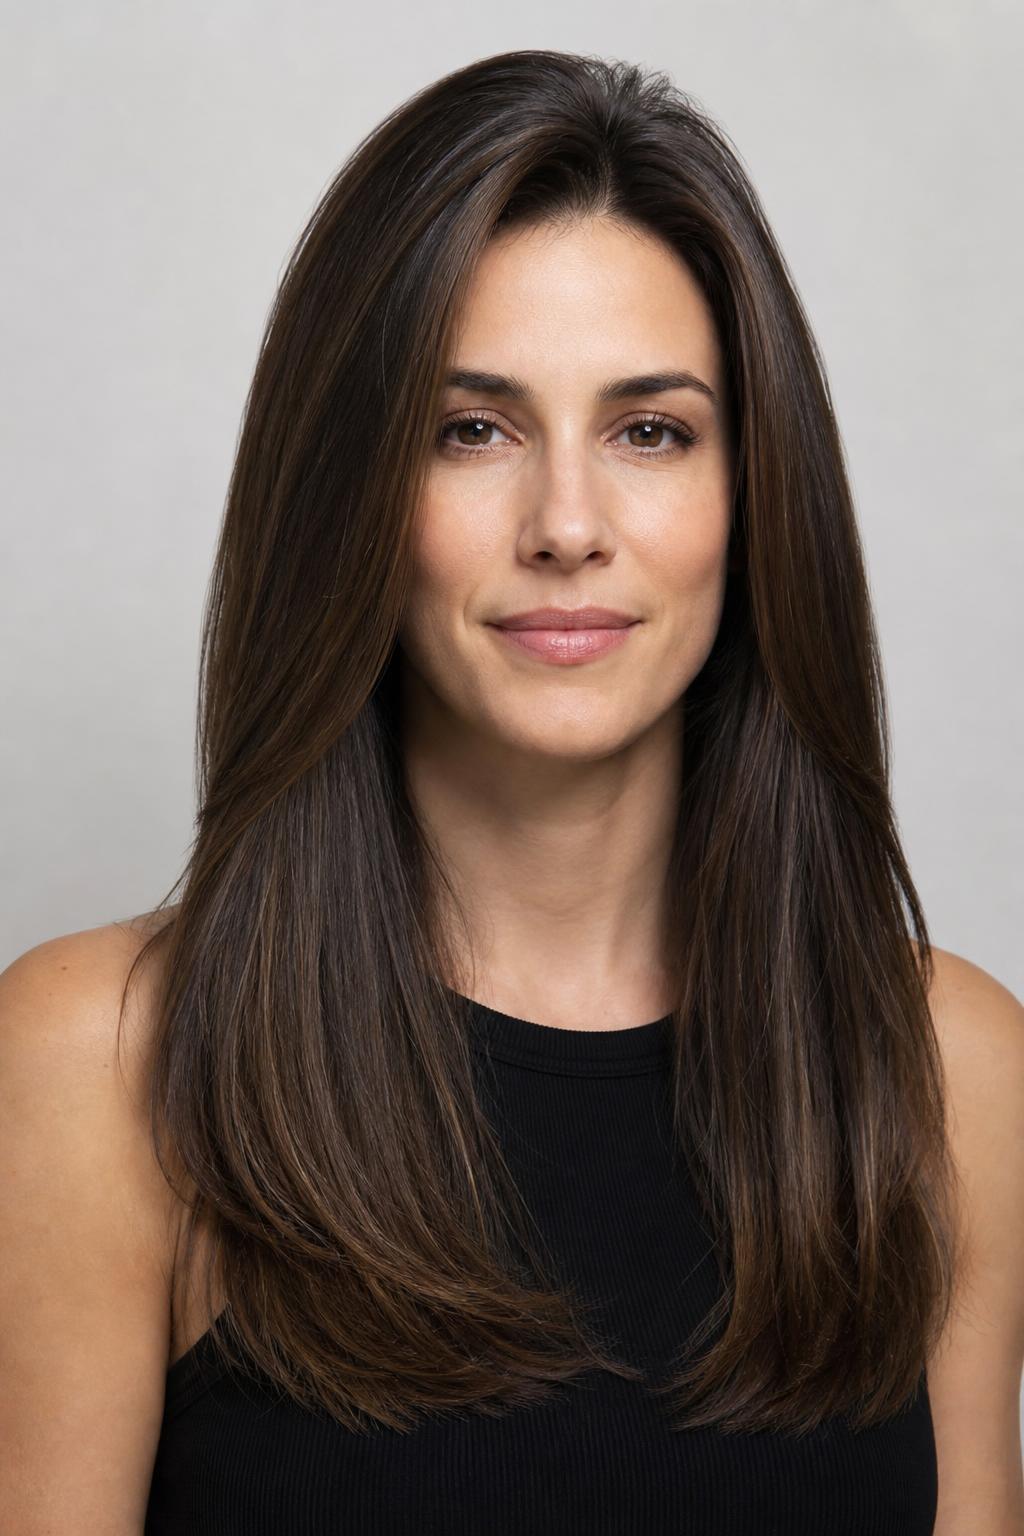
31. Defined Coils on Long Natural Hair
Applying a leave-in and then a gel in sections while the hair is soaking wet, raking each product through and then leaving it, gives 4a to 4c coils definition that survives several days. The cast the gel forms should be scrunched out only once the hair is completely dry. Length here is measured stretched, since shrinkage can hide half of it.
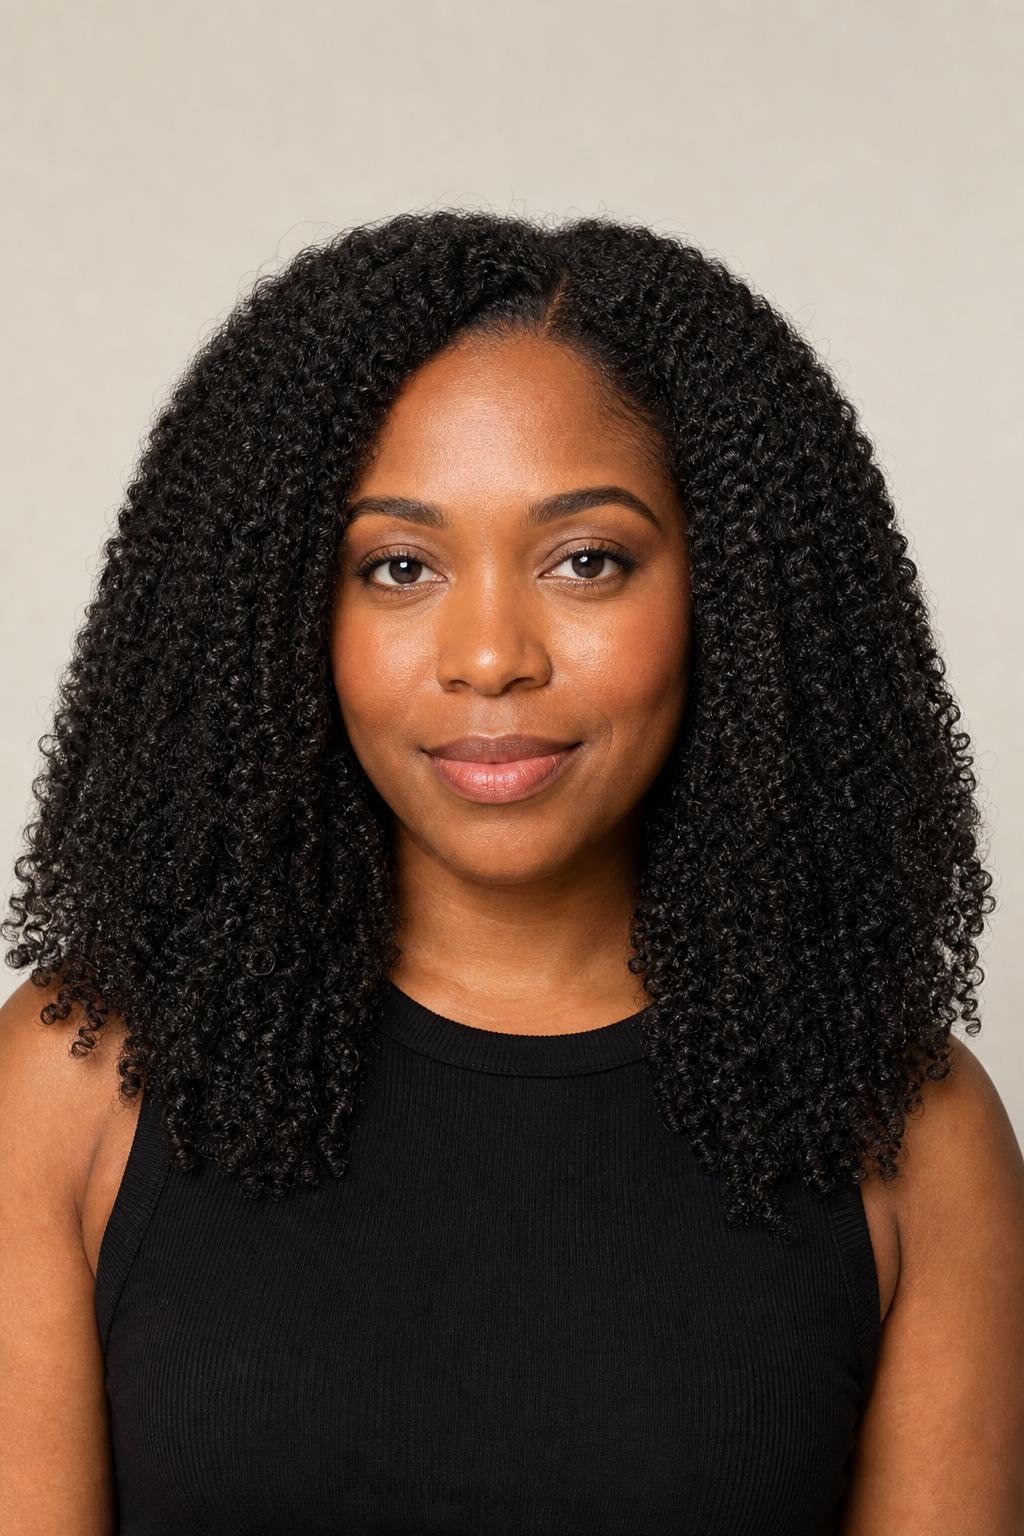
32. Second-Day Waves Refreshed at the Roots
Rather than restyling from scratch, mist water on the roots only, then work a small amount of leave-in through the mid-lengths with your fingers upward toward the scalp. The wave pattern in the length is usually still intact on day two; it is the roots that go flat.
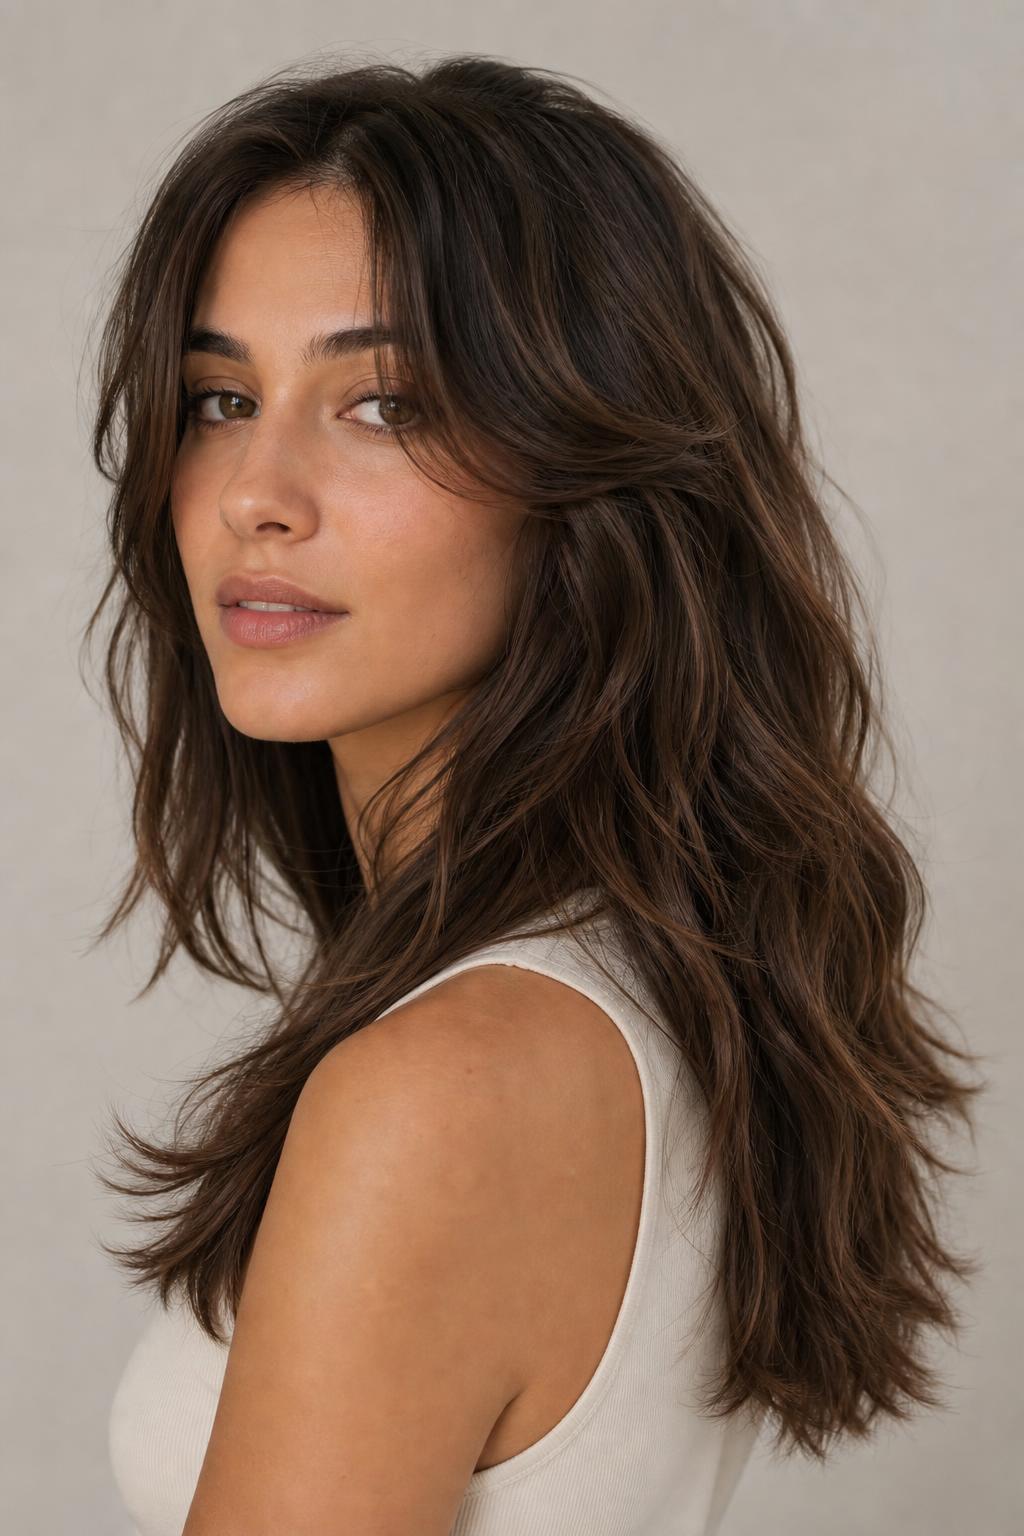
How to Choose a Long Hairstyle for Your Face Shape
Long hair draws a vertical line down both sides of the face, which is why it flatters more shapes than very short hair does. The decisions that still matter are where the shortest layer lands, whether you part in the center or off to one side, and whether you add a fringe. Those three choices do almost all the work.
| Face Shape | Best Layer Placement | Part | Avoid |
|---|---|---|---|
| Oval | Anywhere from cheekbone to collarbone | Center or side, both work | Very heavy blunt fringe that hides the proportions |
| Round | Longest face-framing pieces, starting below the jaw | Deep side part | Layers or waves that add width at cheek level |
| Square | Soft layers starting at the cheekbone | Side part | A blunt one-length cut with a hard center part |
| Heart | Layers beginning at the jaw for fullness lower down | Center or soft side | Crown volume, which widens the forehead further |
| Oblong | Layers at cheekbone level with waves for width | Side part with a fringe | Poker-straight unlayered length and high crown volume |
| Diamond | Face-framing pieces at the chin and a soft fringe | Center part | Everything pulled back tight off the face |
Stylist tip: The shortest layer in a long haircut is the one that determines how the whole shape looks, so agree on it before anything is cut. Ask your stylist to hold a comb at the exact height where the shortest piece will land and check it in the mirror. Everything below that point is just length.
What to Tell Your Stylist
The most common long-hair miscommunication is about trims, not cuts. Saying just a trim can mean half an inch to one stylist and two inches to another, so name the number and add a reference point: half an inch off the ends, keep the length at mid-back. If you are growing your hair out, say so explicitly, because that changes how much a stylist takes to keep the ends healthy.
For layers, describe where the shortest one should land rather than asking for long layers or a few layers. Chin, cheekbone, collarbone, and bust line are all precise. Add whether you want the layers visible on the surface or removed from underneath, since those are two different cuts that both get called layering.
If your ends are thin or split while your mid-lengths are fine, say that too. Long hair is often four or five years old at the ends, and it needs a different approach from the newer growth above it. A stylist who knows the ends are the oldest section will point cut rather than blunt cut them, which keeps the perimeter looking fuller. This matters especially when you are actively trying to gain length and want the smallest useful trim.
Stylist tip: Ask for the dusting technique if your only goal is removing split ends without losing length. The stylist twists small sections and snips only the ends that stick out, which removes damage without taking anything off the overall line. Most salons will do it if you ask by name.
Maintenance and the Real Cost of Long Hair
Long hair inverts the usual maintenance trade-off. Salon visits drop to three or four a year, but wash day expands considerably: washing, conditioning, detangling, and drying mid-back hair takes forty-five minutes to an hour and a half depending on density, against fifteen minutes for a bob. Anyone considering growing their hair out should price that in time rather than in appointments.
| Aspect | Reality |
|---|---|
| Trim frequency | Every 10 to 12 weeks; every 8 weeks if the cut is blunt |
| Wash day | 45 to 90 minutes including drying, on 2 to 3 days per week |
| Daily styling | 2 minutes for a clip or braid, 20 to 25 for a blowout |
| Key products | Leave-in conditioner, heat protectant, a wide-tooth comb, a silk pillowcase |
| Growth rate | About half an inch per month, so roughly 6 inches a year before trims |
| Where damage shows | The last 3 inches, which are several years old and most exposed |
Two habits do more for long hair than any product. The first is detangling from the ends upward with a wide-tooth comb rather than brushing from the roots down, which is how most mid-shaft breakage happens. The second is protecting the length overnight, since friction against a cotton pillowcase over eight hours does measurable damage to hair that is already years old at the ends. A loose braid or a silk pillowcase handles most of it.
When Long Hair Is Not the Right Choice
Long hair suits most people, which makes it worth being specific about the cases where it does not deliver what the reference photo promises.
- Your hair is fine and low density. Past the collarbone, fine hair loses volume at the root and thins visibly at the ends, so the length works against the fullness you want. A blunt lob keeps the same hair in a smaller area and looks considerably denser.
- You have never got past a certain length despite years of trying. Everyone has a terminal length determined by their growth cycle, and for some people that falls around the shoulder blades. If your ends have looked the same for three years, they are shedding as fast as they grow rather than failing to grow.
- You color your hair every six to eight weeks. Long hair means the ends have been through many more chemical cycles than the roots, and by year four they will not hold tone or condition the same way. Either stretch the color intervals or accept a shorter target length.
- You have less than fifteen minutes for wash day. Long hair cannot be rushed through drying without heat damage, and repeatedly going to bed with wet long hair causes its own problems. Be honest about the time before committing to the length.
- You are dealing with significant shedding or scalp irritation. Length adds weight and tension at the follicle, and pulled-back styles on long hair concentrate that tension at the hairline. Treat the scalp condition first and revisit the length afterward.
FAQ
How Often Should Long Hair Be Trimmed?
Every ten to twelve weeks for a layered cut, or every eight weeks if your cut has a blunt perimeter that shows grow-out. Trimming more often does not make hair grow faster, since growth happens at the follicle rather than at the ends, but it does prevent splits from travelling up the shaft and forcing a bigger cut later. If you are growing your hair out, ask for a dusting rather than a full trim.
What Is the Easiest Hairstyle for Long Hair?
A claw clip twist takes about fifteen seconds and holds all day on medium to thick hair, which makes it the fastest option here by a wide margin. A low ponytail with a wrapped base is the next fastest at under a minute. Both work better on second-day hair than on freshly washed hair, which is slippery and works loose.
Does Long Hair Suit Older Women?
Yes, with one adjustment: hair texture usually becomes finer and drier after menopause, so the length that worked at thirty may look thin at sixty. Keeping the perimeter blunt rather than heavily layered and setting the target length at the collarbone or bust rather than mid-back preserves the density. A soft fringe or face-framing layer adds the volume that long unlayered hair loses around the face.
How Do I Add Volume to Long Hair?
Start at the root rather than the length, since long hair goes flat at the scalp before anything else. Dry the roots lifted straight up off the head, switch your part to the opposite side of where it normally falls, and use a mousse at the root rather than a cream through the length. Internal layers help too, because removing weight from underneath lets the top sections lift.
What Layers Work Best on Long Fine Hair?
Long, widely spaced layers with the shortest one at the bust line rather than the collarbone, and no thinning shears anywhere. Fine hair needs weight kept in the perimeter, so anything that removes bulk from the ends makes the hair look sparser. Face-framing pieces are the exception and are worth having, since they add shape without touching the density of the main length.
How Long Does It Take to Grow Hair to Mid-Back?
From shoulder length, roughly two to three years at an average growth rate of half an inch a month, allowing for trims along the way. Growth rate varies by person and slows slightly with age, and the biggest variable is usually how much length you lose to breakage rather than how fast it grows. Protecting the ends does more for reaching a target length than any growth product.
Can I Wear Long Hair with a Round Face?
Yes, and long hair is one of the more flattering options for a round face because it creates a vertical line the face lacks. Keep face-framing layers starting below the jaw rather than at the cheekbone, use a deep side part for asymmetry, and avoid waves that add width at cheek level. Straight or loosely waved length past the bust works better than tight curls at the sides.
The right hairstyles for long hair depend less on the length itself and more on where the weight goes: which layer is shortest, whether the bulk comes out from inside or off the surface, and how you get the roots to lift at the start of the day. Settle the shortest layer with your stylist before the first cut, keep the ends protected between appointments, and pick two or three styling shapes you can do in under five minutes so the length works on ordinary mornings rather than only on good ones.
Hair results vary based on your natural hair type, texture, density, and condition. Always consult with a licensed hairstylist before making significant changes, especially with chemical treatments or dramatic length changes. Photos may show styled results that require professional tools and products to replicate.

1 response