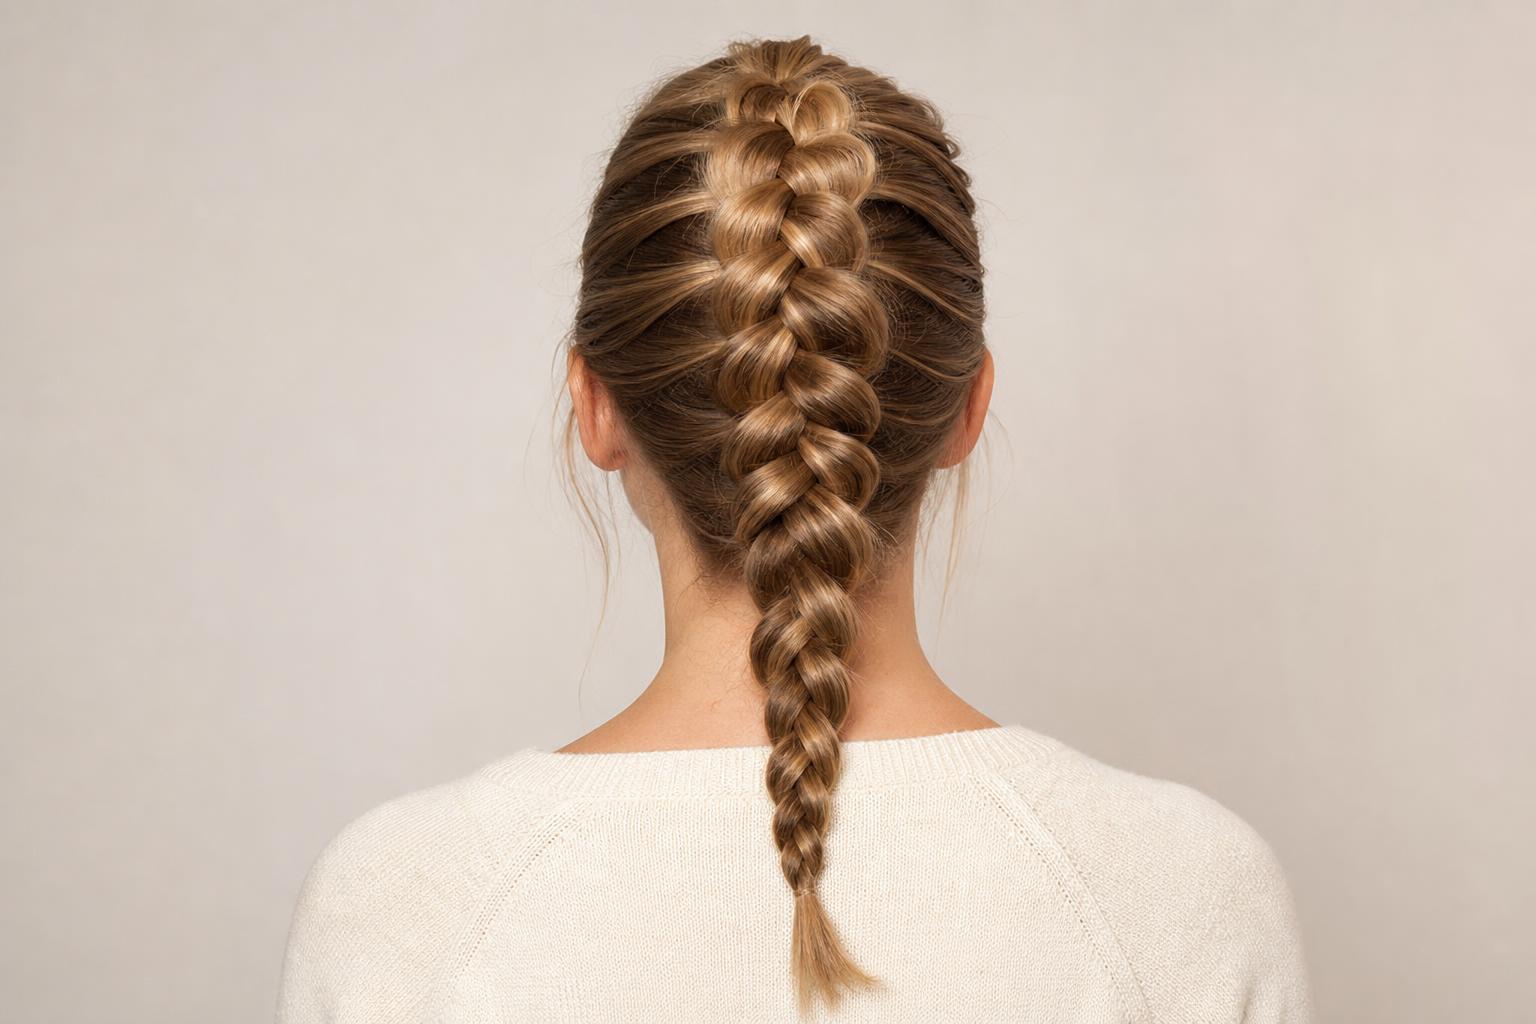
A Dutch braid is a French braid worked in reverse: you cross the outer sections under the middle one instead of over it, so the plait sits raised on the surface of the hair.
That single change from over to under is the whole technique. Everything else, including picking up new hair on each pass and keeping the tension even, works exactly the way it does in a French braid. The result is a braid that stands proud of the scalp like a rope rather than sinking into the hair, which is why Dutch braids photograph so well and why they hold their shape through a workout when a French braid has already gone fuzzy.
This guide walks through the hand motion step by step, explains how to do it on your own head rather than someone else’s, adapts the technique for fine, thick, curly and type 4 hair, covers the four variations worth learning first, and sets out how long each one realistically lasts. It also covers tension, which matters more with Dutch braids than with almost any other style.
A Dutch Braid Crosses Under While a French Braid Crosses Over
Both braids start from the same three sections at the crown and both add hair on every pass. The difference is direction. In a French braid the outer sections travel over the middle section, so each crossing tucks the plait beneath the surrounding hair and the finished braid lies flat and woven-in. In a Dutch braid the outer sections travel under the middle section, which pushes the plait up and out so it sits on top of the hair with visible depth. Some people call it an inside-out braid or a reverse French braid, and all three names describe the same motion.
| Feature | Dutch Braid | French Braid |
|---|---|---|
| Hand motion | Outer sections pass under the middle | Outer sections pass over the middle |
| Finished look | Raised, rope-like, stands off the scalp | Flat, woven into the surrounding hair |
| Difficulty | Slightly harder; the underhand grip is less intuitive | Easier for most beginners |
| Holds up to | Workouts, wind, a full working day | Light activity; fuzzes faster at the crown |
| Best on | Medium to thick hair, second-day texture | Fine to medium hair, freshly washed |
| Can be pancaked | Yes, and the effect is dramatic | Barely; the flat profile limits it |
If the underhand motion will not click, learn the overhand French braid first and then flip the direction once your hands know the rhythm of picking up hair. Most people find the switch takes about twenty minutes of practice rather than a whole new skill.
How to Dutch Braid Step by Step
Work on dry hair with a small amount of grip in it. Freshly washed, conditioned hair slides apart while you braid, which is the single most common reason a first attempt falls out before it is finished. Second-day hair, or clean hair with a light texturizing spray misted through it, holds sections in place while your hands learn the pattern.
Step 1: Section the Hair at the Crown
What you need: a paddle brush, a texturizing or dry shampoo spray, two clear elastics.
How: brush all the tangles out, then take a triangular section from your hairline back about two inches and split it into three equal strands. Hold the left strand in your left hand, the right in your right hand, and pinch the middle strand between thumb and forefinger.
Why: the size of this first section sets the width of the entire braid. Take too little and the braid looks thin against your head; take too much and the first few crossings will not sit flat.
Common mistake: starting with a square section instead of a triangle. A triangle narrows as it goes back, which is what lets the braid taper naturally down the head.
Step 2: Cross the Right Strand Under the Middle
What you need: nothing but the three sections already in your hands.
How: pass the right strand beneath the middle strand and let go. The right strand is now the middle, and what was the middle is now on the right. Repeat on the other side by passing the left strand beneath the new middle.
Why: going under is what lifts the plait to the surface. If you find yourself going over out of habit, you are French braiding and the result will lie flat.
Common mistake: loosening your grip during the crossing. Keep both hands close to the scalp; every inch of slack becomes a visible gap in the finished braid.
Step 3: Add New Hair Before Each Crossing
What you need: the tail of a rat-tail comb helps pick up clean sections, though fingers work.
How: before you pass the right strand under, gather a half-inch of loose hair from the right side of your head and add it to that strand. Do the same on the left. Keep the pickups the same width on both sides and take them from the same distance behind your ear each time.
Why: even pickups are what make a braid look symmetrical. Uneven ones pull the braid off center, and the error compounds with every pass.
Common mistake: grabbing bigger pieces as you get tired near the nape. The braid visibly widens at the bottom when this happens, so slow down rather than speeding up as you go.
Step 4: Continue to the Nape and Finish as a Three-Strand Plait
What you need: one clear elastic.
How: keep adding hair until you reach the nape and there is no loose hair left to pick up. From there, carry on crossing under with the three strands you are holding until you run out of length, then secure with an elastic about an inch above the ends.
Why: leaving an inch of tail below the elastic keeps the ends from splaying and makes the braid look finished rather than cut off.
Common mistake: tying the elastic at the very tip, which creates a hard little brush of ends that catches on clothing.
Step 5: Pancake the Braid to Widen It
What you need: your fingers and about thirty seconds.
How: starting at the bottom, pinch the outer edge of each visible loop and tug gently sideways. Work upward, one loop at a time, on both sides. Hold the elastic while you do it so the braid does not loosen from the bottom.
Why: pancaking is what turns a tight, thin Dutch braid into the wide, full one in the photos. It adds visible width without adding any hair, which makes it especially useful on fine or shoulder-length hair.
Common mistake: pancaking from the top down. The braid unravels upward, so working bottom to top keeps the tension where you put it.
Braiding Your Own Hair Uses a Different Grip
Doing this on someone else is straightforward because you can see what you are doing. On your own head you are working blind and upside down, with your arms raised, which is genuinely harder. The fix is to stop looking in the mirror and start going by feel, since a mirror reverses your hands and doubles the confusion. Sit down, rest your elbows against your ribs to reduce arm fatigue, and keep both hands touching your scalp so you can feel where the last crossing landed.
Stylist tip: practice the underhand motion on a low ponytail first, without picking up any new hair. Once crossing under feels automatic with three plain sections, add the pickups back in. Splitting the two skills apart cuts the learning curve roughly in half compared to trying to do both at once.
Your dominant hand will braid faster and tighter than the other, which is why a first double Dutch braid usually comes out lopsided. Do the weaker side first, while your arms are fresh and your patience holds. Practicing on day-two hair with a little natural grip also removes one variable while you are still learning the motion.
Adjusting the Technique for Your Hair Type
A Dutch braid behaves differently on every texture, and the adjustment is almost always about grip and tension rather than the braiding pattern itself. Match the prep to your hair and the same three crossings will hold in anything from fine straight hair to tightly coiled type 4.
Fine and Slippery Hair Needs Texture Before You Start
Fine hair has a smooth cuticle and very little friction, so sections slide free of your fingers mid-braid. A dry texturizing spray or a light dusting of dry shampoo through the mid-lengths gives the strands something to grip. Skip conditioner on the day you braid, and pancake generously afterward, since widening the loops is what makes a fine-haired Dutch braid look substantial.
Thick and Coarse Hair Needs Smaller Pickups
Dense hair produces a braid that quickly becomes too bulky to sit flat against the head. Take half-inch pickups rather than the inch you would use on medium hair, and expect the braid to take twice as long. A leave-in cream smoothed through before you begin keeps the surface tidy so individual strands do not spring out of the plait.
Curly and Wavy Hair Braids Better Slightly Damp
Fully dry curls resist sectioning and frizz as you handle them, while soaking-wet hair stretches and the braid loosens as it dries. Damp is the sweet spot: mist with water and a leave-in conditioner, then braid. On 2c to 3c textures the finished braid also holds a curl pattern when you take it out, which makes this a useful overnight style.
Type 4 Hair Holds a Dutch Braid Longer Than Any Other Texture
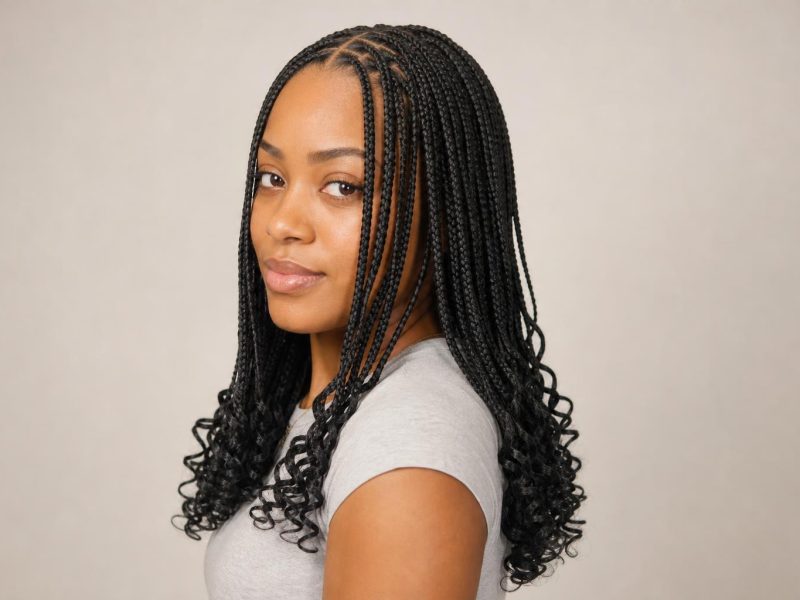
Tightly coiled hair grips itself, so a Dutch braid on 4a to 4c can hold cleanly for a week or more, which is why the technique doubles as a protective style. Braid on stretched hair rather than shrunken, use a moisturizing cream and a light oil on the ends, and part with a rat-tail comb for clean lines. Two Dutch braids done this way are essentially large cornrows, and the same care principles apply as with smaller cornrow patterns.
Short and Layered Hair Needs Pins, Not More Tension
Layers shorter than chin length will not reach the braid and pop out along the top edge no matter how tight you pull. Pulling harder makes it worse and adds strain at the hairline. Pin the escapees flat with small bobby pins matched to your hair color once the braid is finished, or accept them as face-framing pieces, which is how most short-haired versions look in practice.
Four Dutch Braid Variations Worth Learning First
Once the basic braid is reliable, four variations cover almost every occasion. Each one uses exactly the same underhand crossing; only the sectioning changes.
Double Dutch Braids Split the Head Down the Middle
Part the hair straight down the center from forehead to nape, clip one side out of the way, and braid each half separately. This is the version most people picture, and it is the most secure for sport, because the weight is balanced and nothing swings. A clean center part does more for the finished look than the braiding itself, so take the time with a rat-tail comb.
A Half-Up Dutch Braid Uses Only the Top Section
Braid from the hairline back to the crown, stop picking up hair at the top of the ears, and secure the braid into a half ponytail with the rest of the hair left loose. It works on hair too short for a full braid and takes about four minutes. This is a practical option for the office, alongside other styles that look deliberate without looking fussy.
A Dutch Crown Braid Wraps Around the Head
Braid diagonally from one ear across the back of the head to the other, keeping the pickups on the lower side only so the braid arcs upward. Pin the tail beneath the start point and cover the join with a few loose strands. It takes practice to keep the arc even, and it holds through a whole day and evening once you have it.
A Dutch Braid into a Bun Handles Long, Heavy Hair
Dutch braid from the front hairline to the crown, then gather everything, including the braid tail, into a bun. The braid takes the weight off the scalp at the front while the bun carries the length, which is more comfortable than a plain bun on hair past mid-back. Anyone with a lot of length to manage tends to reach this version quickly.
Tension Is the Part Most Tutorials Skip
A Dutch braid pulls at the hairline more than a French braid because the underhand crossing lifts the plait away from the scalp, and that lift comes from tension on the roots. Repeatedly wearing tight braids can cause traction alopecia, a form of hair loss the American Academy of Dermatology links directly to hairstyles that pull, and it can become permanent if the pulling continues over years. The practical test is simple: if it stings, aches, or gives you a headache within the first hour, it is too tight.
Stylist tip: braid at a comfortable tension and create the tight, clean look with pancaking and a light hairspray instead. Pulling hard buys you a slightly crisper braid on day one and costs you baby hairs at the temples over months. Loosening the first two crossings at the hairline alone removes most of the strain without changing how the braid looks.
Sleeping in a Dutch braid is fine and often useful, since it doubles as a heatless wave set. Wrap a satin scarf over it or use a satin pillowcase, because cotton friction is what turns an overnight braid fuzzy by morning. The difference between silk and satin as a sleeping surface matters less than simply not sleeping on cotton.
How Long a Dutch Braid Lasts
Longevity depends almost entirely on texture, not on technique. The numbers below assume a comfortable tension, dry or damp hair at the start, and a satin cover overnight.
| Hair Type | Realistic Wear Time | Prep Needed | First Failure Point |
|---|---|---|---|
| Fine straight | 6 to 10 hours | Dry texture spray through mid-lengths | Slides loose at the crown |
| Medium wavy | 1 full day | Light cream, braid on day-two hair | Fuzz along the top edge |
| Thick coarse | 2 to 3 days | Leave-in cream, small pickups | Strands spring out of the plait |
| Curly 3a to 3c | 2 to 4 days | Braid damp with leave-in conditioner | Loosens as it dries down |
| Coily 4a to 4c | 5 to 7 days | Stretched hair, moisturizer plus light oil | New growth at the parts around day 6 |
Common Dutch Braid Myths
Myth: A Tighter Braid Lasts Longer
Reality: grip comes from the texture of the hair and the evenness of the pickups, not from force. An over-tight braid slips just as fast once the hair relaxes during the day, and it costs you hairline density in the meantime. Even sectioning does far more for longevity than pulling harder.
Myth: You Need Long Hair to Dutch Braid
Reality: anything past chin length can carry a half-up Dutch braid, and a bob can hold a short crown braid pinned at the back. What short hair genuinely cannot do is hold a full head of double Dutch braids without pins, because the layers have nowhere to go.
Myth: Dutch Braids Damage Your Hair
Reality: the braid itself protects the ends by tucking them away, which is why it works as a protective style on textured hair. The damage risk comes from tension at the roots and from leaving a braid in so long that it matts, not from the braiding. Take it out gently, working from the bottom up, and the style is one of the kinder things you can do with your hair.
FAQ
What Is the Difference Between a Dutch Braid and a French Braid?
A Dutch braid crosses the outer sections under the middle section while a French braid crosses them over, which is the only technical difference between the two. Going under pushes the plait to the surface so it sits raised like a rope, while going over sinks it into the surrounding hair so it lies flat. Everything else, including how you pick up new hair, is identical.
Why Does My Dutch Braid Keep Falling Apart?
Freshly washed, conditioned hair is the usual cause, because a smooth cuticle gives your fingers nothing to grip. Braid on second-day hair or mist a dry texturizing spray through the mid-lengths first. The second common cause is losing tension during the crossing, so keep both hands touching your scalp rather than pulling the sections away from your head.
Can You Dutch Braid Short Hair?
Yes, down to about chin length for a half-up version and a bob for a pinned crown braid. Layers shorter than the braid will escape along the top edge, and the fix is small color-matched bobby pins rather than more tension. A full double Dutch braid needs at least shoulder length to look balanced.
How Do I Make My Dutch Braid Look Thicker?
Pancake it, working from the bottom of the braid upward and tugging the outer edge of each loop sideways. This widens the braid without adding any hair and takes about thirty seconds. Holding the elastic while you pancake keeps the braid from loosening, and a light hairspray afterward sets the new width.
Are Dutch Braids Good for Natural Hair?
They work very well on type 4 hair and hold for five to seven days, which makes them a genuine protective style rather than just a look. Braid on stretched rather than shrunken hair, seal the ends with a light oil, and keep the parts clean with a rat-tail comb. Refresh the edges with a little moisturizer rather than redoing the whole braid mid-week.
Is It Safe to Sleep in a Dutch Braid?
Sleeping in one is fine and often desirable, since it sets a heatless wave overnight. Cover it with a satin scarf or sleep on a satin pillowcase, because cotton friction roughs up the cuticle and produces the fuzzy braid people wake up to. Loosen the first crossing at the hairline before bed if you feel any pull when you lie down.
How Long Does It Take to Learn to Dutch Braid Your Own Hair?
Most people manage a recognizable braid within three or four attempts and a neat one within a week of practice. Learning the underhand crossing on a plain ponytail first, before adding pickups, is the fastest route. Expect your non-dominant side to lag behind by several sessions, which is normal and evens out with repetition.
A dutch braid is worth the twenty minutes of practice it takes to learn, because the same underhand motion produces double braids, a crown, a half-up style and a braided bun without learning anything new. Start on dry second-day hair, keep your pickups even, and braid at a tension you could wear all day rather than the tightest one your arms can manage. The neat, full look in the photos comes from pancaking at the end, not from pulling hard at the start.
Hair results vary based on your natural hair type, texture, density, and condition. Always consult with a licensed hairstylist before making significant changes, especially with chemical treatments or dramatic length changes. Photos may show styled results that require professional tools and products to replicate.