
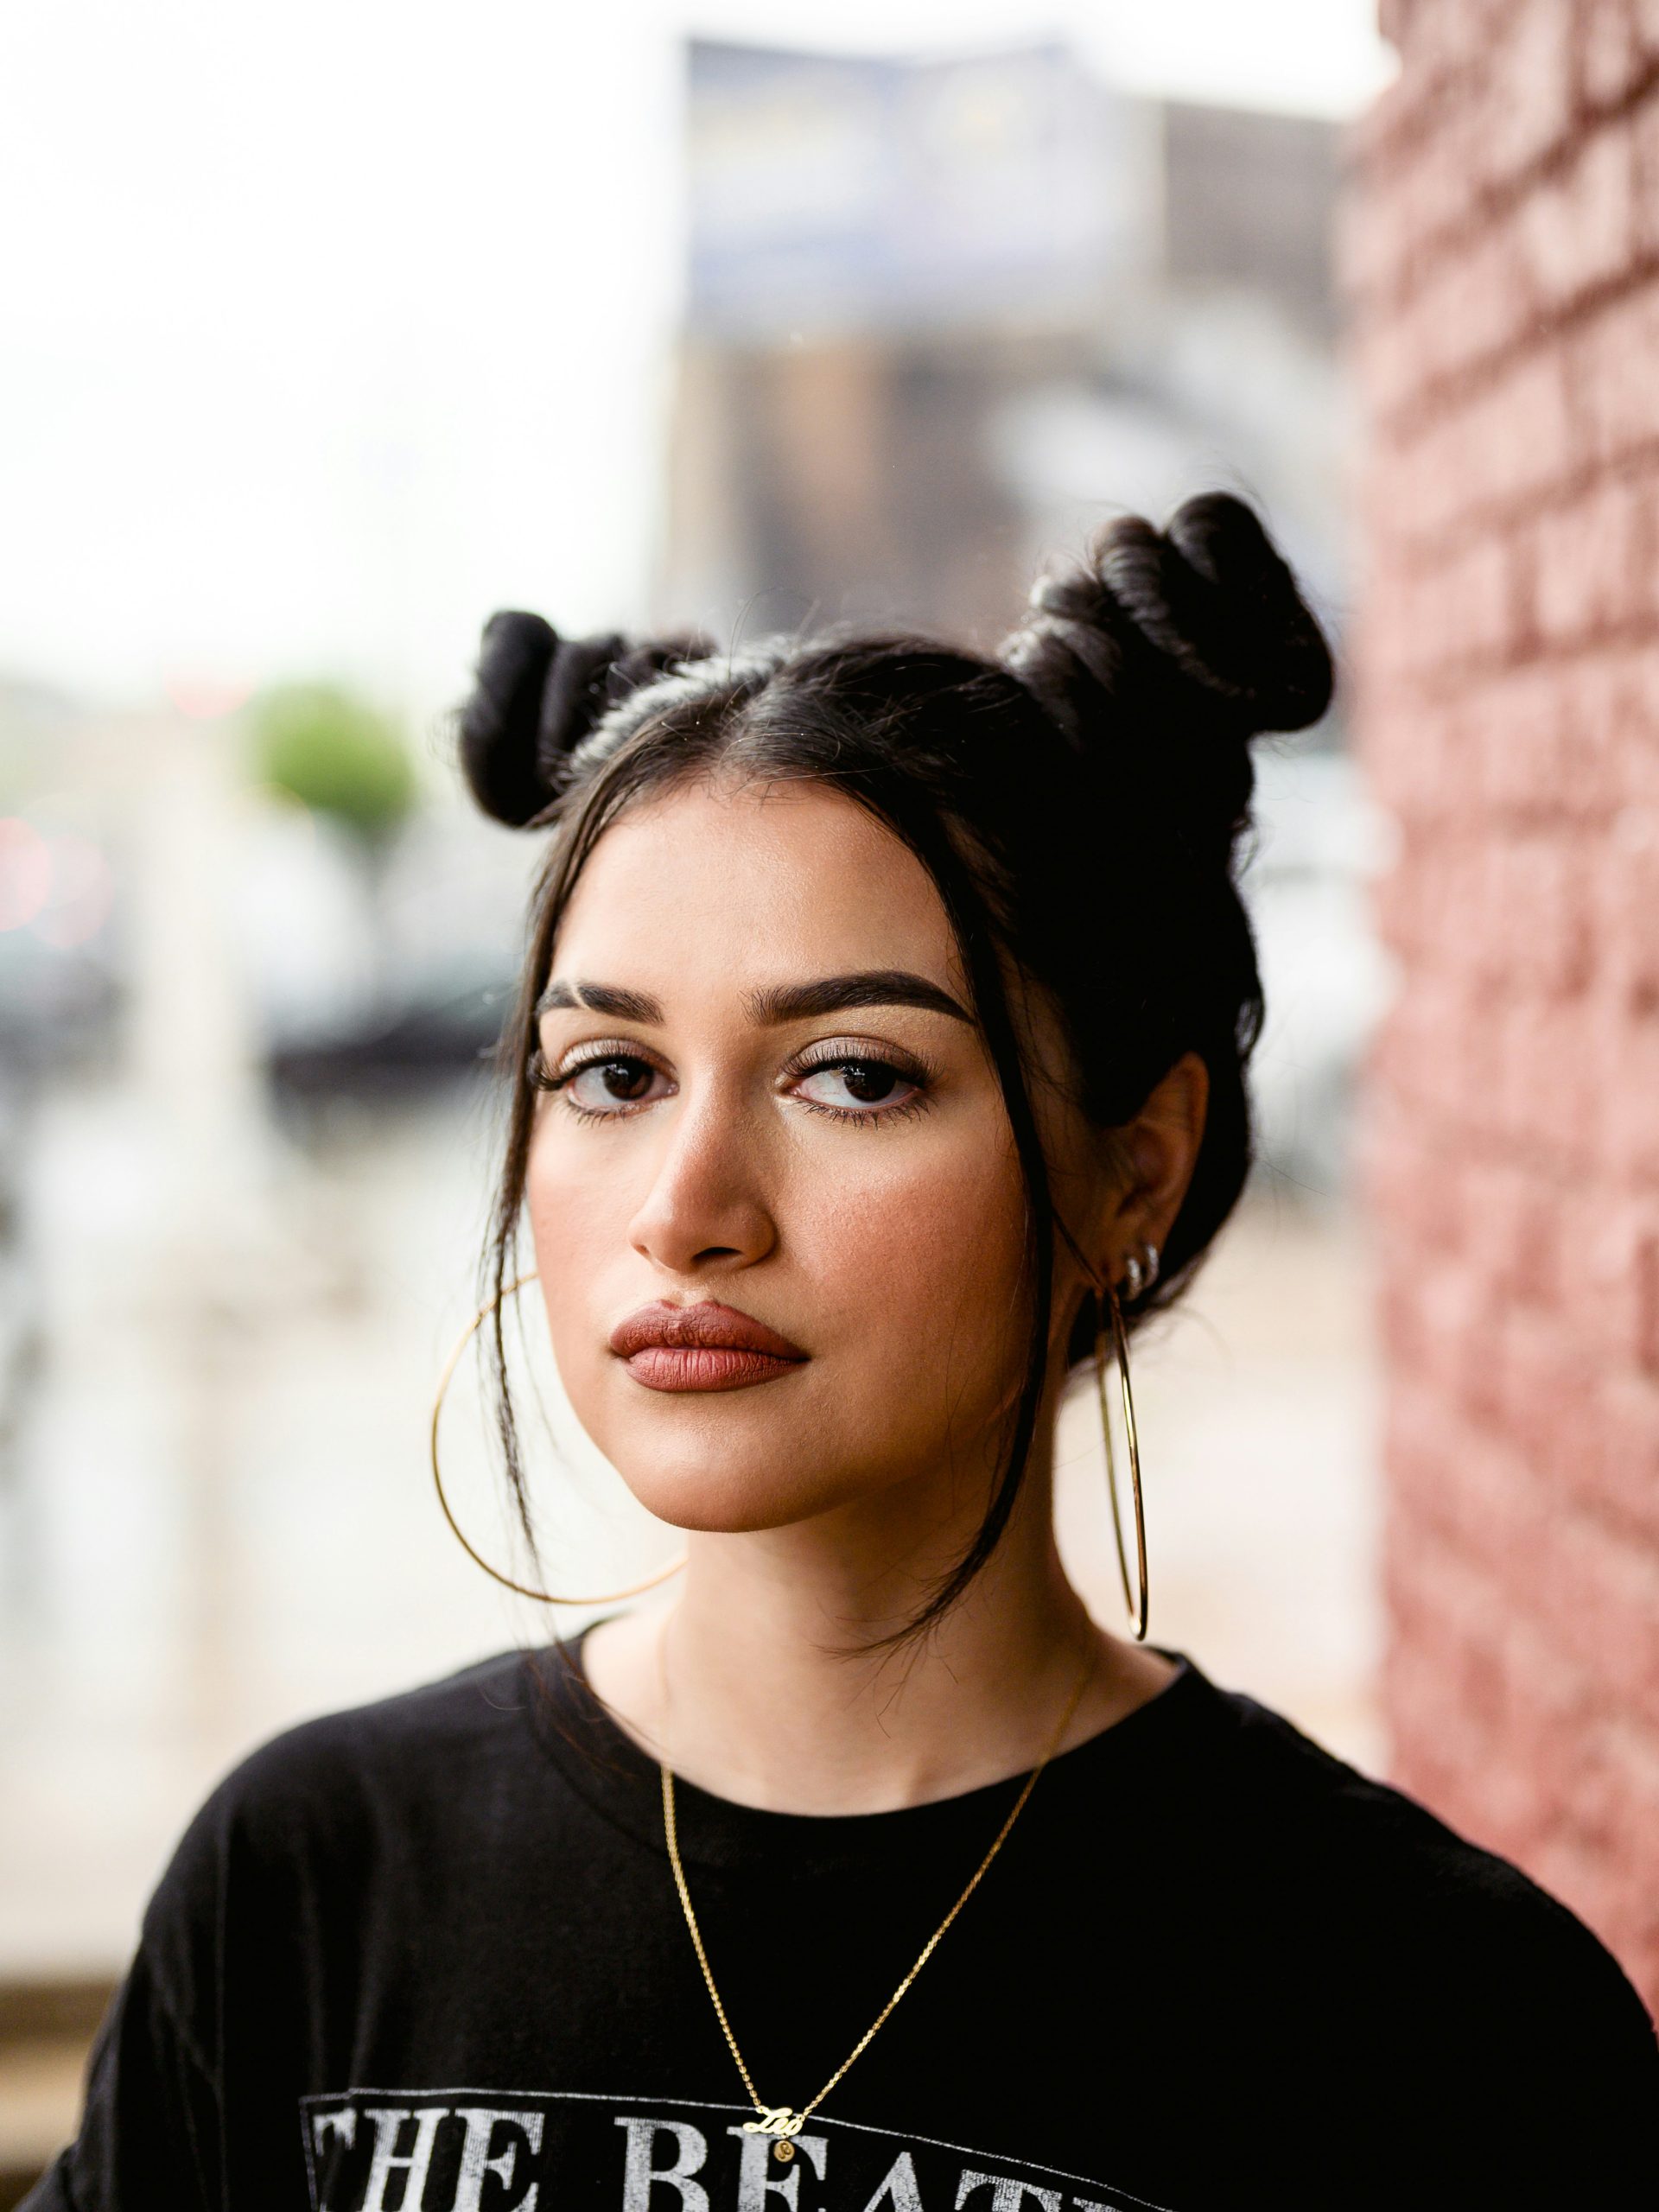
Space buns are two buns set symmetrically on either side of a center part, and the style adapts to every hair type and length, from sleek high buns on straight hair to textured puffs on natural curls.
The 30 looks below are grouped by what changes the style: the classic placements, what works for your specific hair type, braided and twisted versions, accessorized takes, and creative or occasion-ready ideas. Each entry names the detail that defines it and who it suits, so you can scroll to your hair type and length instead of guessing. Space buns hold best on second-day hair, since a little natural grip helps the buns stay put, which makes this one of the rare styles that rewards skipping a wash.
After the gallery you will find a step-by-step method, a hair-type guide for getting the buns to actually hold, and honest notes on when this style works against you. For a softer two-section idea in the same playful family, the THP gallery of bubble braids covers a related look.
| Factor | Details |
|---|---|
| Hair length needed | Chin length and longer; very short hair works as mini buns or puffs |
| Best hair state | Second-day or lightly textured hair grips better than freshly washed |
| Time to create | 5 to 15 minutes depending on sleek versus messy and added braids |
| Tools | Two hair ties, bobby pins, a tail comb for the part, optional edge brush |
| Best for | Every hair type; festivals, casual days, workouts, and second-day refreshes |
Classic Space Buns
These five are the foundation placements that define the style, the versions worth learning first because every other idea builds on them. They range from a polished high set to a deliberately undone finish, and each one works as a complete look on its own. Where you place the buns changes the whole feel, so this is the section to experiment with before adding braids or accessories.
1. High Sleek Space Buns
Set high on the crown and smoothed flat with a brush and a little gel, high sleek buns are the cleanest, most polished version of the style. The high placement lifts the face and reads as deliberate rather than casual. Smooth the hair fully before twisting so no bumps show, and finish with a flexible-hold spray to lock the sleek surface in place.
2. Messy Space Buns with Loose Pieces
Pulling a few face-framing pieces loose and leaving the buns slightly undone gives a relaxed, lived-in finish that suits a casual day. The look is forgiving, since stray pieces are part of the design rather than a flaw. Thick and wavy hair gets the fullest version, where the natural texture adds volume to the loose strands without any extra effort.
3. Low Space Buns at the Nape
Placing the two buns low, just above the nape on each side, gives a softer, more grown-up take than the high version. The lower set flatters longer face shapes by keeping volume away from the crown. This placement also stays more comfortable when lying back or wearing a hat, since the buns sit below the crown rather than on top of it.
4. Half-Up Space Buns
Taking only the top half of the hair into two small buns and leaving the rest down combines the playful bun shape with the length of worn-down hair. The half-up version suits anyone who wants the look without committing the whole head. It is also the easiest entry point for very long or heavy hair, where full space buns can get bulky and hard to secure.
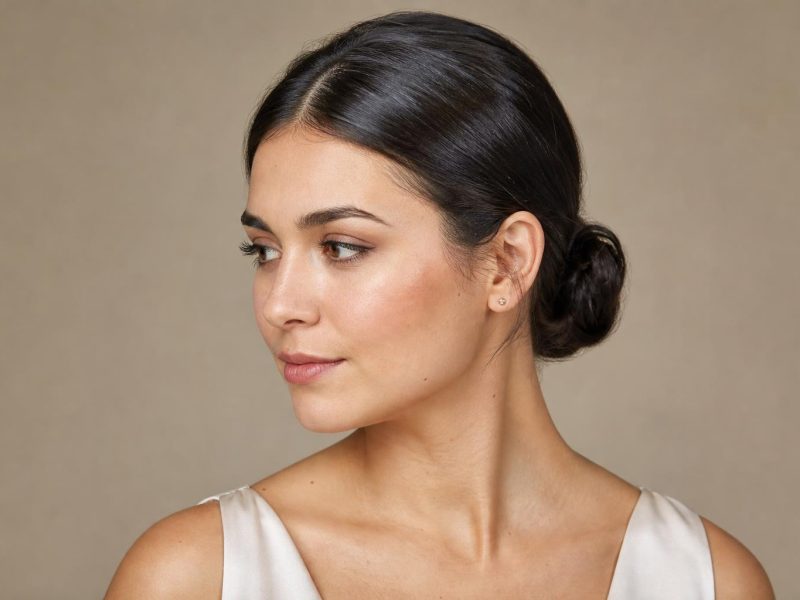
5. Double Space Buns with a Defined Center Part
A sharp, straight center part is what separates a clean space bun look from a sloppy one, dividing the hair into two even sections before the buns are formed. Use a tail comb to draw the part from the forehead to the nape for full symmetry. A precise part is the single biggest factor in making space buns look intentional, so it is worth the extra minute to get it straight.
Space Buns by Hair Type and Length
The same two buns behave very differently depending on your texture and length, so these seven entries break the style down by hair type. From fine straight hair that needs padding to natural curls that form puffs, each version adjusts the method to the hair. Find your type here for the most realistic starting point.
6. Mini Space Buns for Short Hair
Short hair around chin to shoulder length makes small, neat buns that sit close to the head, and pins do most of the holding where a tie alone would slip. The shorter length actually opens up options rather than limiting them, giving a charming, playful result. Tuck and pin any ends that will not reach the bun, and use a light hold spray since short pieces work loose fastest.
7. Full Space Buns for Long Hair
Long hair wraps into big, full buns with real presence, though the extra length and weight can pull the buns loose over the day. Wrapping the length around the base in the same direction as the twist keeps the bun tight. For very long hair, braiding each section before coiling it into a bun reduces bulk and helps the buns hold their shape for hours.
8. Voluminous Space Buns for Thick Hair
Thick hair makes the most dramatic, voluminous buns, where the density that can be hard to manage becomes the whole appeal. A messy finish suits thick hair best, since it shows off the volume rather than fighting it. Use a stronger elastic and a few extra pins, because thick buns carry more weight and need more anchoring than fine hair does.
9. Padded Space Buns for Fine Hair
Fine hair makes smaller buns, so backcombing the section lightly at the base or wrapping it over a small hair donut builds the size the hair lacks on its own. A texturizing spray before styling gives fine strands the grip they need to hold a bun. The padding trick is the difference between two thin knots and two full, balanced buns on fine hair.
10. Sleek Space Buns for Straight Hair
Straight hair takes the sleekest, most precise version of the style, smoothing flat with a boar-bristle brush for a glassy finish. The lack of texture means straight hair can slip, so a little gel or pomade at the roots gives the hold the buns need. This is the cleanest-looking version of space buns, ideal when you want polished rather than playful.
11. Textured Space Buns for Wavy Hair
Wavy hair sits in the sweet spot for space buns, with enough natural texture to grip and enough movement to make loose pieces look effortless. Second-day waves hold even better than fresh ones. Leave a few waves loose around the face and let the natural bend do the styling, since wavy hair needs the least help to look finished in this style.
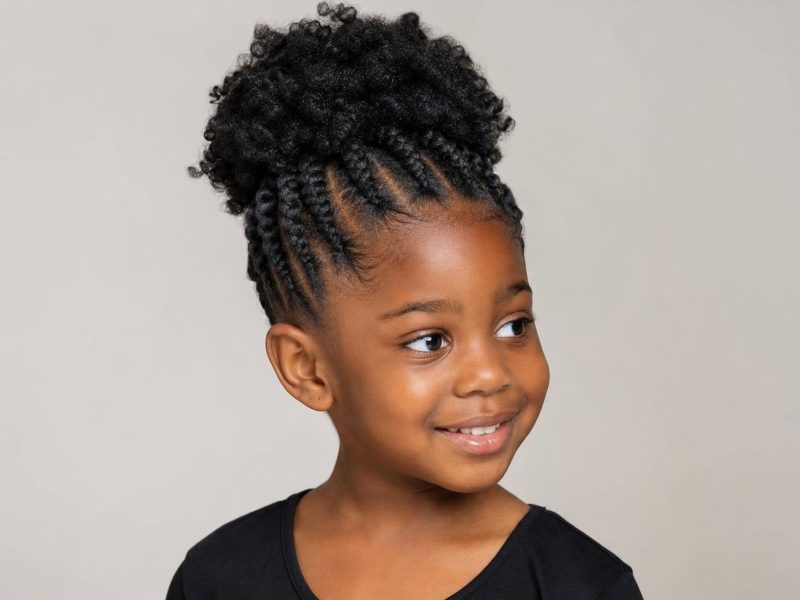
12. Curly Puff Space Buns for Natural Hair
On natural hair, space buns become puffs, sometimes called puffballs, gathering the curls into two rounded shapes that show off the texture while keeping it controlled. Slick the edges with an edge brush and a light gel, then secure each section with a loop tie that will not snag the curls. Medium-length 3c to 4c hair makes the fullest puffs, and a satin scrunchie under the tie protects the curls from breakage at the gather point.
Braided and Twisted Space Buns
Adding a braid or twist before coiling the bun turns a simple style into something with more detail and staying power. These seven entries cover the braided and twisted versions, which also tend to hold longer because the braid keeps the section organized. They suit anyone who wants the look to last from morning through a long day or event.
13. Braided Space Buns
Braiding each section into a single plait before coiling it into a bun creates a textured, rope-like bun that holds far longer than a plain twist. The braid keeps every strand contained, so the bun stays neat even after hours of movement. This is the most practical version for a full day out, where untextured buns tend to loosen and fuzz.
14. Cornrow-to-Bun Space Buns
Cornrowing the hair back from the part into each bun gives a sleek, scalp-flat front that flows into a fuller bun at the crown. The cornrowed front keeps everything secure and adds a clean graphic line, similar to the scalp work in lemonade braids. This version takes more time and skill, so it suits anyone comfortable with cornrows or willing to have them done at a salon.
15. Two-Strand Twist Space Buns
Twisting each section as a two-strand twist before winding it into a bun adds a defined, ropey texture and gives natural hair extra hold. The twist also stretches the curl slightly, making the buns sit a little fuller. For the twisting technique itself, the THP guide to two-strand twist styles walks through clean sectioning.
16. Dutch Braid into Space Buns
A Dutch braid running from the front hairline back into each bun raises the braid off the scalp for a bold, dimensional front. The raised braid frames the face and adds structure that a flat braid lacks. Keep the two braids even on each side, since any asymmetry shows clearly with this raised, high-contrast technique.
17. Boho Space Buns with Loose Tendrils
Pulling soft tendrils loose at the temples and nape gives a romantic, bohemian finish that softens the structured bun shape. The loose pieces work best with a slight wave or curl rather than poker-straight ends. A curling wand used lightly on the loose tendrils turns this from undone into deliberately styled.
18. Faux Locs Space Buns
Gathering faux locs or existing locs into two high buns creates a dramatic, sculptural version with built-in texture and weight. The locs hold their shape on their own, so the buns stay defined all day. Wrap a few loose locs around each base to hide the tie for the cleanest finish.
19. Twisted Rope Space Buns
Twisting two sections of each ponytail around each other into a rope before coiling builds a bun with visible spiral texture. The rope twist is faster than a braid but adds more interest than a plain wrap. Twist both sections in the same direction, then let them wind around each other naturally so the rope holds without unraveling.
Accessorized Space Buns
Accessories turn a basic set of buns into a finished, occasion-ready look, and these six entries cover the most flattering ways to embellish them. From scrunchies to hair jewelry, the right addition elevates the style without much extra effort. These are the versions to reach for when you want space buns to read as dressed up rather than thrown together.
20. Scrunchie Space Buns
Wrapping each bun with a soft scrunchie adds color and a cushioned finish that works across straight, wavy, and lightly curly hair. The scrunchie hides the elastic and adds a grown-up, polished touch. A satin scrunchie does double duty here, protecting the hair from creasing while finishing the look.
21. Ribbon-Wrapped Space Buns
Threading a ribbon around the base of each bun and tying a small bow gives a soft, feminine detail that suits events and photos. The ribbon color can match an outfit or add a deliberate contrast. Velvet or satin ribbon sits more securely than slippery synthetic, which tends to slide loose during wear.
22. Space Buns with Hair Cuffs and Rings
Sliding metal cuffs or rings onto a few strands near the buns adds an edgy, festival-ready detail with a bit of shine. The cuffs catch light as you move and need no maintenance once on. This works especially well on braided or twisted buns, where the cuffs have a defined section to grip.
23. Glitter-Parted Space Buns
Brushing fine cosmetic glitter or a gel-based glitter along the center part turns the part itself into the statement. The look is built for festivals, concerts, and themed events. Use a cosmetic-grade glitter gel applied with a small brush so it stays put rather than shedding onto the face.
24. Bandana Space Buns
Tying a folded bandana or headscarf across the front before setting the buns adds a retro, casual element that also tames the hairline. The scarf covers any flyaways at the front for an instantly neater finish. Knot the bandana underneath at the nape so it stays secure through movement.
25. Space Buns with Decorative Pins
Sliding pearl, metallic, or beaded pins around the base of each bun is the lowest-effort way to dress up the style. The pins add finish exactly where the elastic would otherwise show. Cluster two or three pins on the outer side of each bun rather than spacing them evenly, which reads as more intentional and modern.
Creative and Occasion Space Buns
These final five entries cover the bolder, more specific takes, the versions for a festival, a face-framing finish, or a colorful statement. Each one pushes the basic style somewhere new while keeping the recognizable two-bun shape. Use these when you want space buns to be the centerpiece of the look rather than a quick fix.
26. Festival Space Buns with Edges Laid
Pairing high space buns with carefully laid baby hairs at the hairline is the defining festival look, combining structure on top with intricate edge work at the front. The laid edges frame the face and turn the style into a complete statement. An edge brush and a strong-hold edge gel are the two tools that make the baby hairs hold through a long, warm day.
27. Space Buns with Curtain Bangs
Leaving curtain bangs out at the front softens the high buns and frames the face on either side. The bangs bridge the playful buns and a more polished overall look. For more on wearing and styling this fringe, the THP guide to curtain bangs with layers covers the shaping that makes them fall right.
28. Space Buns for Big Foreheads with Soft Front Pieces
Pulling soft pieces forward at the hairline lets space buns work for those who would rather not expose a larger forehead, since the high buns alone draw the eye up and back. The front pieces add coverage while keeping the clean bun shape. The THP guide to hairstyles for a big forehead covers more ways to balance the proportion.
29. Colorful Space Buns on Dyed Hair
Space buns show off dyed and multi-tonal hair especially well, since coiling the hair stacks the colors and reveals any hidden underlayers. Bright or pastel dye reads boldest in the wound bun shape, and the THP gallery of pink hair ideas shows how playful color pairs with this kind of style. If you have peekaboo color underneath, this style brings it to the surface in a way that worn-down hair hides.
30. Triple Buns and Beyond
Adding a third small bun down the part, or a row of mini buns, extends the concept for anyone wanting a bolder, more graphic statement. The multi-bun version suits festivals and creative events where more is the point. Keep the buns evenly spaced and uniform in size so the row reads as deliberate rather than haphazard.
How to Do Space Buns: The Basic Method
The core technique is the same across hair types, with small adjustments for texture. Start on second-day hair if you can, since a little natural grip helps the buns hold. Freshly washed hair is slippery, so add a texturizing spray or a touch of dry shampoo first.

- Part the hair: Use a tail comb to draw a straight center part from the forehead to the nape, dividing the hair into two even sections.
- Tie two ponytails: Secure each section into a ponytail where you want the bun to sit, high on the crown for a playful look or lower for a softer one. Make sure both sit at the same height.
- Form the buns: Twist or braid each ponytail, then wrap it around its base into a bun. Wrap in the same direction you twisted so it holds.
- Secure and finish: Pin each bun with bobby pins crossed against the direction of pull, then mist with a flexible-hold spray. Pull a few face-framing pieces loose if you want a softer finish.
Stylist tip: Cross your bobby pins in an X shape rather than sliding them straight in. A single straight pin works loose within an hour, while two pins crossed against each other lock the bun in place for the whole day. This one change is the difference between buns that hold and buns that sag by lunch.
Space Buns by Hair Type: Quick Reference
Each hair type needs a slightly different approach to get the buns to hold and look balanced. The table below maps the most common types to the adjustment that makes the biggest difference.
| Hair Type | Key Adjustment | Best Finish |
|---|---|---|
| Fine or thin | Backcomb the base or use a small hair donut for size; texturizing spray for grip | Padded, slightly messy |
| Thick or coarse | Stronger elastic and extra pins; braid first to reduce bulk | Full, voluminous, messy |
| Straight | Gel or pomade at the roots to stop slipping; brush smooth | Sleek and polished |
| Wavy | Use second-day waves; minimal product needed | Textured with loose pieces |
| Curly or coily | Slick edges, secure as puffs with loop ties and a satin scrunchie | Rounded puffs with laid edges |
When Space Buns Are Not the Right Choice
Space buns suit most hair, but a few situations call for a different style or a modified version.
- Very short hair below chin length: Hair shorter than chin length will not gather into a bun and the ends slip out constantly. Two small slicked sections or tiny pinned twists give a similar spirit, but a true bun needs more length to wrap and hold.
- Tender or fragile edges: High, tight buns pull on the hairline, and repeated tension on already-thin or fragile edges can worsen breakage. Set the buns lower and looser, use a satin scrunchie at the base, and skip the daily tight version if your edges are recovering.
- A formal or conservative setting: Space buns read as playful and casual by design, which can feel out of place in a formal workplace or event. A low, sleek single bun or a polished half-up style carries the same neatness without the playful signal.
FAQ
What Are Space Buns?
Space buns are two buns positioned symmetrically on either side of a center part, usually high on the head. The style blends a retro, playful feel with a modern, festival-ready edge, and it adapts to straight, wavy, curly, and coily hair. On natural hair the same style is often called puffs or puffballs.
How Do You Make Space Buns Stay In?
The biggest factor is starting with second-day or lightly textured hair, which grips far better than freshly washed hair. Braid or twist each section before coiling it, then secure with bobby pins crossed in an X shape rather than slid straight in. A texturizing spray beforehand and a flexible-hold spray after are what keep the buns from loosening through the day.
Can You Do Space Buns on Short Hair?
Yes, short hair makes neat mini buns, though pins do more of the work than the elastic since there is less length to wrap. Chin-length and above is the easiest, where each section can still coil into a small bun. For hair shorter than that, tiny pinned twists give a similar look when a full bun will not hold.
Are Space Buns Damaging to Hair?
Space buns are not damaging when set with reasonable tension and protective ties, but pulling them high and tight repeatedly can stress the hairline and cause breakage over time. Use a satin scrunchie or loop tie at the base, avoid the same tight placement every day, and set them lower if your edges feel tender. The occasional space bun is gentle; daily tight versions are the risk.
What Hair Length Do You Need for Space Buns?
Chin-length hair is the practical minimum for buns that hold, and any length beyond that works progressively better. Long and thick hair makes the fullest buns, though very long hair benefits from braiding each section first to manage the bulk. Shorter hair can do half-up space buns or mini buns as an alternative.
How Do You Do Space Buns on Curly or Natural Hair?
On curly and natural hair, space buns become puffs: gather each section, slick the edges with an edge brush and light gel, and secure with a loop tie over a satin scrunchie to avoid snagging. Medium-length 3c to 4c hair makes the fullest, most defined puffs. Adding a two-strand twist before coiling gives extra hold and a more sculpted shape.
The best thing about space buns hairstyles is how completely they adapt: sleek and high on straight hair, full and messy on thick waves, or rounded puffs on natural curls, all from the same two-section starting point. Start with second-day hair, get the center part straight, and cross your pins to make the buns hold. Once the basic method is comfortable, the braids, accessories, and creative versions in this gallery are quick variations on a style you already know.
Hair results vary based on your natural hair type, length, density, and condition. Use protective ties and avoid excessive tension, especially on fragile edges or thinning hair. Styles that pull tightly on the hairline can contribute to breakage over time. Individual hold and appearance will vary. Photos may show styled results created with specific tools and products.
1 response