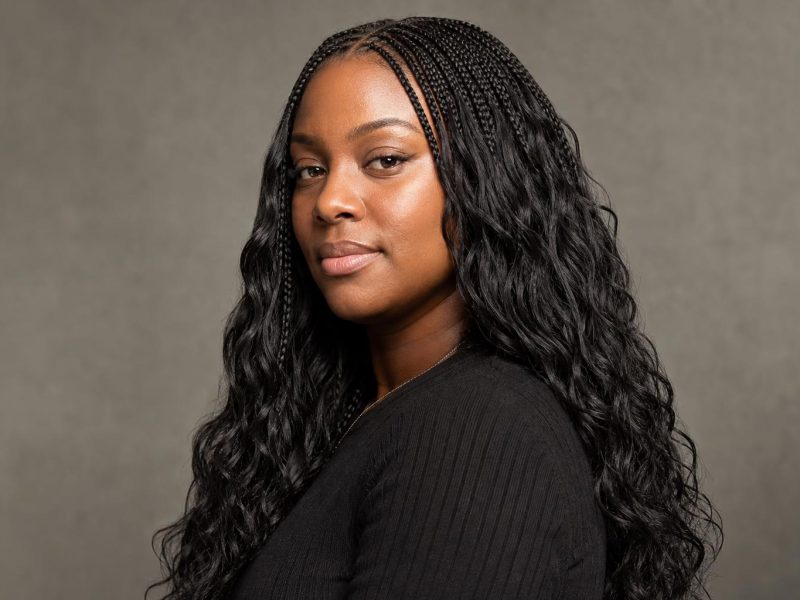
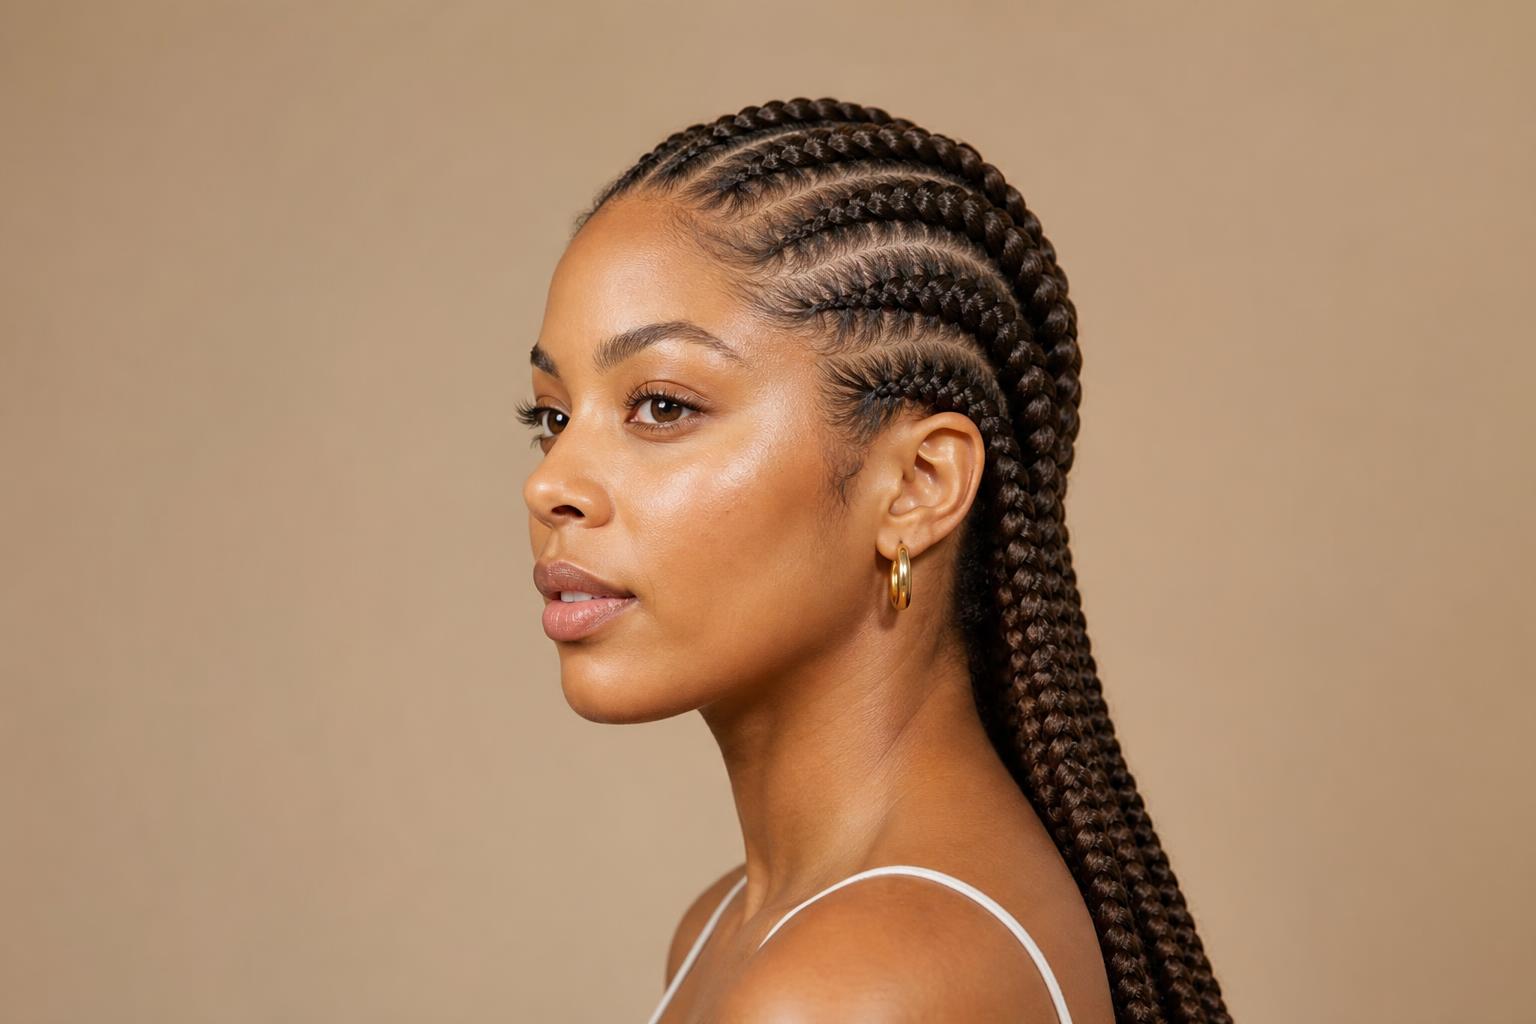
Ghana braids are cornrows fed with extension hair so each row starts thin at the hairline and thickens as it travels back, which is why the shape looks fuller than a standard cornrow without pulling any harder at the roots.
The defining feature is the feed, not the pattern. Your braider starts with a small amount of your own hair at the front, then adds extension hair in small increments along the row, so the braid swells gradually instead of starting fat at the hairline. That gradual build is what gives Ghana braids their banana shape, and it also keeps the weight off the most fragile hair you have.
Below are 25 Ghana braid patterns sorted by parting style, from plain straight-backs through curved and zigzag partings, gathered styles and mixed-technique versions. After the gallery you will find install times and wear length by pattern, which partings suit which hairline, the exact language to give a braider, and the signs that tension has gone too far.
Straight-Back Ghana Braid Patterns
Straight-back rows run from the hairline to the nape in parallel lines, and they are the fastest, cheapest and least fussy version of the style. Row count is the only real variable, and it changes everything about how the finished head looks. Fewer, thicker rows look bold and take two hours; twelve or more thin rows take five and give a much finer, more detailed surface.
1. Six Straight-Back Ghana Braids
Six rows is the sweet spot most braiders will suggest for a first attempt, thick enough to build a visible taper along each braid but not so heavy that the scalp carries real weight. Parting lines stay wide, which keeps the whole install around two and a half hours. Anyone new to feed-in work should start here before committing to a finer pattern, or look at the tighter grids in our gallery of cornrow-inspired tribal braid sizes.
2. Ten Thin Straight-Back Braids
Doubling the row count halves the thickness of each braid and creates a much finer grid across the scalp. Fine or low-density hair benefits here, because thin rows spread the extension weight across more anchor points instead of loading four heavy braids. Budget four to five hours and expect a higher price for the extra parting work.
3. Four Thick Banana Braids
Four rows produce the most dramatic version of the taper, each braid narrow as a pencil at the hairline and as wide as two fingers by the crown. Thick, dense natural hair handles these best because there is enough of your own hair in each section to grip the added length. The trade-off is weight, so keep the extension length shorter than waist level.
4. Straight-Back with a Middle Part Split
Splitting the pattern down the center and running rows back on each side softens the severity of a full straight-back set. A visible center parting breaks up the forehead and gives the style somewhere to fall other than straight back. Ask for the center part to be cut slightly off-true if your natural part already falls to one side.
5. Straight-Back with Loose Ends Left Long
Instead of braiding all the way to the tips, the braider stops at shoulder level and leaves the extension hair loose below it. The finish looks softer than a fully braided set and moves like loose hair while keeping the scalp pattern crisp. Wavy or curly extension hair works better than straight for this finish, since loose straight ends can separate and look sparse.
6. Straight-Back with Alternating Thick and Thin Rows
Alternating one wide braid with one narrow braid gives a rhythm across the scalp that a uniform set cannot. Square and rectangular face shapes gain from the irregularity, which draws the eye across rather than straight back. Bring a photo for this one, because braiders execute alternating widths very differently from each other.
Curved, Zigzag and Side-Swept Patterns
Once the partings stop being straight, the pattern itself becomes the design. Curved and zigzag partings take longer because each line has to be drawn before any braiding starts, and a braider who rushes the parting stage will leave you with lines that wobble. Allow an extra hour over the equivalent straight-back count and look closely at parting photos in a braider portfolio before booking.
7. Curved Side-Swept Ghana Braids
All rows sweep from one side of the head toward the opposite shoulder in long arcs, which puts asymmetry into a style that is often rigidly symmetrical. Round faces gain the most because the diagonal line cuts across the width of the cheeks. Tell the braider which side you want the volume to land on, since the sweep direction is difficult to change once started.
8. Zigzag Parted Ghana Braids
Sharp angled partings between the rows create a lightning pattern across the scalp that shows most clearly on a freshly washed head. The zigzag itself hides new growth for longer than a straight line does, so the style stays presentable further into week five. Precision matters more here than in any other pattern, and it is worth paying for a braider whose partings are genuinely clean.
9. Halo Braid Wrapped Around the Crown
Two long feed-in braids run from the nape up and around the head, meeting at the front to form a crown. Because the finished style carries no hanging length, it works well through a hot summer or under a helmet. Keep the tension deliberately loose at the temples, where a wrapped braid pulls hardest.
10. Diagonal Braids Sweeping to One Shoulder
Rows travel across the head at a slant and gather over one shoulder, giving all the finished length somewhere to fall. Long or oblong faces suit this because horizontal movement across the forehead shortens the visual length of the face. Ask for the front two rows to be angled slightly more steeply than the rest, which keeps the sweep from flattening at the hairline.
11. Heart-Shaped Parting at the Crown
A heart outline is carved into the crown partings, with braids radiating out from it into a straight-back pattern behind. Teens and children ask for this constantly, and it holds up well on smaller heads where the shape stays readable. Expect to pay for the extra hour of parting work on top of the braid count.
12. S-Curve Braids Along the Sides
Gentle S-shaped rows run along both sides while the center section stays straight back, which comes out far softer than a full zigzag. Soft curves flatter heart-shaped faces by adding width at the jaw where the shape narrows. Fine hair holds this pattern surprisingly well because the curve distributes tension across a longer line.
13. Spiral Parting Radiating from the Crown
Every braid begins at a single point on the crown and spirals outward, so the pattern looks like a fingerprint from above. It is the most technically demanding parting in this gallery and not every braider offers it. Six hours is realistic, and the style photographs far better than it feels in the first two days.
Ghana Braids Gathered into Ponytails, Buns and Half-Up Styles
Gathering the finished length changes the weight distribution completely. A hanging set pulls evenly downward, while a ponytail or bun concentrates the pull at one point, usually the crown. These styles look sharp and should be worn for shorter stretches than a hanging set, particularly if your edges are already thin.
14. Ghana Braid Ponytail at the Crown
Straight-back rows feed into one high ponytail, with the extension hair continuing as loose braids or a wrapped tail below. The gathering point does carry weight, so ask for it to be secured with a wrap rather than a tight elastic. Two weeks is a sensible wear window before the tension at the crown starts to matter.
15. High Bun with Straight-Back Feed-Ins
All rows travel up and back into a coiled bun at the top of the head, which keeps the neck clear and suits formal occasions. Oval and heart shapes carry the exposed hairline comfortably; a low forehead is better served by leaving the front two rows slightly looser and lower. A satin scarf at night keeps the bun from flattening on one side.
16. Half-Up Ghana Braids with Loose Curls
Only the top half of the head is braided, with the braids gathered at the crown and curly extension hair left loose underneath. The combination gives the crisp scalp pattern of a feed-in style with the movement of loose hair, which suits anyone not ready for a fully braided head. Loose curly hair needs a leave-in refresh every second day to stay defined, much like the hanging sets in our knotless braids with curly ends gallery.
17. Low Braided Ponytail at the Nape
Gathering at the nape rather than the crown puts the weight at the strongest point on the head and pulls almost nothing at the temples. Anyone recovering from thinning edges should pick this over any high style. The low position also stays comfortable to sleep on, which a crown bun does not, and it suits the sleeker gathered finishes covered in our sleek bun tutorial.
18. Double Buns with Side Partings
Rows split down the middle and gather into two buns, one on each side of the crown. Because the weight is divided between two points instead of one, the pull is gentler than a single high bun of the same length. Shorter extension hair keeps the buns compact and stops them drooping by day three.
Ghana Braids Mixed with Other Techniques and Color
The last group blends feed-in cornrows with texture, beads, cuffs and color. These are the styles that push install times toward seven hours and prices toward the top of a braider rate card, but they are also the ones that keep looking deliberate through week six. Color in particular does more work than any extra parting detail.
19. Ghana Braids with Curly Ends
Braiding stops around mid-back and the remaining extension hair is left as loose curls, which softens the whole silhouette. Curly ends cover the point where the braid stops, so the transition never looks unfinished. Refresh the curls with water and a light cream every two or three days, since dry curly extension hair tangles at the join.
20. Ghana Braids with Beads at the Ends
Wooden or glass beads threaded onto the final inches add sound and weight and stand out clearly against a plain straight-back pattern. Beads suit shorter sets better than waist-length ones, where added weight at the tip compounds the pull. Children wear this version constantly and it stays neat through a school week.
21. Ghana Braids with Gold Cuffs and Accent Rings
Metal cuffs clipped along the length of two or three braids give a Fulani-inspired finish without changing the pattern underneath. Placement matters more than quantity, and three well-spaced cuffs land better than a dozen crowded together. If the look you want leans further into that tradition, our gallery of Fulani braid patterns and placements covers the full range.
22. Ghana Braids in a Burgundy Ombre
Dark roots fading into burgundy from the mid-length down gives depth to a pattern that can otherwise flatten under a single color. Deeper skin tones and warm undertones carry burgundy particularly well, and the shade stays readable indoors where brighter reds do not. Because the color lives in the extension hair, none of it touches your own strands.
23. Ghana Braids with Loose Boho Pieces
Wavy strands are left hanging free between the braids, breaking up the structure with deliberately undone texture, the same treatment that drives our boho knotless braid collection. The boho treatment pairs best with thicker, fewer rows, where the loose pieces have space to read as a choice. Expect the loose hair to need brushing out daily or it will knot into the braid line.
24. Ghana Braids with Two Buns and a Long Tail
Two compact buns near the crown with the remaining braids hanging long behind them combines a gathered front with a flowing back. Tall or oblong faces balance well against the horizontal line the buns create. Tell the braider to build the buns from the front rows only, or the whole set ends up pulled upward.
25. Honey Blonde Highlights on the Outer Rows
Keeping the center rows dark and running honey blonde extension hair through the outer ones frames the face without committing to a full head of color. The contrast is strong enough to show in daylight and subtle enough for an office. Ask the braider to mirror the placement on both sides, since uneven highlight rows are the most common complaint with this finish.
Ghana Braids, Feed-In Cornrows and Box Braids Are Not the Same Thing
The naming is genuinely inconsistent from salon to salon, which is why so many booking conversations go wrong. Some braiders use Ghana braids and feed-in cornrows as exact synonyms; others reserve Ghana braids for the thicker, more tapered result and use feed-in for finer work. Describing the physical result rather than picking a name is the only reliable way to book what you want.
| Feature | Ghana Braids | Plain Cornrows | Box Braids |
|---|---|---|---|
| Braided against the scalp | Yes, flat to the head | Yes, flat to the head | No, hangs free from the root |
| Extension hair added | Fed in gradually along the row | Often none at all | All at once at the root |
| Thickness along the braid | Starts thin, thickens toward the back | Even throughout | Even throughout |
| Tension at the hairline | Low, weight builds away from the root | Low with no extensions | Higher, full weight at the root |
| Typical install time | 2 to 6 hours | 1 to 3 hours | 4 to 8 hours |
Anyone weighing the flat-to-scalp options against each other will find the full range of parting layouts in our gallery of trending cornrow styles and patterns, and the hanging alternatives compared in our collection of braided styles for Black women.
Install Time and Wear Length by Pattern
Row count drives the clock more than anything else, and parting complexity adds on top of it. Use the figures below to sanity-check a quote and to plan the day, because a braider who promises a spiral pattern in three hours is either rushing the partings or braiding too tight.
| Pattern | Typical Rows | Install Time | Comfortable Wear |
|---|---|---|---|
| Thick straight-back | 4 to 6 | 2 to 3 hours | 4 to 6 weeks |
| Fine straight-back | 10 to 14 | 4 to 5 hours | 5 to 6 weeks |
| Curved or side-swept | 6 to 10 | 4 to 6 hours | 4 to 6 weeks |
| Zigzag or geometric parting | 8 to 12 | 5 to 7 hours | 5 to 6 weeks |
| Gathered into a bun or ponytail | 6 to 10 | 3 to 5 hours | 2 to 3 weeks |
| Mixed texture, beads or color | 6 to 12 | 5 to 7 hours | 4 to 6 weeks |
Six weeks is the outer limit for any of these, and not because the braids stop looking good. New growth at the root loosens the grip of the braid while the extension weight stays the same, which is the point at which pulling starts to concentrate on fewer strands. Take them down while they still look neat rather than wearing them until they do not.
Choosing a Parting Pattern for Your Hairline and Face Shape
Ghana braids expose the hairline completely, so the parting layout does the same job a fringe or face-framing layer does in a cut. Match the pattern to the proportion you want to change rather than to whichever photo has the most saves.
| Face Shape | Best Pattern | Finished Length | Avoid |
|---|---|---|---|
| Oval | Almost any, including spiral and geometric | Any | Nothing structural; pick by lifestyle |
| Round | Curved side-swept or diagonal rows | Past the shoulder | Wide double buns level with the cheeks |
| Square | Alternating widths or soft S-curves | Mid-back | Rigid straight-back with a hard center part |
| Heart | S-curve sides with volume kept low | Collarbone to mid-back | High crown buns that widen the forehead |
| Oblong or long | Diagonal sweep or double buns | Shoulder length | Waist-length hanging sets with no width |
| Thinning or receded edges | Fine rows starting behind the hairline | Shoulder length or shorter | Any gathered style, beads, or waist length |
What to Tell Your Braider
Say the row count, the parting shape, the finished length and where you want the weight to fall. Those four details settle almost every misunderstanding, because they describe the result physically rather than relying on a style name two people may define differently.
A workable script sounds like this. Eight rows, straight back with a soft curve toward the left shoulder, fed in gradually so the front inch stays thin, finished at mid-back, nothing gathered. Then add the one line that matters most, which is that you want the front hairline rows braided loosely enough that you can move your eyebrows without feeling it.
Stylist tip: Speak up during the first two rows, not at the end. Tension is set row by row and a braider can redo the first two in minutes, while asking for a whole head to be loosened after five hours means starting again.
Ask about the extension hair too. Pre-stretched braiding hair saves an hour of prep, and a braider who lets you pick the pack is usually one who will also match the color across both sides properly. If you want the finished set to look closer to loose natural texture at the ends, say so before the first braid, not after.
When Ghana Braids Are Not the Right Choice
The feed-in method is gentler than loading full extension weight at the root, but gentler is not the same as harmless. Traction alopecia is common enough in this population to take seriously. A review of clinical and cultural patterns in traction alopecia cites South African population data where 31.7 percent of adult women showed traction-related hair changes, against 2.3 percent of men, with prevalence in children aged 6 to 15 ranging from 8.6 to 21.7 percent. Skip or delay Ghana braids in these situations.
- Your edges are already sparse or receding, since exposed hairline rows put the pull exactly where the hair is thinnest.
- The scalp is sore, flaking or broken out right now, because a braid pattern seals the problem in for weeks.
- You had a relaxer or color service in the past two weeks and the hair is still fragile from the chemical process.
- You cannot commit to taking them down inside six weeks, which is when the grip at the root loosens while the weight stays put.
- Bumps, tenting at the root or a headache appear in the first 48 hours, all of which mean the set is too tight and needs loosening rather than waiting out.
- You are going straight back into another protective style with no rest period, because back-to-back installs give the hairline no recovery time.
The American Academy of Dermatology lists tight braids, cornrows and extensions among the styles most likely to cause permanent hair loss when worn repeatedly, and pain during or after a braiding appointment is the clearest signal that damage is being done. Pain is never part of a correct install.
Caring for Ghana Braids While You Wear Them
Cleanse the scalp roughly every 7 to 10 days with diluted shampoo in an applicator bottle, aimed at the parting lines rather than the braids themselves. Squeeze rather than rub, then press a towel along the rows and let them air-dry fully before bed, since damp braids at the root are how odor and itching start. A light oil on the partings two or three times a week keeps the exposed scalp comfortable without building up.
Stylist tip: Sleep in a satin scarf or bonnet from the first night, not from week three when the frizz has already arrived. Cotton pillowcases lift the fine hairs along each parting, and once those are raised no amount of mousse puts them back down.
Around week four, flyaways along the partings are normal and can be smoothed with a small amount of mousse and a soft brush. Resist the urge to re-braid the front rows yourself, because that front hair has already carried the tension for a month and redoing it is where most edge damage happens. If the front is what keeps bothering you, our guide to braided styles that stay gentle on young hairlines covers lower-tension alternatives worth rotating into.
FAQ
How Long Do Ghana Braids Last?
Four to six weeks is the realistic window for a hanging set, and two to three weeks for anything gathered into a bun or high ponytail. The limit is not how the braids look but how the root behaves, since new growth loosens the braid grip while the extension weight stays constant. Taking them down at week five while they still look tidy protects the hairline far better than stretching to week eight.
Do Ghana Braids Damage Your Hair?
Correctly installed, they are one of the gentler extension styles, because feeding hair in gradually keeps the heaviest weight away from the root. Damage comes from three things, which are tension at install, wearing them too long, and going straight into another style without a rest. Give the scalp at least a week between installs and keep the finished length modest if your hair is fine.
How Much Do Ghana Braids Cost?
Prices vary enormously by city, braider experience and whether the extension hair is included, so treat any single figure with caution. What you can predict is the shape of the quote, since it tracks install time closely. A simple six-row straight-back lands at the bottom of any braider rate card and a spiral or geometric parting with color lands at the top.
Can You Get Ghana Braids on Short Hair?
Yes, and about four inches of natural length is the usual minimum for the braid to grip. Below that the front sections slip and the braider compensates by pulling tighter, which is exactly what you want to avoid. If your hair is shorter than that, cornrows without extensions or a set of flat twists will hold better while you grow it out.
Can You Wash Ghana Braids?
You should, roughly every week to ten days, using diluted shampoo in an applicator bottle along the parting lines. The part people skip is drying, and braids left damp at the root are the main source of the smell that shows up in week three. Air-dry completely before sleeping, and use a cool hairdryer at the nape if that area stays wet.
What Is the Difference Between Ghana Braids and Feed-In Braids?
In most salons the terms describe the same technique, which is why booking by name alone causes so much confusion. Where braiders do separate them, Ghana braids means the thicker, more strongly tapered result and feed-in means finer rows with a subtler build. Describe the row count and the thickness you want and the label stops mattering.
Ghana braids reward specificity more than almost any other protective style, because the same three words can mean four thick banana rows or fourteen fine ones depending on who is holding the comb. Pick the pattern for the proportion you want to change, name the row count and finished length out loud, insist on loose tension at the front, and take the set down at five or six weeks rather than pushing for one more.
This article is for general information and is not medical advice. If you notice hairline recession, scalp pain, bumps or persistent shedding after a braiding service, see a board-certified dermatologist or a trichologist experienced in textured hair.