

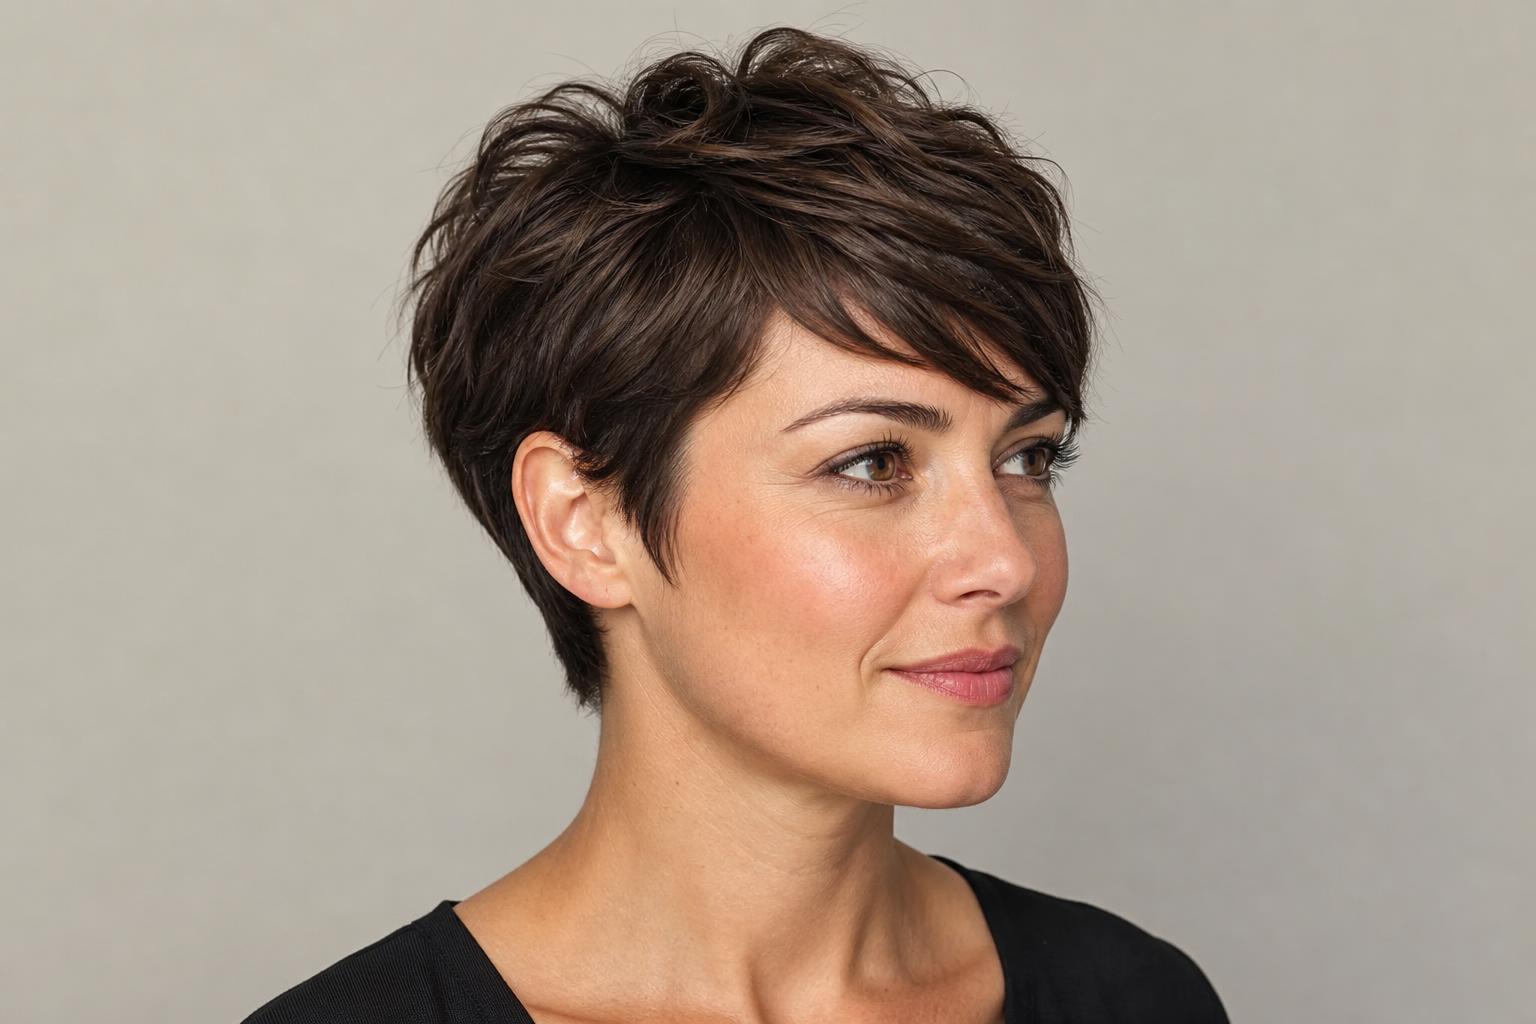
A square face and a pixie cut can be a perfect match, when the cut is designed to soften the jawline rather than mirror its shape.
The goal on a square face is diagonal movement and crown volume, not uniform length all around. Textured layers on top, side-swept fringe, and asymmetric lines all create the contrast that balances a strong jaw and wide forehead. These 25 pixie cuts for square faces are organized by technique so you can find the approach that suits your hair texture and styling comfort level.
Every entry explains the specific design detail that makes it work for a square face shape, and a face shape guidance table, salon script section, and limiting guide follow the gallery.
| Factor | Details |
|---|---|
| Face shape goal | Soften angular jaw, add diagonal movement, reduce visual equal-width at forehead and jaw |
| Best variations | Textured layered pixie, pixie with side-swept fringe, asymmetrical pixie, longer pixie or bixie |
| Hair textures | Fine to medium are easiest; thick hair needs internal thinning on the sides to avoid width |
| Avoid | Uniform buzz-length cut, straight-across blunt bangs, geometric lines that echo the jaw |
| Trim frequency | Every 4-6 weeks to keep the softening proportions crisp |
Textured and Layered Pixies
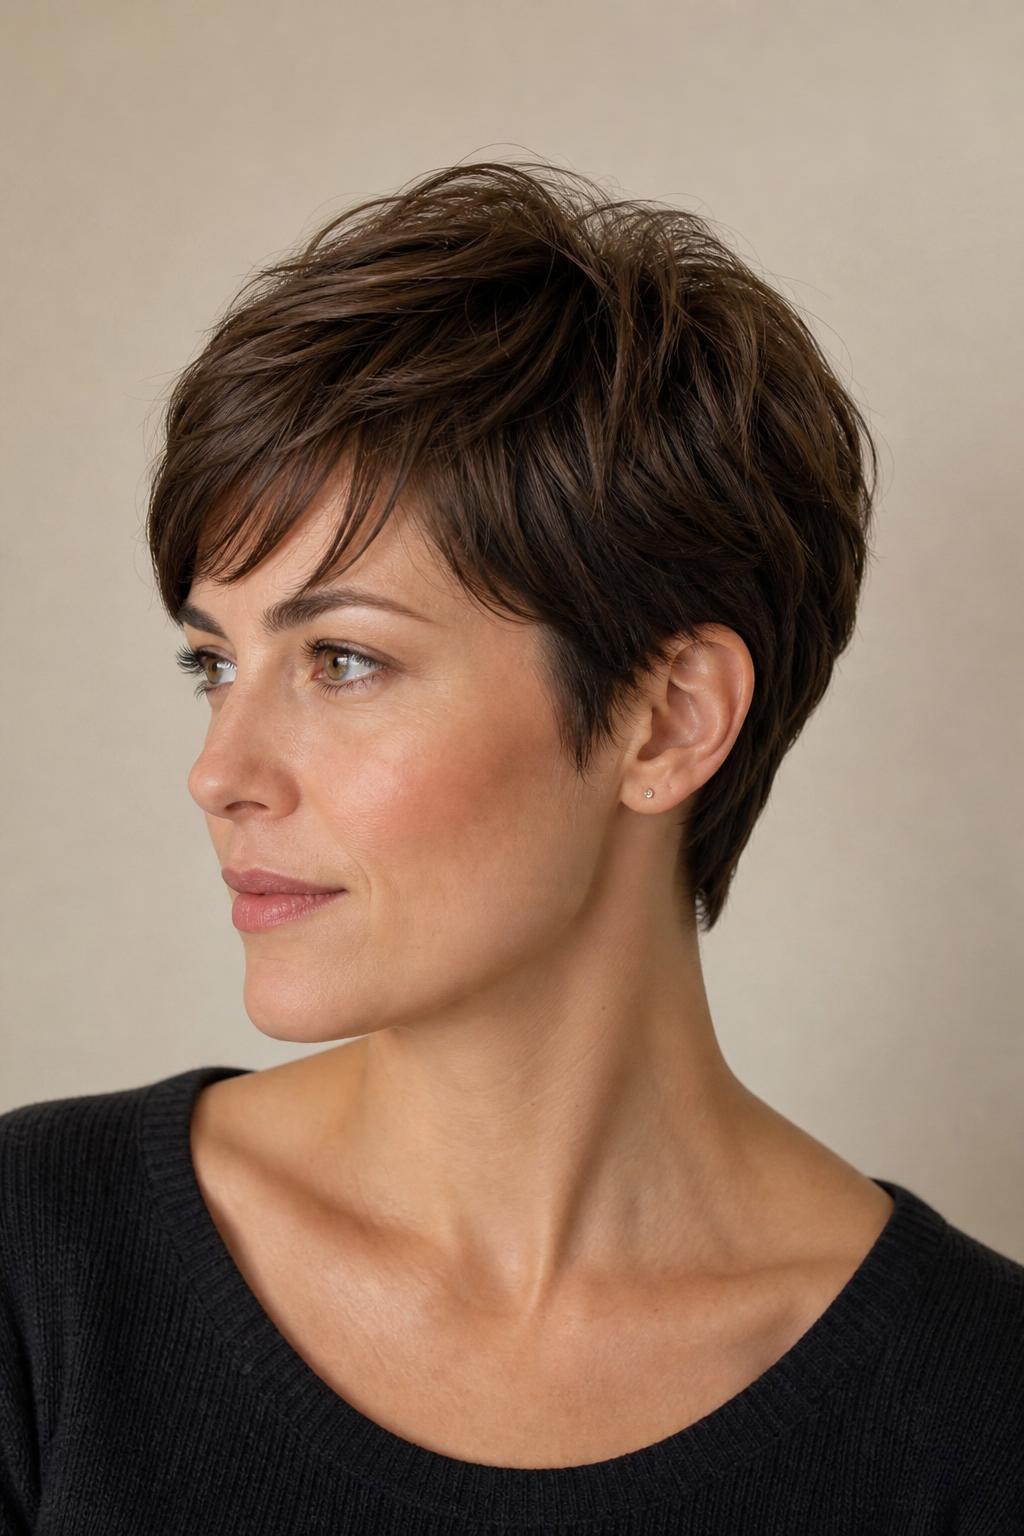
Texture is the most versatile softening tool for a square face. Point-cut or razor-cut layers on the crown break up the uniform silhouette and introduce the natural movement that works with a strong jaw rather than emphasizing it. These seven cuts use layering as their central technique.
1. Piece-Out Crown Pixie
Point-cut layers on the crown are styled apart with a small amount of texturizing paste, creating separated pieces that break up the hard horizontal line across the forehead. On medium-density hair, the separated pieces catch light and create a dynamic silhouette rather than a single flat plane. Growing out the crown pieces adds face-framing volume rather than becoming shapeless, making this one of the more forgiving pixie cuts for the grow-out phase.
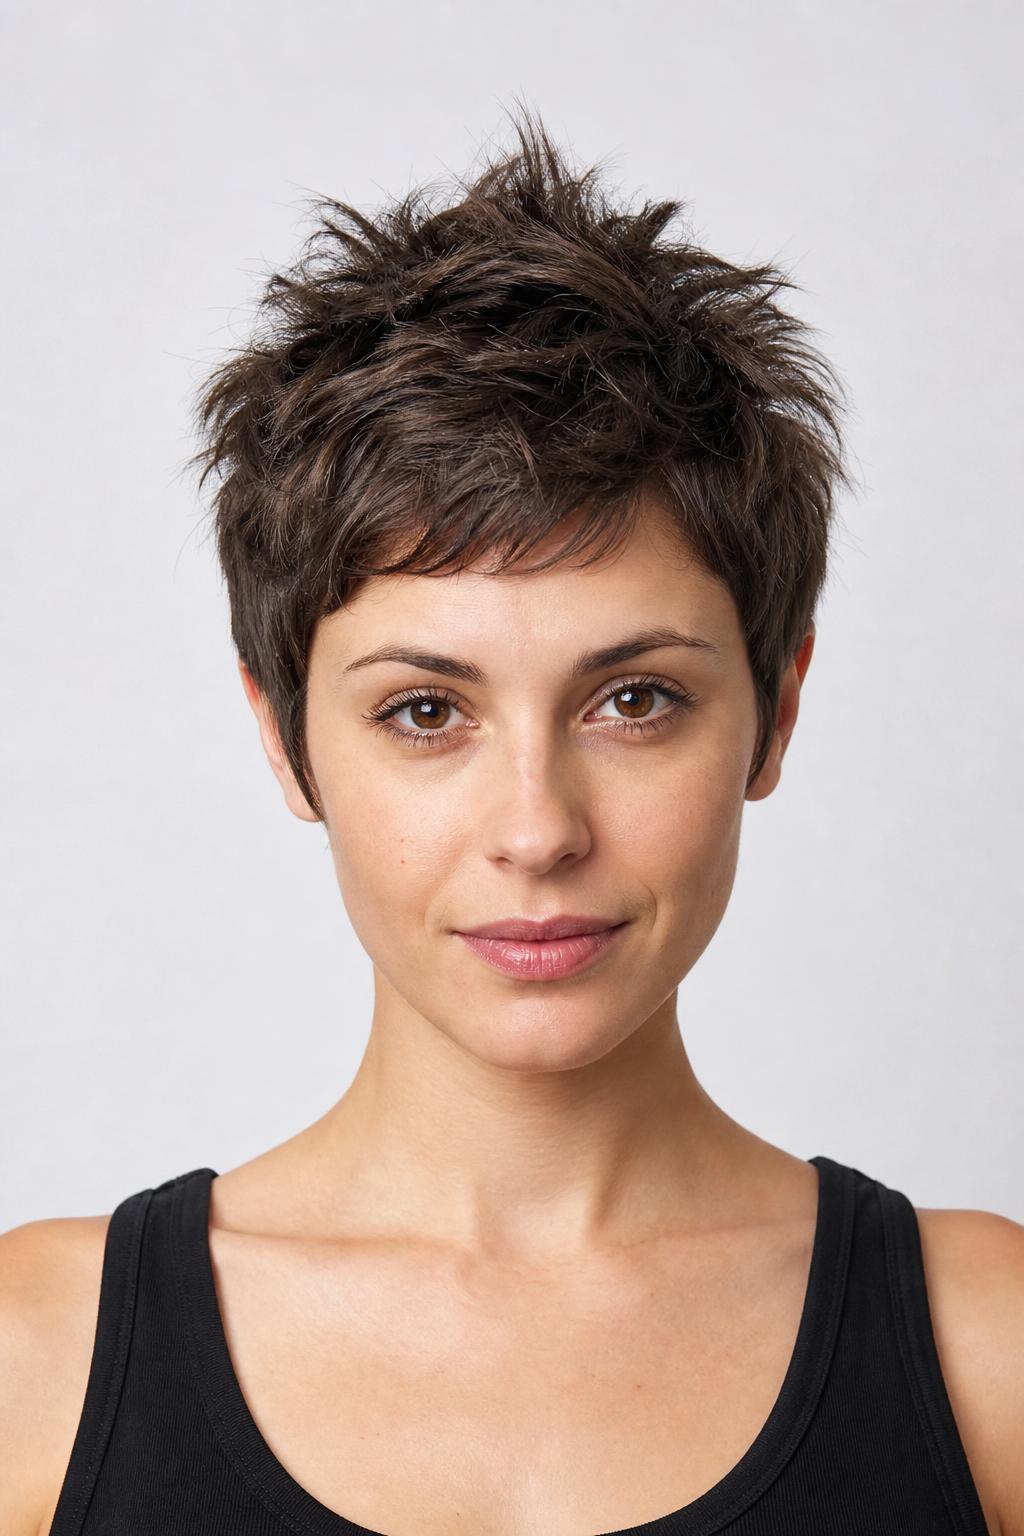
2. Fine-Hair Volume Pixie
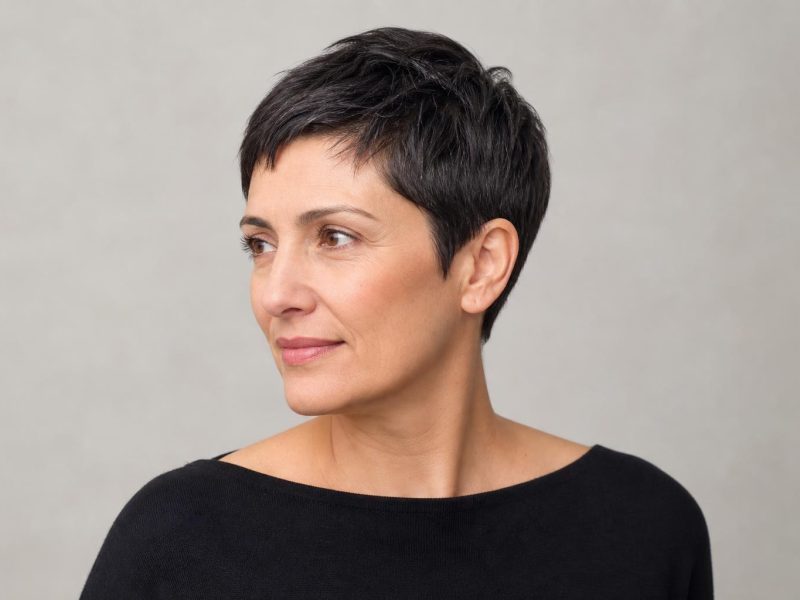
Fine hair and a square face both benefit from layers stacked toward the crown to build a lifted, rounded top, adding the height fine hair lacks naturally. A tapered neckline keeps the sides clean without adding width, and the crown lift draws the eye upward rather than across the jaw. Avoid razor cutting on fine hair; point cutting preserves the density the ends need to look full rather than wispy.
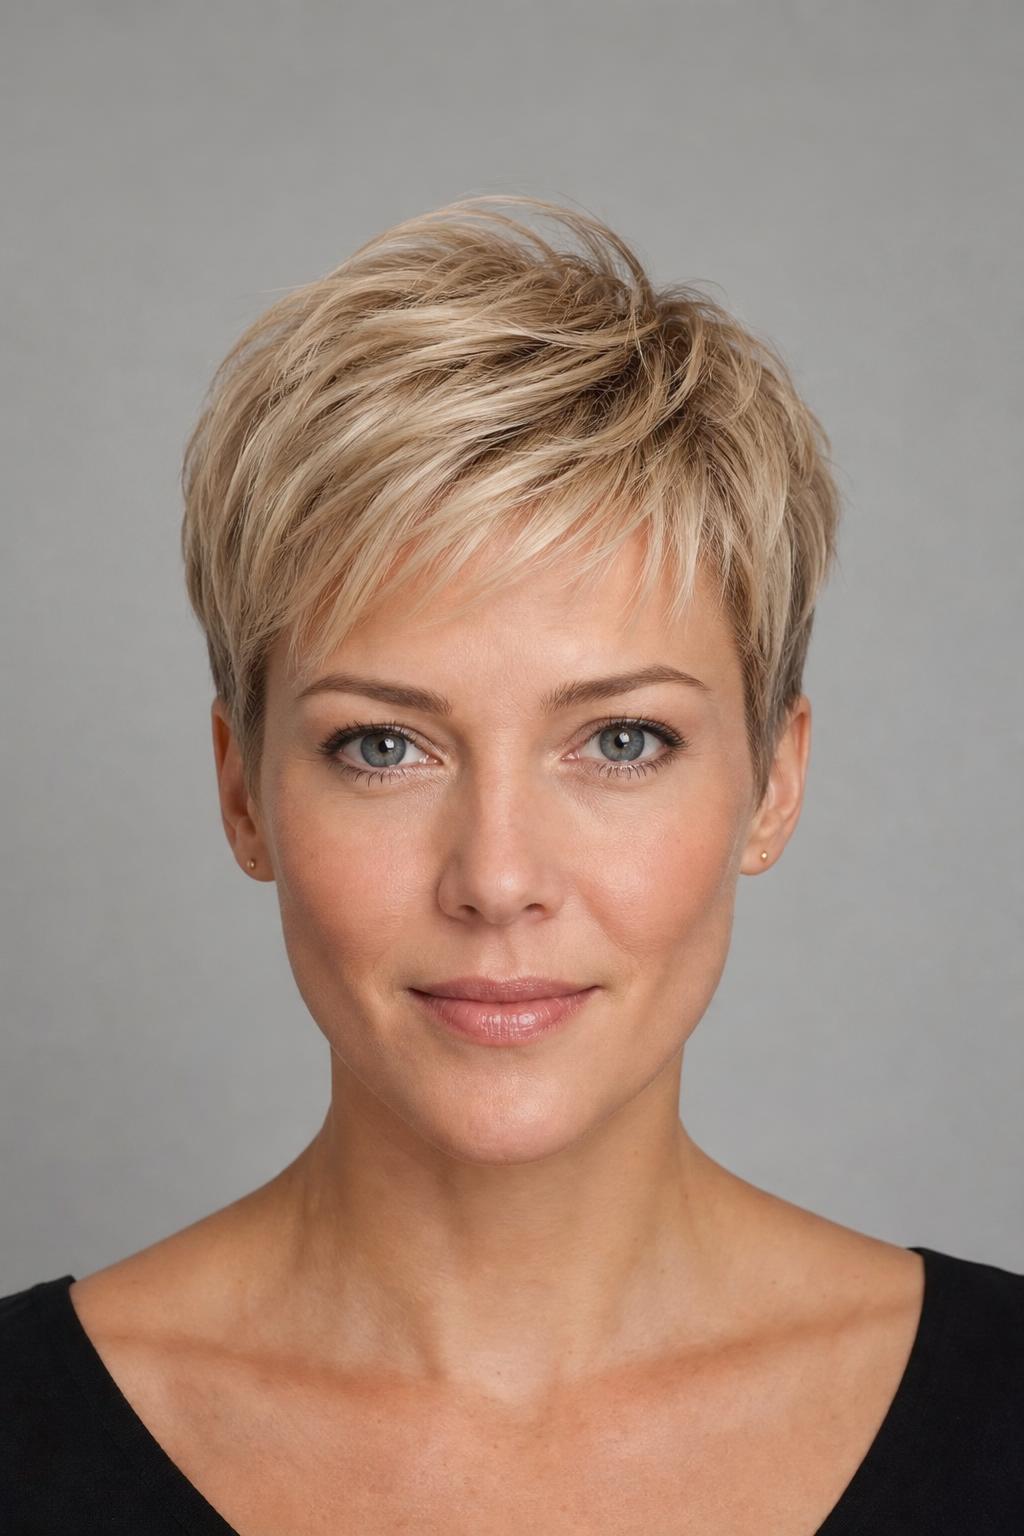
3. Lifted Crown with Jaw-Framing Pieces
Soft face-framing pieces left in front of the ears shift attention from the width of the jaw to the cheekbones and eyes. The crown is kept higher than the sides, creating a vertical line that visually elongates the face. For maximum effect, ask your stylist to leave the front sections about a centimeter longer than the side panels, that small length difference is what makes the framing possible on a square shape.
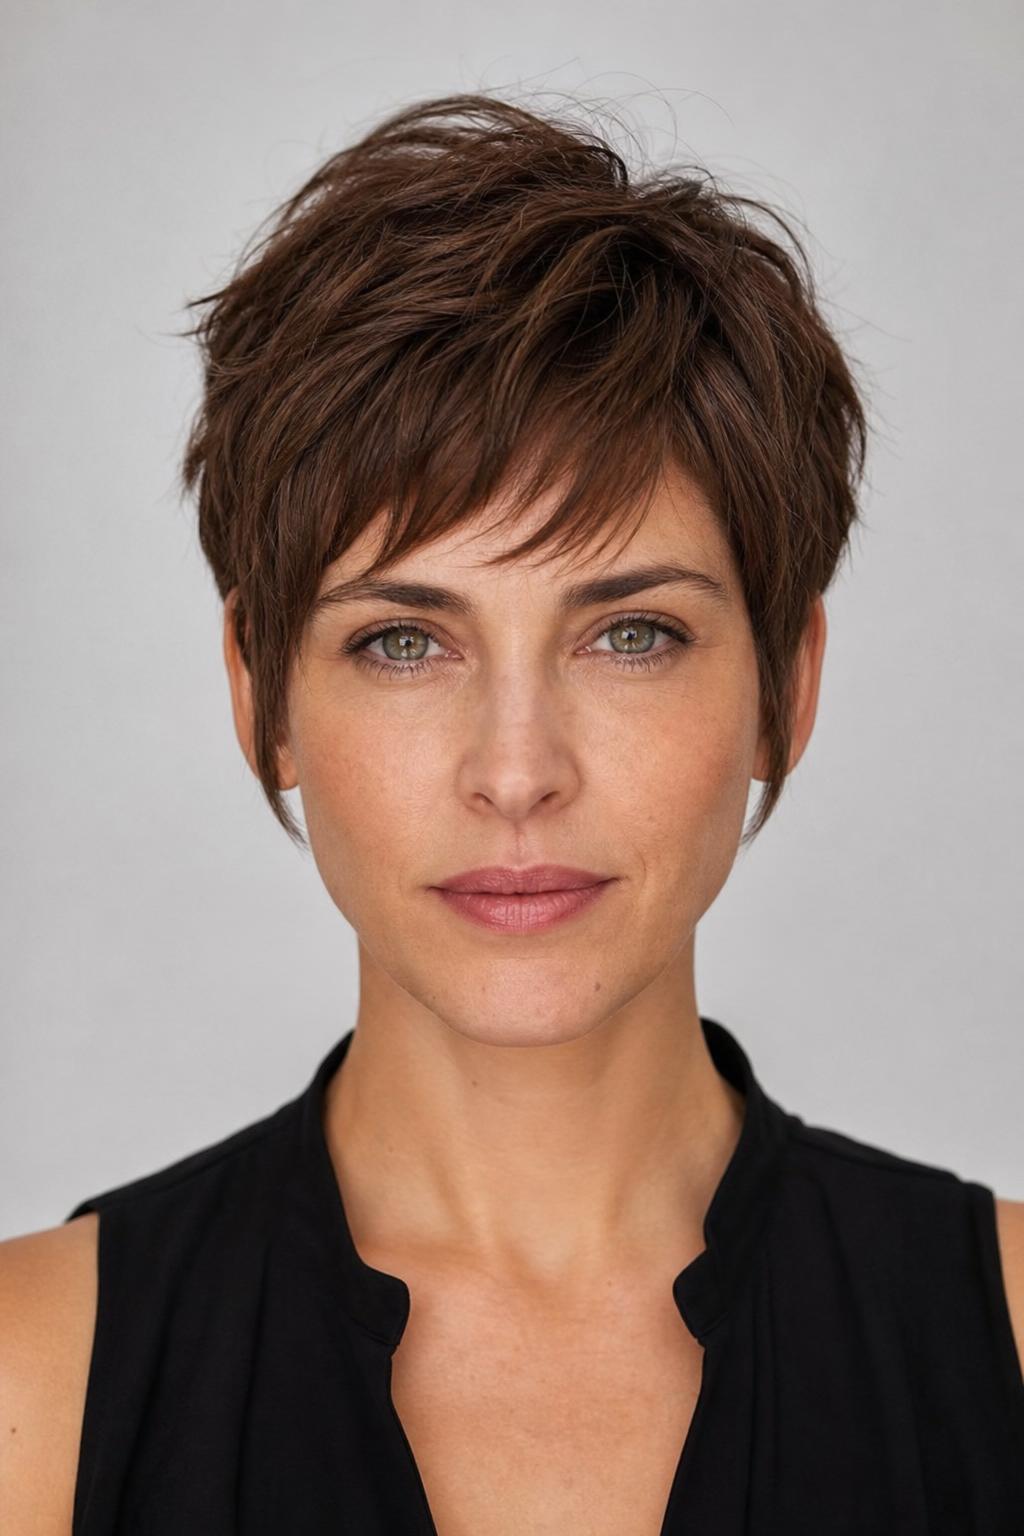
4. Tousled Finger-Styled Pixie
A sea-salt spray applied to towel-dried hair, then worked with fingers while a diffuser runs on low heat, gives this cut the organic movement that a brush-styled pixie cannot achieve. The slightly irregular texture is particularly effective on square faces because it never reads as structured or geometric. Wavy and naturally textured hair holds this style best; straight hair needs a light-hold cream to maintain the tousle through the day.
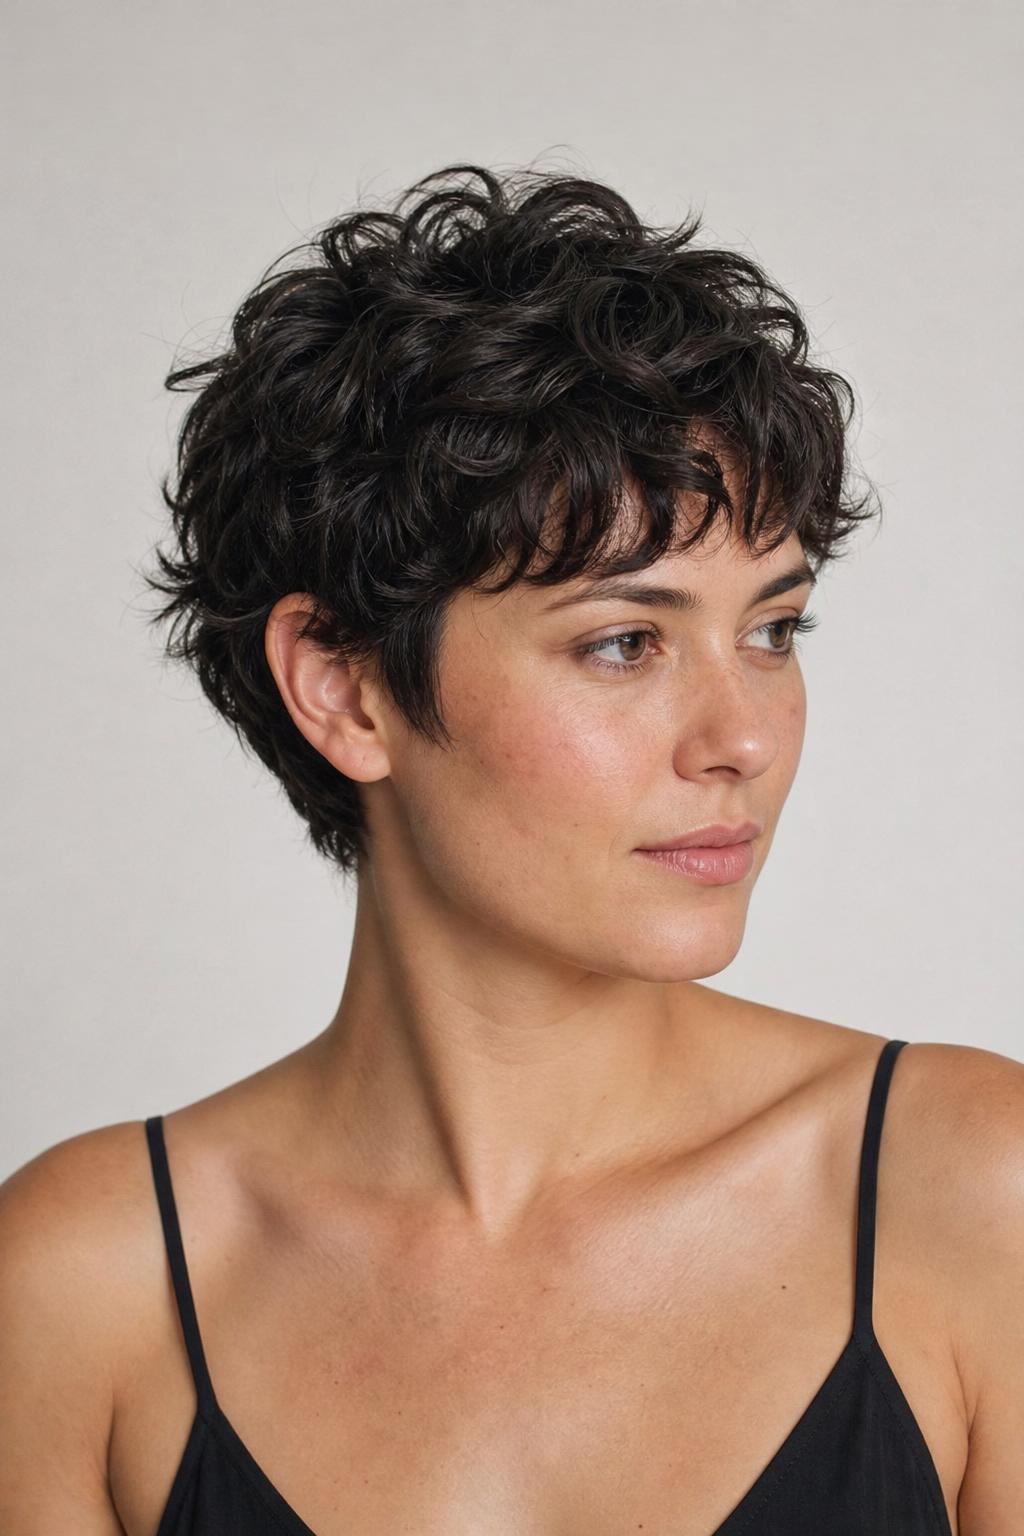
5. Grow-Friendly Textured Pixie
Slightly longer on top and more tapered at the sides, this version transitions into a pixie-mullet hybrid rather than an awkward in-between stage as it grows. On a square face, the grow-out naturally adds volume at the sides before reaching the nape, which is the only phase that needs management. Budget trims every 6-8 weeks rather than the usual 4-6, and use a flat iron or round brush to smooth the sides if they begin to widen.
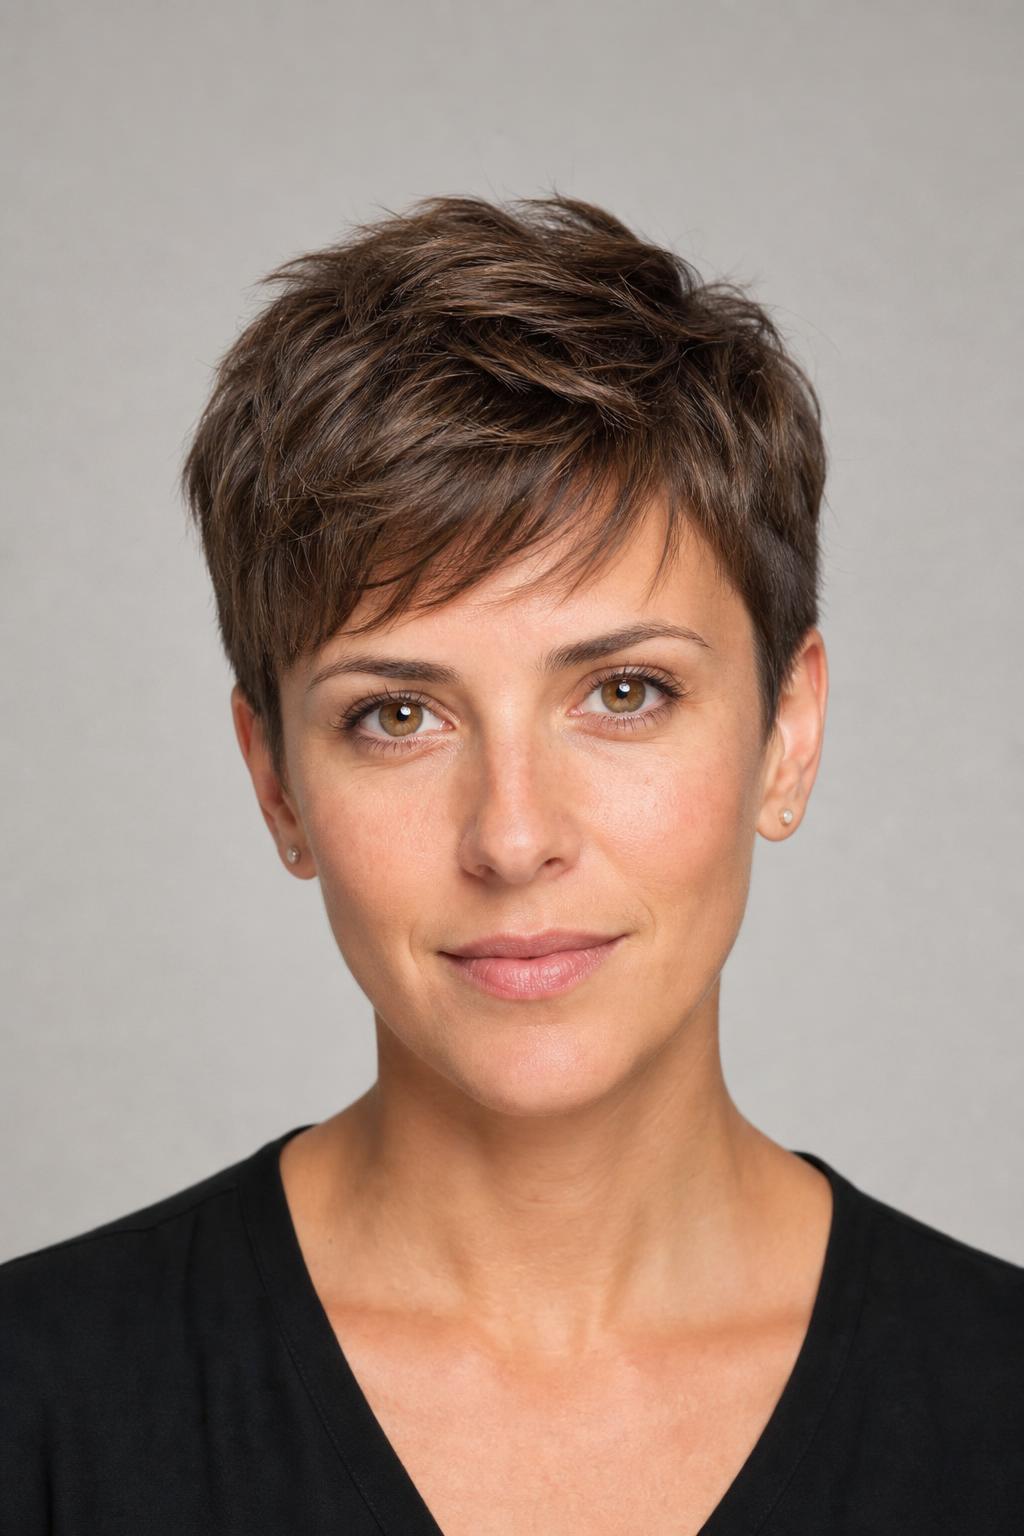
6. Cool-Tone Brunette Layered Pixie
Dimensional brunette color with ash or cool undertones adds depth to the layering on top, making each point-cut piece visually distinct and enhancing the separation the cut already creates. Face-framing highlights around the hairline draw attention to the eyes rather than the jaw. Cool-toned brunettes need a color-safe shampoo and a toning gloss every 8-10 weeks to keep the ash shade from shifting brassy between appointments.
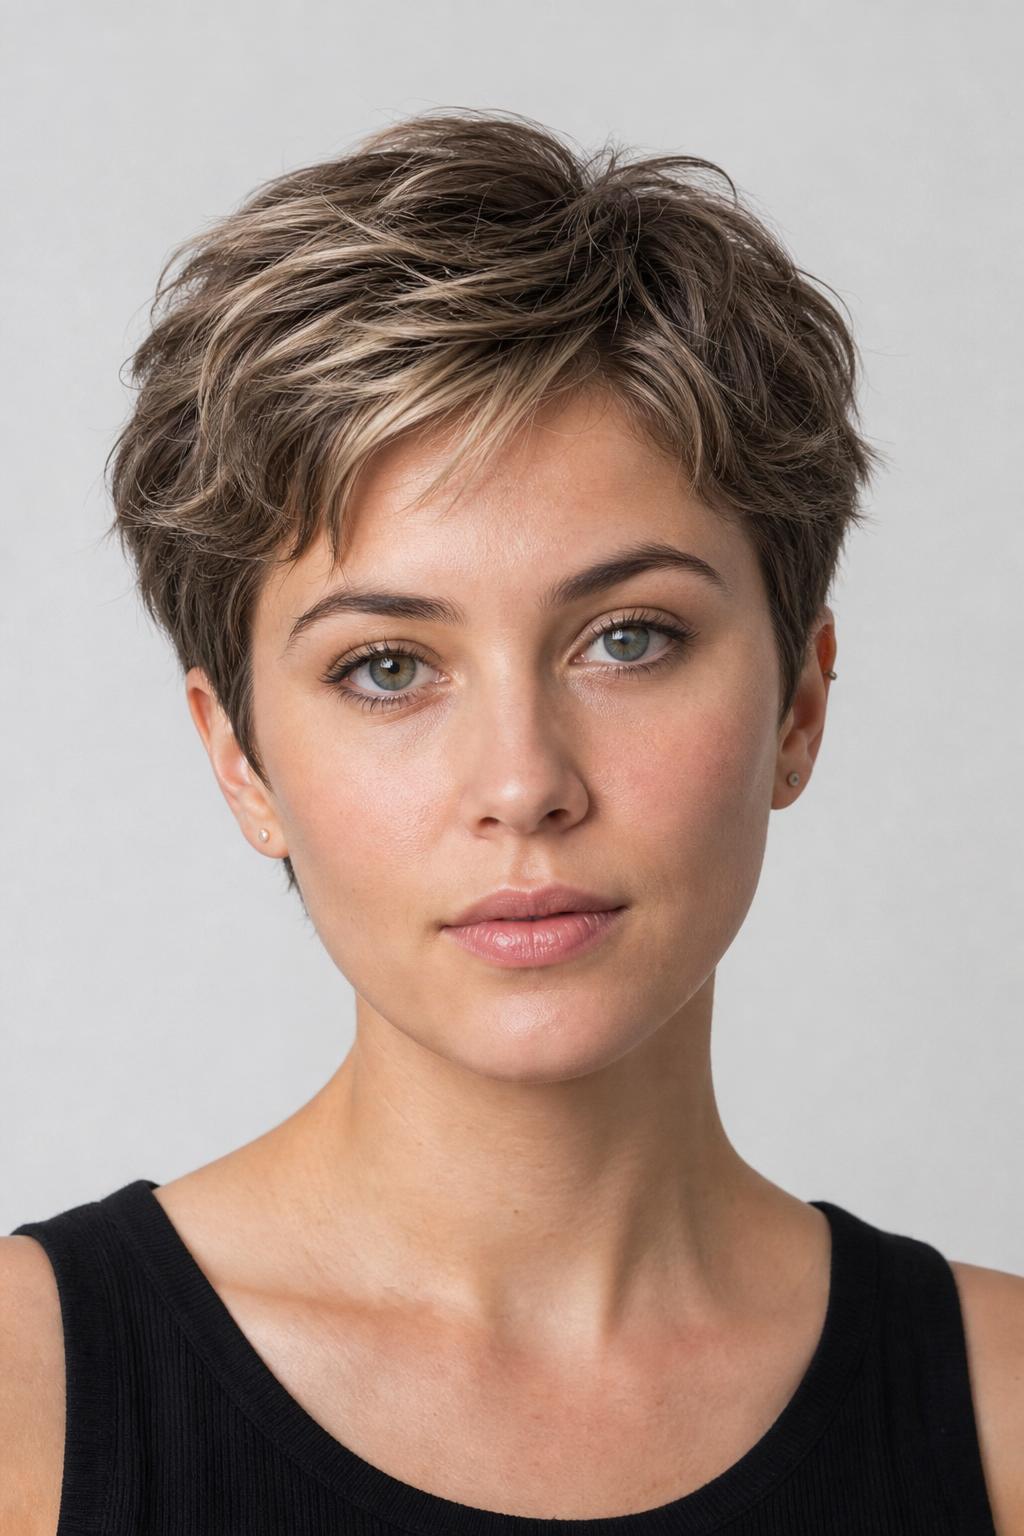
7. Piecey-Crown Script Pixie
Bring a photo and say: “textured pixie with point-cut layers on top for movement, tapered sides with no added width, and slightly longer pieces in front of the ears.” That request covers all three elements that matter for a square face. For thick hair, add “internal thinning through the sides, not the crown” to prevent the sides from expanding outward as they are cut, which is the most common mistake on thick hair at this length.
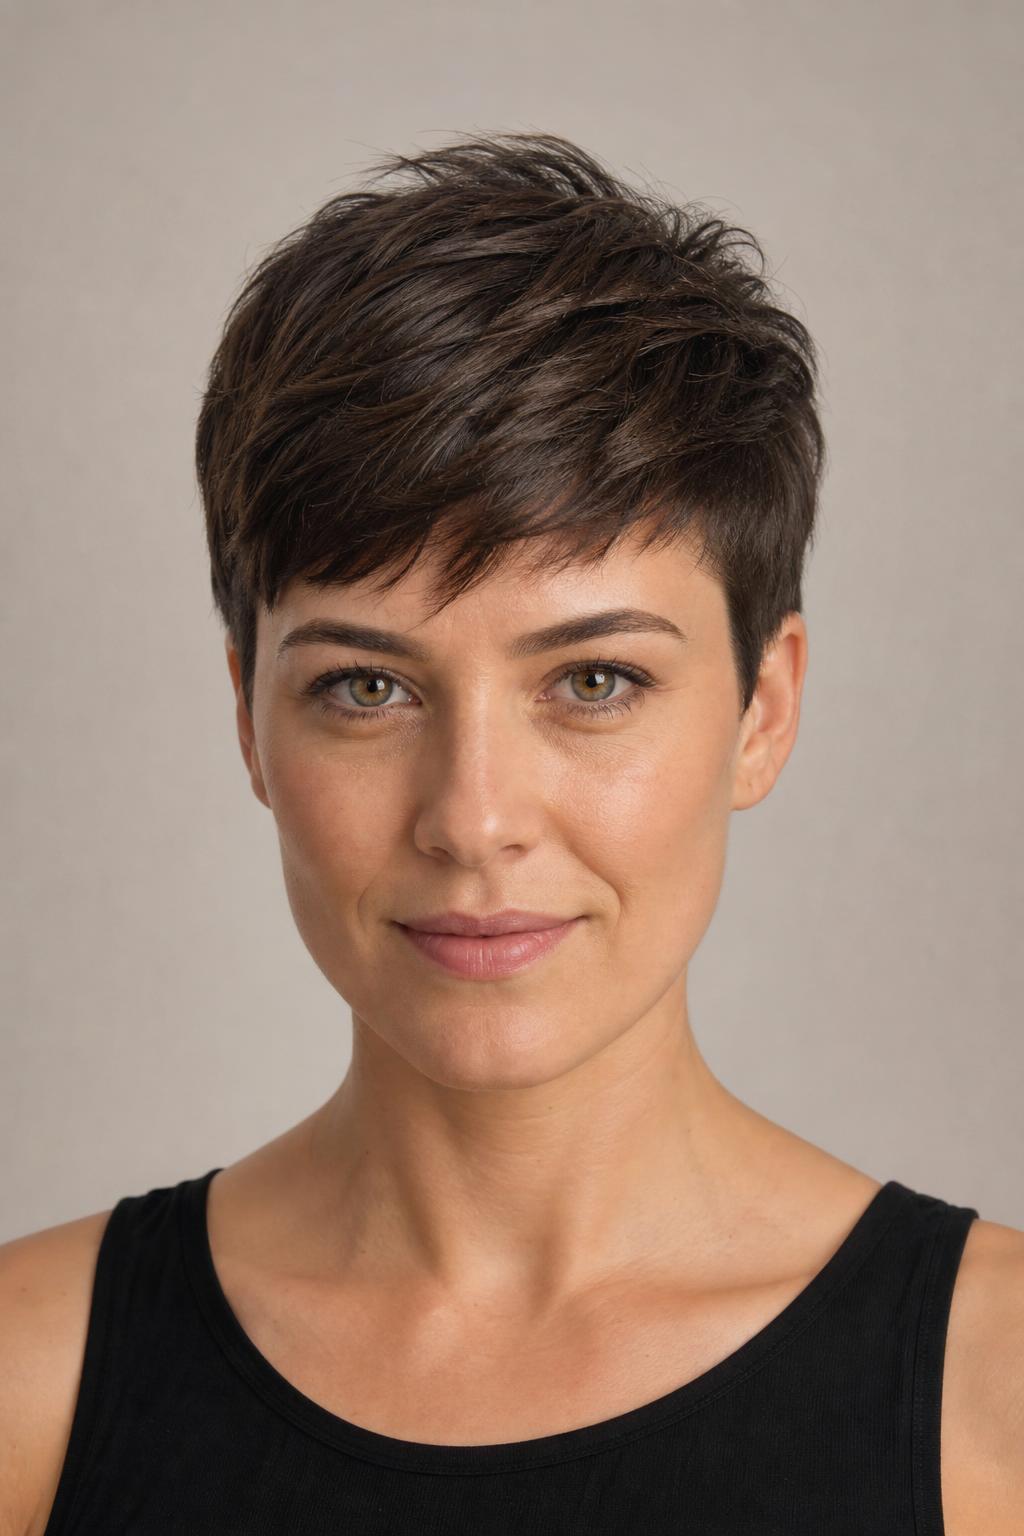
Pixies with Soft Fringe
A fringe does something most styling tricks cannot: it breaks the space between the crown and jaw, creating a horizontal visual interruption that divides the face into thirds. On a square face, soft fringe reduces the appearance of a wide, flat forehead. The angle of the fringe matters, though, because a side-swept or wispy style works well while a straight-across blunt-cut bang emphasizes the flat forehead rather than softening it.
8. Long Side-Swept Fringe Pixie
Unlike a classic pixie with uniform short length, this variation keeps the front sections long enough to sweep across the forehead at an angle, creating the diagonal line that square faces most benefit from. The fringe reaches the outer corner of the eyebrow on most face shapes, long enough to create movement, short enough not to feel like a traditional bang. Ask your stylist to point-cut the fringe edge; a blunt fringe line sharpens the geometric quality of a square face rather than reducing it.
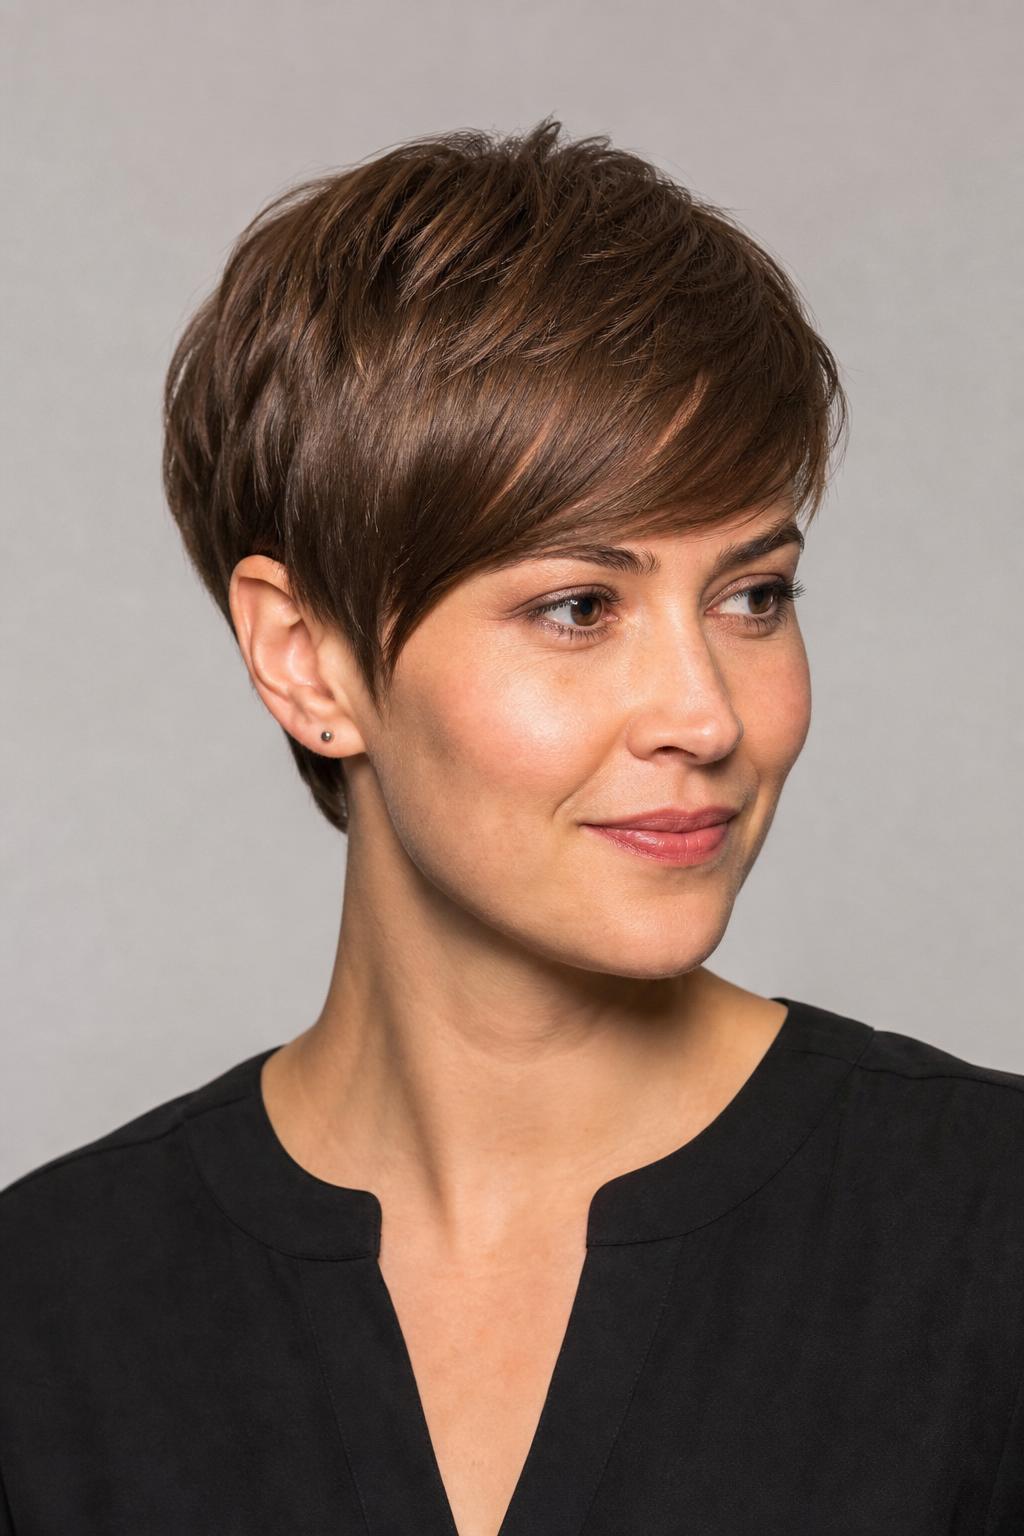
9. Curtain-Style Pixie Fringe
Parted in the center with soft pieces falling on each side, a curtain fringe on a pixie introduces symmetry without rigidity, the slight drape of each section draws attention to the center of the face rather than the edges. Fine-to-medium hair holds this style well with a light-hold mousse; thick hair needs thinning through the fringe sections or it sits heavy and flat. This pairs with a sheer see-through fringe if you want the lightest possible coverage on a square forehead.
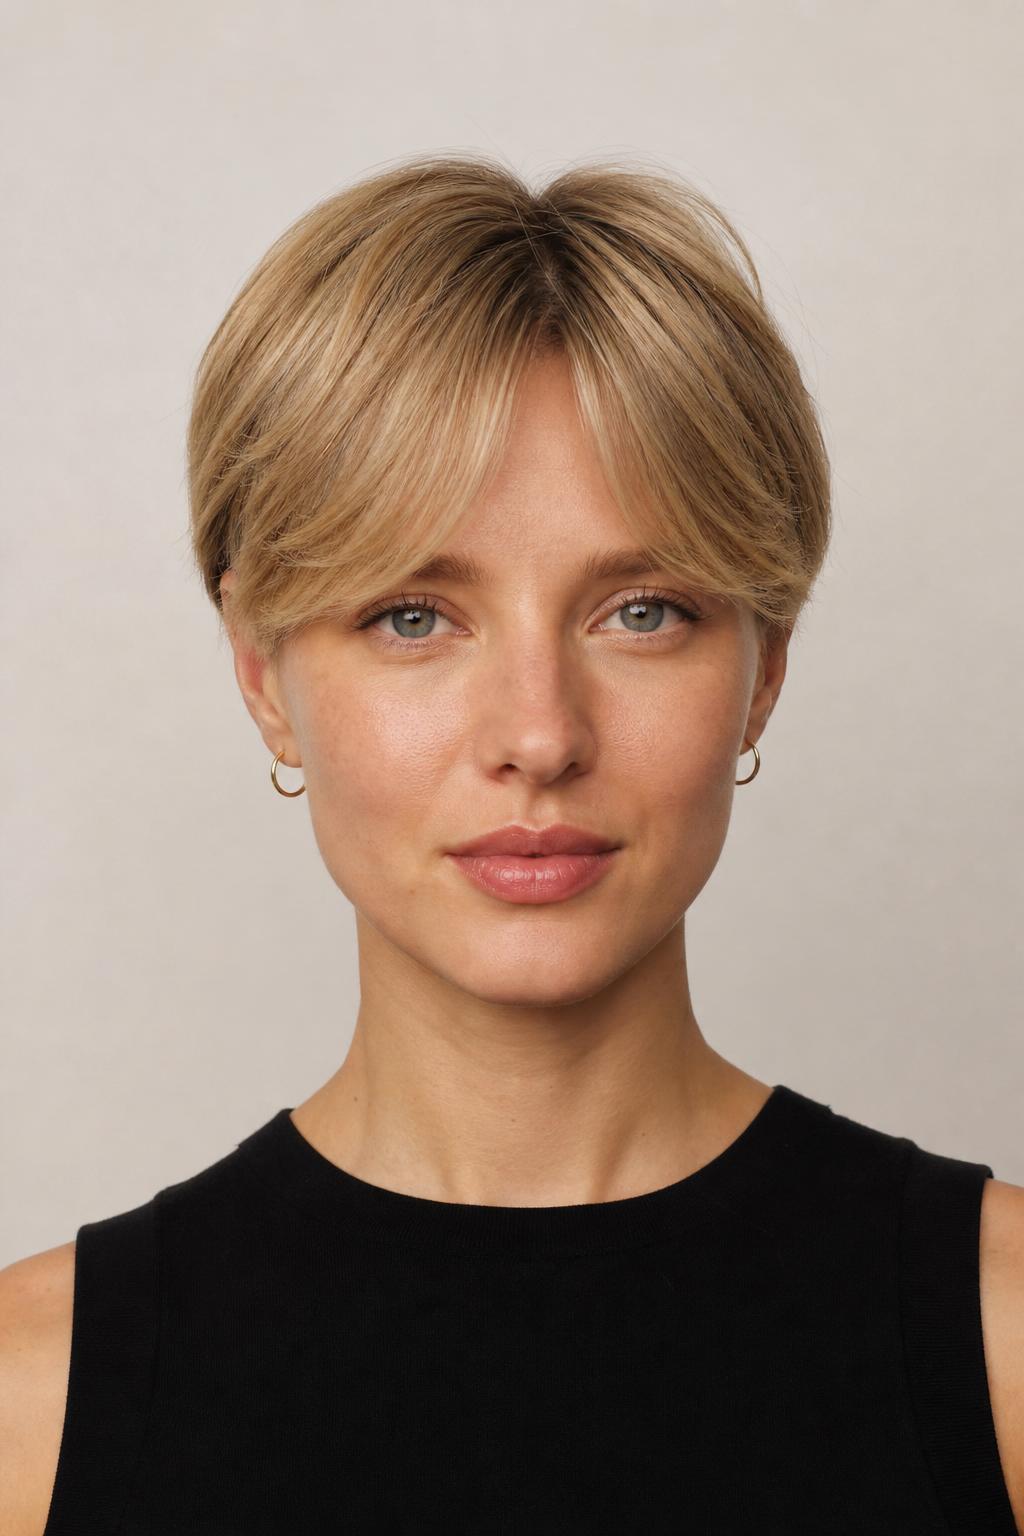
10. Wispy Brow-Grazing Fringe
Thin, wispy fringe that just grazes the eyebrows adds softness without coverage, well suited to fine hair where a full fringe risks looking flat and shapeless. The thin points of the fringe create visual interest at the forehead without forming a horizontal block that widens the face. Use a straightening comb and a light spritz of flexible-hold spray to keep wispy fringe from curling upward in humid conditions.
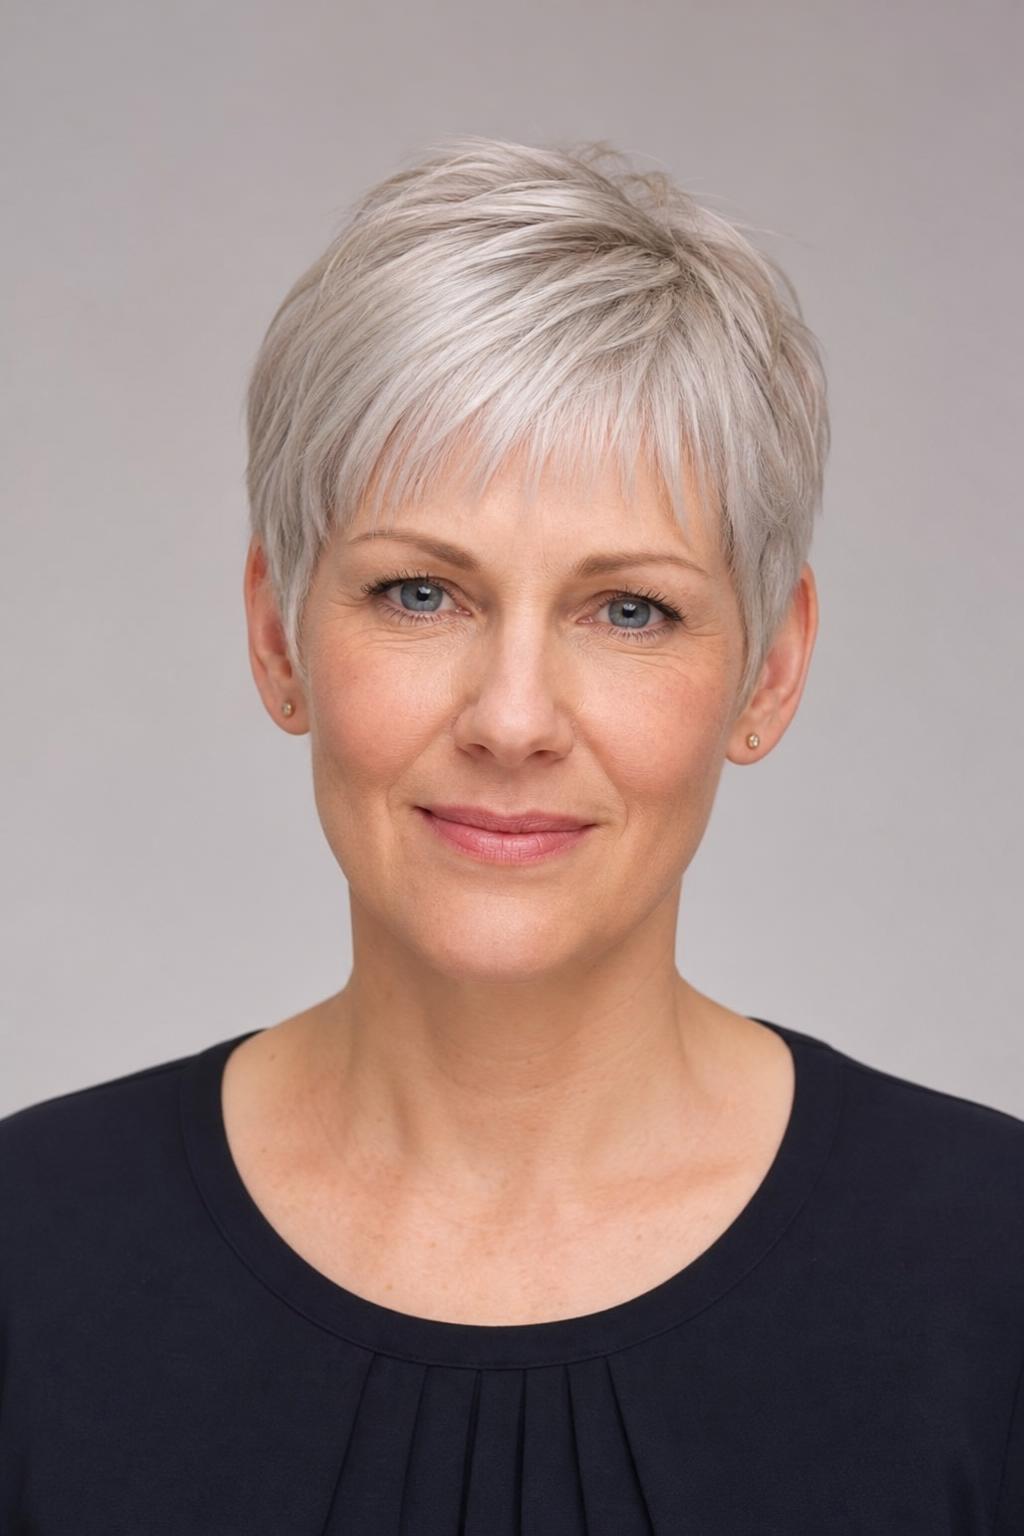
11. Angled Fringe with One-Sided Drop
An angled fringe that drops lower on one side creates a diagonal line across the forehead that runs opposite to the jaw’s horizontal line, introducing the asymmetry that reduces the boxy quality of a square face. Best for medium-thick hair with some natural movement; very fine hair needs a light-hold product to hold the fringe in its angled position throughout the day. A subtle variation is leaving the longer side at the eyebrow and the shorter side just above it, a gentle angle rather than a dramatic drop.
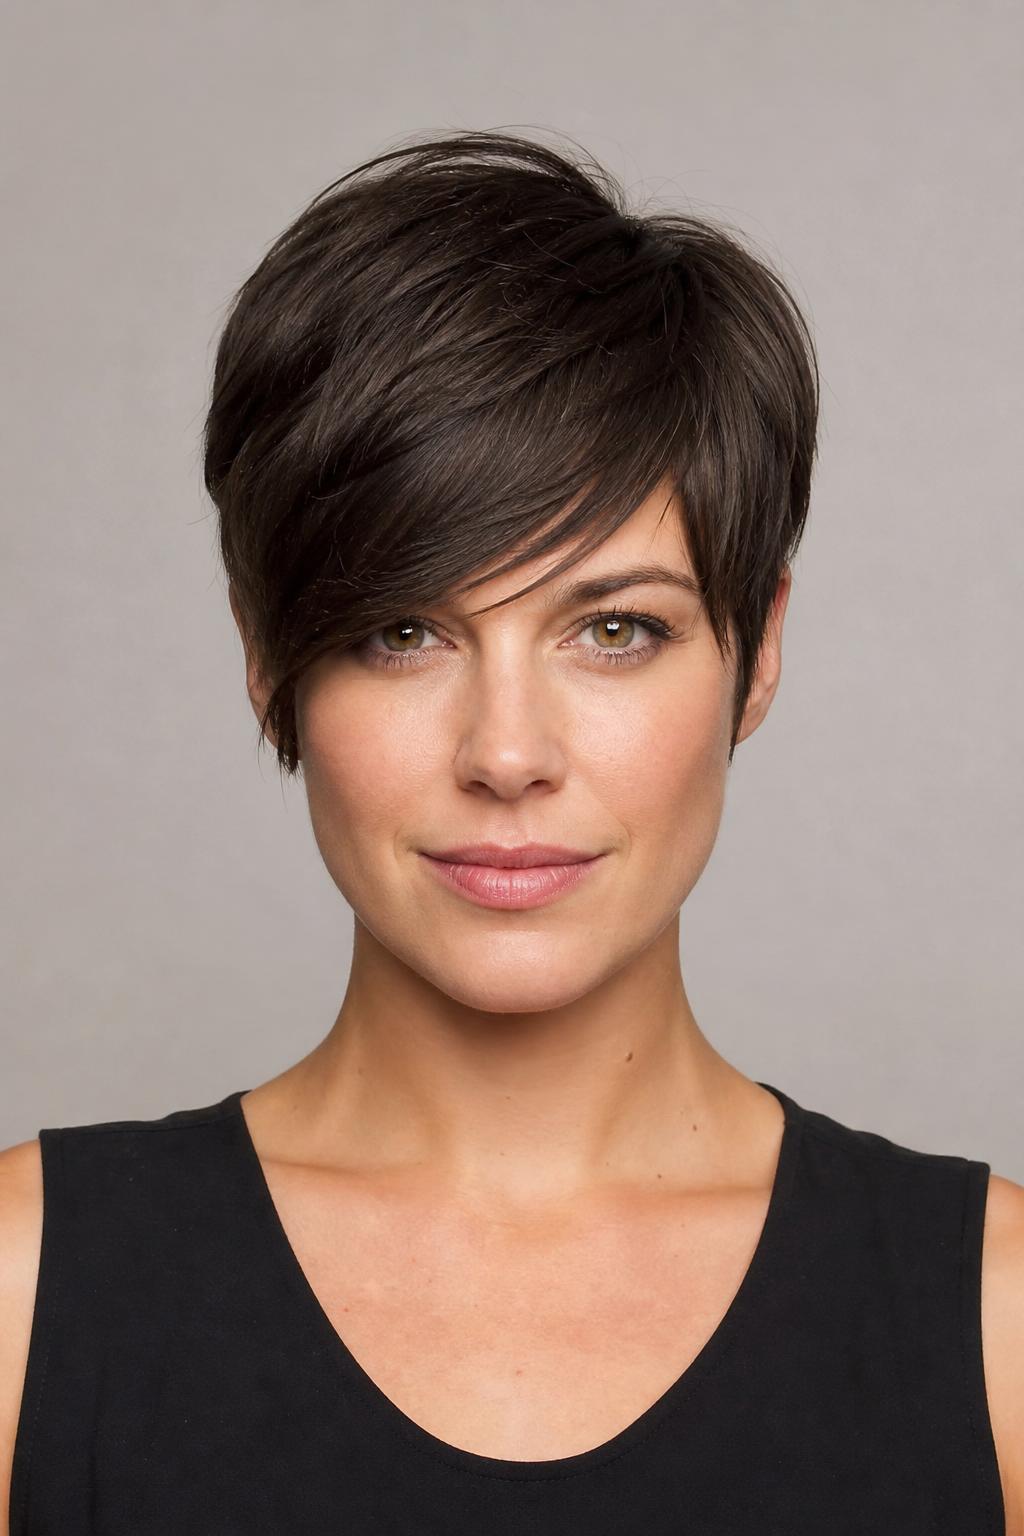
12. Blow-Dried Curved Fringe
Blow-drying the fringe with a small round brush, rolling the fringe outward at the ends, lifts the front away from the forehead and creates a gentle curve that softens the face. Straight-dried fringe lying flat reads as rigid; curved fringe reads as relaxed and intentional. For this technique, use a 1-inch round brush, dry on medium heat, and finish with a light hold spray while the hair is still warm to lock the curve in place.
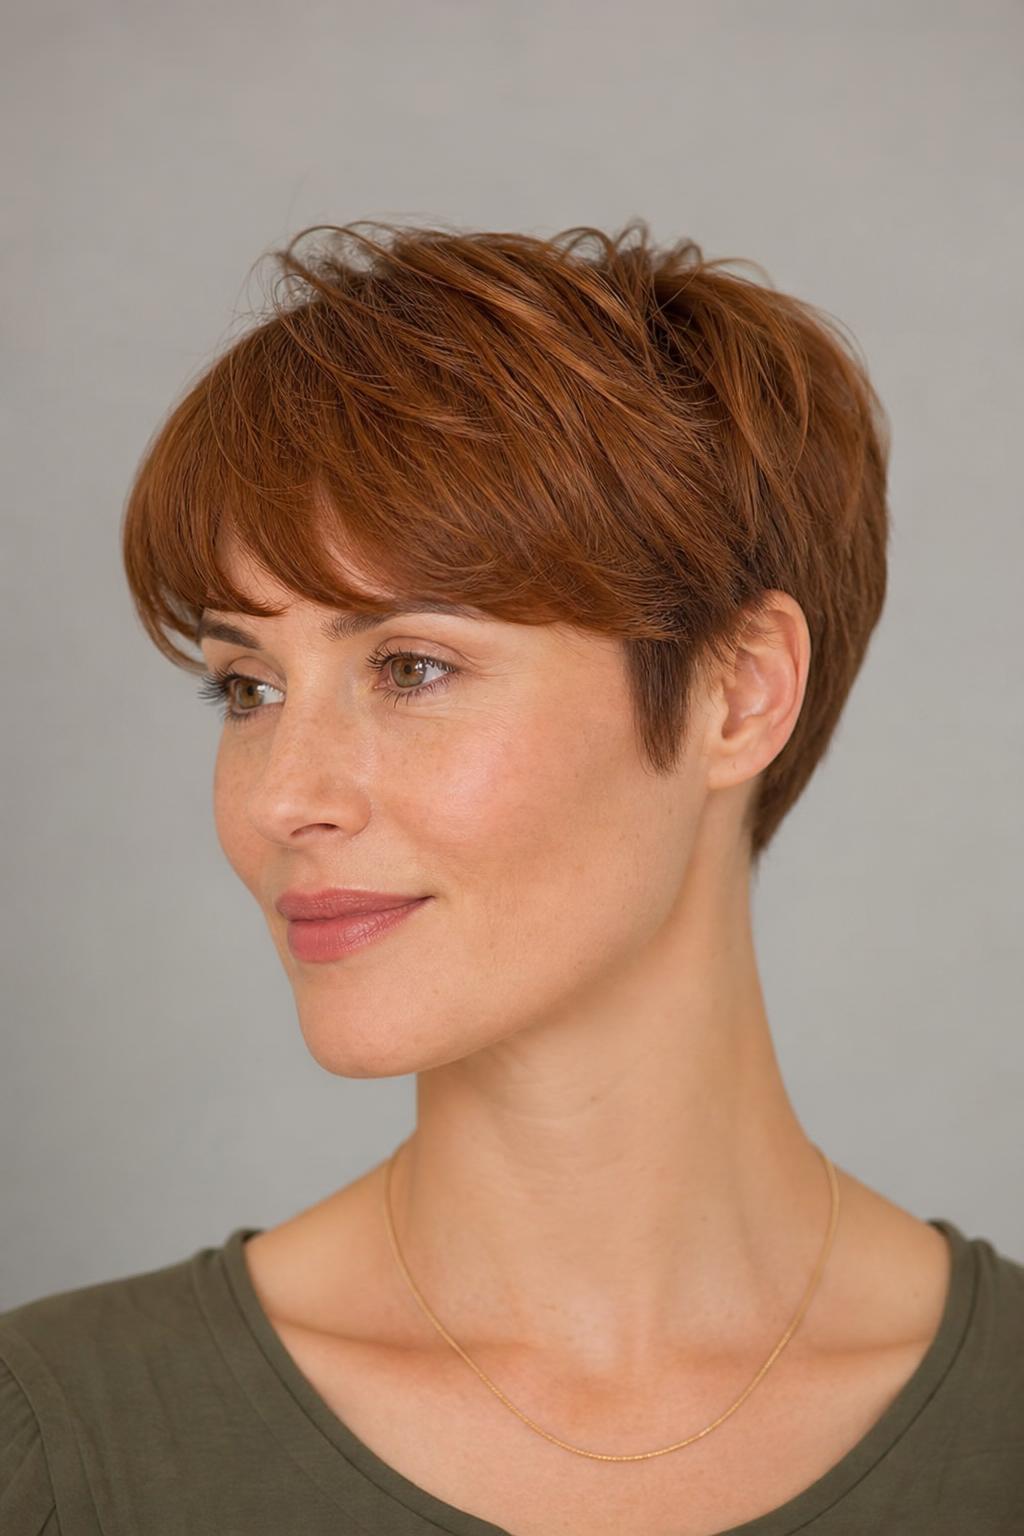
13. Grow-Out-Ready Side Fringe
A side fringe transitions gracefully during a grow-out, softening from a short sweep into a longer curtain fringe before reaching chin-length. Mark your trim schedule at 7-8 weeks rather than the usual 4-6; the fringe stays soft and intentional at this interval rather than becoming blunt-edged and shapeless. The nape and sides need attention earlier, around 5 weeks, to keep the rest of the cut looking crisp as the fringe grows.

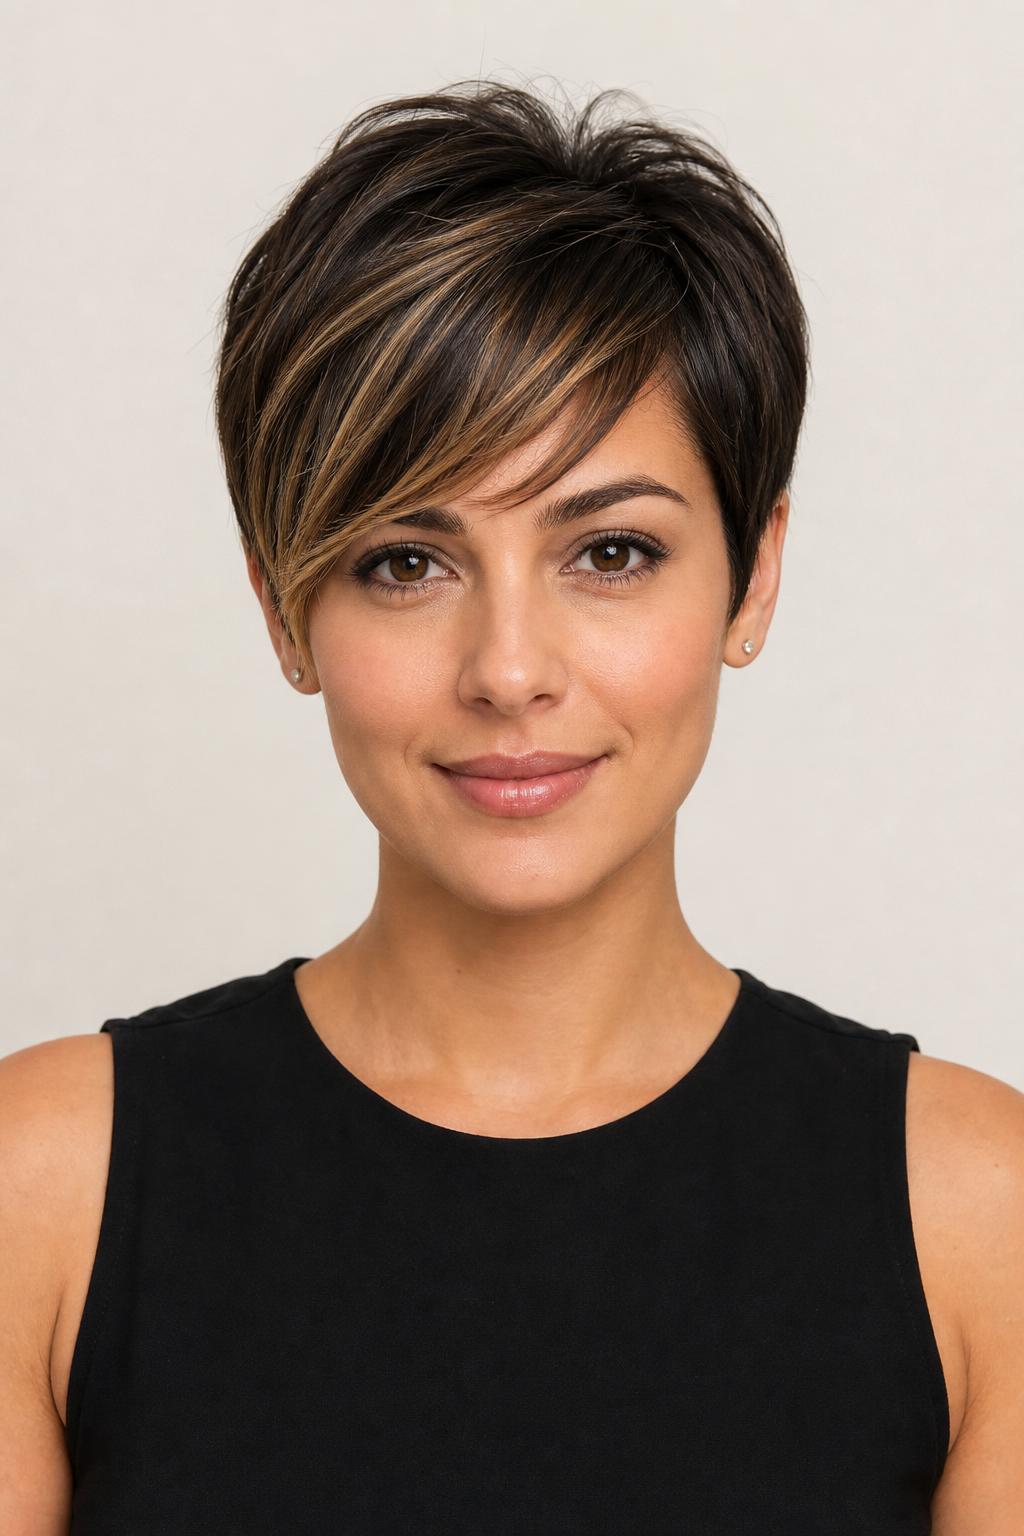
14. Money-Piece Fringe Pixie
A warm blonde money-piece highlight on the front fringe sections draws the eye toward the forehead rather than the jaw, redirecting attention exactly where a square face benefits. A warm honey piece on dark hair creates the highest contrast; a cool platinum streak on brunette achieves the same redirection with an edgier result. Keep the highlight in the fringe section only, extending it down the sides adds width and defeats the softening purpose.
Asymmetrical and Side-Swept Pixies
Asymmetry is one of the most effective tools for a square face shape, a cut that is not the same on both sides creates diagonal lines that break up the symmetrical horizontal ones of the forehead and jaw. These six styles use asymmetry as their central softening technique, from a subtle deep side part to a dramatically longer front section on one side.
15. Classic Deep-Part Asymmetric Pixie
A deep side part takes a standard textured pixie and creates an asymmetric silhouette without requiring a fundamentally different cut. Ask your stylist to build the cut with an asymmetric line in mind, leaving the heavier side slightly longer to reinforce the part direction. Many clients find their natural growth pattern already favors one direction, ask your stylist which side would feel most natural before committing to a specific part placement.
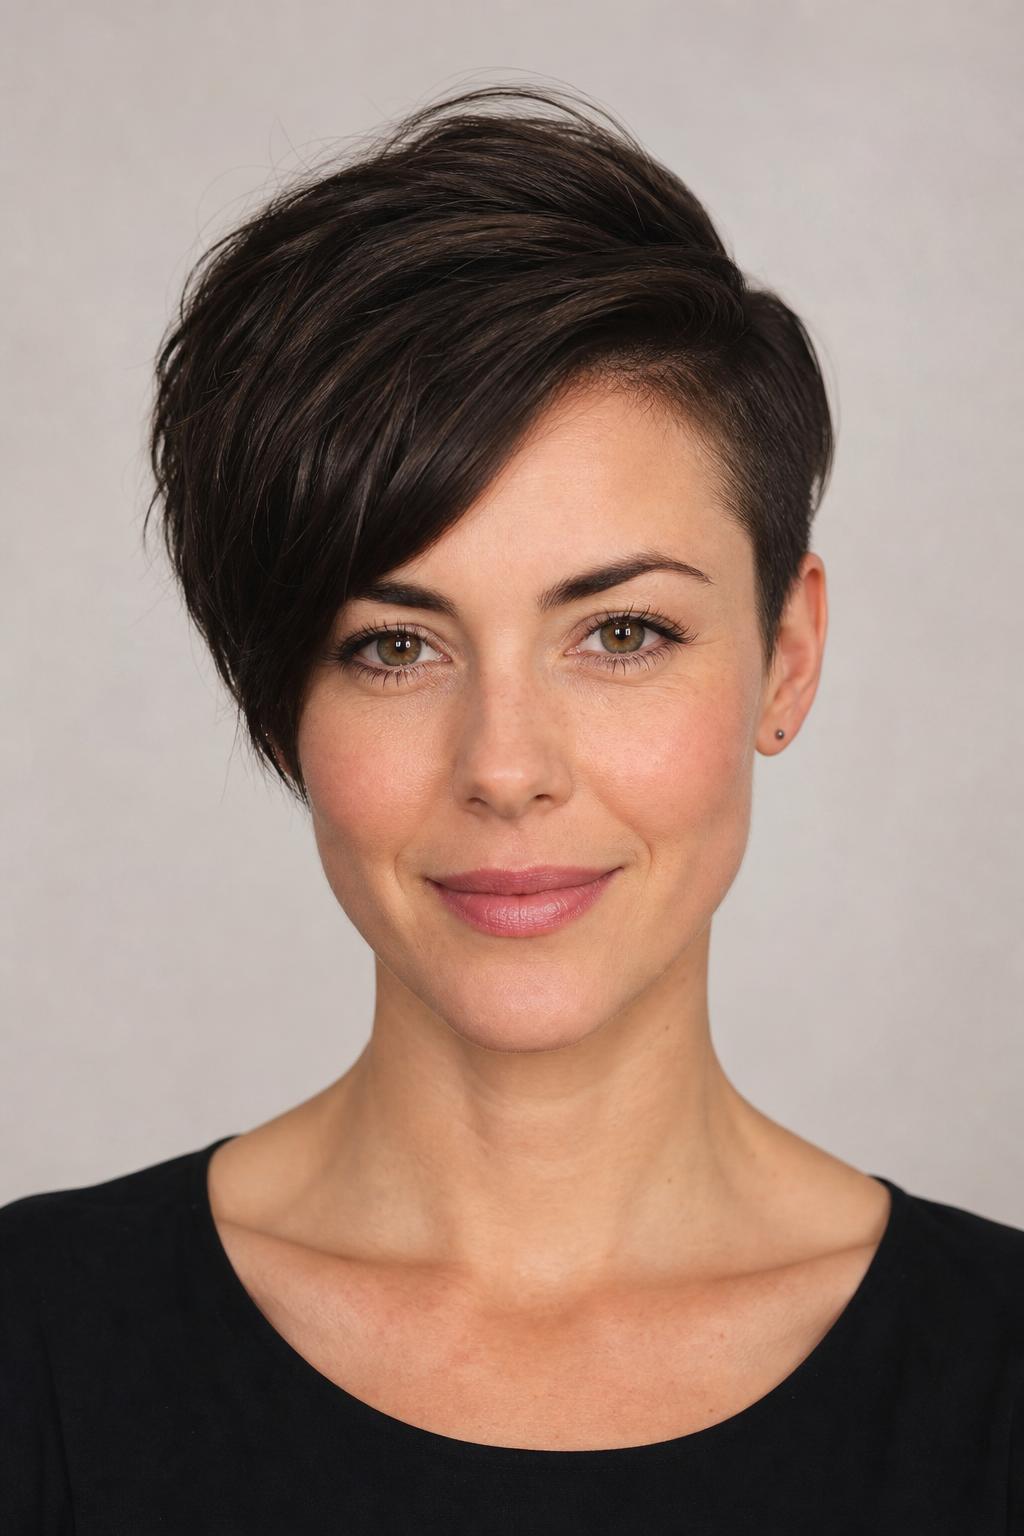
16. Razor-Edged Asymmetric Pixie
Razor cutting creates a feathered, broken edge on the longer front section that softens the outline rather than giving it a sharp geometric line. On a razor-cut pixie, the longer front section can be styled forward, swept to the side, or tucked behind the ear depending on the occasion. On thick hair, razor cutting through the sides removes bulk and prevents the cut from expanding outward; on fine hair, point-cut scissors achieve a similar feathered finish without removing too much weight.
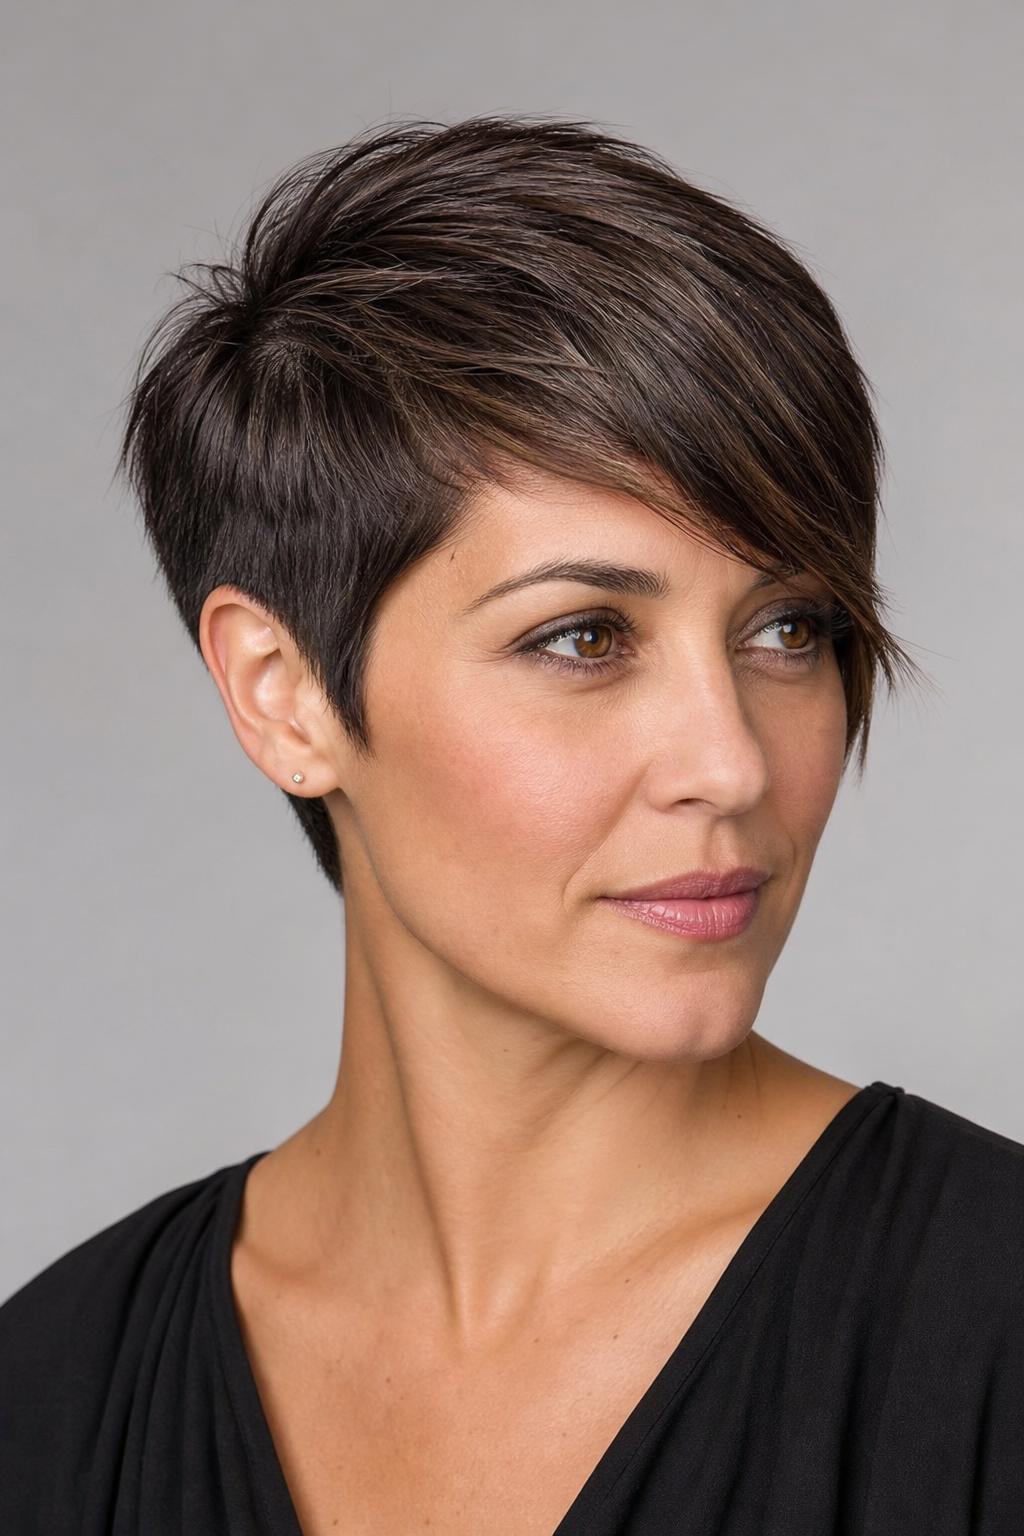
17. Wavy-Texture Asymmetric Pixie
Naturally wavy hair enhances the asymmetric quality of this cut because the wave pattern falls differently on each side, creating organic variation that requires almost no product. The longer front section waves forward and slightly in front of the cheekbone, adding movement at exactly the point where the face is widest on a square shape. Diffuse on low heat and scrunch to encourage the wave, then break it apart lightly with fingers for a softer finish.
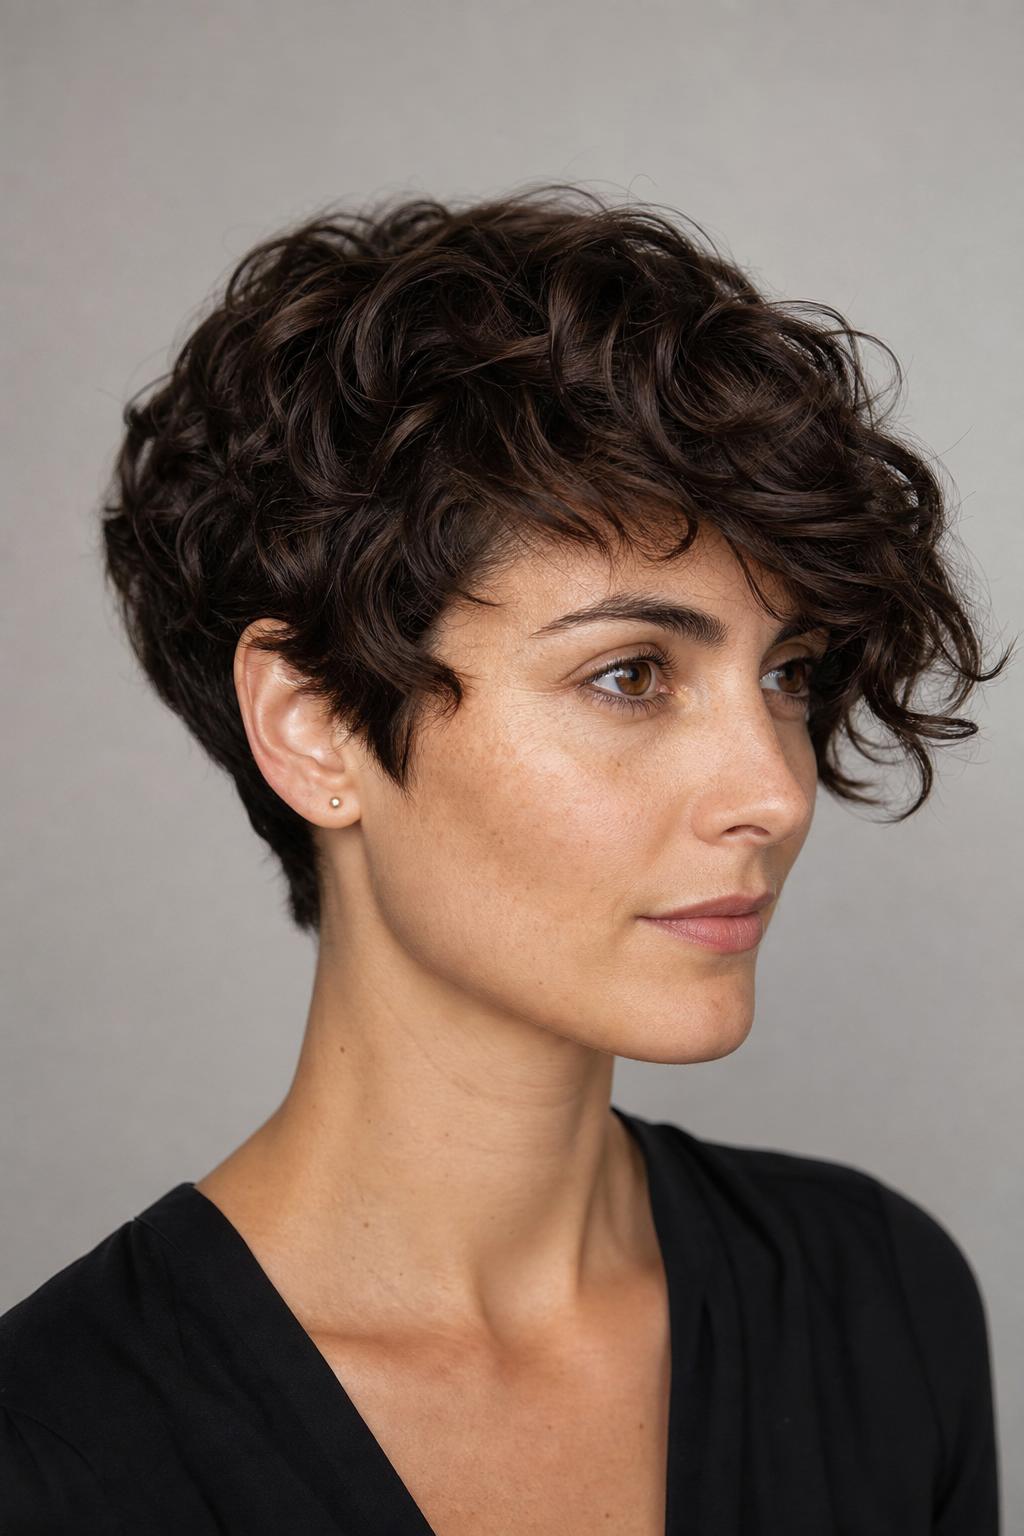
18. Cheekbone-Framing Long Side
The longer section in this pixie extends past the ear on the swept side, with the front edge reaching the mid-cheek, creating a soft point of color and movement at the face’s widest area. On square faces, adding visual interest at cheekbone level pulls attention to the midface rather than the jaw. Keep the opposite side tightly tapered to maximize the asymmetry, matching both sides reduces the softening effect considerably.
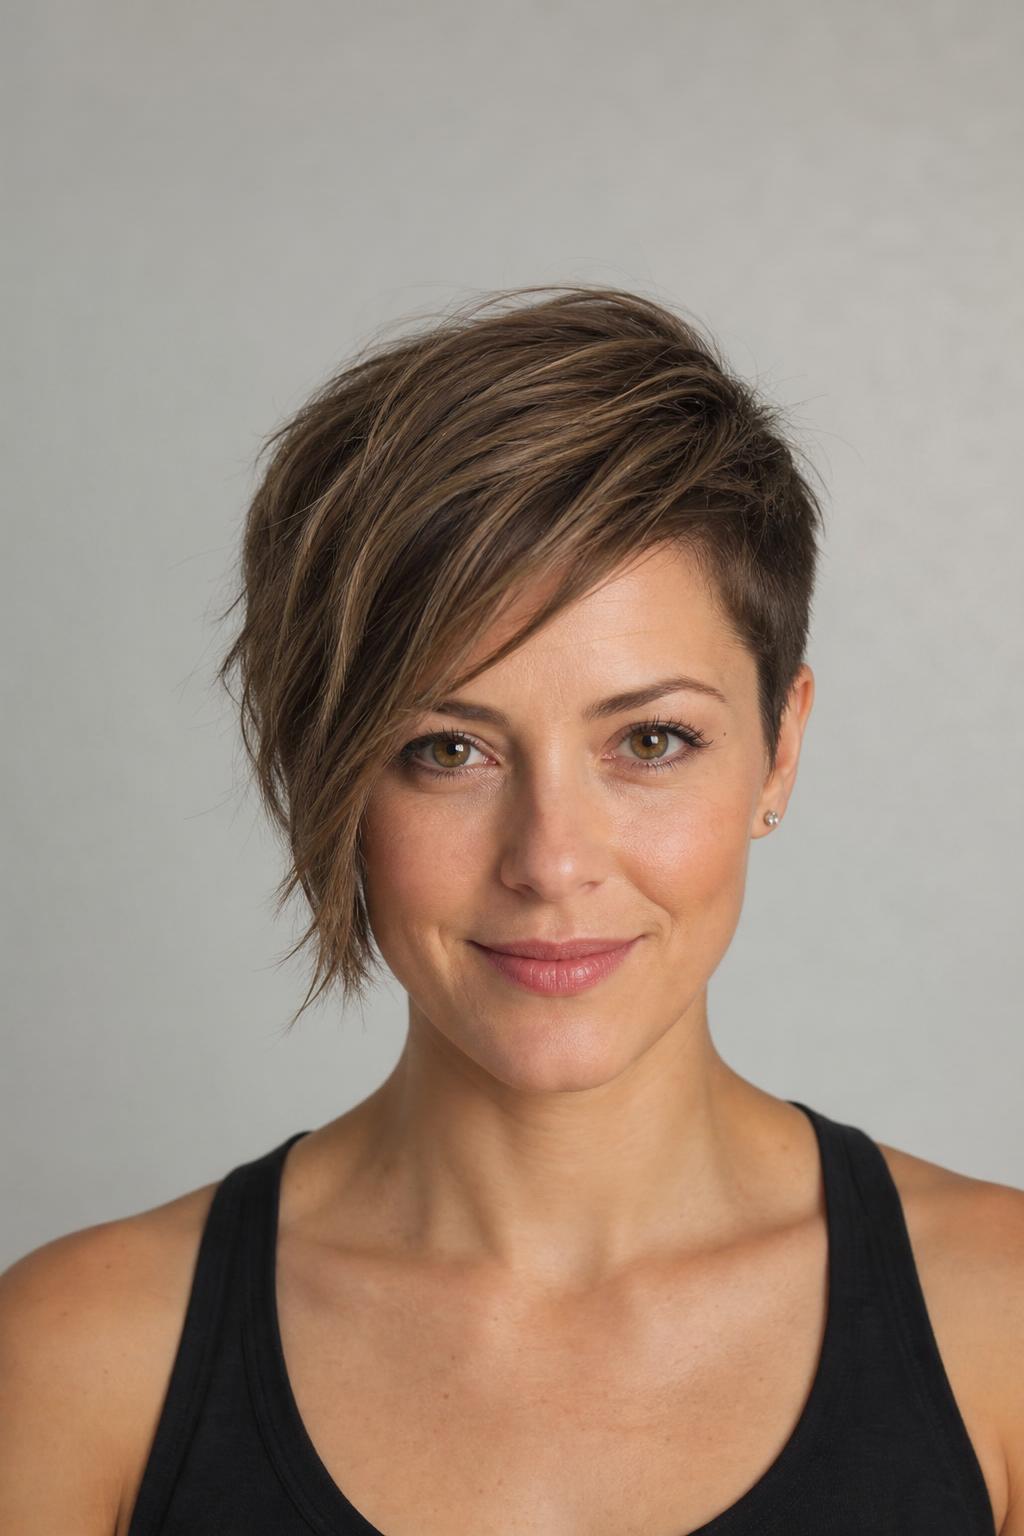
19. Wax-Defined Side-Swept Pixie
Pomade or matte wax gives an asymmetric pixie cleaner definition than a spray or mousse, separating the longer pieces on the swept side and keeping the shorter sections flat and structured. Work a pea-sized amount of wax through the longer front pieces, sweep them deliberately to the intended side, and hold for 10 seconds, the definition typically holds all day. Matte-finish wax reads as effortless; gloss-finish looks more polished and suits formal occasions.
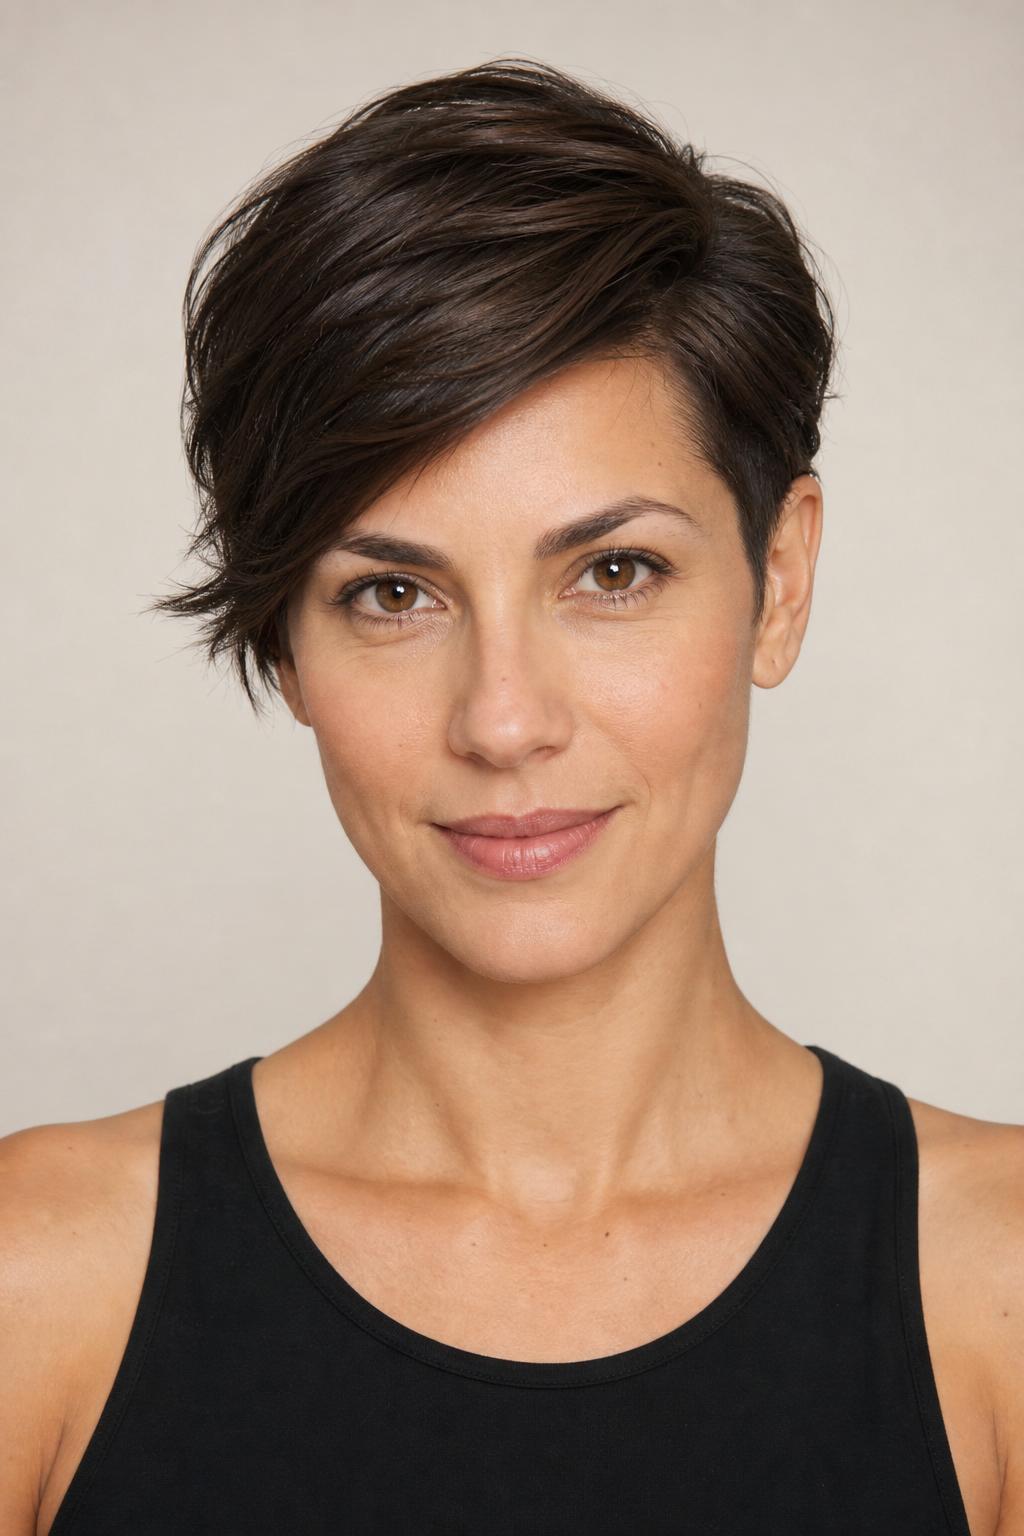
20. Undercut-Side Asymmetric Pixie
Shaving one side shorter than a standard taper creates a sharp contrast between the shaved side and the longer, styled top and front. On a square face, the undercut keeps one side so close that the longer front section reads as an intentional structural element. For a feminine undercut pixie, ask for a skin or zero-guard fade on one side only, keeping the other at a standard short taper, the full-shave look on both sides removes the face-framing length that balances the jaw.
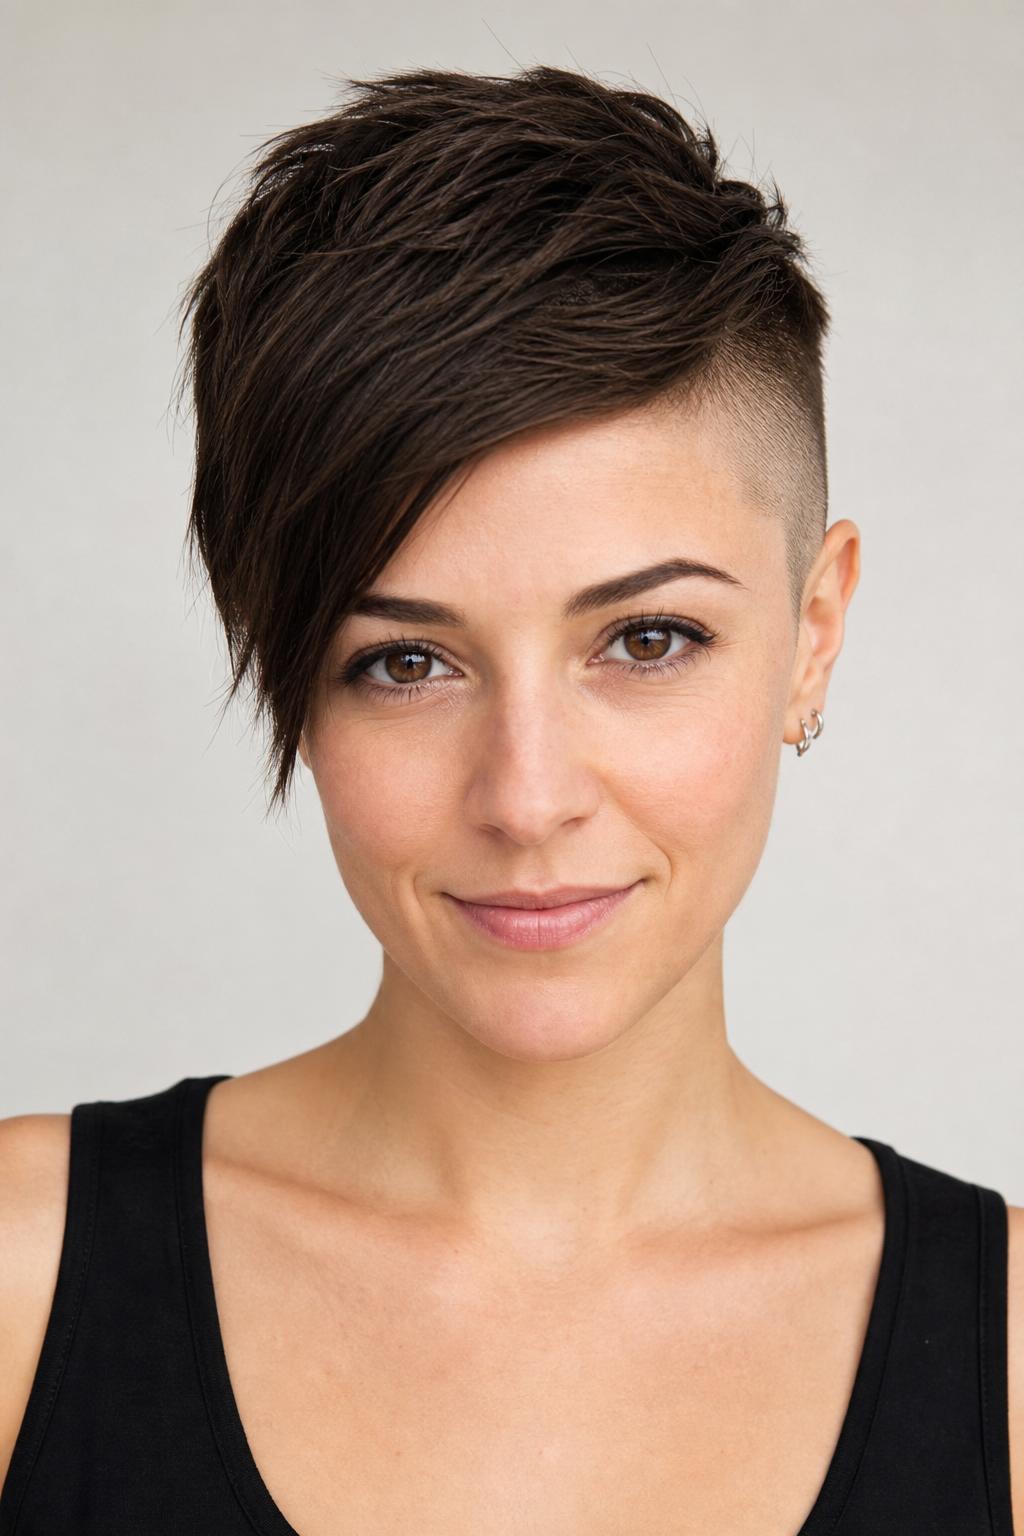
Longer Pixies and Transition Cuts
A longer pixie provides more styling flexibility and, on a square face, more opportunity for face-framing length. These five cuts sit between a classic close-cropped pixie and the shortest bob, enough length to tuck behind the ear or style in different directions, while staying above the jaw where a standard bob would land.
21. Ear-Grazing Pixie with Tuck Option
Ear-length pieces on the sides give this pixie built-in versatility that shorter cuts cannot, tucked behind the ear for a clean look, or left loose for softer framing. The maintenance window is slightly more forgiving than a classic short pixie: the extra length at the sides means the cut holds its general shape for 6-7 weeks rather than the typical 4-5. Fine hair benefits most from this length because the extra weight helps the hair lie flat without product.
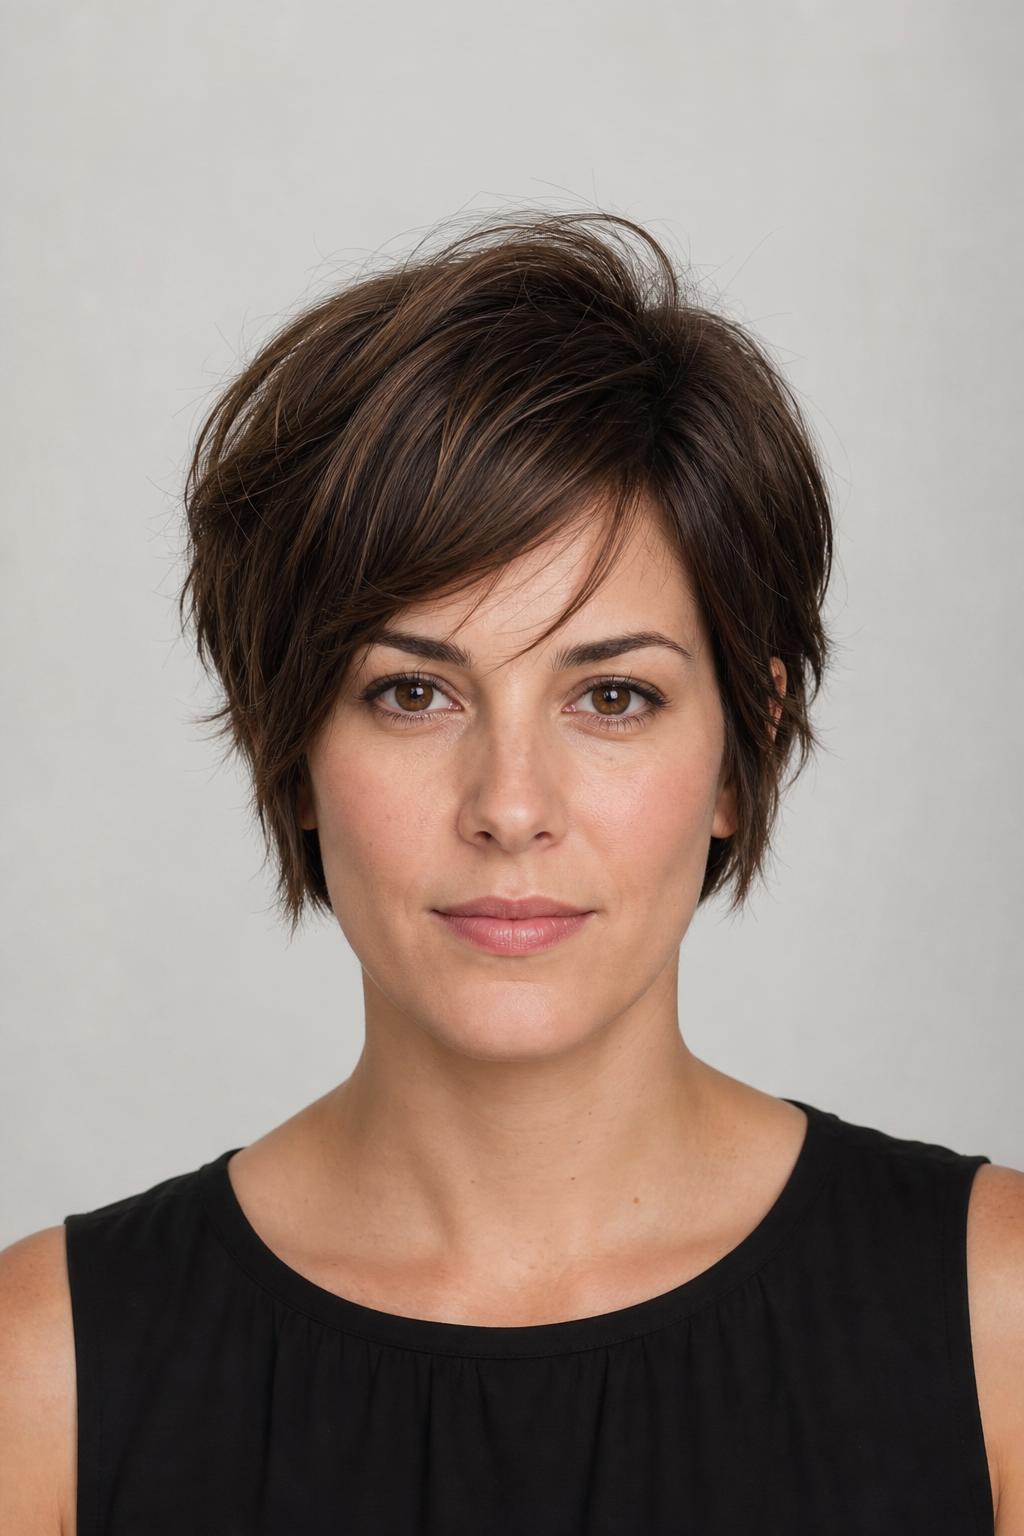
22. Warm-Highlight Long Pixie
Caramel or honey highlights through the crown of a longer pixie make the layering visible from a distance, adding dimension that flat single-process color cannot achieve. On a square face, warm tones at the crown naturally draw the eye upward, which lengthens the visual impression of the face. Warm highlights also transition well through any grow-out stage, making the journey from pixie to bob more photogenic at each length milestone.
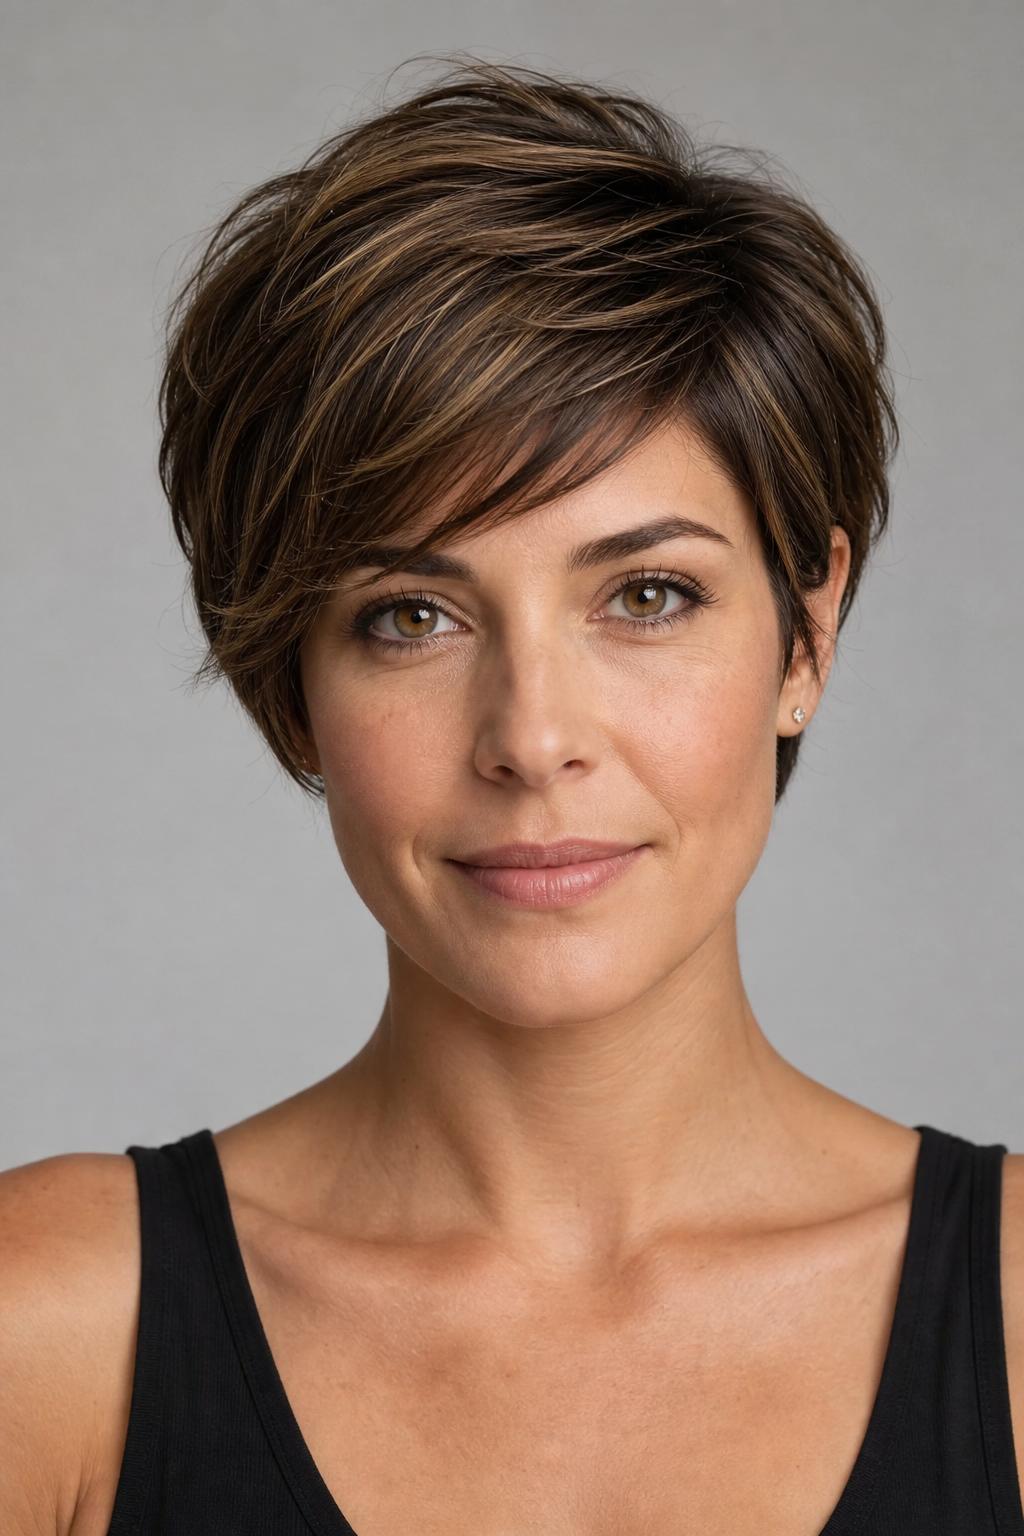
23. Behind-Ear Styling Pixie
Tell your stylist you want a pixie “long enough to tuck behind the ear on both sides, with soft layered fringe that sweeps to one side.” That gives you daily flexibility, clean and professional when tucked, casual when left loose. For a square face, add “keep the sides tapered but not too short, so there’s no heaviness at jaw level”, this prevents the side sections from sitting wide against the jaw as they grow.
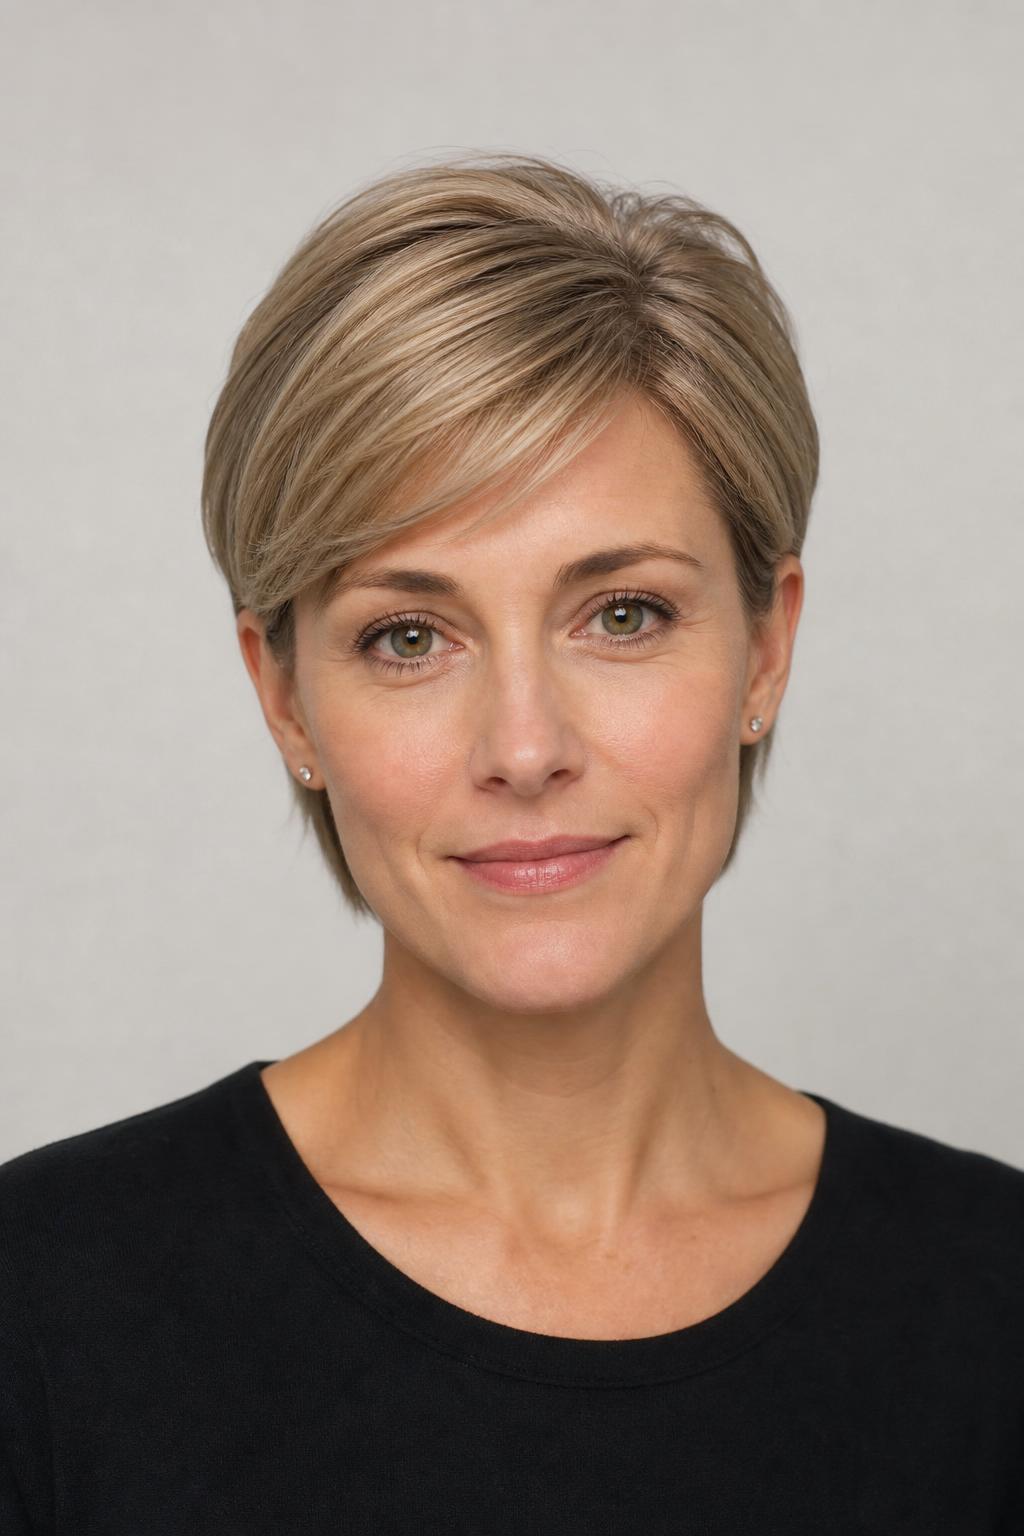
24. Bixie Transition Style
A bixie sits longer than a classic pixie and shorter than a bob, bridging the most challenging stage of growing out short hair. On a square face, the extra length at the front frames the jaw in a way a shorter pixie cannot, the sides reach below the ear but stay above chin level, and the front sections add the face-framing coverage that a standard crop lacks. See our pixie grow-out guide if the bixie is your transition destination rather than a permanent style.
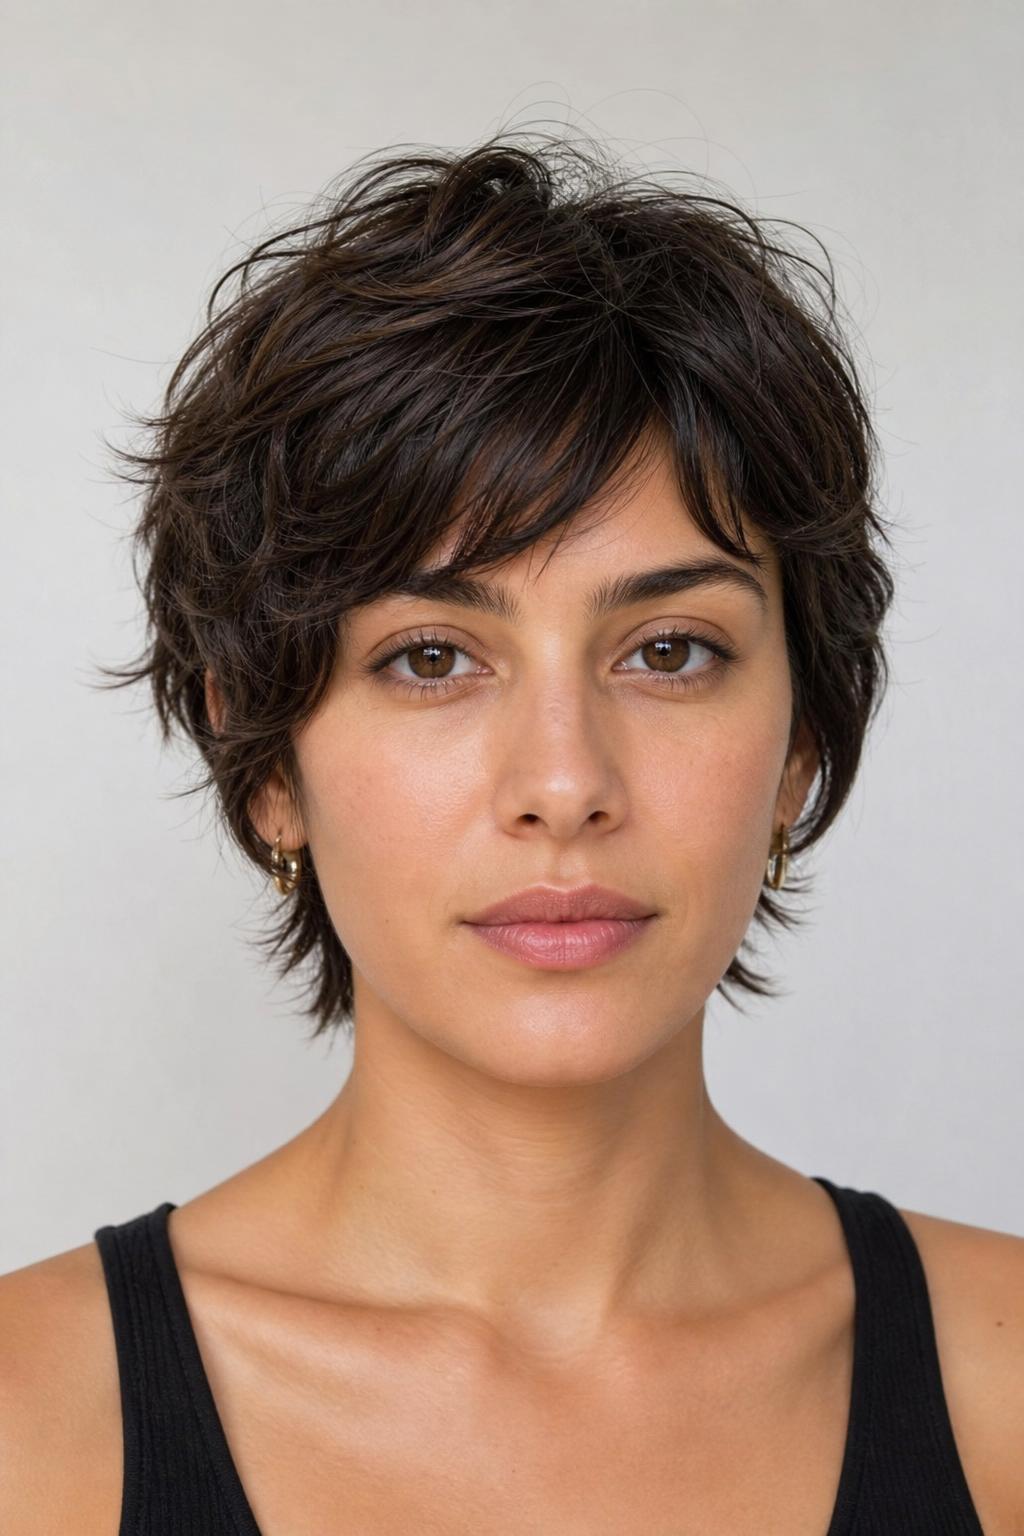
25. Graduated Long Pixie
Graduated layers from the crown to the nape, cut progressively shorter toward the back, build a rounded shape that contrasts with the flat horizontal lines of a square face. The graduation adds volume at the back of the crown while the front stays longer and flatter, creating a silhouette that is fuller at the top and narrower at the sides. This comes closest to combining the lifted fullness of a blowout style with the everyday simplicity of short hair.
What to Tell Your Stylist
The most common mistake on a square face is asking for “a pixie cut” without specifying softening elements, and getting a uniform short cut that mirrors the jaw’s horizontal lines. Go to the appointment with a photo and one clear instruction:
“I have a square face shape, so I want volume and movement on top rather than at the sides. Can you keep the sides tapered clean, add layered texture at the crown, and leave a soft fringe or face-framing pieces in front?”
Stylist tip: If your stylist suggests removing all length from the sides, ask them to leave at least a little texture in front of the ear. That front section is what creates the frame for a square face, without it, even the best crown layering loses its softening effect against a strong jaw.
Bring two or three photos if possible: one showing the fringe style, one showing the crown texture, and one showing the overall length. Multiple reference images prevent your stylist from defaulting to a generic version based on a single photo taken from one angle.
When a Pixie Is Not the Right Choice for a Square Face
A pixie can work well on a square face when designed correctly, but not every version and not every square face benefits equally from short hair.
Very strong, wide jaw: A jaw that is notably wider than the forehead may not be well served by any close-cropped pixie, because removing all side length exposes the jaw rather than framing it. A longer pixie or well-maintained bixie is more forgiving, more length provides more framing.
Very flat crown with no natural volume: If your crown has no natural lift, a pixie with crown layering will require daily blowout effort to look full. Without volume at the top, the square face’s horizontal lines dominate and the cut reads as boxy. A soft lob provides more forgiving framing without that styling requirement.
First-time short hair: A pixie is hard to reverse quickly. If you’re uncertain, try a shorter bob first. If that transition feels right, a pixie becomes a much easier decision the second time.
Stylist tip: Square faces with strong bone structure often look striking in a pixie, but the cut must be customized from the first appointment. A thorough stylist will assess your dry hair growth pattern and natural volume before cutting. If yours does not look at your dry hair first, ask them to pause and assess before picking up the scissors.
FAQ
What Pixie Variation Looks Best on a Square Face?
A textured pixie with layered crown and soft side-swept fringe is the most consistently flattering for square faces. The layers add diagonal movement at the top while the fringe breaks the horizontal line of the forehead. For something lower-maintenance, a longer pixie with tucked-behind-ear styling provides similar face-framing benefits with fewer trim visits required.
Should a Square Face Get a Pixie with Bangs?
Yes, but the type of bangs matters. Avoid a thick, straight-across blunt fringe, which emphasizes the flat forehead and mirrors the strong jaw. Instead, ask for a wispy side-swept fringe that crosses the forehead at an angle, or a curtain fringe parted softly in the center. Both types introduce diagonal or curved lines that work with square proportions rather than fighting them.
Can Thick Hair Work in a Pixie on a Square Face?
Thick hair needs internal thinning on the sides to avoid expanding outward, which adds width to a square face. Ask your stylist for slide cutting or internal thinning on the side sections specifically, not the crown, you want volume on top and clean sides. Thick hair with proper internal thinning holds a layered pixie shape longer than fine hair once styled.
How Often Does a Pixie Need Trimming for a Square Face?
Every 4-6 weeks. A pixie that grows past its designed length on a square face loses its face-framing proportions quickly, the sides grow outward before the top grows up, which adds width and removes the crown height that balances the face. The 4-week end of that range applies to tight tapers; the 6-week end works for longer, more textured variations.
Will a Pixie Make a Square Face Look More Square?
Only if it is cut without the softening techniques in mind. A pixie with no fringe, no layering, and uniform short length all around will mirror the square outline and emphasize it. A properly designed pixie with crown volume, soft fringe, and tapered sides does the opposite, it redirects visual attention upward and inward, making the face appear closer to oval proportions.
Is a Pixie a Good Choice for Older Women with Square Faces?
Yes, with the right variation. A longer pixie or soft layered crop at ear-length is particularly flattering because it provides face-framing length without requiring high-maintenance styling. Avoid a classic very short crop if natural volume has thinned over time; the flatter crown removes the height that makes the cut work for square proportions. The longer pixie styles in the final section of this gallery are the most adaptable for this combination.
What Is the Difference Between a Textured Pixie and an Asymmetric Pixie for Square Faces?
A textured pixie softens a square face through movement and volume, the layered pieces create a dynamic top that contrasts with the jaw. An asymmetric pixie softens it through diagonal lines, the uneven lengths break up the symmetrical shape. Both work; the best choice depends on styling habits. Texture requires daily product and a brief routine; asymmetry can be managed minimally once you know which direction to sweep the longer side.
Pixie cuts for square faces work best when the cut is built around the face shape from the first appointment, not corrected afterward with product and styling. Bring reference photos from this gallery, name your face shape clearly, and ask your stylist to keep the sides tapered and the crown textured. When those two elements are right, the pixie cut for a square face delivers one of the sharpest, most confident looks available in short hair.
Hair results vary based on your natural hair type, texture, density, and condition. Always consult with a licensed hairstylist before making significant changes, especially with chemical treatments or dramatic length changes. Photos may show styled results that require professional tools and products to replicate.

1 response