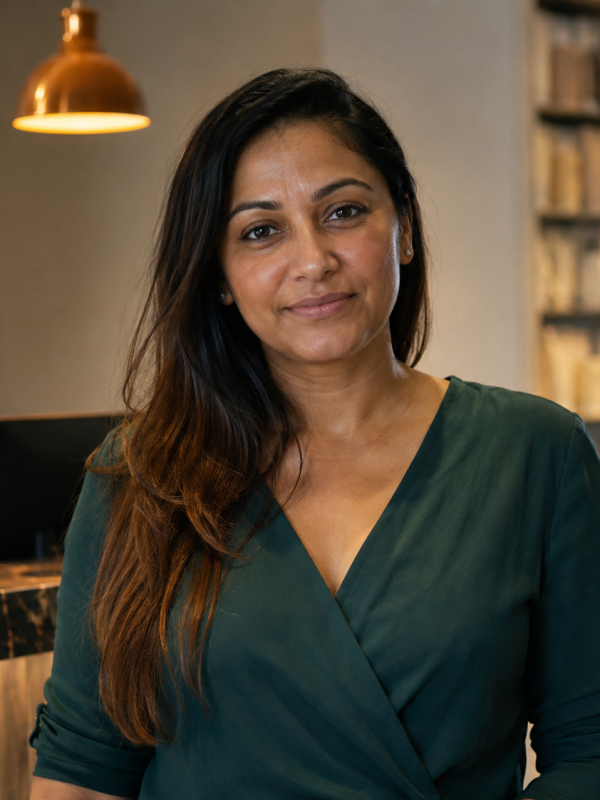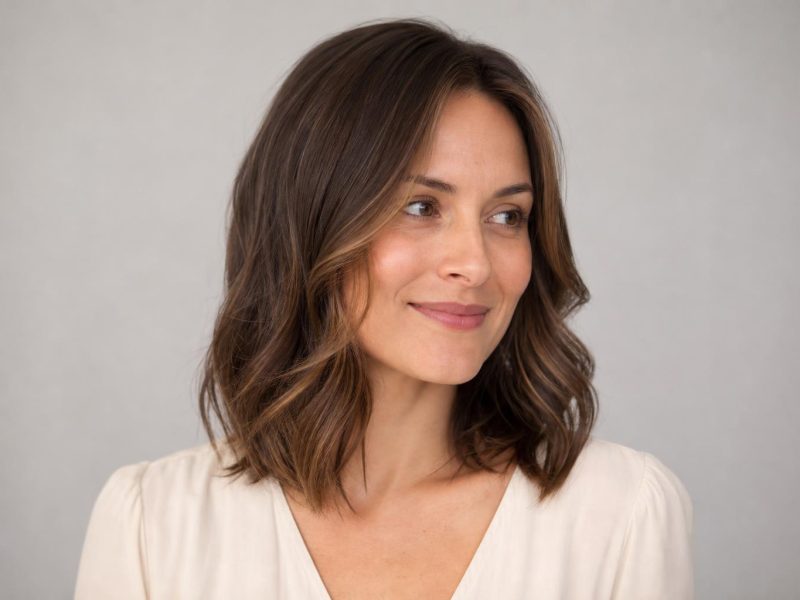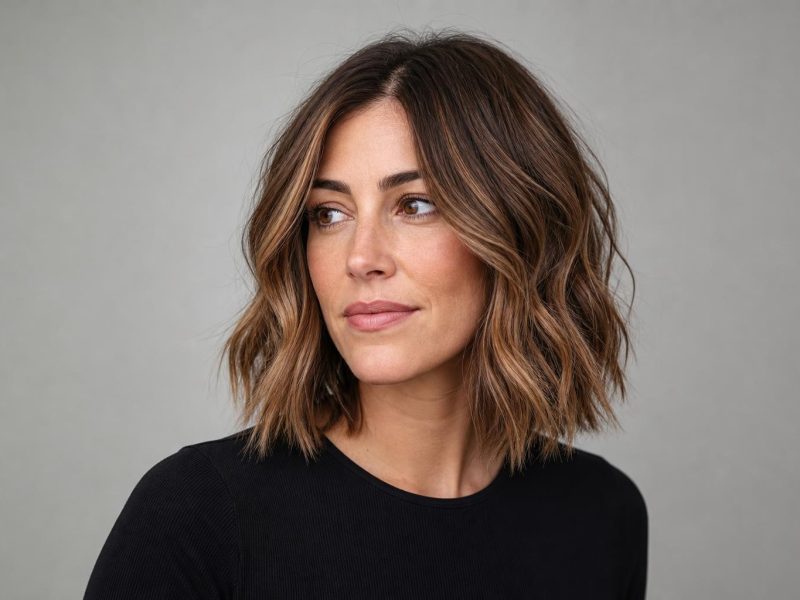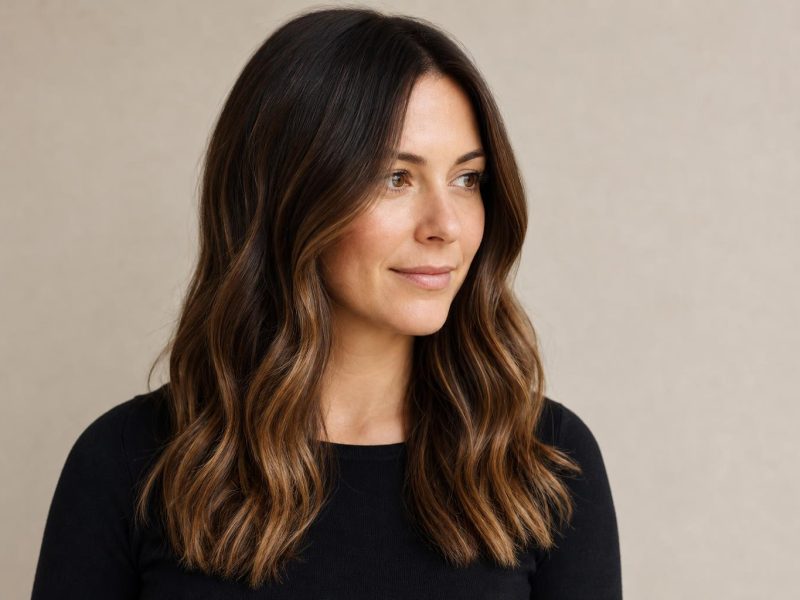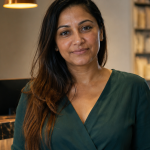

Caramel highlights work on every dark base — the tone direction and placement determine whether your result looks natural or salon-obvious.

Caramel highlights on brown, dark brown, and black hair add warmth and dimensional depth through golden, honey, and toffee tones that flatter nearly every skin undertone. These 30 styles are sorted by base hair color — scroll to your starting shade and find placement ideas, technique notes, and exact stylist language for each variation. Whether you want barely-there face-framing pieces or a full balayage transformation, the entry matching your natural base gives the most realistic preview of your result.
The gallery covers four base shades: light brown, medium brown, dark brown, and black. Each section includes balayage, foil, and babylight variations alongside styling notes, maintenance expectations, and skin-tone-specific tone guidance. A skin undertone compatibility chart and “what to tell your colorist” section follow the gallery.
| Factor | Details |
|---|---|
| Best for | Brown, dark brown, and black hair; warm and neutral skin undertones |
| Technique options | Balayage, foil highlights, babylights, money piece, root smudge |
| Touch-up frequency | 8–14 weeks for balayage; 6–8 weeks for foil highlights |
| Avoid if | Hair is severely heat-damaged or recently had a relaxer (wait 2+ weeks) |
| Salon time | 2–4 hours depending on placement coverage and starting base |
Caramel Highlights on Light Brown Hair
Light brown is the most forgiving base for caramel highlights; the tonal gap between base and highlight is moderate, so the transition blends naturally without requiring an aggressive bleach lift. Most of these results are achievable in a single session, and the grow-out is soft enough that clients often go 12–14 weeks before needing a touch-up.
1. Sun-Kissed Balayage on Sandy Brown
Hand-painted caramel strokes from mid-length to the ends give sandy brown hair the warmth of a summer weekend without obvious roots or harsh lines of demarcation. The technique keeps the heaviest color in the bottom third, so the grow-out blends seamlessly over 10–14 weeks. For warm-to-neutral skin undertones, ask your colorist for a golden caramel with honey tones rather than a reddish tawny shade.

2. Honey Caramel Face-Framing on Light Brown
Fine, straight light brown hair gets the most noticeable lift from concentrated caramel pieces placed at the front hairline, where they catch light and brighten the face without needing full-head coverage. This placement adds visual warmth that makes fine hair look thicker by creating the illusion of depth at the part. Ask your colorist to keep the face-framing pieces within 1.5 inches of your hairline for a natural, not obvious, result.

3. Foil Highlights on Light Brown for Extra Brightness
Foil highlights on light brown hair create more precise, evenly distributed color than balayage: the strands are more defined and the overall effect is brighter. On light brown hair, foils lift to a clean caramel without going brassy, especially when followed by a gloss toner in golden honey or warm beige. The trade-off: foils need a touch-up every 6–8 weeks because the regrowth line is more visible than a balayage grow-out.

4. Caramel Lowlights and Highlights Mixed
Mixing caramel highlights with darker lowlights in the same session gives light brown hair a depth that pure highlighting cannot achieve. The lowlights add shadow, which makes the caramel pieces appear lighter by contrast, and the effect looks more three-dimensional than a one-directional all-over lightening. This works particularly well for fine hair, where the contrast between the two tones creates the visual impression of more strands.

5. Caramel Babylights on Light Brown
Babylights use the smallest foil sections possible, which means each highlighted strand is nearly as thin as a single hair. On light brown, caramel babylights create a soft, luminous warmth that looks like hair left lighter from childhood. At 12–16 weeks between appointments, this is one of the most low-maintenance color approaches for light brown bases. Expect to sit for 3–4 hours, since more sections means more application time.

6. Tonal Caramel Gloss on Light Brown
A caramel toning gloss applied over unlifted light brown hair deposits warm golden-brown pigment without individual highlight strands. The result is a richer, more luminous version of your natural color rather than a traditional highlighted look. This is a good entry point if you want warmth without commitment: glosses fade over 4–6 weeks and leave no visible grow-out line. A honey-brown gloss is a slightly cooler alternative for those who want dimension without red undertones.

7. Root Shadow with Caramel Through Mid-Lengths
Root shadow keeps the first 2–3 inches at your natural color before transitioning into caramel mid-lengths, which creates a lived-in grow-out effect from the first appointment. On light brown hair, the root shadow is subtle enough that most people perceive the result as natural, not colored. This is one of the better choices for anyone who won’t make it to the salon every 6–8 weeks, since the darkened roots do the maintenance work for you.

8. Chunky Caramel Panels on Light Brown
Chunky caramel panels — wider foil sections than a standard highlight. They came back strongly in 2025 and carry into 2026 with a warmer, less crispy finish than the 2000s version. Unlike whisper-thin babylights, chunky panels are deliberate and visible; they’re the right choice if you want people to notice the color change rather than wonder if your hair just looks naturally warm. On light brown, they land closer to a statement balayage than a traditional highlight.

Caramel Highlights on Medium Brown Hair
Medium brown is where caramel highlights create their most dramatic-yet-natural results. The base is dark enough to make caramel tones pop, but not so dark that the bleach lift risks pulling orange. Most medium brown clients can reach a true caramel in a single session on uncolored or lightly colored hair. The styles below range from natural balayage to face-framing highlights and everything between.
9. Classic Caramel Balayage on Medium Brown
Balayage on medium brown hair with a caramel result is one of the most requested color techniques for good reason: the hand-painted approach allows the colorist to customize placement for your specific face shape and haircut. On medium brown, the caramel typically lands in the level 6–7 range (warm copper-blonde), which is light enough to be clearly visible without looking bleached. Bring three reference photos from different angles to communicate exactly how much caramel coverage you want.

10. Caramel Highlights Placed for a Square Jaw
Square jawlines benefit from caramel placement that avoids heavy horizontal bands at jaw level. Ask your colorist to concentrate the lightest pieces in the crown and face-framing sections rather than evenly distributing color through the perimeter, which would emphasize the jaw’s width. Soft waves or layers further break up the angularity, and warm caramel tones are less severe than cooler ash highlights against a strong facial structure.

11. Caramel on Thick, Coarse Medium Brown Hair
Thick, coarse hair benefits from foil highlights rather than balayage, since coarse strands resist color penetration and need the controlled lift that open-air balayage cannot always guarantee. Your colorist will use a slightly higher developer volume (20 or 30 vol) to push through the cuticle, and the result on thick medium brown hair is usually a bold, noticeable caramel rather than a subtle one. Budget an extra 30 minutes for application compared to fine or medium density hair.

12. Wave-Activated Caramel on Medium Brown
Wavy hair is the ideal texture for caramel highlights because each wave acts as its own light-catching surface. Color placed on the outer curve of each wave looks bright in daylight and warm in softer light, which is why caramel-highlighted wavy hair photographs so well. Air-drying or diffusing with a curl cream or mousse intensifies the dimensional effect better than blow-drying straight.

13. Golden Caramel vs Tawny Caramel on Medium Brown
Golden caramel is warm and honey-adjacent; tawny caramel pulls slightly more red-brown. On medium brown hair, golden caramel suits warm and olive skin undertones and feels more like the classic sun-kissed result. Tawny caramel suits neutral-to-cool undertones and looks more auburn in certain lighting, which some people love and others find unexpectedly red. The distinction is worth discussing with your colorist before the appointment, since most people ask for “caramel” without specifying the undertone direction.

14. Medium Brown Caramel at 10-Week Grow-Out
Balayage caramel on medium brown hair at 10 weeks looks almost as natural as it did freshly done, which is one of the main appeals over traditional highlights. The root grows in at your natural medium brown and blends into the caramel mid-lengths without a harsh demarcation. Most clients with this look come in every 10–14 weeks, at which point a gloss refresh (30–45 minutes, no bleach) adds shine and tonal accuracy between full color appointments.

15. Caramel Money Piece on Medium Brown
A money piece — two heavily lightened panels framing the face on either side of a center part and stands out more on medium brown than on lighter bases because the contrast is higher. To get a caramel money piece rather than a platinum or yellow result, tell your colorist specifically: “I want the panels lifted to a warm caramel or golden honey, not platinum.” The money piece grows in noticeably faster than balayage, so budget for a touch-up every 6–8 weeks if keeping it crisp.

16. Caramel Ombre on Medium Brown
An ombre on medium brown creates a more gradient, less blended effect than balayage: the color transition is deliberate and visible, shifting from the natural base at the roots to warm caramel at the ends. Balayage on brown hair blends more seamlessly, but some clients prefer the clean ombre line because it photographs well and requires no blending maintenance. Make sure the transition point hits somewhere between the chin and shoulder, not at the roots.

Caramel Highlights on Dark Brown Hair
Dark brown hair (level 3–4) requires a lift of 2–3 levels to reach true caramel, which means bleach is involved regardless of technique. Balayage, foil highlights, and babylights all work on dark brown, but the colorist must manage the risk of a brassy or orange intermediate stage. A quality toner applied after lifting locks in the caramel tone. A deeper chocolate brown base may need two sessions to reach a bright caramel without risking breakage.
17. Babylights on Dark Brown for a Natural Look
Babylights on dark brown hair create dozens of tiny lightened strands that, from a distance, look like the hair simply absorbed more light. Up close, you can see the individual highlights, but the overall effect is far more natural than chunky foils on a dark base. On dark brown hair, expect the process to take 3.5–5 hours because the fine sections and the deeper starting base both add time.

18. Foil Highlights for Visible Dimension on Dark Brown
Foil highlights on dark brown hair create the most visible caramel results in a single session since the enclosed foil environment allows for a more controlled, predictable lift than open-air balayage. The contrast on dark brown is naturally higher, so even a few well-placed foils create noticeable warmth. Ask for foils throughout the mid-section and ends rather than all the way to the root for a result that looks closer to natural new growth.

19. Caramel Highlights Placed for Oblong Faces
Oblong and long face shapes need horizontal visual interest rather than vertical lines. On dark brown hair, width-adding placement means concentrating caramel highlights at the temples and sides rather than through the crown, which draws the eye outward. A colorist experienced with face shape guidance will pull highlights more from the sides of the head and use slightly chunkier placement at ear level. This is the one case where a full balayage along the sides beats a delicate babylight approach.

20. Copper-Warm vs Golden Caramel on Dark Brown
The copper-warm version of caramel has red-brown undertones that work beautifully on dark brown hair with warm, olive, or deep skin tones. Golden caramel leans toward honey-blonde and appears lighter in photographs. If you have cool or pink skin undertones, the copper version risks clashing. Ask your colorist to show you a color swatch or a digital rendering before committing, particularly if you have never gone warm before.

21. Caramel on Dark Brown Curly Hair
On curly hair, caramel highlights placed on the outer peaks of each curl catch light on the highest point and create a dimensional shimmer that flat or wavy hair cannot replicate. Your stylist needs to see your curls at their natural resting size before placing color — applying color to wet or pulled-straight hair will land in unexpected sections once the curl springs back. Confirm your colorist works frequently on naturally curly clients before booking.

22. Managing Bleach Health on Dark Brown Hair
Any caramel result on dark brown hair involves bleach, and bleach-treated ends need more hydration than uncolored hair. A bond-building treatment applied during color (Olaplex, K18, or a similar in-salon option) reduces breakage risk significantly. Between appointments, weekly deep conditioning and a sulfate-free shampoo extend the life of the color and keep ends from turning brittle. Fine dark brown hair is the highest-risk category for breakage from lifting, so discuss your hair’s health history with your colorist before the first session.

23. Setting Realistic Expectations for Dark Brown to Caramel
One of the most common disappointments in this color category comes from showing a photo of naturally light hair with caramel tones and expecting the same result starting from dark brown. The lightest point on dark brown hair does reach true caramel in most cases, but it will look noticeably darker than a blonde’s caramel result. Tell your colorist: “I understand my base is dark brown and I’m expecting a dark caramel: I want visible warmth and dimension, not a blonde result.” That one sentence sets a shared expectation before you sit down.

Caramel Highlights on Black Hair
Black hair (level 1–2) creates the most dramatic caramel contrast of any base, particularly for face-framing pieces and strategic placement. Achieving caramel on true black hair requires 3–4 levels of lift, which means a careful bleach process and a skilled colorist who knows how to manage the orange stage before toning. The styles below are all achievable on uncolored black hair, but may require two sessions for longer or thicker hair.
24. Dramatic Face-Framing Caramel on Black Hair
Face-framing caramel on black hair creates the highest-contrast result in this gallery: the warm honey and toffee tones stand out against the dark base in a way that’s visible from across a room. This placement is also the most strategic for women who want color without the full commitment of an all-over highlight. Two or three concentrated face-framing panels take about 90 minutes versus a full balayage that runs 3–4 hours.

25. Caramel Money Piece on Black Hair for Heart Faces
Heart-shaped faces have a wider forehead and narrower jaw, and caramel money pieces placed close to the hairline can inadvertently widen the forehead further. A better placement for heart faces: ask your colorist to start the lightest caramel pieces below the ear rather than at the hairline, so the color adds brightness lower on the face. A center part then shows the naturally dark frame at the top, creating the vertical balance a heart face benefits from.

26. Full Caramel Balayage on Black Hair
Balayage on black hair produces a softer, less precise result than foils because the open-air process varies based on room temperature, application timing, and the stylist’s technique. Many colorists prefer balayage on black hair specifically because it creates a softer demarcation at the root — less obvious grow-out than a foil highlight that starts close to the scalp. Ask your colorist which technique they recommend given your specific hair history and maintenance tolerance.

27. Caramel Highlights on Black Coily Hair
Coily 4a–4c hair has a natural shrinkage that means highlights placed at mid-length on stretched hair may appear closer to the root once the hair coils back. A colorist who specializes in textured hair accounts for shrinkage when placing color rather than treating it like any other hair type. The tightly coiled structure can also trap heat and process unevenly during bleaching, so look for a colorist who specifically names textured hair as a specialty.

28. Caramel Highlights in Box Braids and Protective Styles
Caramel highlights on black hair work especially well in box braids and twists because each braided section alternates between the dark base and the lighter highlighted strands, creating a naturally interwoven dimensional effect. The highlights don’t need to be dense to show up well in braids; even a few strategic highlighted sections create visible warmth once the hair is braided. Wait at least 2 weeks after any color session before installing braids to allow the hair to stabilize.

29. Black Hair to Caramel in Two Sessions
Very dark or previously uncolored black hair often cannot reach a true caramel in a single session without risking breakage from over-processing. A skilled colorist will lift to a warm orange-bronze in the first session, tone it to a deep tawny caramel, and then refine to a brighter golden caramel in session two, spaced 4–6 weeks later. Don’t try to rush this to one appointment: a healthy dark caramel achieved over two sessions is a better result than broken, uneven ends from a single over-processed visit.

30. Strawberry-Caramel Blend on Black Hair
A strawberry-caramel result on black hair blends the red-warm dimension of a strawberry blonde finish with the honey-brown depth of caramel, creating a result that is richer and more dimensional than either alone. This works particularly well on deep skin tones with warm or olive undertones. Tell your colorist: “I want a result that looks caramel in low light and warm reddish-honey in sunlight. Mix a small amount of red-orange toner into the caramel formula.”

Which Caramel Tone Suits Your Skin Undertone
Not all caramel is the same. The three main caramel directions are golden (honey-yellow base), tawny (red-brown base), and neutral (balanced, no dominant undertone). Understanding how hair color levels and tone directions interact helps you and your colorist land on the right formula. Choosing the wrong direction is the most common source of caramel disappointment; the color looks great in the salon and strange in natural lighting because it clashed with your undertone rather than complementing it.
| Skin Undertone | Best Caramel Direction | Avoid |
|---|---|---|
| Warm (golden, olive, yellow) | Golden or honey caramel | Neutral-ash caramel, which looks muddy on warm skin |
| Cool (pink, rosy, bluish) | Neutral caramel or beige-caramel | Tawny or copper caramel, which can make pink skin look redder |
| Neutral (no strong undertone) | Any caramel direction; golden, tawny, or neutral all work | Very yellow or very red ends of the spectrum without seeing a swatch first |
| Deep (brown, deep olive, cool-deep) | Tawny or golden caramel with depth | Very pale caramel that looks washed out against a deep base color |
Stylist tip: Ask your colorist to show you a physical color swatch against your skin before mixing the formula. Most professional salons carry shade swatches that give a far more accurate preview than any digital filter or app.
How Placement Changes the Result
Where your colorist places the caramel matters as much as the tone. The same formula can look completely different depending on whether it is concentrated at the face, throughout the mid-shaft, or at the ends only. Below are the three main placement approaches and when each works best.
Face-Framing Placement Adds Brightness Without Full Coverage
Face-framing caramel is the lowest commitment option and the fastest appointment, typically 90 minutes. The color is concentrated at the front two sections of hair on each side of the part. The effect is visible when your hair is down and forward but nearly disappears in a ponytail or bun. Good for first-time color clients, cost-conscious clients, or those who want warmth without an all-over commitment.
Through-Section Balayage Creates Natural, Even Dimension
A full balayage touches most of the hair but concentrates the lightest color at the ends. The roots stay dark, the mid-lengths transition, and the ends are the brightest point. This is the most universally flattering placement because it mimics how the sun naturally lightens hair. A full through-section balayage takes 2.5–3.5 hours and is the right choice if you want a complete dimensional shift.
Root-to-Tip Foil Highlights Give the Most Coverage
Traditional foil highlights placed from close to the root through the ends give the most saturated coverage but also the most obvious regrowth. On dark or black hair, the grow-out line is stark at week 6–7, which means a more consistent maintenance schedule. If high contrast is what you want and you will commit to 6–8 week touch-ups, foil highlights from root to tip give the fullest transformation.
What to Tell Your Colorist
Vague requests like “I want caramel highlights” produce inconsistent results. The more specific you are before the colorist picks up a brush, the closer the final result to what you showed in a photo. Bring at least two reference images — one showing the color depth you want and one showing the placement style you prefer. These two elements can come from different photos.
Exact language that gets results: “I want a golden caramel result: honey tones, not red or coppery. Place the color through the top section and concentrate it at the ends, keeping the roots looking dark and natural. I’m not trying to go blonde.” That instruction covers tone direction, placement, root policy, and end goal, ruling out three common miscommunications before the appointment starts.
Stylist tip: If you want caramel highlights but your hair has a history of pulling orange, tell your colorist upfront. A skilled colorist will use a pearl or beige toner after lifting to neutralize brassiness before you leave the chair. Not mentioning your color history is how you end up with orange highlights instead of caramel.
When Caramel Highlights Are Not the Right Choice
Caramel highlights don’t deliver equally well for every client. These situations call for a different approach.
- Hair damaged from previous bleach or heat: Adding more bleach to compromised hair risks breakage and uneven results. Wait until the damaged sections are trimmed out, or have your colorist do a bond-building treatment and a strand test before committing to a full application.
- Very recently relaxed hair: Chemical relaxers weaken the hair structure temporarily. Wait a minimum of 2 weeks before any bleach application; many professionals recommend 4 weeks for safety.
- Extremely fine or sparse hair: Bleach lightening removes protein from the hair shaft. Fine hair that is also sparse may not handle the additional stress well. A tonal gloss in a warm caramel shade adds warmth without any lifting risk and is the safer route.
- Cool undertones targeting very warm caramel: Very warm or copper-heavy caramel on cool-toned skin tends to look jarring rather than luminous. A neutral or beige caramel is the better bridge for cool-undertone clients who still want warmth.
Maintenance and Touch-Up Reality
Maintenance schedules differ based on technique. The table below covers realistic expectations rather than best-case-scenario ones.
| Technique | Touch-Up Interval | Between-Visit Care | Grow-Out Behavior |
|---|---|---|---|
| Balayage | 10–14 weeks | Warm-toned gloss every 6–8 weeks; weekly deep conditioner | Soft and natural; dark roots blend with the gradient |
| Foil highlights | 6–8 weeks | Color-safe shampoo; weekly conditioning mask | Visible regrowth line by week 5–6 on dark bases |
| Babylights | 12–16 weeks | Bond-building treatment every 4 weeks; weekly mask | Very gradual; fine strands blend nearly invisibly |
| Money piece | 6–8 weeks | Face-framing gloss; heat protectant on the framing pieces | Root line visible quickly at the front hairline |
| Tonal gloss | 4–6 weeks | Color-depositing conditioner between appointments | Fades gradually; no visible regrowth line |
FAQ
Will Caramel Highlights Look Orange on Dark Hair?
They can, if the colorist lifts without toning afterward. Dark hair passes through a warm orange-bronze stage during bleaching before reaching the caramel zone. A skilled colorist applies a pearl, beige, or golden toner after lifting to neutralize any orange and lock in the caramel result. If you leave the salon with orange highlights, the toner step was either skipped or underdeveloped. Before the appointment, ask: “What toner will you use to achieve a true caramel, and how will you prevent brassiness?”
How Much Do Caramel Highlights Cost?
Prices vary significantly by base color, hair length, and location. Partial balayage on medium brown hair runs $100–$180 at mid-range salons in most US cities. A full balayage on dark or black hair starts at $150 and can exceed $300 at higher-end salons due to the extra time and product required. Foil highlights on dark hair are similarly priced. A gloss touch-up between appointments typically runs $50–$90.
Can I Maintain Caramel Tone with At-Home Products?
Tonal maintenance between appointments is possible with a warm-toned color-depositing conditioner, which deposits a small amount of golden or honey pigment each wash to counteract fading. These products don’t replace professional toning but extend the life of the caramel tone by 2–4 weeks. Use a sulfate-free shampoo to slow color stripping, and deep condition weekly. Avoid purple shampoo: it neutralizes warm tones, which is exactly what you want to preserve.
How Long Before Caramel Highlights Fade?
The lightened strands themselves don’t disappear, but the caramel tone fades as the toner washes out. Without maintenance, a caramel result typically shifts toward pale honey or yellow-blonde within 8–12 weeks. A warm-toned gloss at your 8-week appointment refreshes the caramel depth without requiring a full re-lighten. Using heat tools daily accelerates tonal fading, so a heat protectant is not optional with highlighted hair.
Can I Get Caramel Highlights Over Boxed Hair Dye?
It depends on the dye and how your hair processes. Boxed dyes often contain metallic salts that react unpredictably with bleach, potentially causing breakage or uneven results. Tell your colorist the full history of any box color before the appointment: the brand, shade, and how long ago you used it. Most colorists will do a strand test before committing to a full application, and if you’re unsure of your color history, a strand test is the right starting point, not an optional extra.
What Hair Type Gets the Best Caramel Highlight Results?
Wavy and curly hair gets the most dimensional-looking results because the curves of each wave or curl catch light differently, making the caramel pop visually. Straight hair shows caramel highlights most clearly in direct light. Thick hair takes caramel well but needs more processing time. Fine hair gets the best results from babylights or a tonal gloss rather than heavy foil highlights, which can over-process fragile strands. If you have fine wavy hair, consider these options alongside other warm color approaches that work without heavy lifting.
The best caramel highlights start with an honest conversation about your base color, your hair’s health history, and your maintenance tolerance. Bring photos from this collection to your next appointment alongside your preferred tone direction — golden, neutral, or tawny, and you and your colorist will start the session with the same result in mind. Caramel highlights on brown, dark brown, and black hair look their best when both the technique and tone are chosen for your specific starting point, not just the look you loved on someone else’s hair.
Hair results vary based on your natural hair type, texture, density, and condition. Always consult with a licensed hairstylist before making significant changes, especially with chemical treatments or dramatic length changes. Photos may show styled results that require professional tools and products to replicate.