

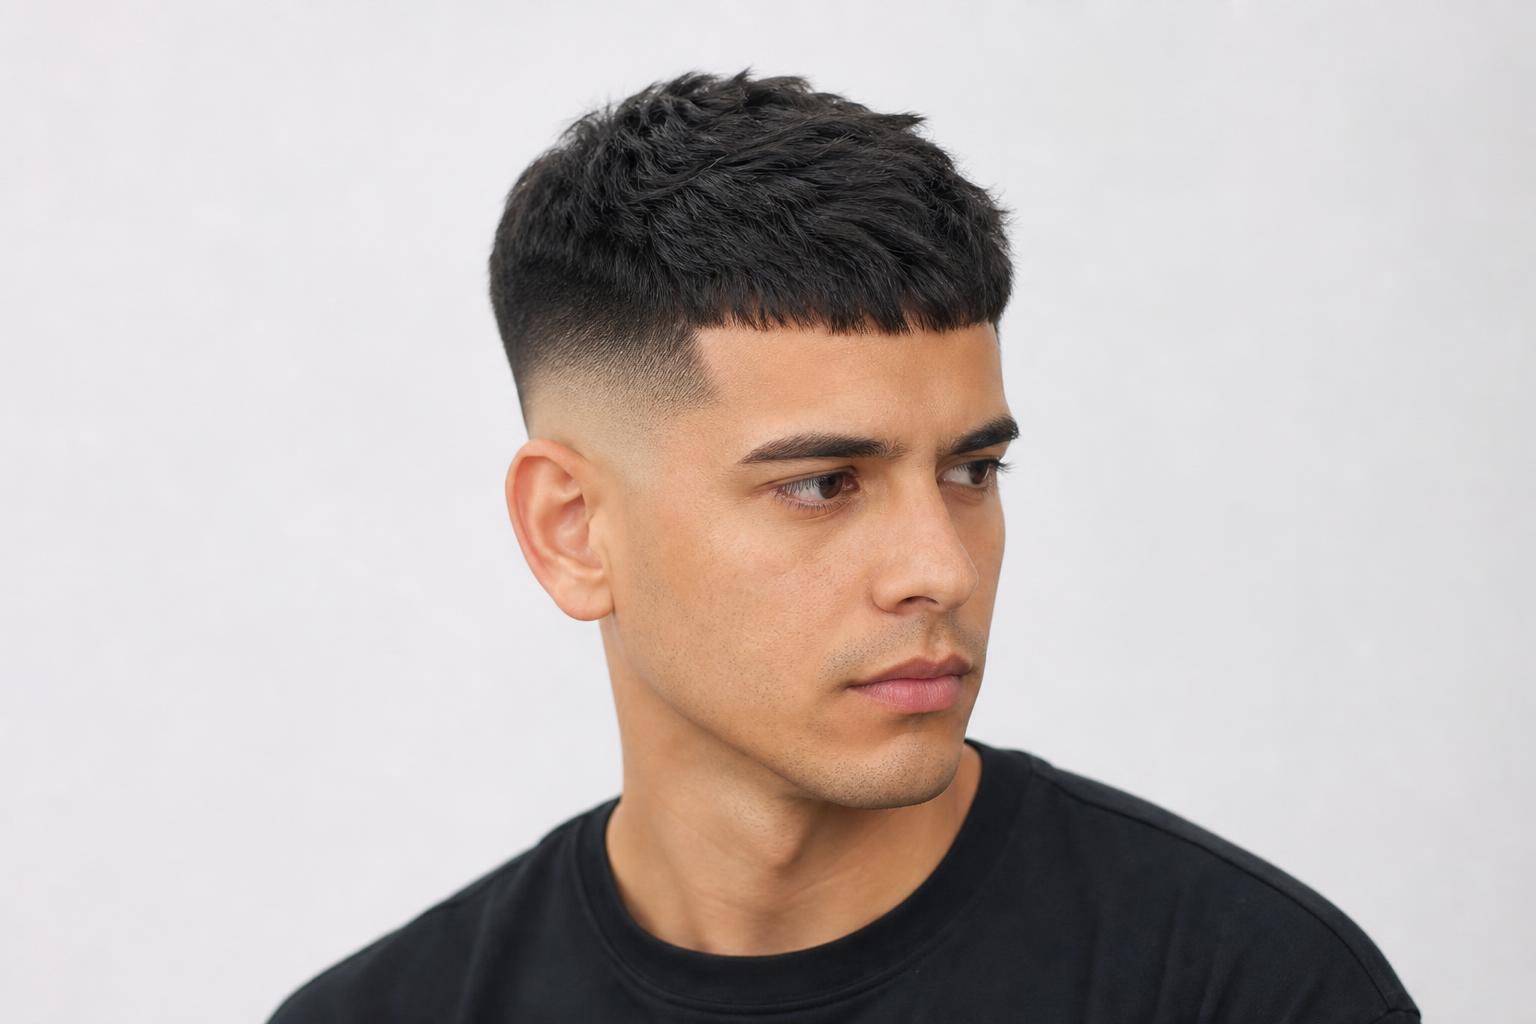
A mid fade starts at temple level, which is the one detail that decides whether your barber gives you the haircut you asked for or the one next to it on the wall.
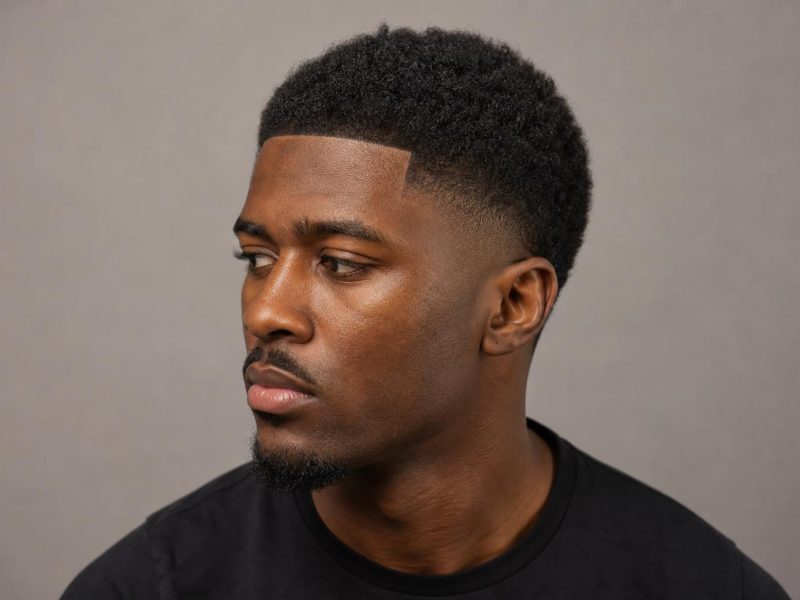
A mid fade haircut is a graduated blend on the sides and back that begins roughly halfway up the head, level with the temples, and works down to short or bare skin at the hairline. That starting height is the whole definition: a low fade begins just above the ear, a high fade begins above the temple near the parietal ridge, and the mid fade splits the two. This collection covers 28 versions of it, grouped by how much length stays on top.
Every entry names the guard numbers or cutting technique behind the shape, so you can describe it in the chair instead of holding up a phone. After the gallery you get a fade height comparison table, face shape guidance, the exact barber wording for each variation, and a realistic look at the two to three week cycle a mid fade actually runs on.
| Factor | Details |
|---|---|
| Fade starts at | Temple level, roughly halfway between the ear and the parietal ridge |
| Best for | Oval, square, and heart faces; straight, wavy, and coily textures alike |
| Maintenance | Barber visit every 2 to 3 weeks; 1 to 3 minutes of daily styling |
| Avoid if | You have a receding temple line or scarring you would rather not expose |
| Barber time | 30 to 50 minutes, longer with a beard blend or design work |
Mid Fade Haircuts with Short Tops
Keeping the top under about two inches makes the fade itself the main event, and it is where a mid fade earns its reputation for looking tidy with almost no morning effort. These versions live and die on the quality of the blend, because there is no length up top to distract from a visible guard line. Ask to see the back in a hand mirror before you leave the chair.
1. Mid Skin Fade with a Buzzed Top
The clipper drops all the way to bare skin at the hairline and blends up through roughly a 0.5, 1, and 2 guard to meet a top buzzed at a 3 or 4. Because every length here is set by a guard number, this is the easiest mid fade to reproduce at a new barbershop.
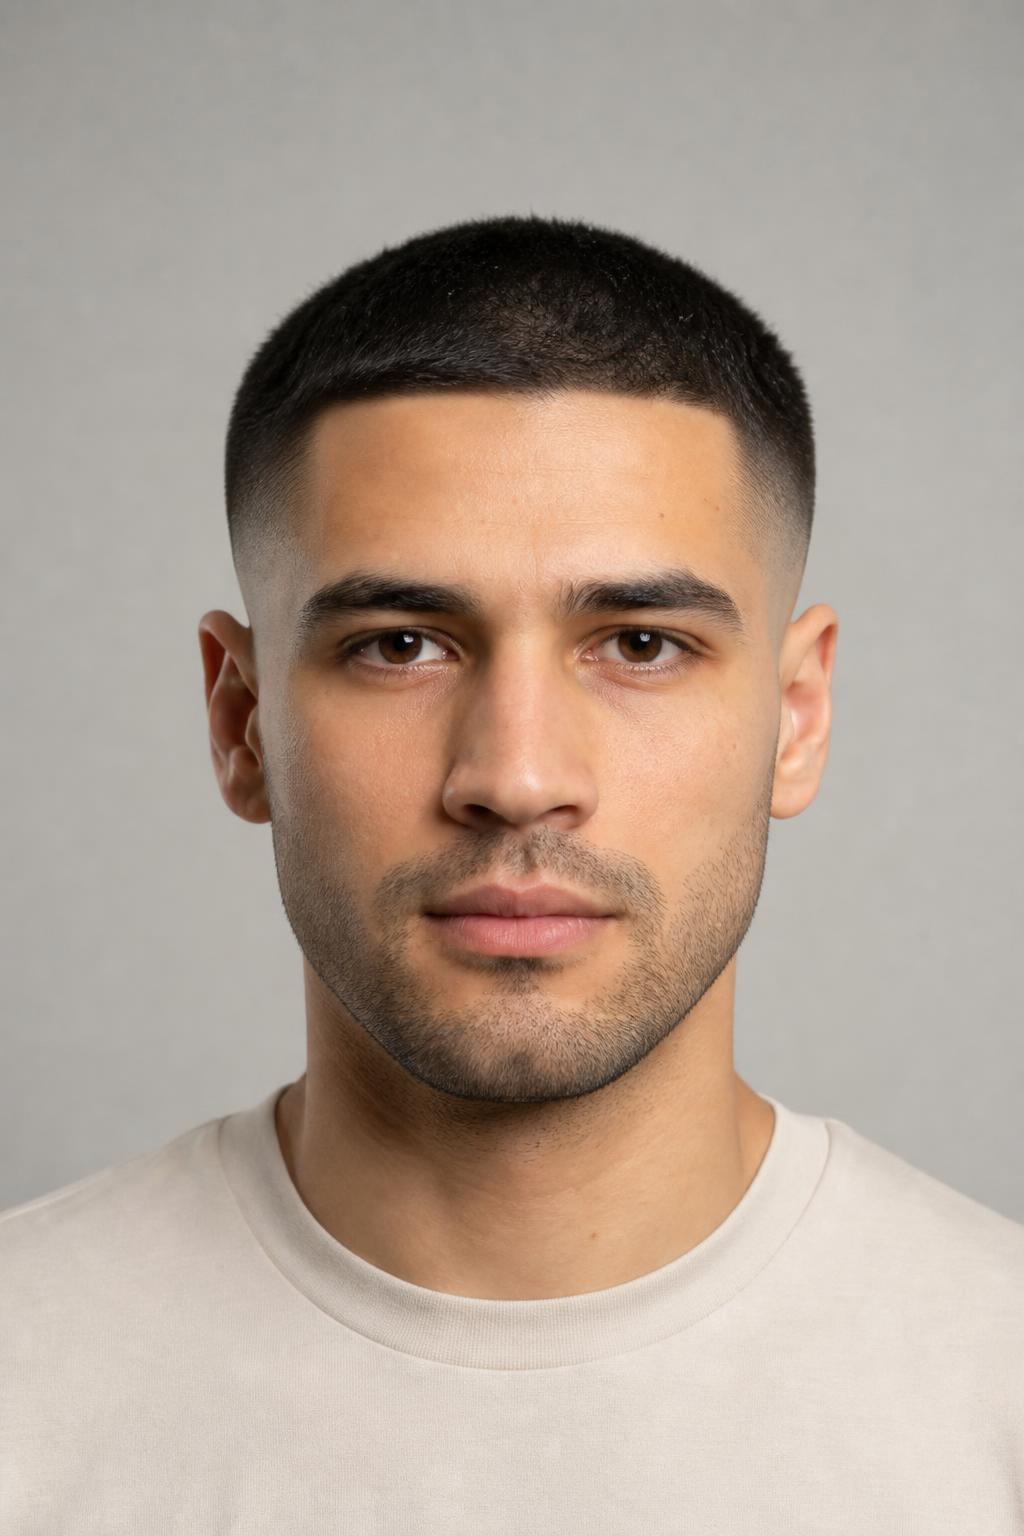
2. Mid Fade with a French Crop
Where a plain buzzed top has no front detail, the crop family pushes a short, blunt fringe forward onto the forehead and leaves the crown slightly longer. Pairing that fringe with a mid fade rather than a high one keeps the head from looking narrow at the sides.
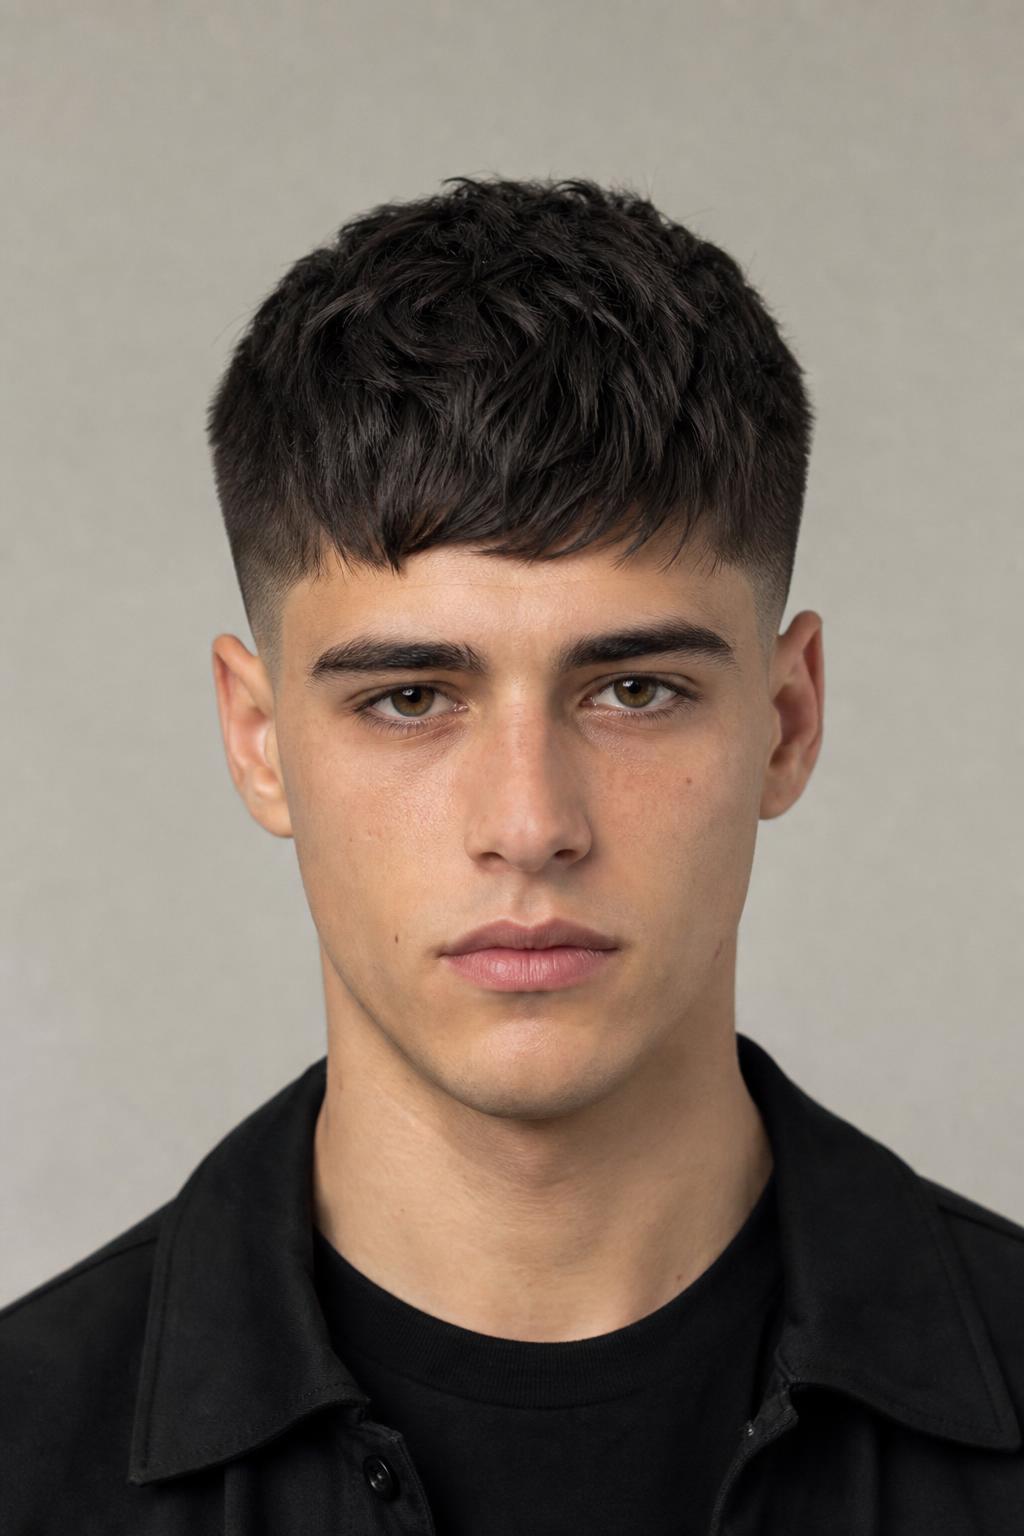
3. Mid Fade Caesar Cut
The Caesar keeps a uniform inch on top combed forward into a straight fringe line, which adds a horizontal edge across the forehead. On a long or oblong face that horizontal line is exactly what shortens the visual length. On a round face it does the opposite, so pair it with more height instead.

4. Mid Fade with a Textured Crop
Thick, coarse hair pushes outward at the crown when it is cut to one flat length, and point cutting into the top two inches is what stops that. The result separates into pieces instead of forming a solid block. Fine hair should skip the heavy texturizing here and keep the top blunt.
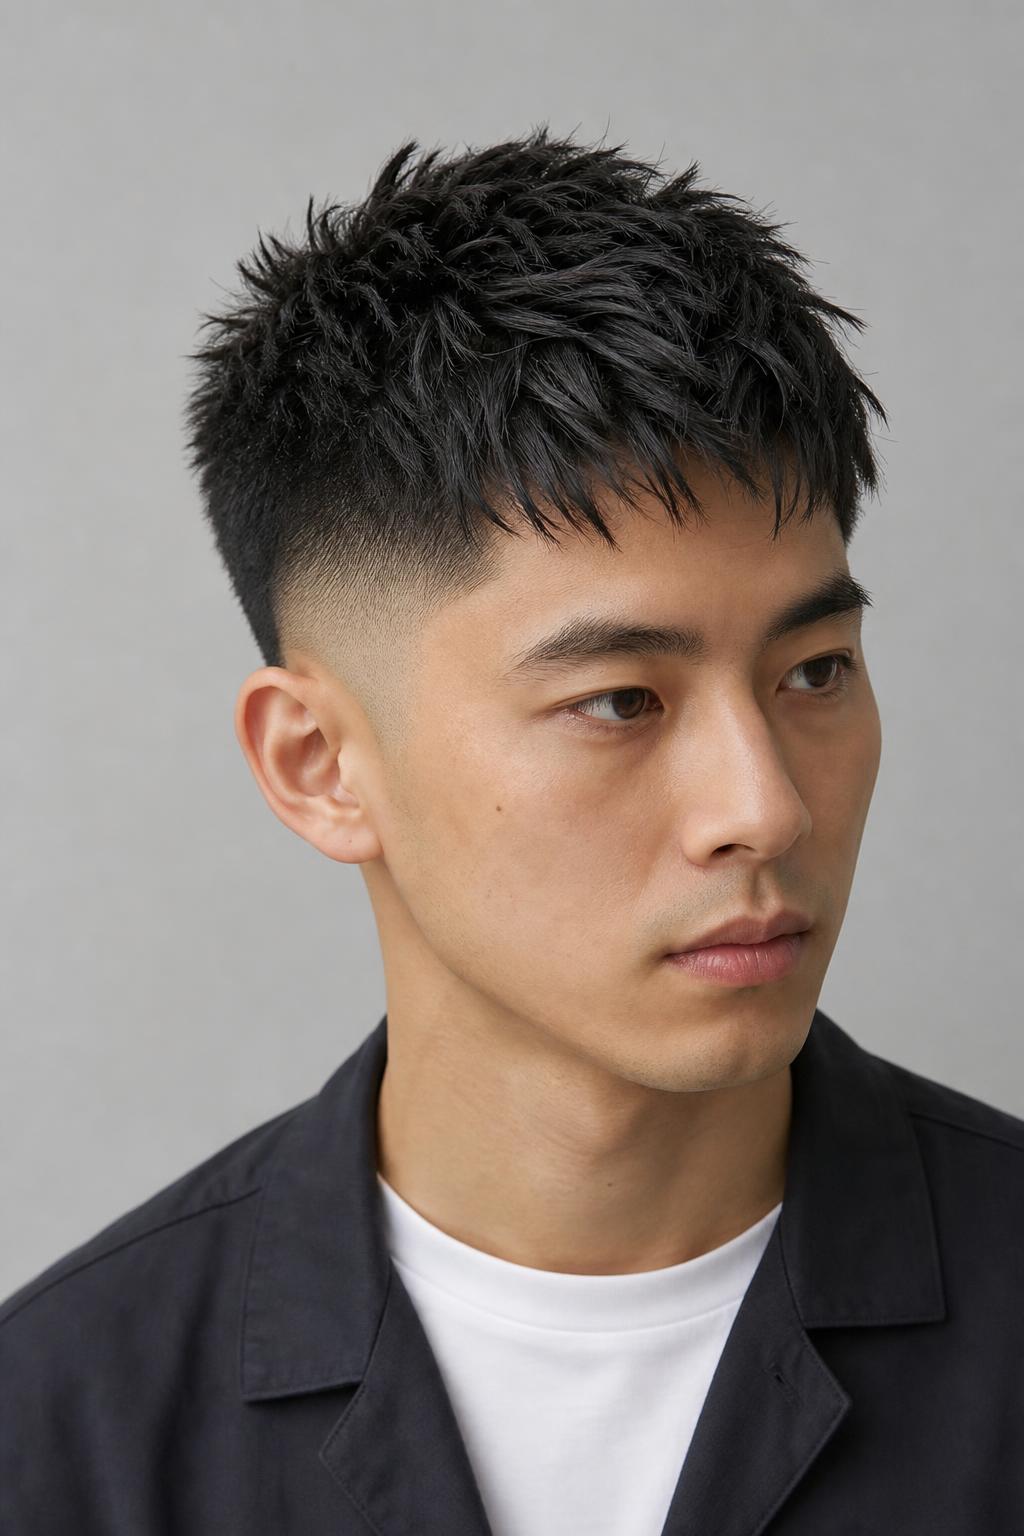
5. Mid Fade Edgar Cut
The wording that gets this right is a straight-across fringe at the hairline, no taper into the forehead, with the fade starting at my temples. Saying only Edgar leaves the fringe height entirely to the barber, and a quarter inch either way changes the whole look.
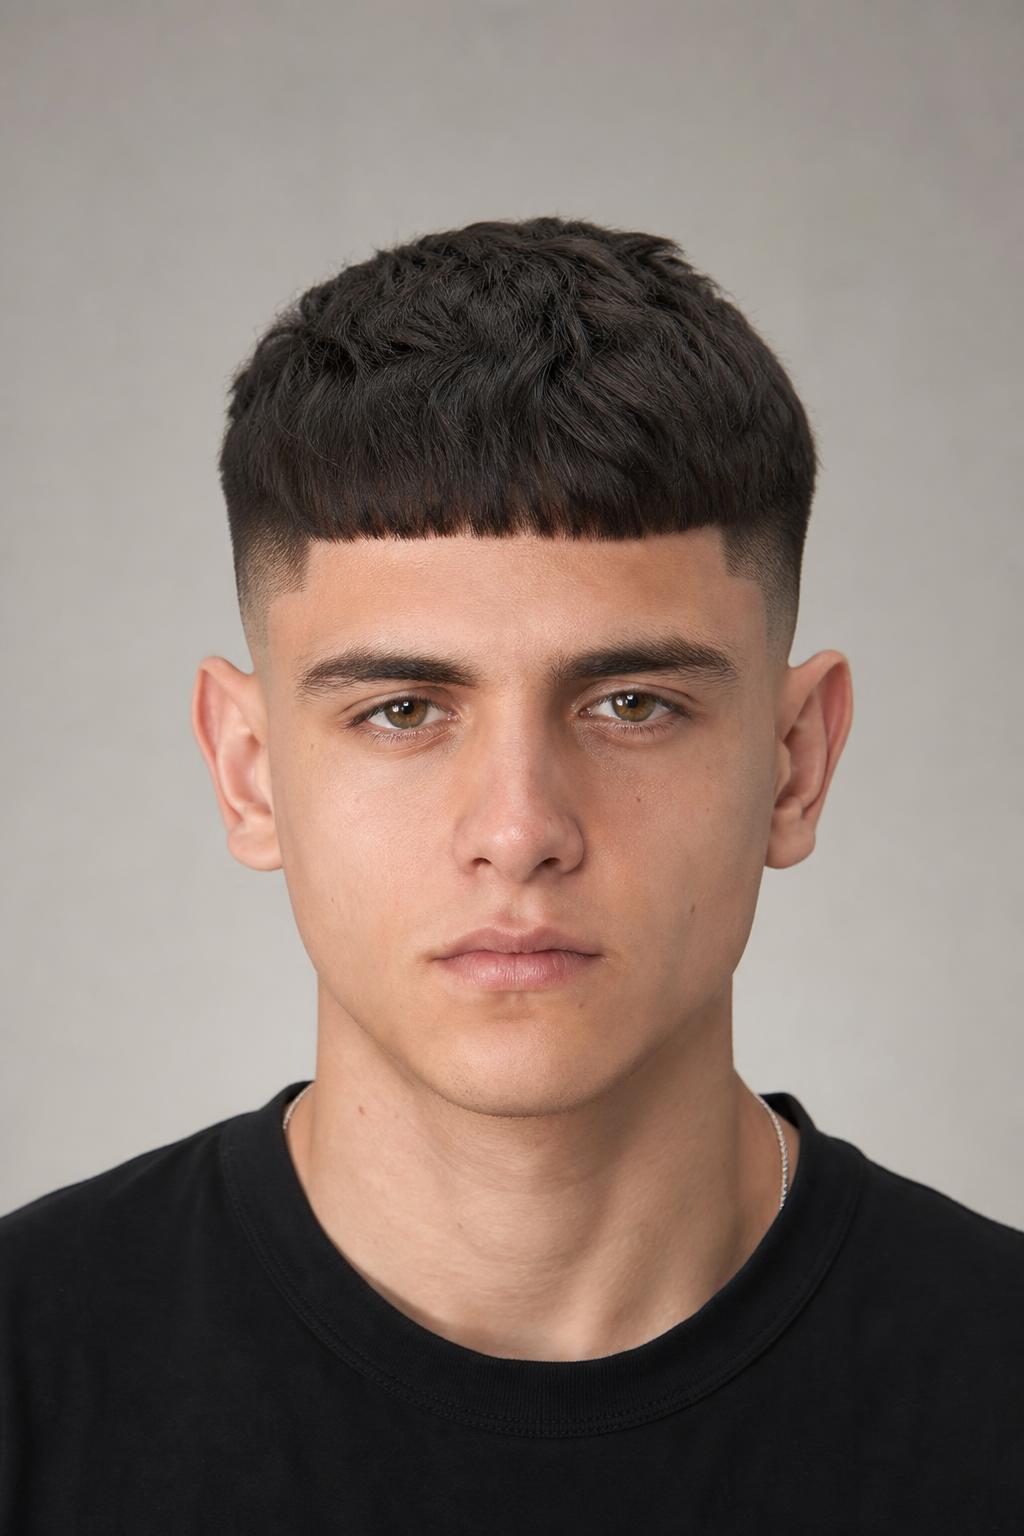
6. Mid Fade Burr Cut with a Line-Up
A burr cut is a single short guard over the whole top with the fade underneath, and it holds a recognizable shape for about ten days before the fade blurs. The line-up along the forehead and temples is what fades first, usually within a week.

7. Mid Fade with a Short Side Part
Work a matte clay through dry hair and comb the top across from a natural part, then leave it alone. A short side part at this length holds all day without spray, which is the point of pairing it with a fade rather than with longer sides.
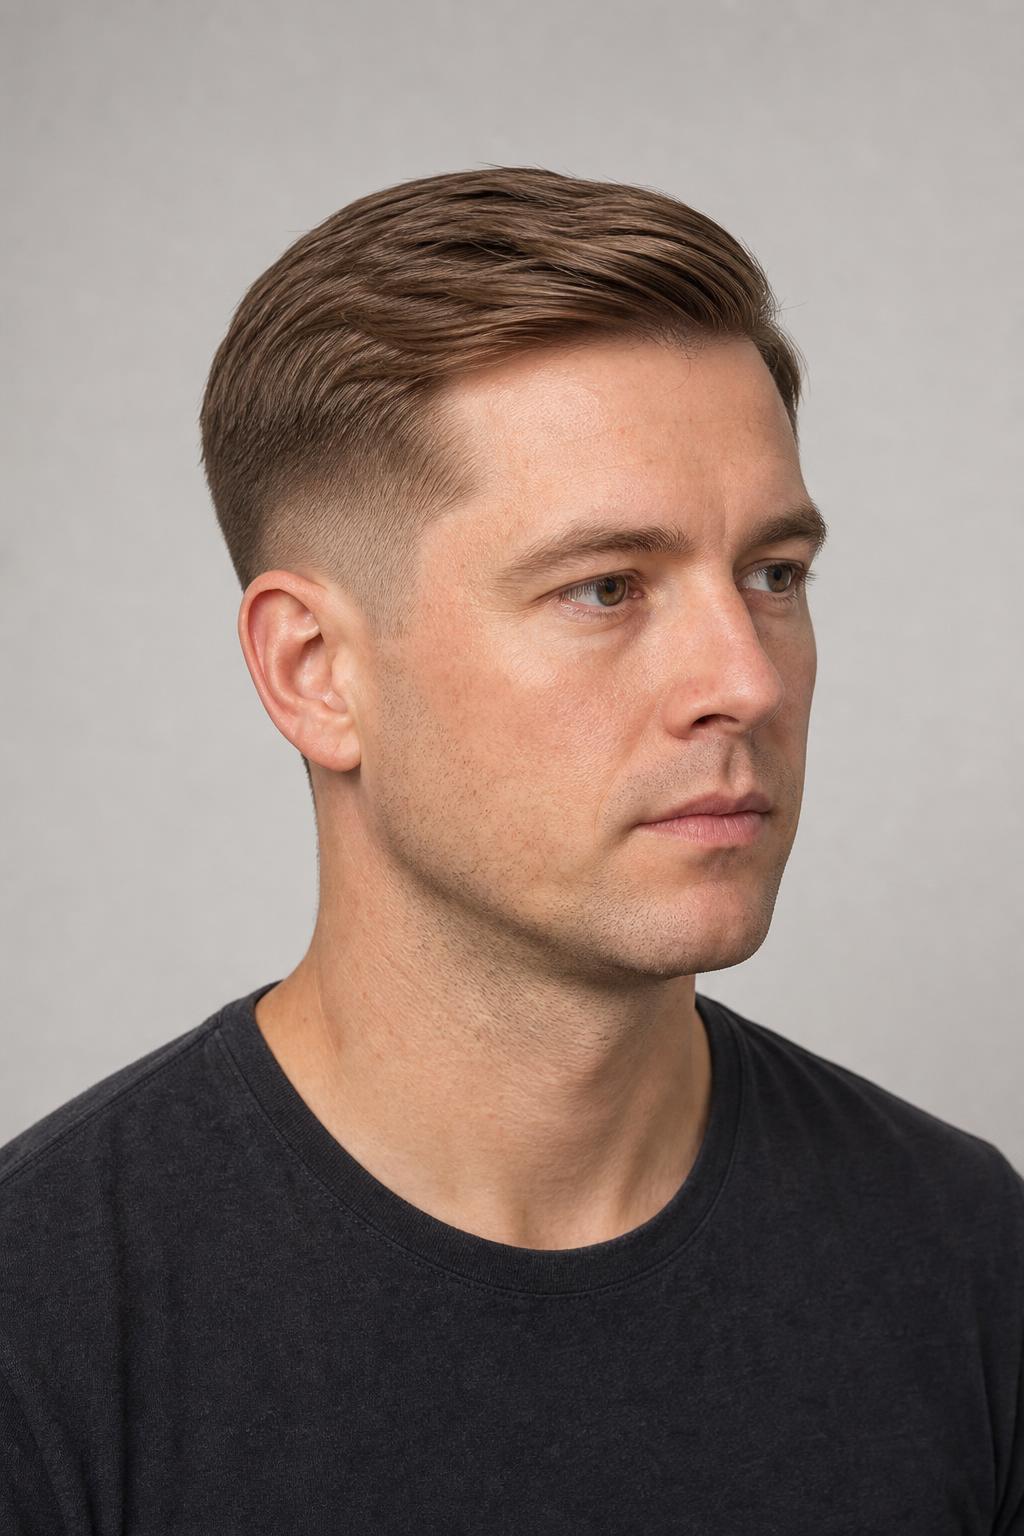
8. Mid Fade Crew Cut
A crew cut graduates the top itself, longest at the front hairline and shortest at the crown, so the shape has a slight forward rise built in by the scissors. Combined with a mid fade it gives more height than a buzz without needing product.
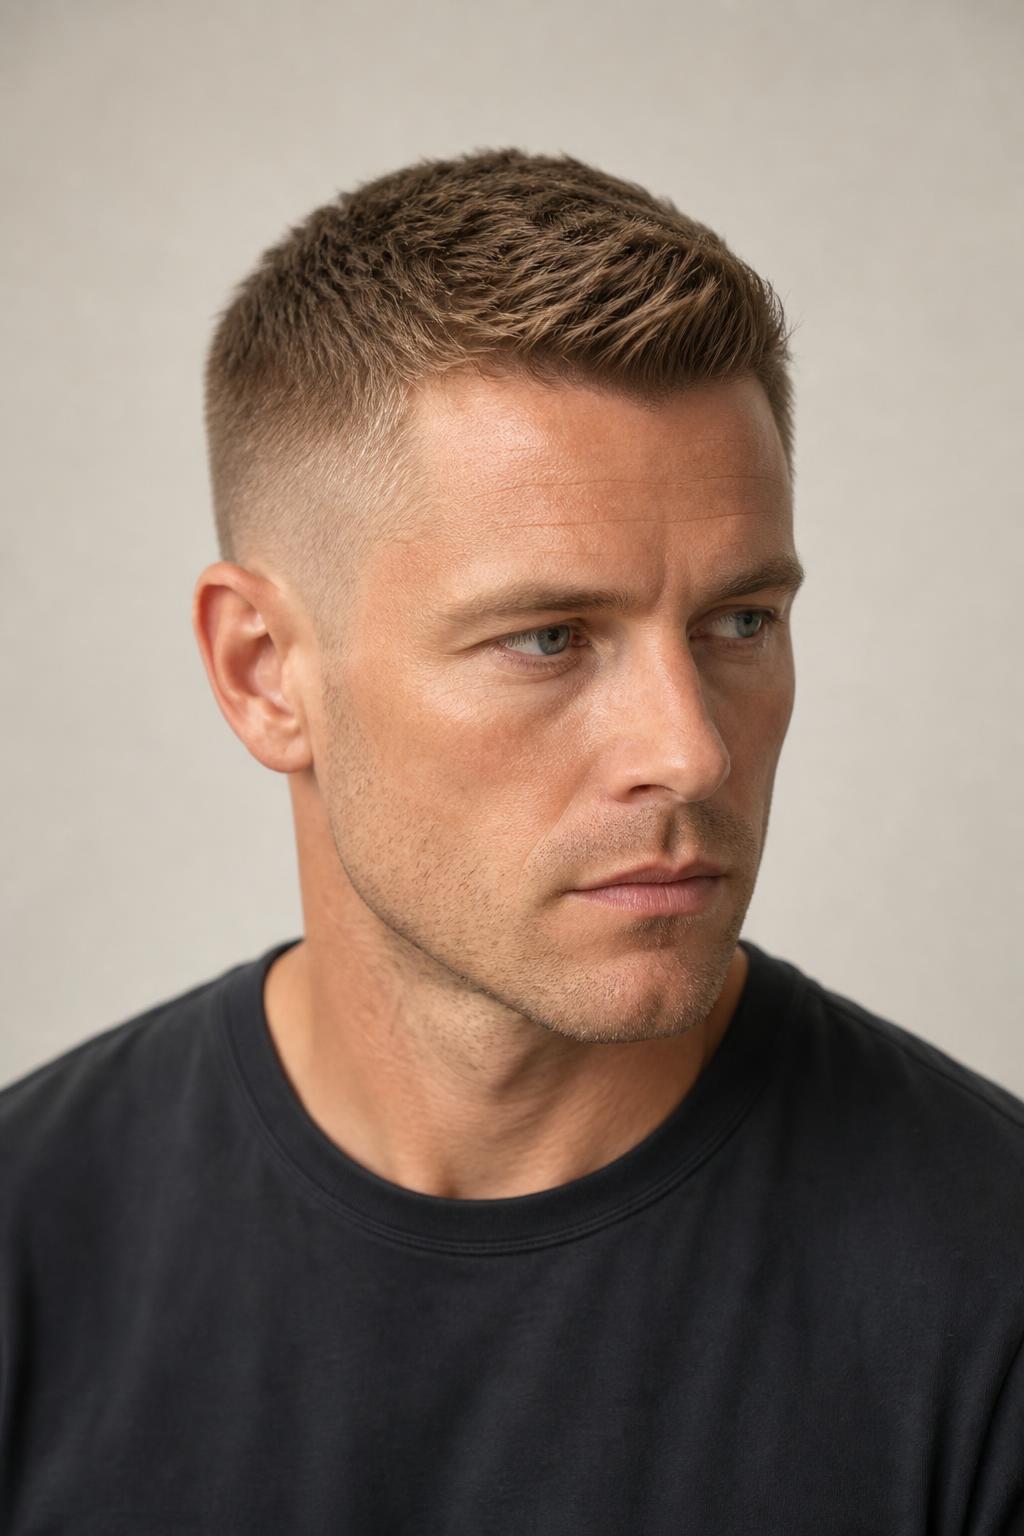
Mid Fade Haircuts with Length on Top
Once the top passes about three inches, the mid fade stops being the whole haircut and starts working as a frame for whatever you style above it. The contrast is sharper than with a taper, which is why these versions look deliberate even on a bad hair day. All of them need a product with some hold, and most need thirty seconds with a dryer.
9. Mid Fade Pompadour
Blow-dry the front section straight up while pulling it back with a vent brush, then set it with a medium-hold pomade once the hair is fully cool. Drying is what builds the height; the pomade only holds what the dryer already created. Most people skip the cooling step and lose half the lift.
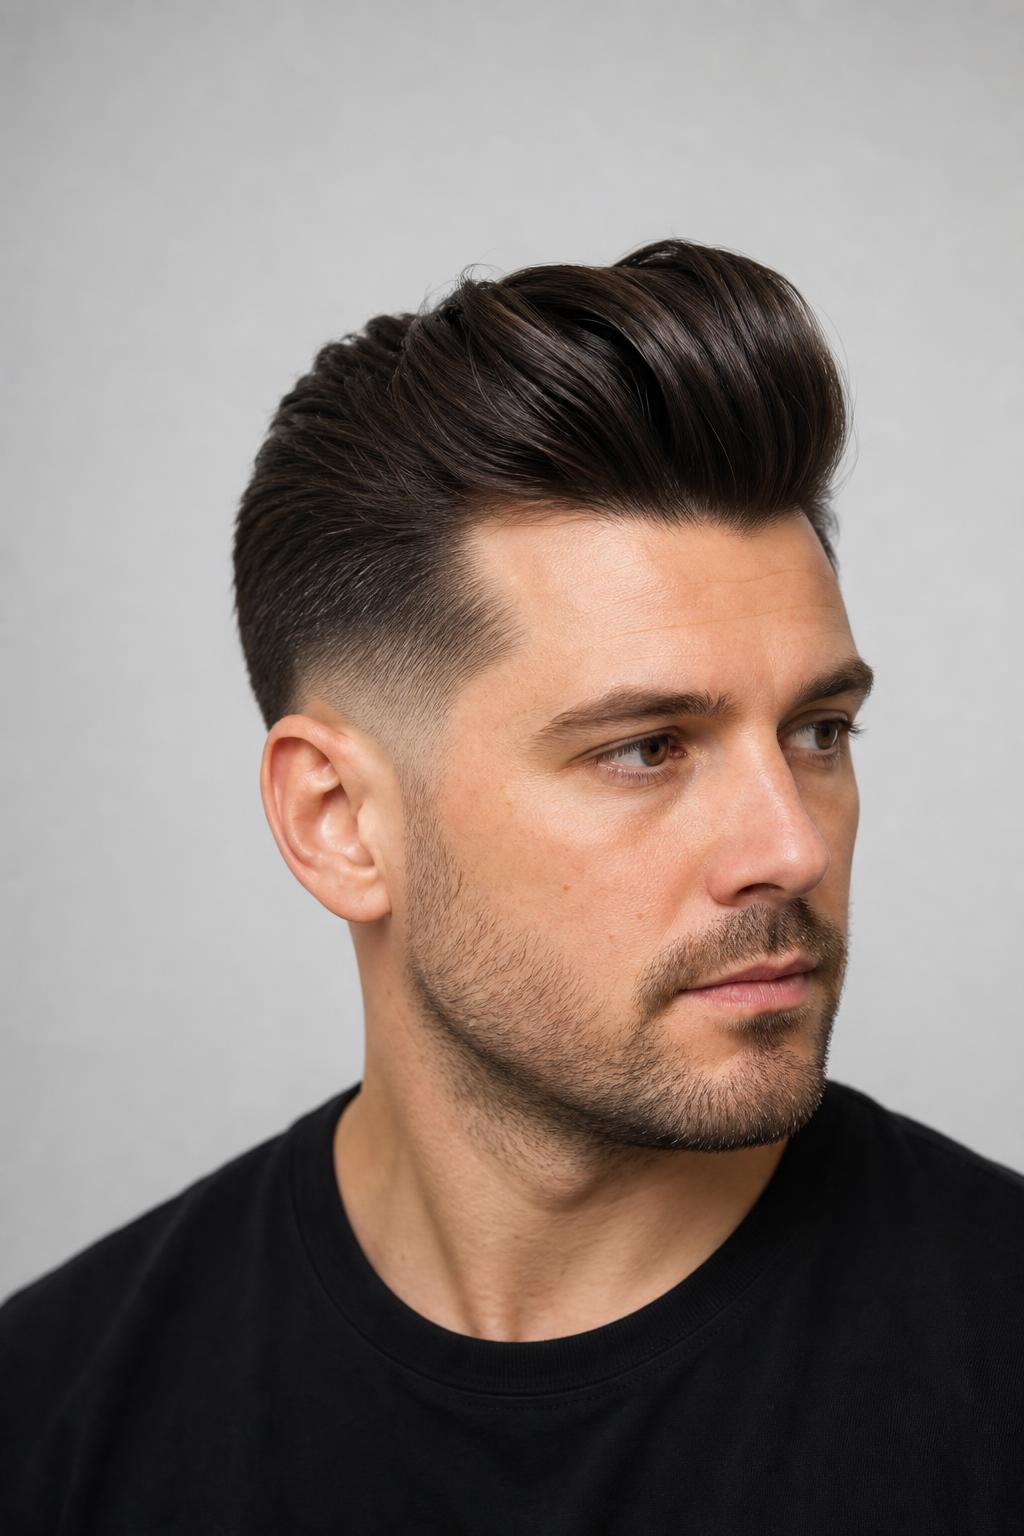
10. Mid Fade Quiff
A quiff is cut with graduated length running from long at the front to shorter at the crown, so the lift happens only at the hairline rather than across the whole top. That graduation is scissor work, not styling, and it is the difference between a real quiff and a pompadour that has fallen forward.
11. Mid Fade Comb Over
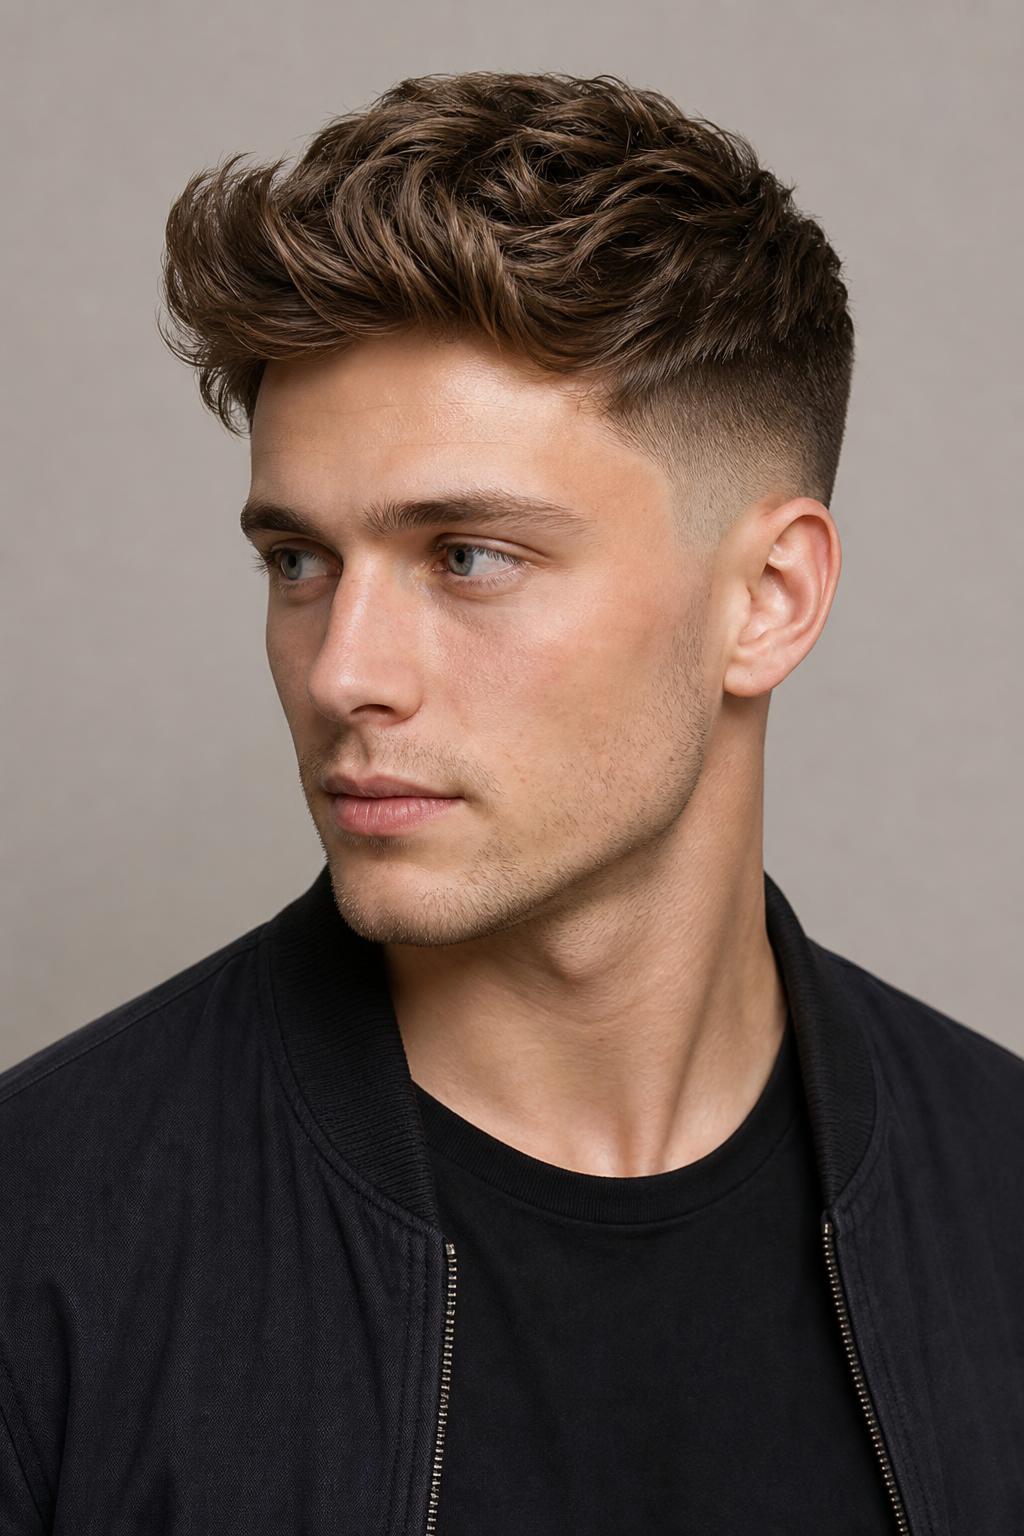
Sweeping the top across from a defined part creates a diagonal line, and diagonals soften the square corners of a strong jaw. Square and rectangular faces gain the most from this one. On a very round face, keep the part deeper and the height higher so the diagonal is steeper.

12. Mid Fade Slick Back
A slicked-back top with a mid fade holds its shape for a full working day, but it needs a wash every night because the pomade builds up fast at the roots. Skipping that wash is what turns a slick back greasy by day three rather than merely lived-in.
13. Mid Fade Faux Hawk
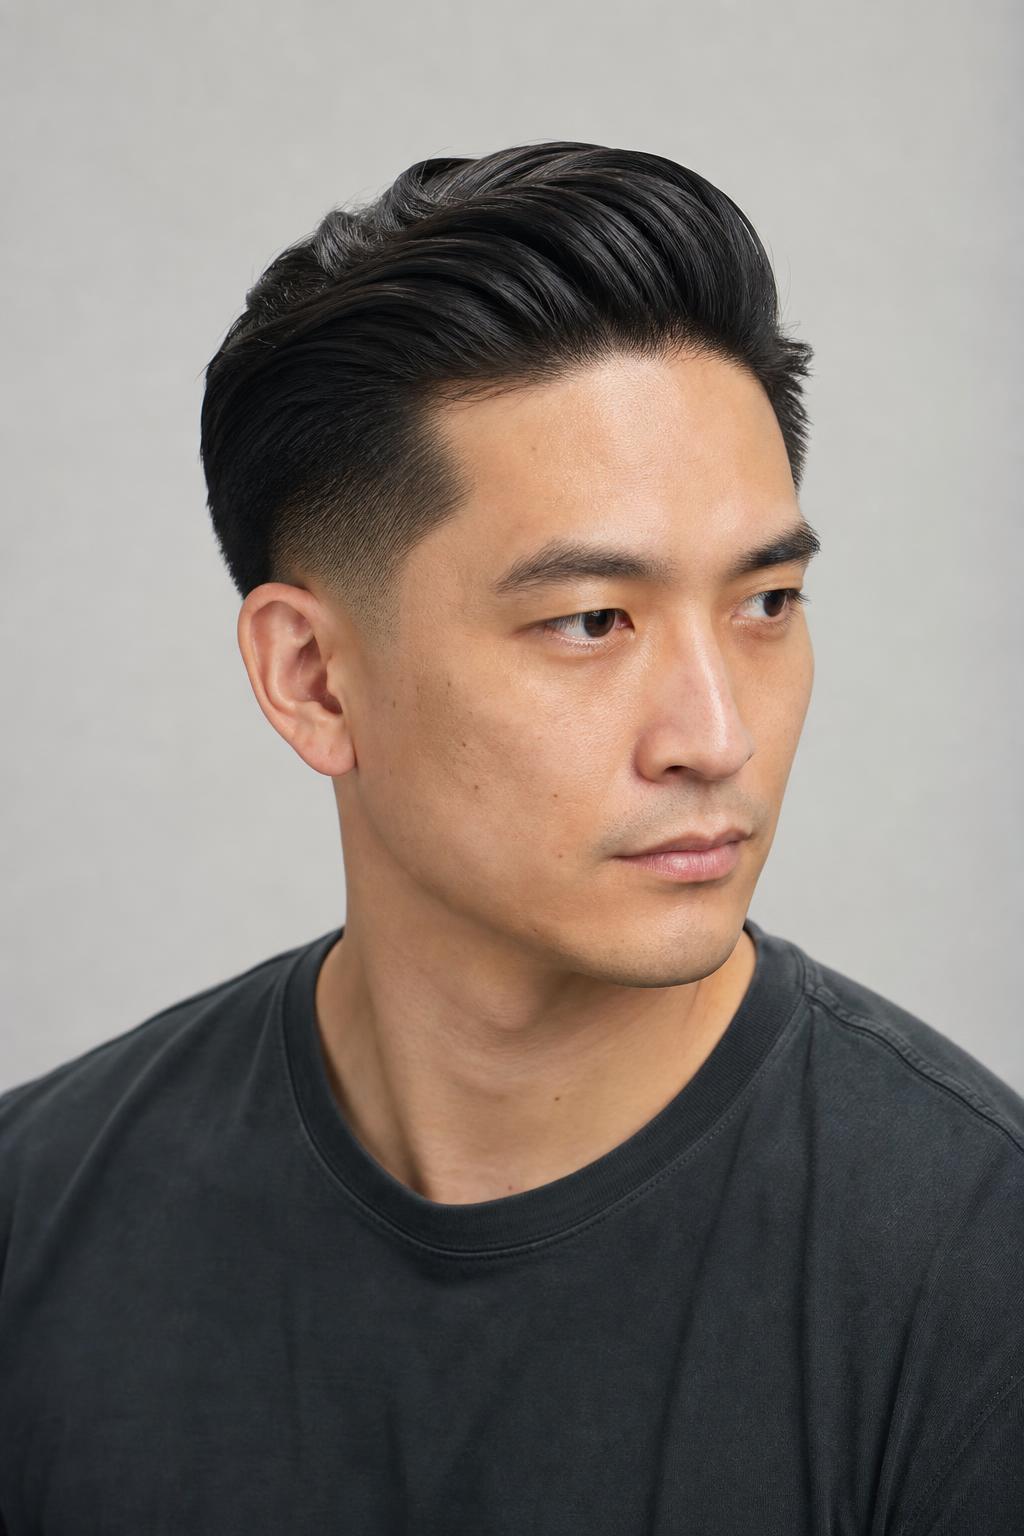
Unlike a comb over, which moves hair sideways, a faux hawk gathers the top toward the center line so the height runs front to back like a ridge. The mid fade keeps that ridge from looking as severe as it would over a high fade, which makes it wearable in an office.
14. Mid Fade with a Textured Fringe
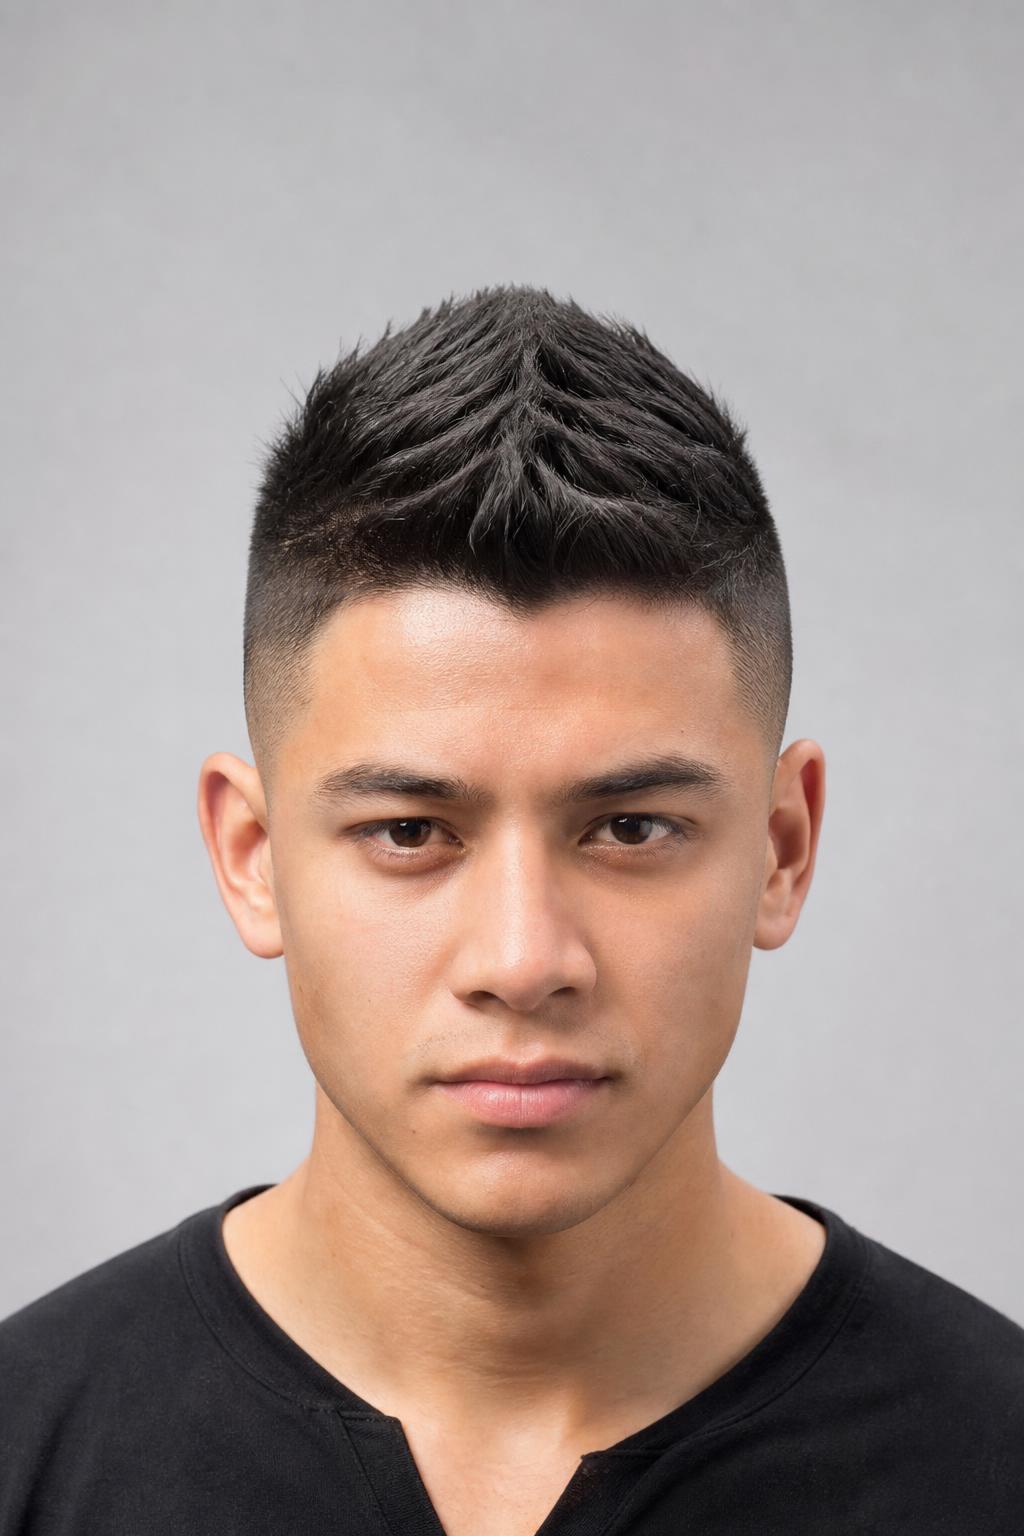
Wavy and slightly curly hair falls forward naturally, and a fringe cut to graze the eyebrows uses that instead of fighting it. Straight hair needs a light sea salt spray to get the same separation. Density under medium keeps the fringe from looking thin at the edges.

15. Mid Fade with Middle-Part Curtains
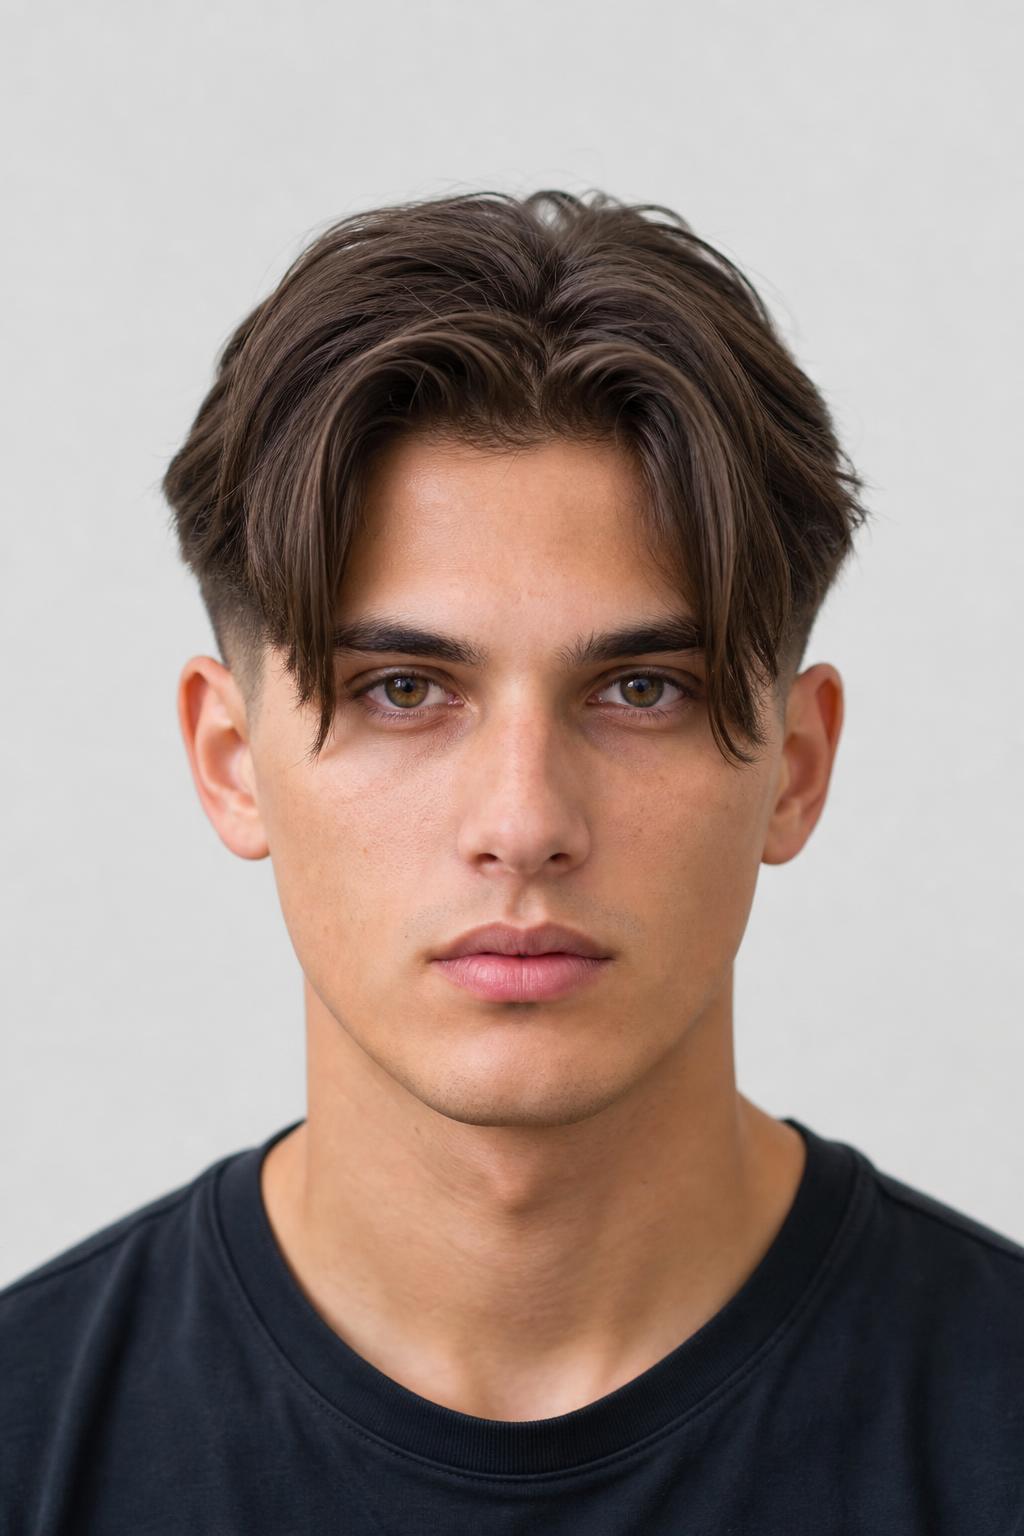
Ask for four to five inches left on top, split down the middle, with the front pieces cut to reach the cheekbone and the fade brought up to temple level only. Naming the cheekbone as the stopping point is what keeps curtains from being cut too short to part at all.
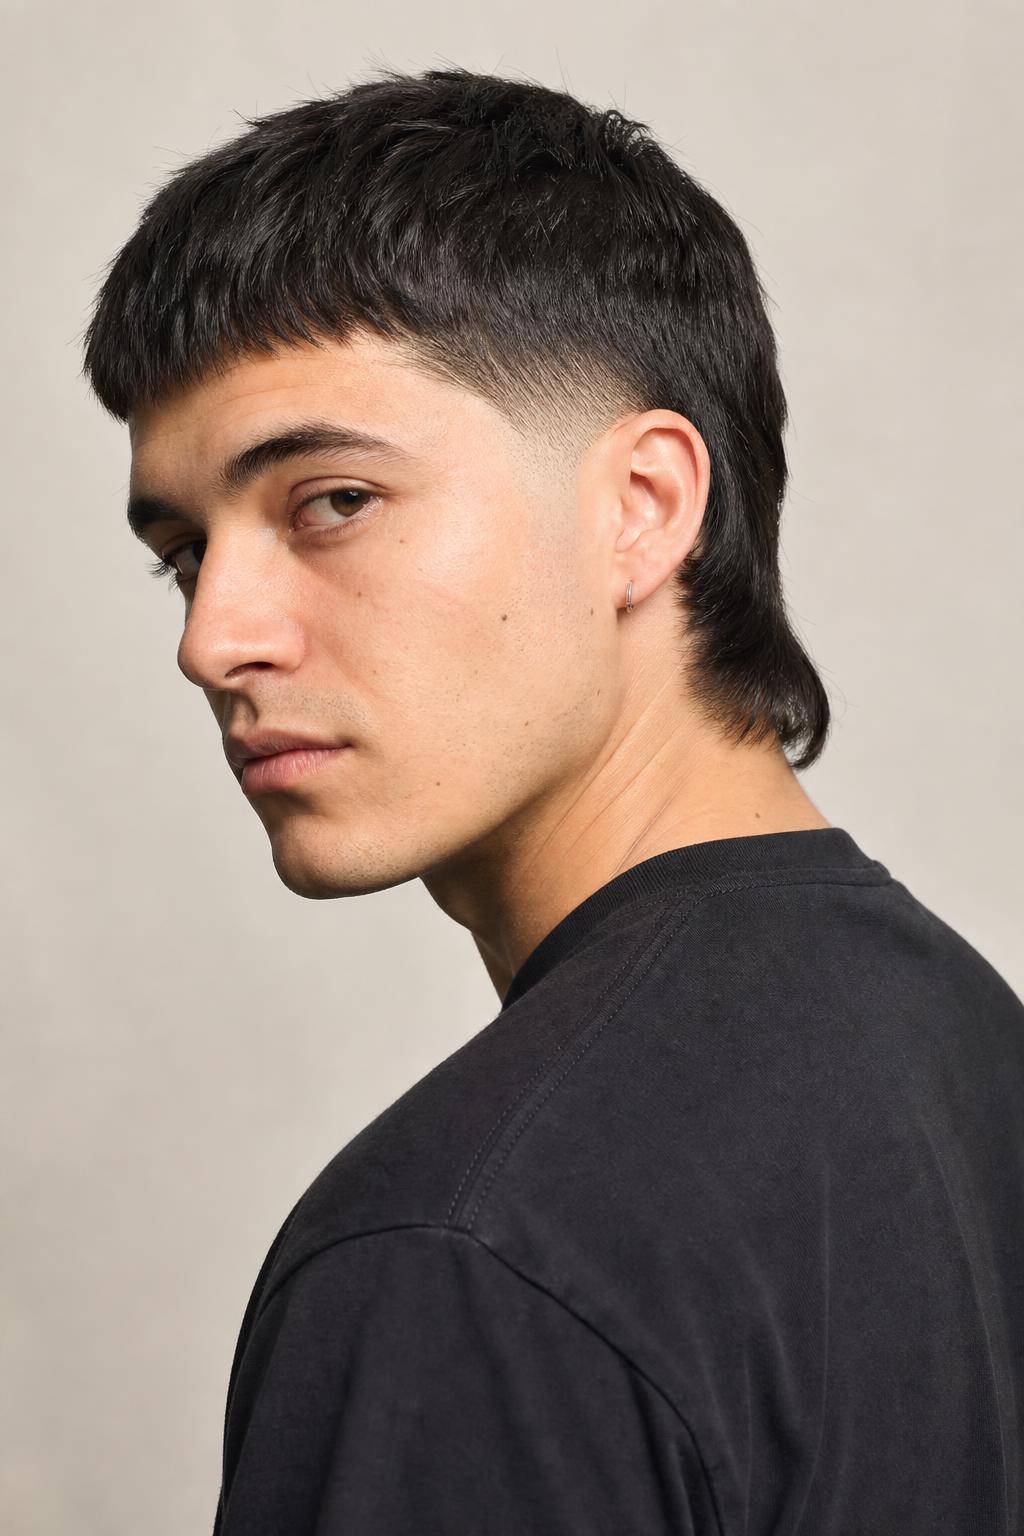
16. Mid Fade Mullet
Compared with a taper, which softens the transition, a mid fade against a mullet makes the jump from short sides to long nape deliberate rather than accidental. The nape section is left at collar length while the fade cuts the sides clean from temple level down.
Mid Fades for Curly and Coily Hair
Curly and coily textures shrink when dry, so a mid fade cut to look balanced on wet hair often ends up looking high once the top springs up. Any barber working on 3c to 4c hair should be cutting the top dry and blending the transition with scissor-over-comb rather than clippers alone. That transition zone, where the faded skin meets the curl, is where good and bad fades separate.
17. Mid Fade with a Sponge-Curled Top
A curl sponge worked in small circles over damp coils creates uniform curl definition across a short top, and it takes about ninety seconds. The top needs at least an inch of length for the sponge to catch. Apply a leave-in first or the sponge will pull and frizz the ends.
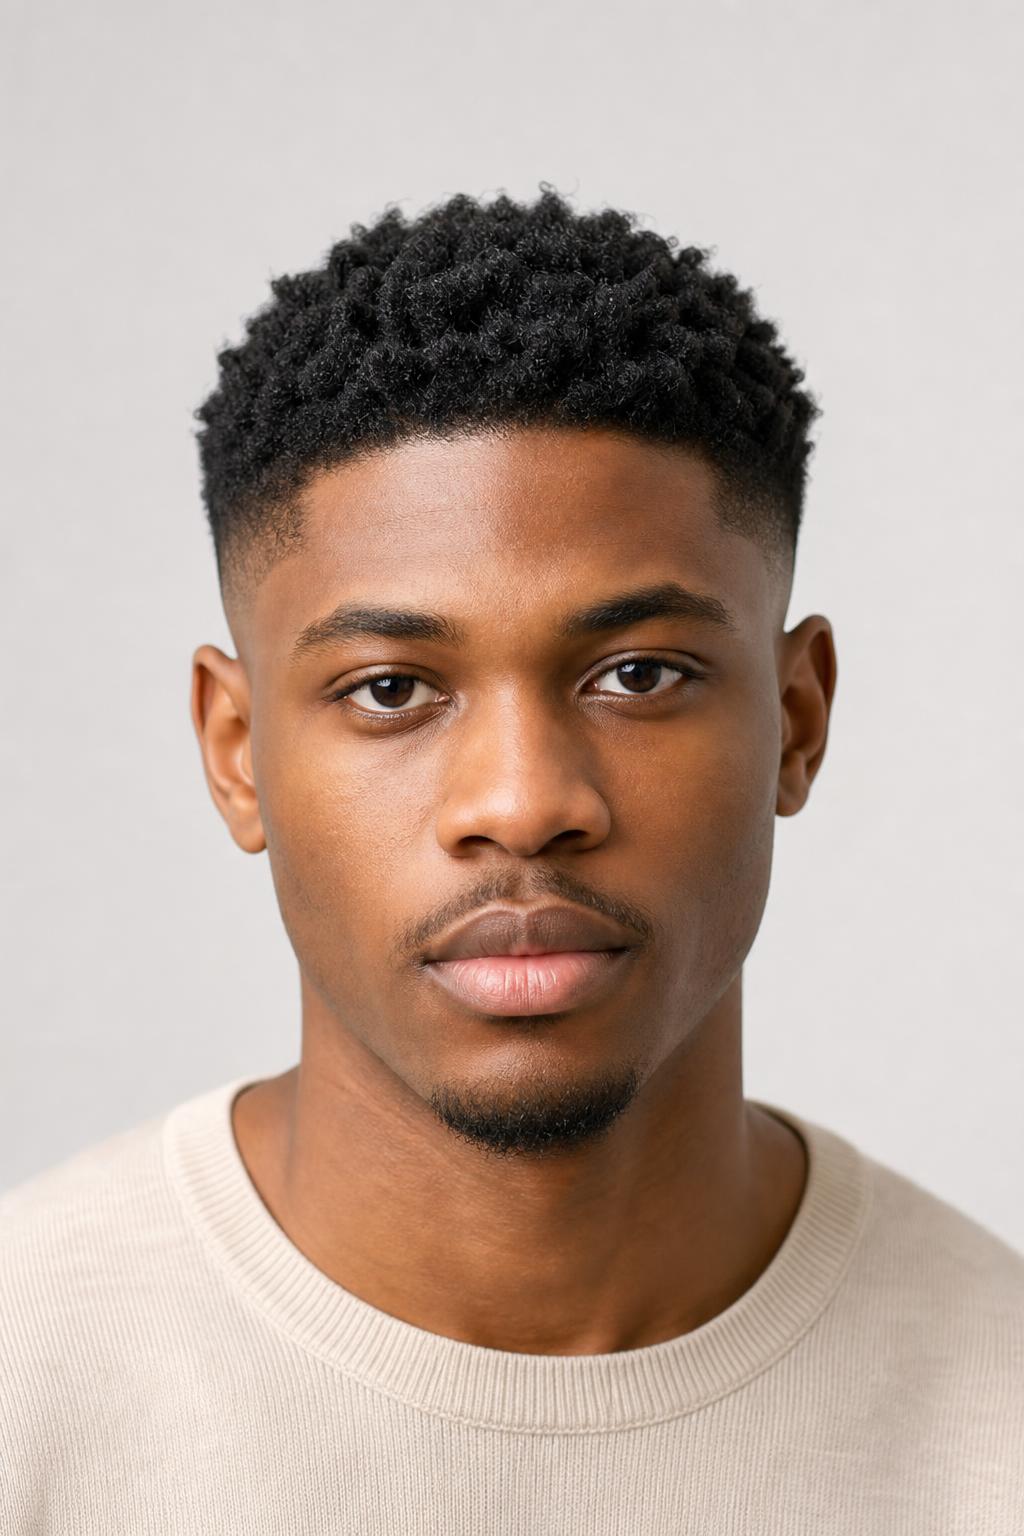
18. Mid Drop Fade on Coily Hair
A drop fade curves the fade line downward behind the ear instead of running level around the head, which follows the natural round of the skull. On dense 4b and 4c hair that curve keeps the back of the head from looking flat where the density is heaviest. It costs the barber an extra ten minutes.
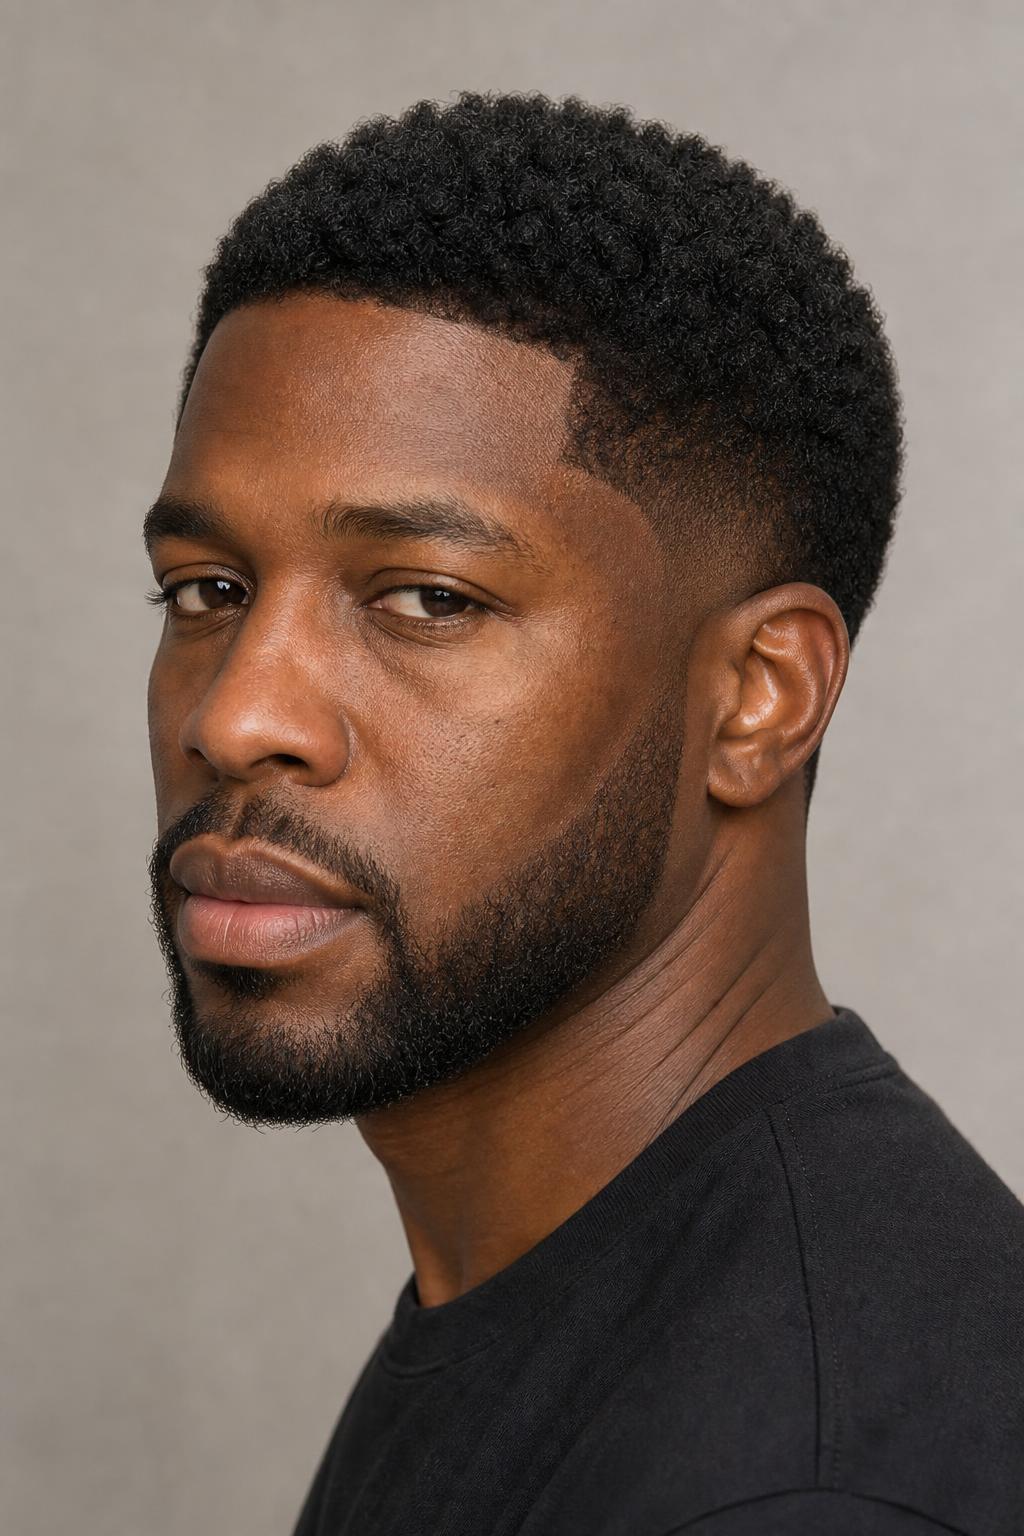
19. Mid Fade with 360 Waves
Waves need brushing twice a day and a durag every night to hold a pattern, and a mid fade has to be re-cut every two weeks to keep the wave field from running into the blend. This is the highest-maintenance entry in the collection by a wide margin.
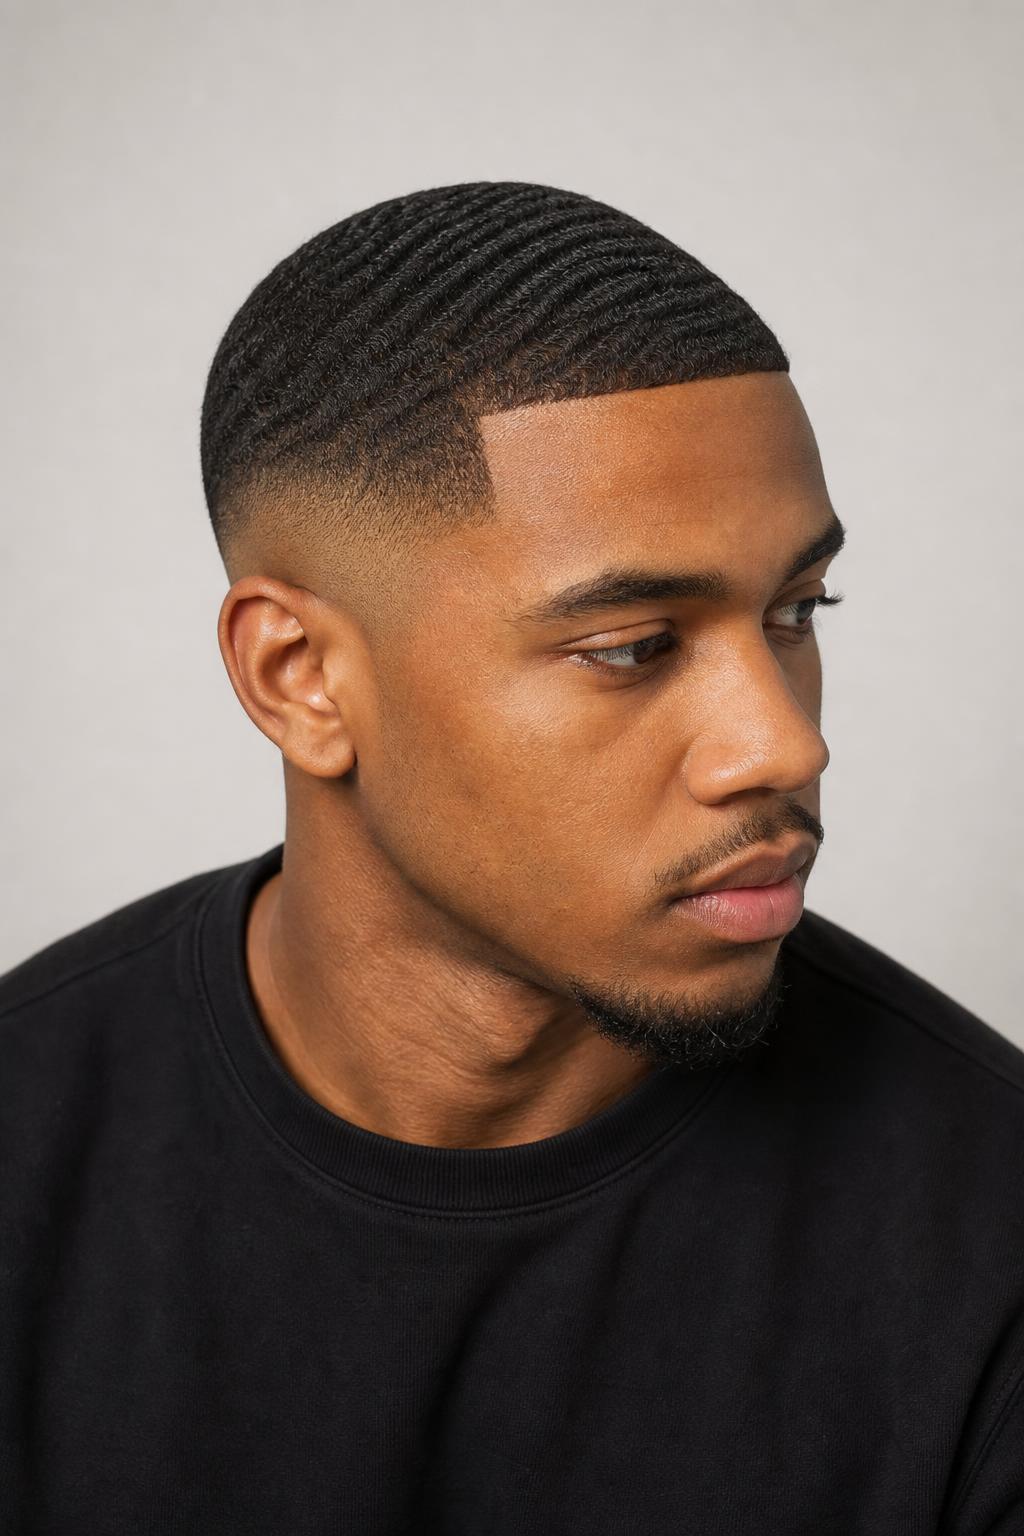
20. Mid Fade with a Rounded Afro Top
Keeping three to four inches of rounded afro above a mid fade adds height without width, which balances a shorter or rounder face. The fade removes the side volume that would otherwise widen the head at ear level. Ask for the top to be shaped round rather than flat across.
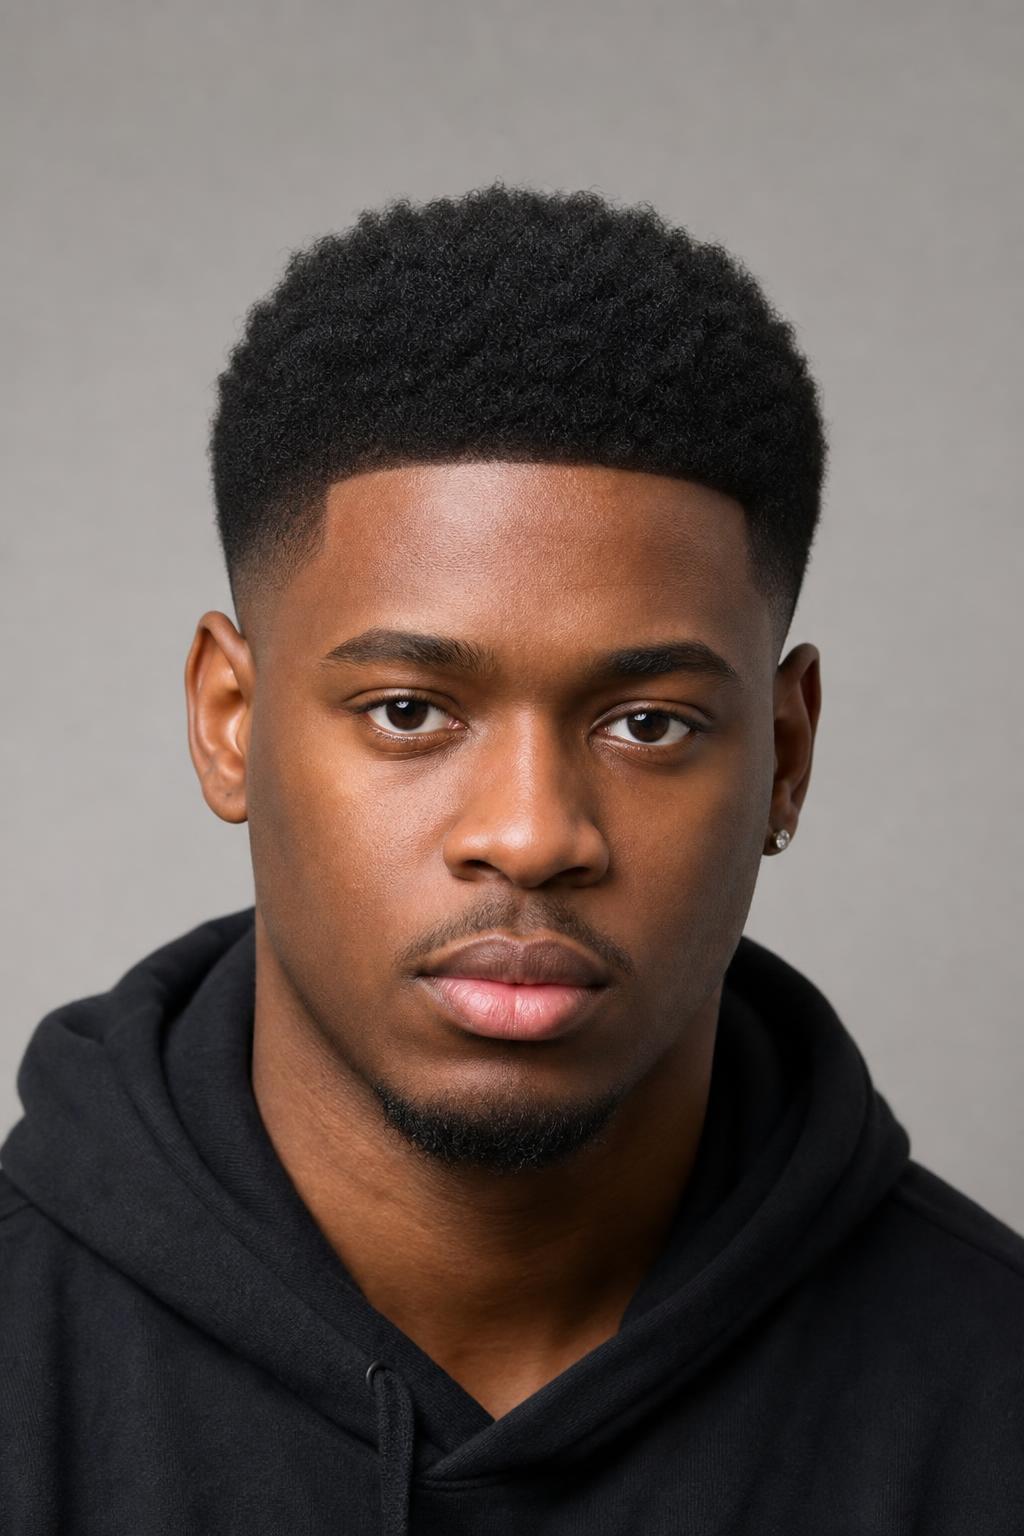
21. Mid Fade with a Twist-Out Top
Two-strand twists set on damp hair overnight and unravelled in the morning give a defined, elongated curl that a wash-and-go cannot match. Separate each twist once, not three times, or the definition collapses into frizz. Works on anything from three inches of length upward.
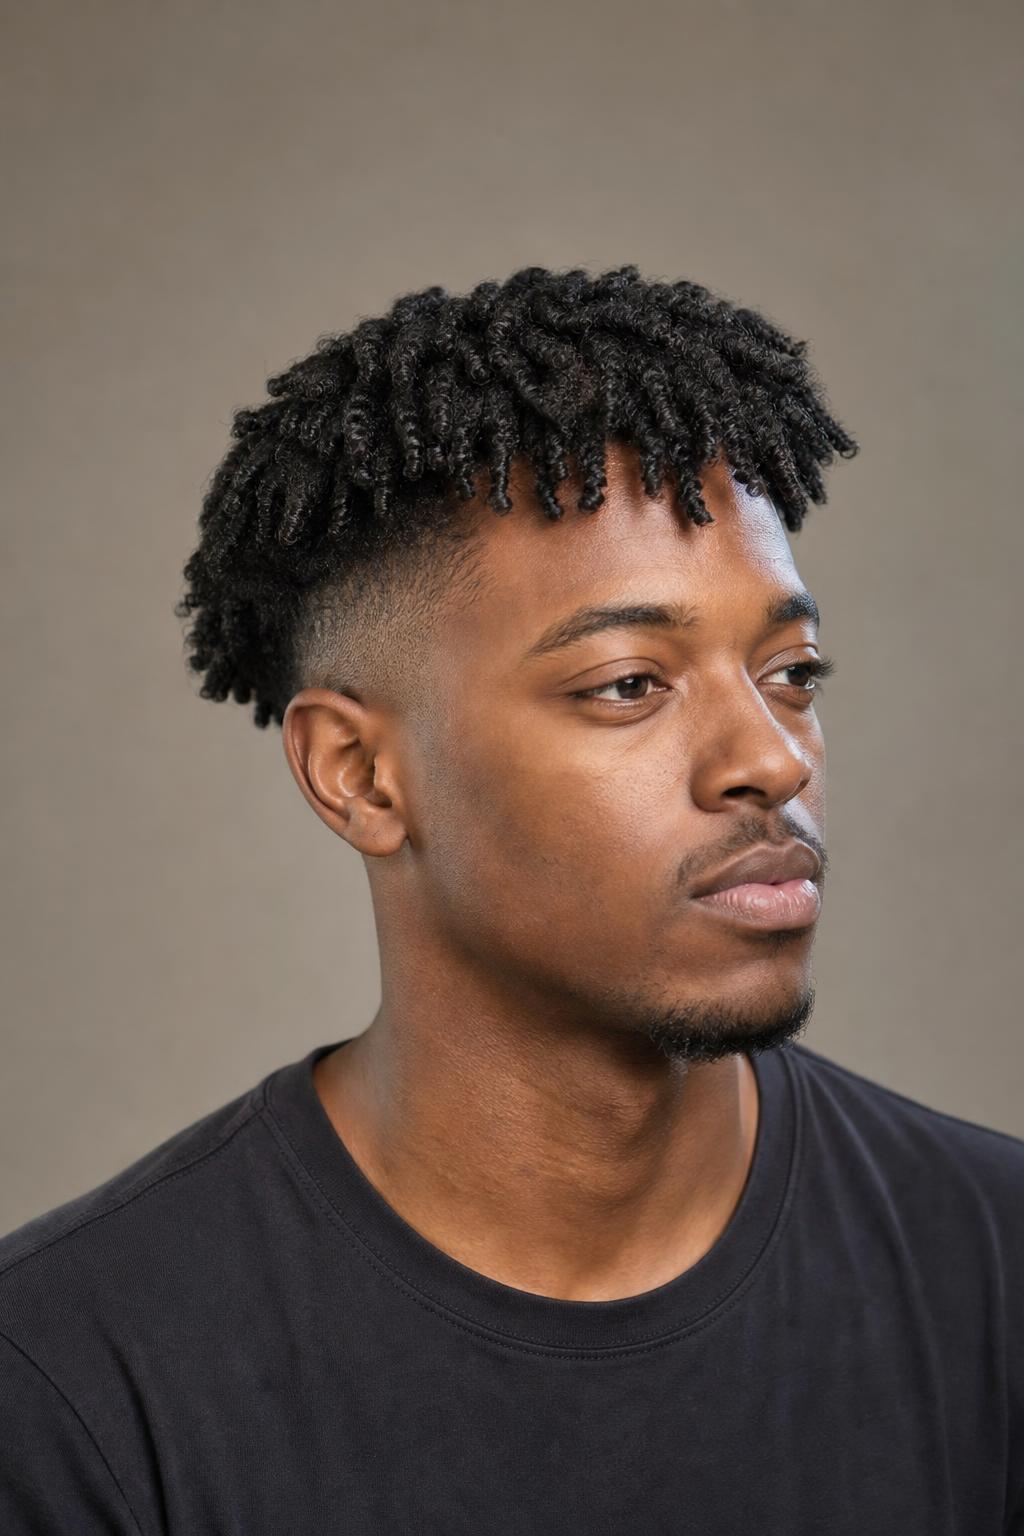
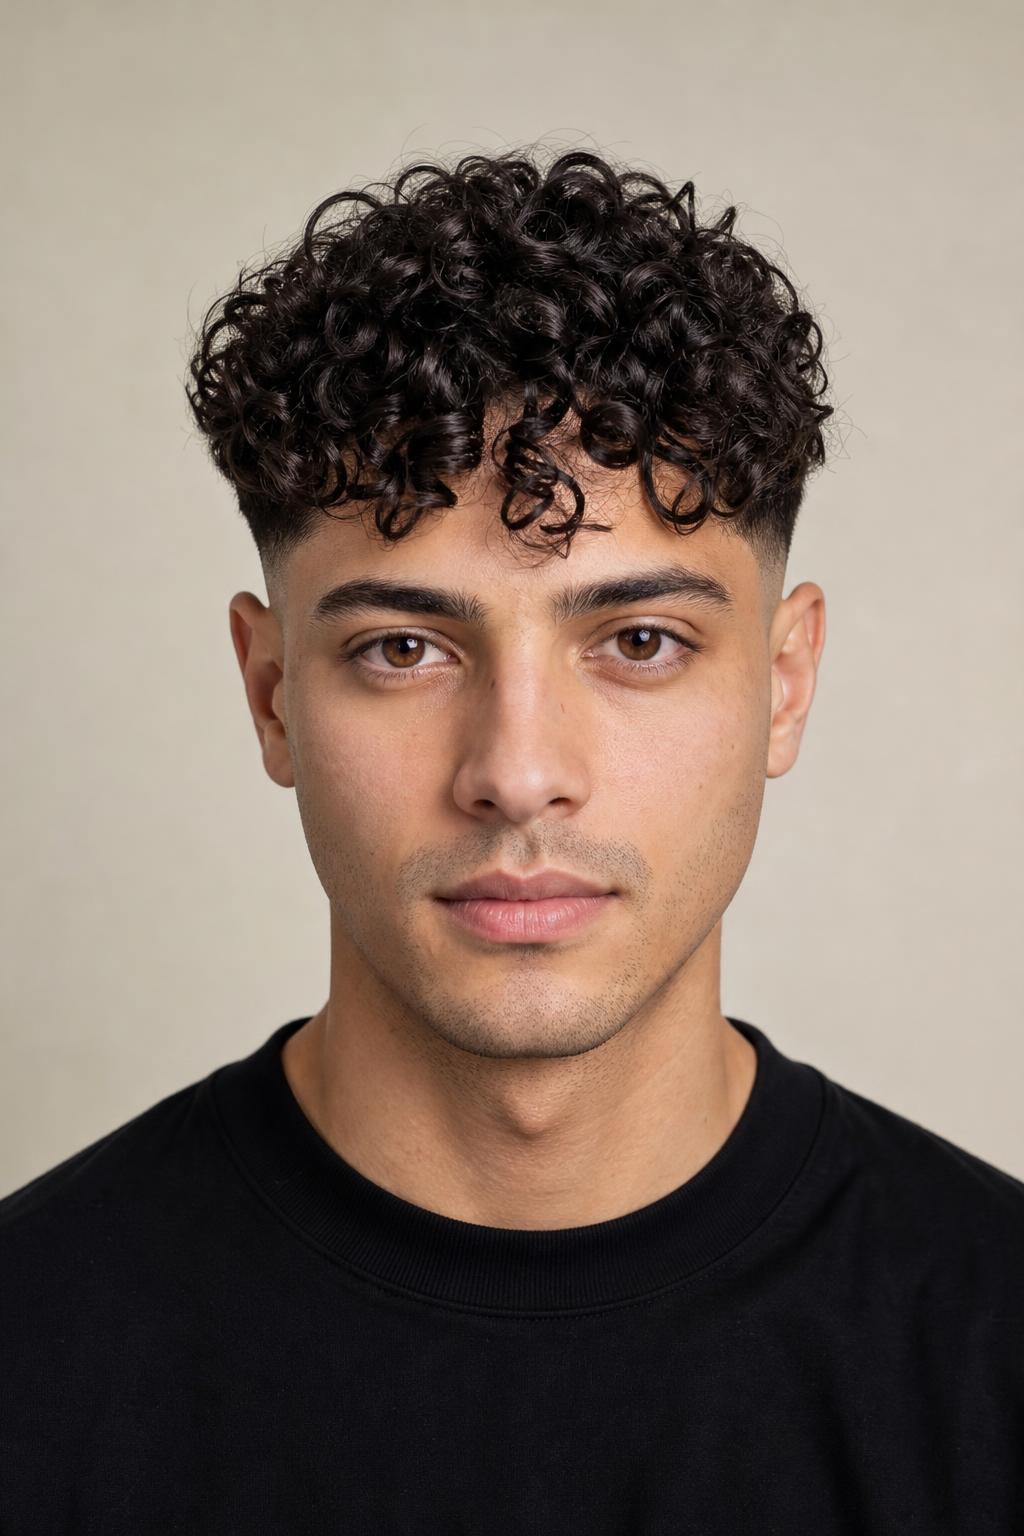
22. Mid Fade with a Curly Fringe
Where a straight-hair fringe is cut to one blunt line, a curly fringe has to be cut curl by curl so each one lands where it should after shrinkage. The result falls forward onto the forehead in irregular pieces rather than a solid edge, and it needs no daily styling at all.
Mid Fades with Line Work and Detail
The last group adds a second element on top of the fade itself: a razored part, a squared line-up, a beard blend, or color. These details are what most people are actually looking at when they save a photo, and they are also the parts that need the tightest re-cut schedule. Every one of them adds five to fifteen minutes to the appointment.
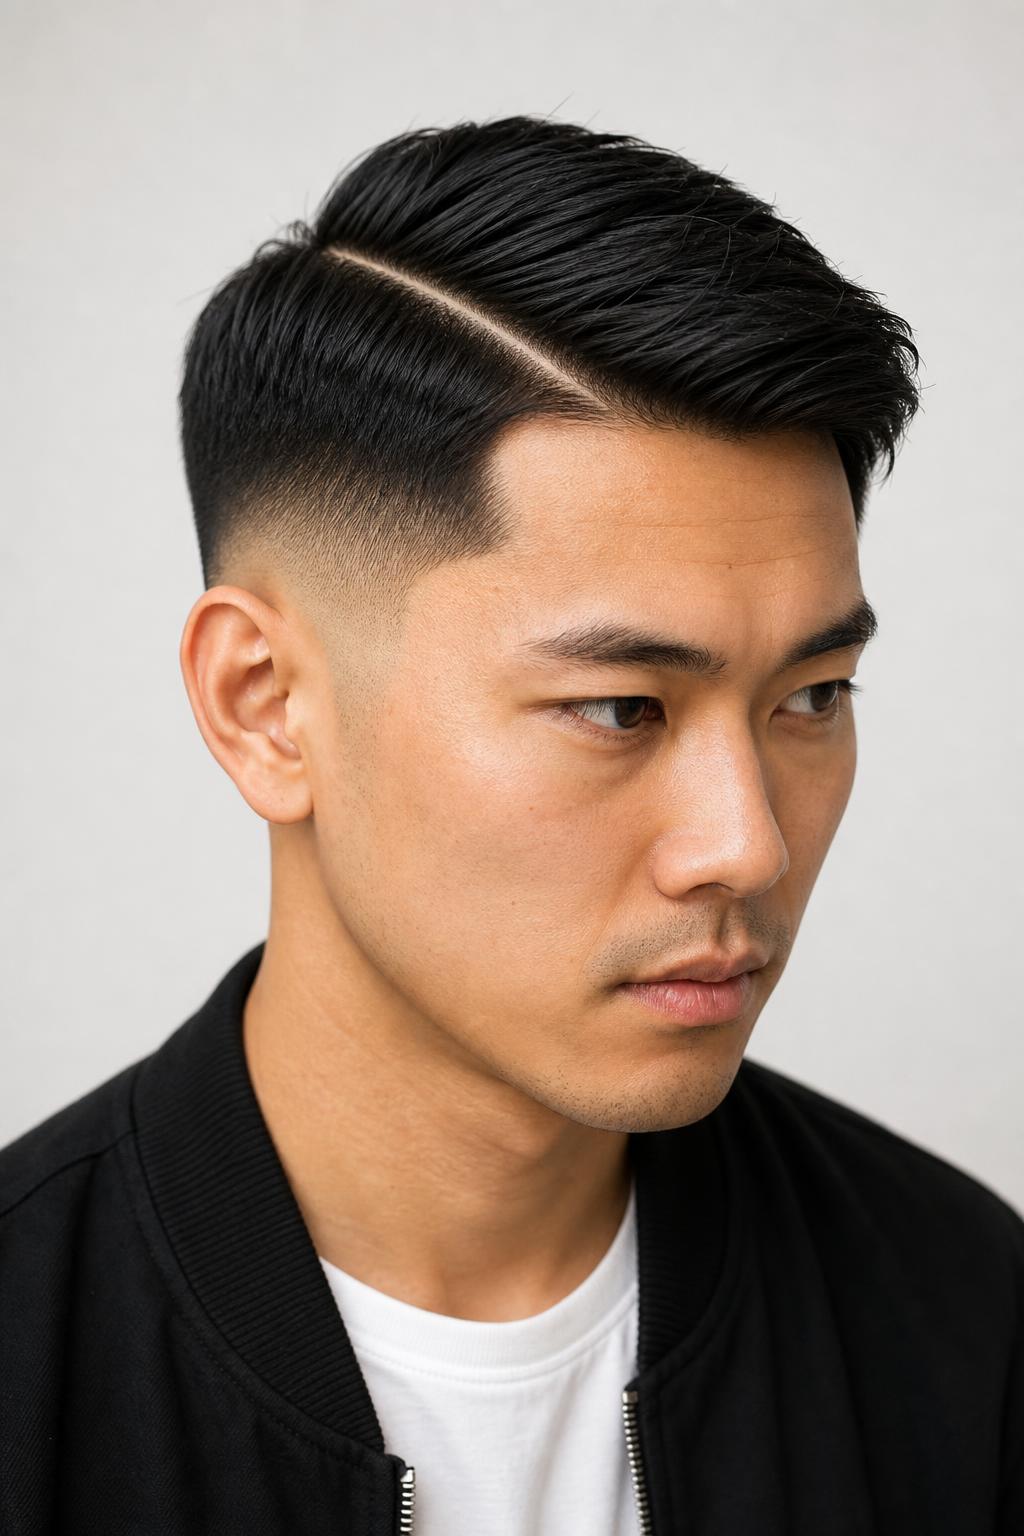
23. Mid Fade with a Hard Part
A hard part is a single line shaved with a trimmer along the natural parting, about an eighth of an inch wide, running from the front hairline back toward the crown. It gives a comb over a defined edge that combing alone cannot hold, and it grows in visibly within eight to ten days.
24. Mid Fade with a Squared Line-Up
Tell your barber square the corners but follow my natural hairline, do not push it back. Barbers who square aggressively can gain you a sharper edge this week and a receded-looking hairline within a year, and that is the single most common regret from line-up work.
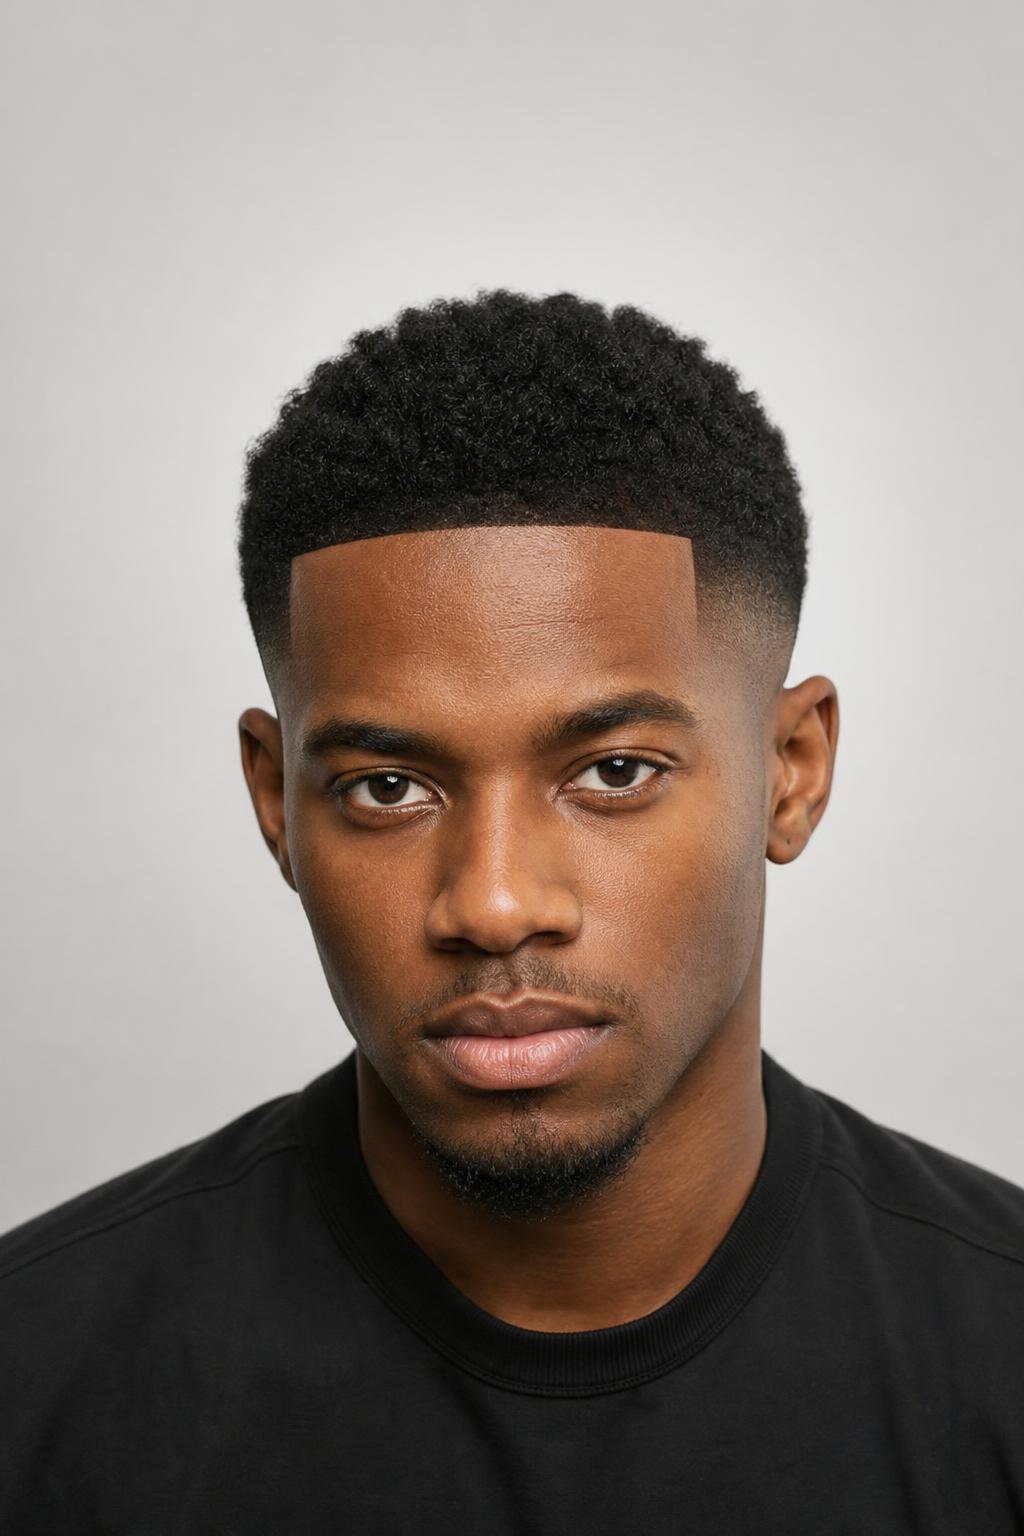
25. Mid Fade with a Blowout Top
Point the dryer straight down at the crown while pushing the hair up and forward with your fingers, then finish with a strong-hold spray at the roots only. The blowout shape is entirely heat, which is why it collapses in humidity unless the roots are sprayed rather than the ends.
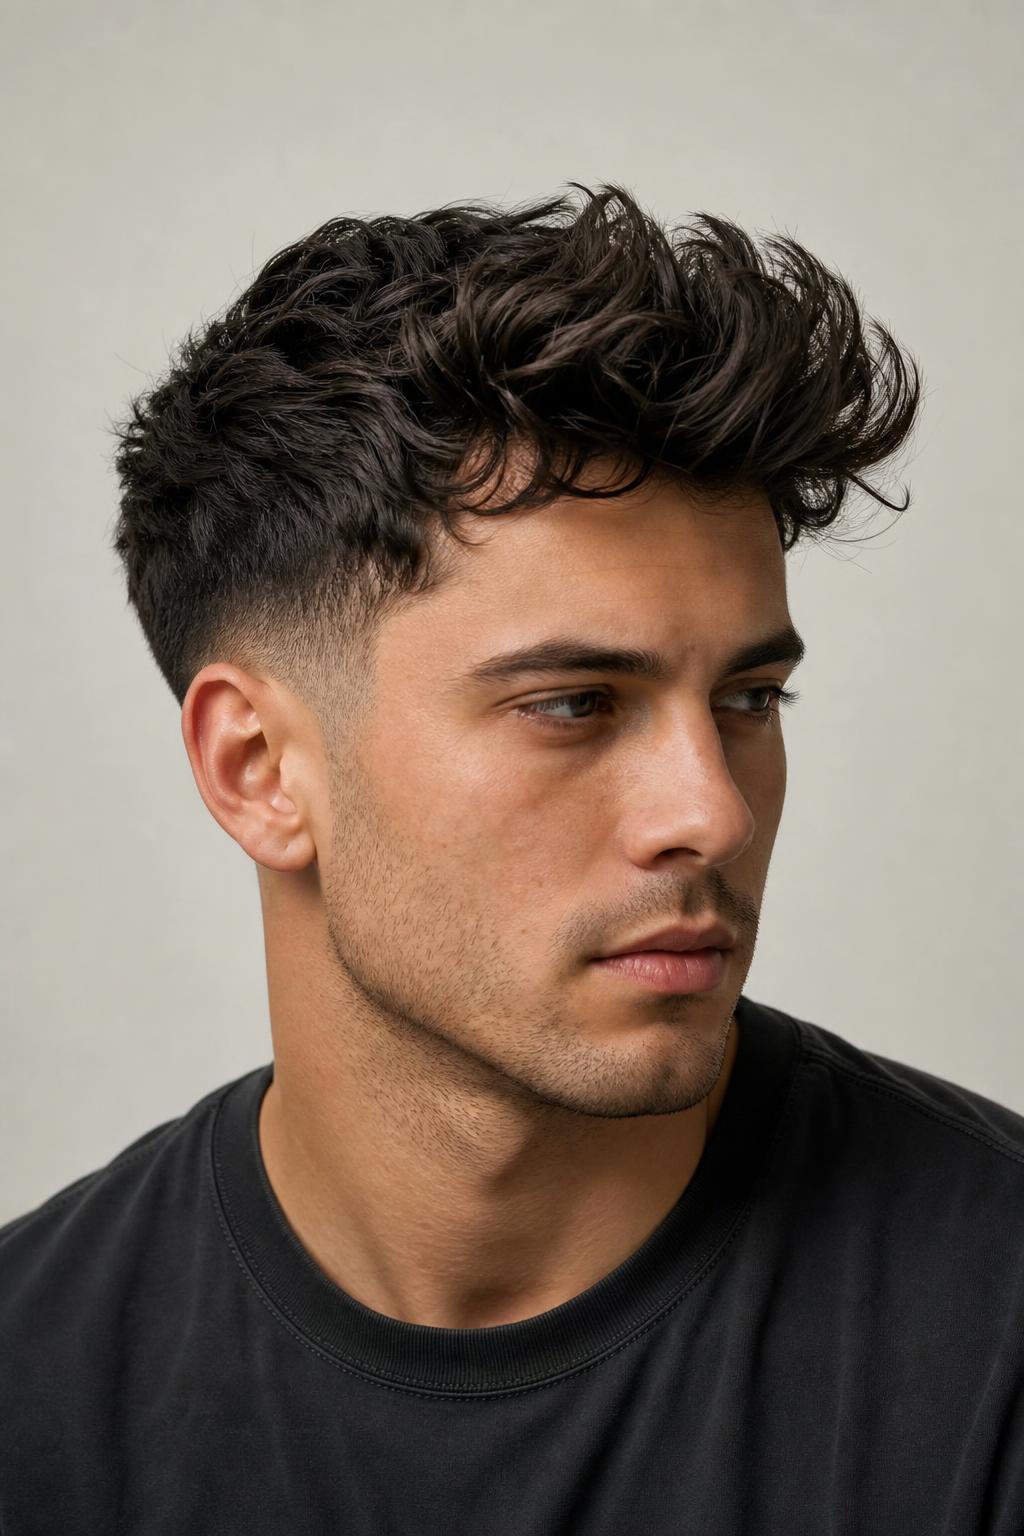
26. Mid Fade with a Beard Blend
Connecting the fade into the beard removes the hard line at the jaw, but it locks you into trimming both on the same cycle, roughly every two weeks. Let the beard grow past that and the blend inverts, with the beard reading heavier than the hair above it.
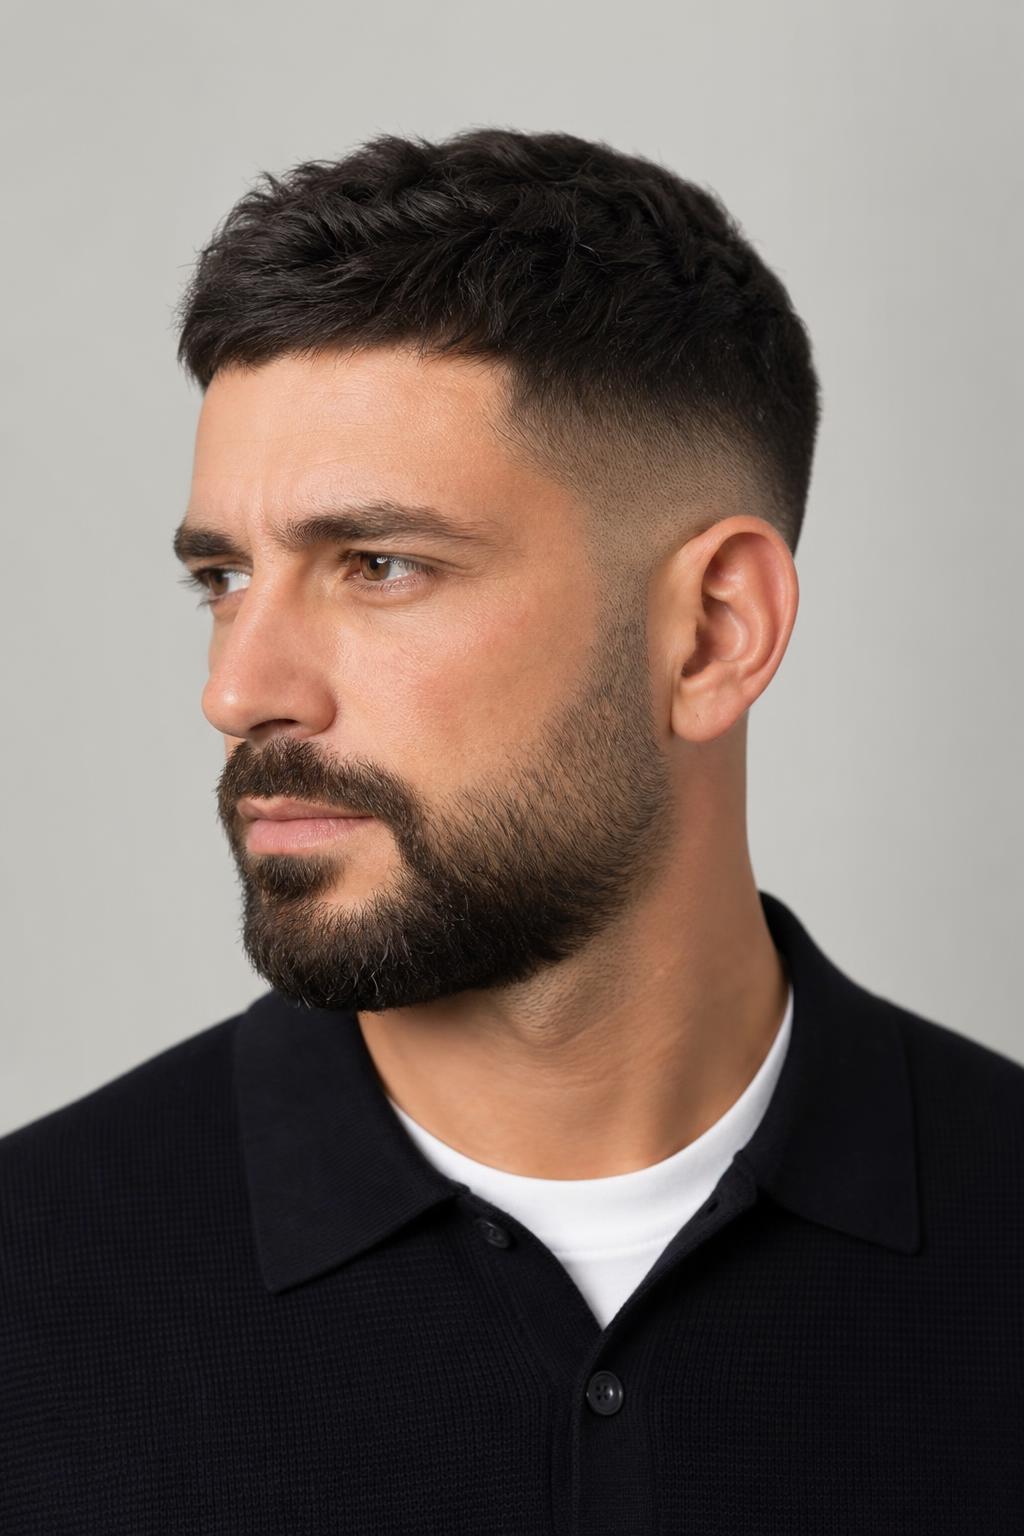
27. Mid Fade with a Bleached Top
Lightening only the top section while the faded sides stay natural makes the fade line read as a deliberate color break as well as a length one. On dark hair this takes two sessions to reach a clean blonde without breakage, and the regrowth line shows at about four weeks.

28. Mid Fade with a Temple Taper
Tapering the corners at the temples rather than squaring them softens a strong forehead and suits diamond and heart-shaped faces, where width at the temples is already the widest point. The fade still starts at temple level, but the front corners curve instead of cutting straight across.

Mid Fade vs Low Fade, High Fade, and Mid Taper
Four names get used interchangeably in barbershops and they are not the same haircut. The height where the fade begins separates low from mid from high, while taper versus fade describes how short the hair goes at the very bottom. A taper stops at a short guard; a fade can run all the way to skin. Knowing which two words you need is most of the consultation.
| Cut | Where It Starts | Shortest Point | Best For |
|---|---|---|---|
| Low fade | Just above the ear | Skin or a 0.5 guard | Conservative settings; round and full faces |
| Mid fade | Temple level, halfway up | Skin or a 0.5 guard | Most face shapes; the default balanced choice |
| High fade | Above the temple, near the parietal ridge | Skin, almost always | Maximum contrast; oval and longer faces |
| Mid taper | Temple level, halfway up | A 1 or 2 guard, not skin | Softer look; stretches to 4 weeks between cuts |
If you want the same fade height with a gentler finish, the mid taper version keeps a guard length at the hairline and buys you an extra week or two before it looks grown out. Going the other way, a low fade keeps more weight around the ear, which flatters a fuller face.
How to Choose a Mid Fade for Your Face Shape
A fade changes the width of your head at a specific height, and that is the only thing face shape guidance for men needs to account for. Removing bulk at temple level narrows the upper half of the head; adding height on top lengthens it. Match the pairing to the proportion you want to change, and ignore advice that treats fade height as a style preference alone.
| Face Shape | Best Top Pairing | Avoid |
|---|---|---|
| Oval | Nearly anything, from a buzz to a pompadour | Very heavy forward fringes that shorten a balanced face |
| Round | Quiff or faux hawk with three inches or more of height | Flat forward-combed Caesar tops, which add width |
| Square | Comb over or textured crop with a soft front line | A hard squared line-up over an already angular jaw |
| Heart | Textured fringe or curtains that cover the wider forehead | Slicked-back tops that expose the full forehead width |
| Oblong | Caesar or French crop, kept under two inches | Tall pompadours, which lengthen the face further |
| Diamond | Fringe or crop with a temple taper at the corners | Squared temple corners that widen the widest point |
Stylist tip: If you are between a mid and a high fade, ask for the mid on the first appointment. Your barber can lift a mid fade to a high fade in five minutes at the next visit. Dropping a high fade back down means waiting three to four weeks for the growth.
What to Tell Your Barber
A mid fade request has four parts, and skipping any of them hands the decision to your barber. Say where the fade starts, how short it goes at the bottom, how long the top stays, and what happens at the hairline. In practice that sounds like: mid fade starting level with my temples, down to a 0.5 at the bottom, leave about two inches on top with texture, and follow my natural hairline on the line-up.
Guard numbers are more reliable than adjectives. A 0 is skin-close, a 1 is roughly an eighth of an inch, a 2 is a quarter, a 3 is three eighths, and a 4 is half an inch. Saying take the sides down to a 1 and blend up to a 4 removes almost all interpretation, which matters most on a first visit to a new barber.
Mention thinning before the cut, not after. A mid fade on a thinning crown draws the eye up toward the sparse area because the sides are so clean, and there are specific top shapes that work around a thinning crown instead of pointing at it. Barbers will adjust the fade height for this if you raise it first.
Stylist tip: Ask your barber to show you the fade in a hand mirror while you are still in the chair, and specifically look for a horizontal band where the guard changed. A visible line means the blend was rushed, and it takes two minutes to fix then versus two weeks to grow out.
Maintenance and Upkeep
A mid fade is a two to three week haircut. Fades look sharpest in the first ten days, acceptable through day fourteen, and grown out by week three, because the shortest section grows proportionally faster in visual terms than the top does. This is the real cost of the cut, and it is worth pricing before committing.
| Element | Re-Cut Interval | Daily Effort | What Goes First |
|---|---|---|---|
| Skin fade at the bottom | 10 to 14 days | None | Stubble shadow appears within 4 days |
| Line-up at the hairline | 7 to 10 days | None | The squared edge blurs first |
| Short textured top | 3 to 4 weeks | 1 minute with clay | Texture flattens as weight builds |
| Long styled top | 5 to 6 weeks | 3 minutes with a dryer | The shape gets heavy and drops forward |
| Beard blend | 2 weeks | Daily neckline trim | The blend inverts as the beard outgrows the fade |
Between appointments, a personal trimmer used only on the neckline buys about a week. Do not attempt the fade itself at home, since the blend runs across three or four guard lengths and a single wrong pass leaves a step that has to grow out. Wash with a clarifying shampoo once a week if you use clay or pomade daily, because product residue at the roots flattens a short top faster than anything else.
When a Mid Fade Is Not the Right Choice
A mid fade is close to a default recommendation for men, which is exactly why it is worth naming the cases where it underperforms.
- Your temple line is receding. A fade starting at temple level puts a bright, clean edge right where the hairline is thinnest, drawing attention there. A low fade or a taper keeps more weight in that zone.
- You cannot get to a barber every two to three weeks. A mid taper or a scissor-cut short back and sides holds a decent shape for five to six weeks; a skin fade does not.
- You have scarring, moles, or an uneven scalp contour you would rather not show. A fade to skin exposes the entire side of the head. Ask for the shortest point to be a 1 or 2 guard instead of bare skin.
- You work outdoors in strong sun. Faded-to-skin sides burn easily and the scalp there is rarely protected by a hat brim. Keep a guard length at the bottom through summer.
- Your hair is very fine and light-colored. The contrast that makes a mid fade look sharp comes from the difference between the top and the skin, and on fine blonde hair that contrast barely registers, which makes the whole cut look softer than the photo you brought.
FAQ
Where Exactly Does a Mid Fade Start?
At temple level, roughly halfway between the top of the ear and the parietal ridge, which is the corner where the side of your head turns into the top. Put a finger on your temple and the fade line runs level with it around the head. A low fade sits an inch or two below that point, and a high fade begins above it.
How Often Do I Need to Get a Mid Fade Re-Cut?
Every two to three weeks for a skin fade, or three to four weeks if the shortest point is a 1 or 2 guard rather than bare skin. The line-up at the hairline goes first, usually blurring by day eight or nine, so some people book a quick line-up in between full cuts. Stretching past three weeks means the fade stops looking like a fade at all.
Is a Mid Fade the Same as a Mid Taper?
No. Both start at the same height, but a taper stops at a short guard length while a fade can go all the way to bare skin, so a taper always leaves visible hair at the bottom. The practical difference is upkeep: a mid taper holds its shape a week or two longer. Ask for a taper if you want the look with fewer barber visits.
Does a Mid Fade Work with Curly Hair?
Yes, and it is one of the better fade heights for curls because it keeps some volume above the fade line rather than removing it all. The important request is that the top be cut dry and the transition blended with scissor-over-comb, since clippers alone leave a hard edge where the curl pattern meets the faded section. Expect the appointment to run ten to fifteen minutes longer than a straight-hair fade.
Can I Get a Mid Fade with Thinning Hair?
You can, but the fade height matters more than usual. A mid fade against a thinning crown creates contrast that highlights the sparse area, so most barbers will suggest keeping the shortest point at a 1 or 2 guard rather than skin, which softens the difference. A shorter, textured top also helps far more than trying to cover the crown with length.
What Should I Ask For If I Want the Fade Higher Next Time?
Say take the fade up about an inch from last time, keep the same length on top. Barbers can lift a fade line at any appointment because the hair above it is still long enough to blend into. Going lower is the harder direction, since it needs three to four weeks of regrowth in the faded zone before there is anything to work with.
What Products Do I Need for a Mid Fade?
For a top under two inches, a matte clay is the only product you need, used in a pea-sized amount on dry hair. Longer styled tops need a medium-hold pomade and a blow dryer, since the shape comes from heat rather than product. Faded sides need nothing at all, though a light moisturizer helps if the skin at the bottom of the fade gets dry or flaky.
The mid fade haircut works as well as it does because temple level is the one fade height that flatters almost every head shape without pushing into severe territory. Decide how long you want the top before you sit down, name your guard numbers rather than a style word, and be honest with yourself about whether a two-week barber cycle fits your calendar. Get those three right and the rest of the cut takes care of itself.
Hair results vary based on your natural hair type, texture, density, and condition. Always consult with a licensed hairstylist before making significant changes, especially with chemical treatments or dramatic length changes. Photos may show styled results that require professional tools and products to replicate.


4 responses